Photo 1 Assignments
WELCOME TO 2024 PHOTOGRAPHY 1 CLASS
Assignments due Friday, May 3
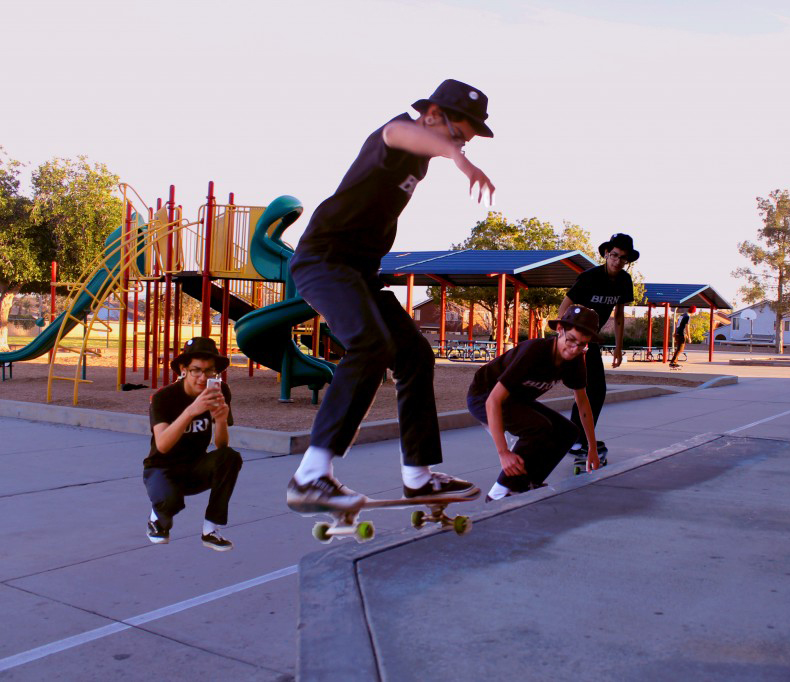
1. METICULOUS PHOTOGRAPHY
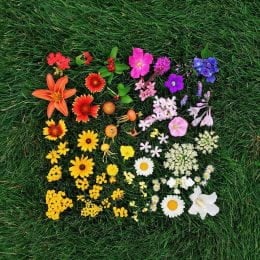
Meticulous means to show great attention to detail, very careful and precise. For this assignment you will meticulously arrange everyday objects that can be found around your home.
First, look at the photography work of Emily Blincoe. http://www.emilyblincoe.com/arrangements
Select your favorite work by her and put it on your blog with a short explanation why this image caught your eye.
Find a variety of objects and items that can be used to create your meticulous arrangement.
Find a simple suitable background for your shot. This could be a plain pillow case, large piece of paper, or anything large enough with no pattern. Set up your arrangement and be meticulous and pay attention to details. Make sure you are in adequate lighting, and please remember how important good lighting is in photography.
Take a few photographs from above, looking straight down at your arrangement. Go in as close as you can. Make sure your image is tack sharp! Never rely on just taking one shot.
Edit your favorite photograph with PS or LR and then post to your blog.
Meticulous arrangement of objects, which are then photographed have been used in advertising and commercial photography for years.


2. COMMENTS ON BLOGS OF PEERS
Look at some of the blogs of your peers, and make five comments on five different peoples blogs. Make sure your comments are in sentence form, with at least two sentences each comment and in academic language. Add the name of the person whose blog it is or their blog name to the beginning of the comment, and your name at the end of the comment. Screenshot each comment (use the snipping tool)and email your 5 screenshots to me at caucrg@fusd.net.
3. MOVIE POSTER ABOUT THE STORY OF YOUR LIFE
Look at movie posters online and post 3 that you like on your blog with an explanation as to what is it that captures your eye and that you like about these movie posters. Then make your poster in Photoshop 16×20 @ 200 resolution. Make sure to include the title, at least one original photograph, the actors who will be in the movie, a catch phrase, and a rating. Post to your blog, and in a 200-300 word reflection give a synopsis on what your movie is about.


_____________________________________________
>PORTFOLIOS <
Create your photography portfolio using Adobe Express https://www.adobe.com/express/
Make a folder in your Desktop called Portfolio Images. Select your best 20-25 images you created either during this class or outside of class time.
Log into Adobe Express with your school credentials. Go to the Presentation tab
Add a title to your portfolio. Add an image to the header and then add introduction text about yourself, your hobbies, and your experiences in photography.
Keep adding your images with the Adobe Express layouts: Design each page to your liking. Put one image per slide, unless you are going for a diptych or triptych.
Write a caption for each photograph, or series of photographs.
End your portfolio with a meaningful quote.
Go to the share button and make sure to publish and update your portfolio often. Post your portfolio on the Teams Channel: FINAL PORTFOLIOS.
3 Assignments due Friday, April 26
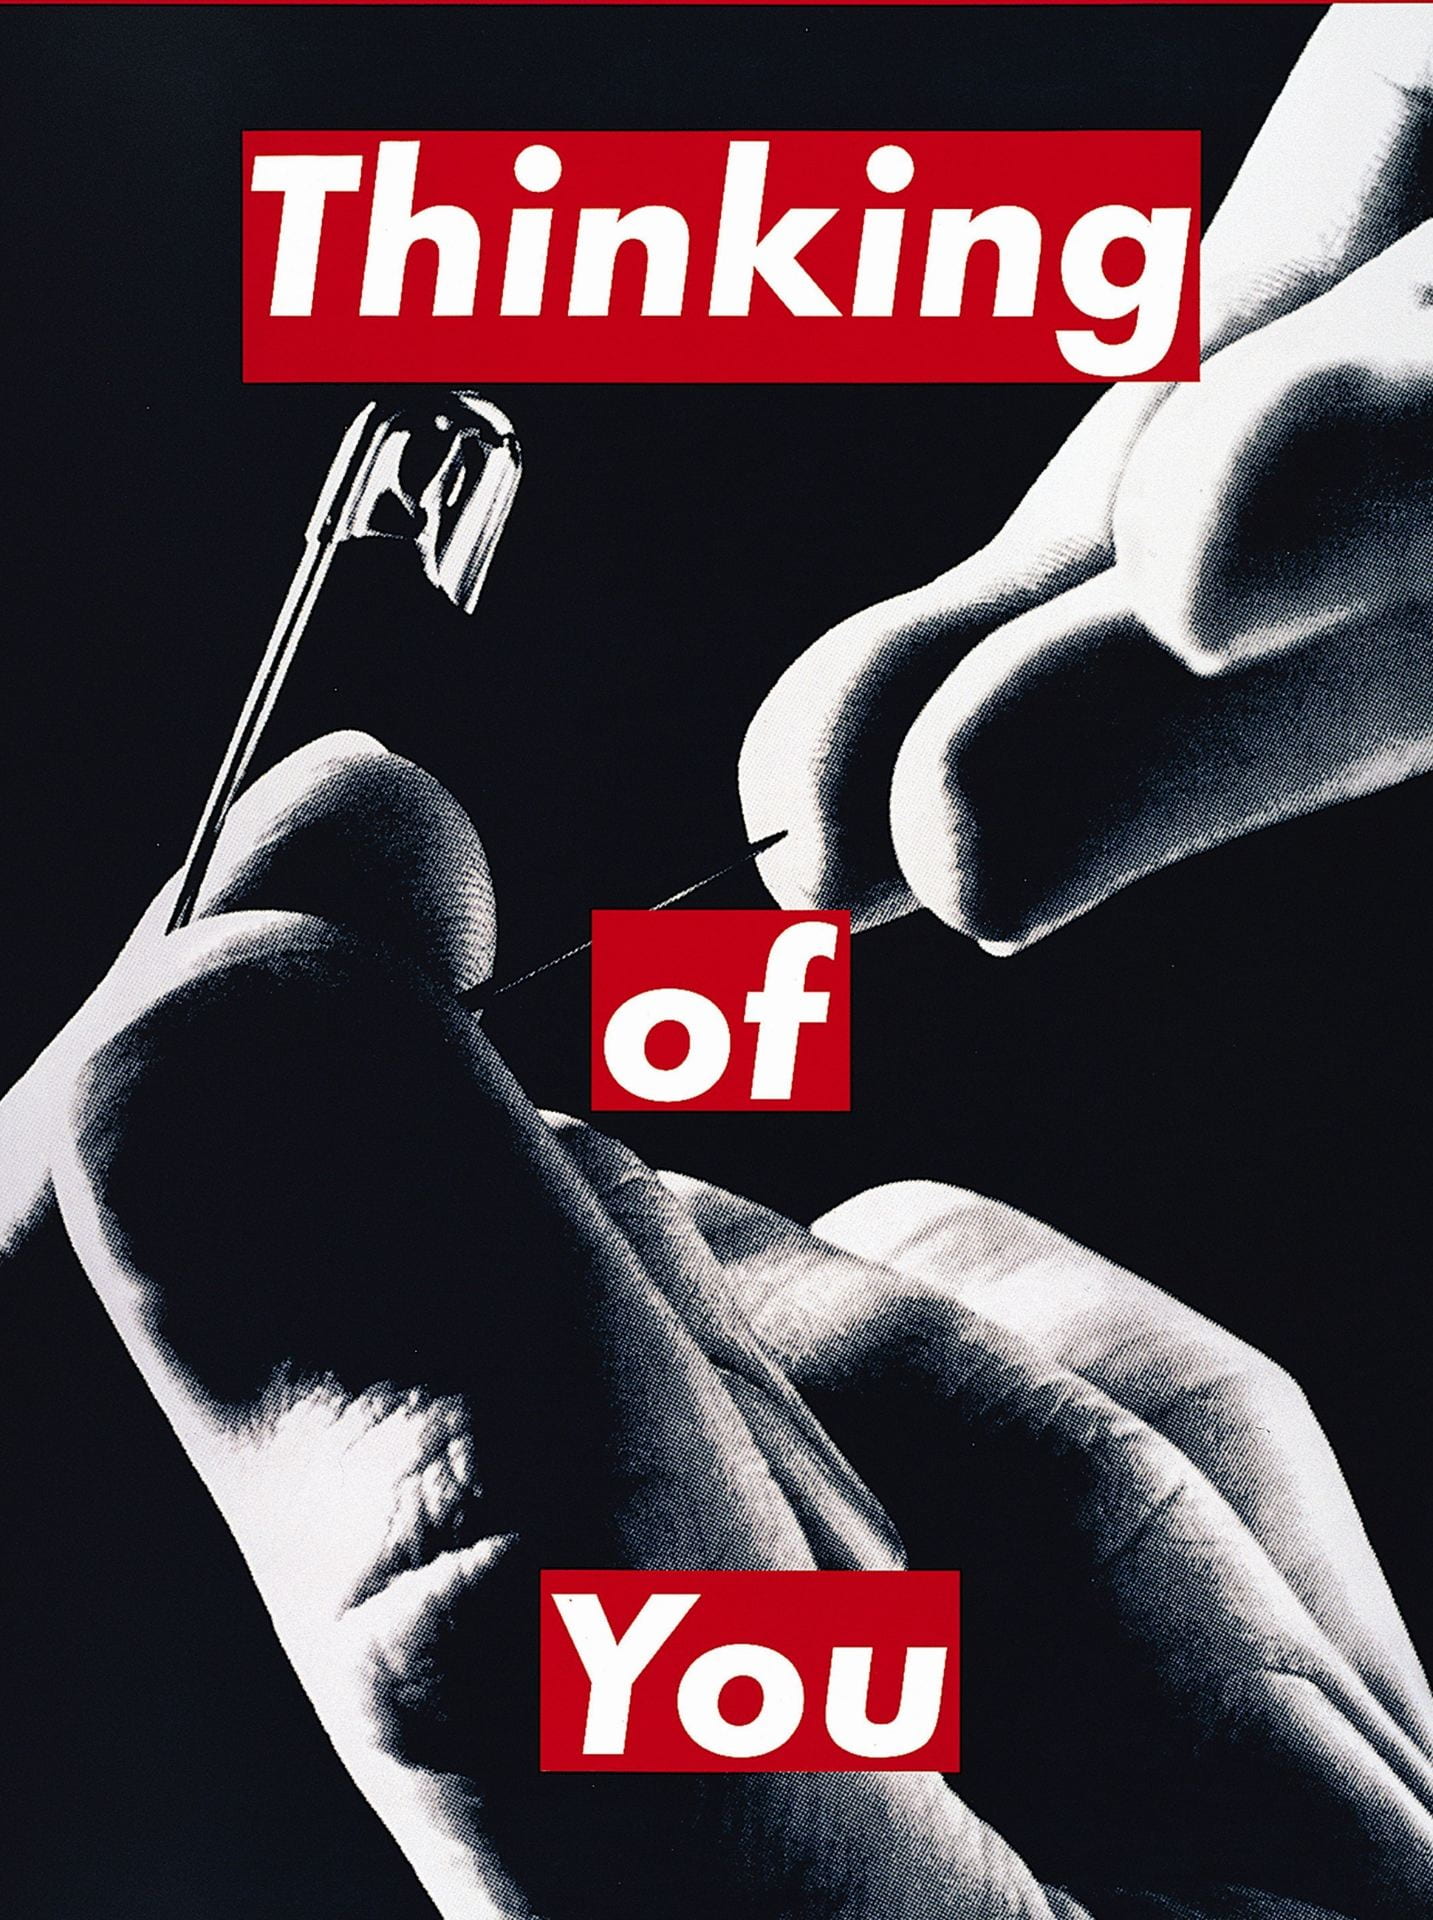
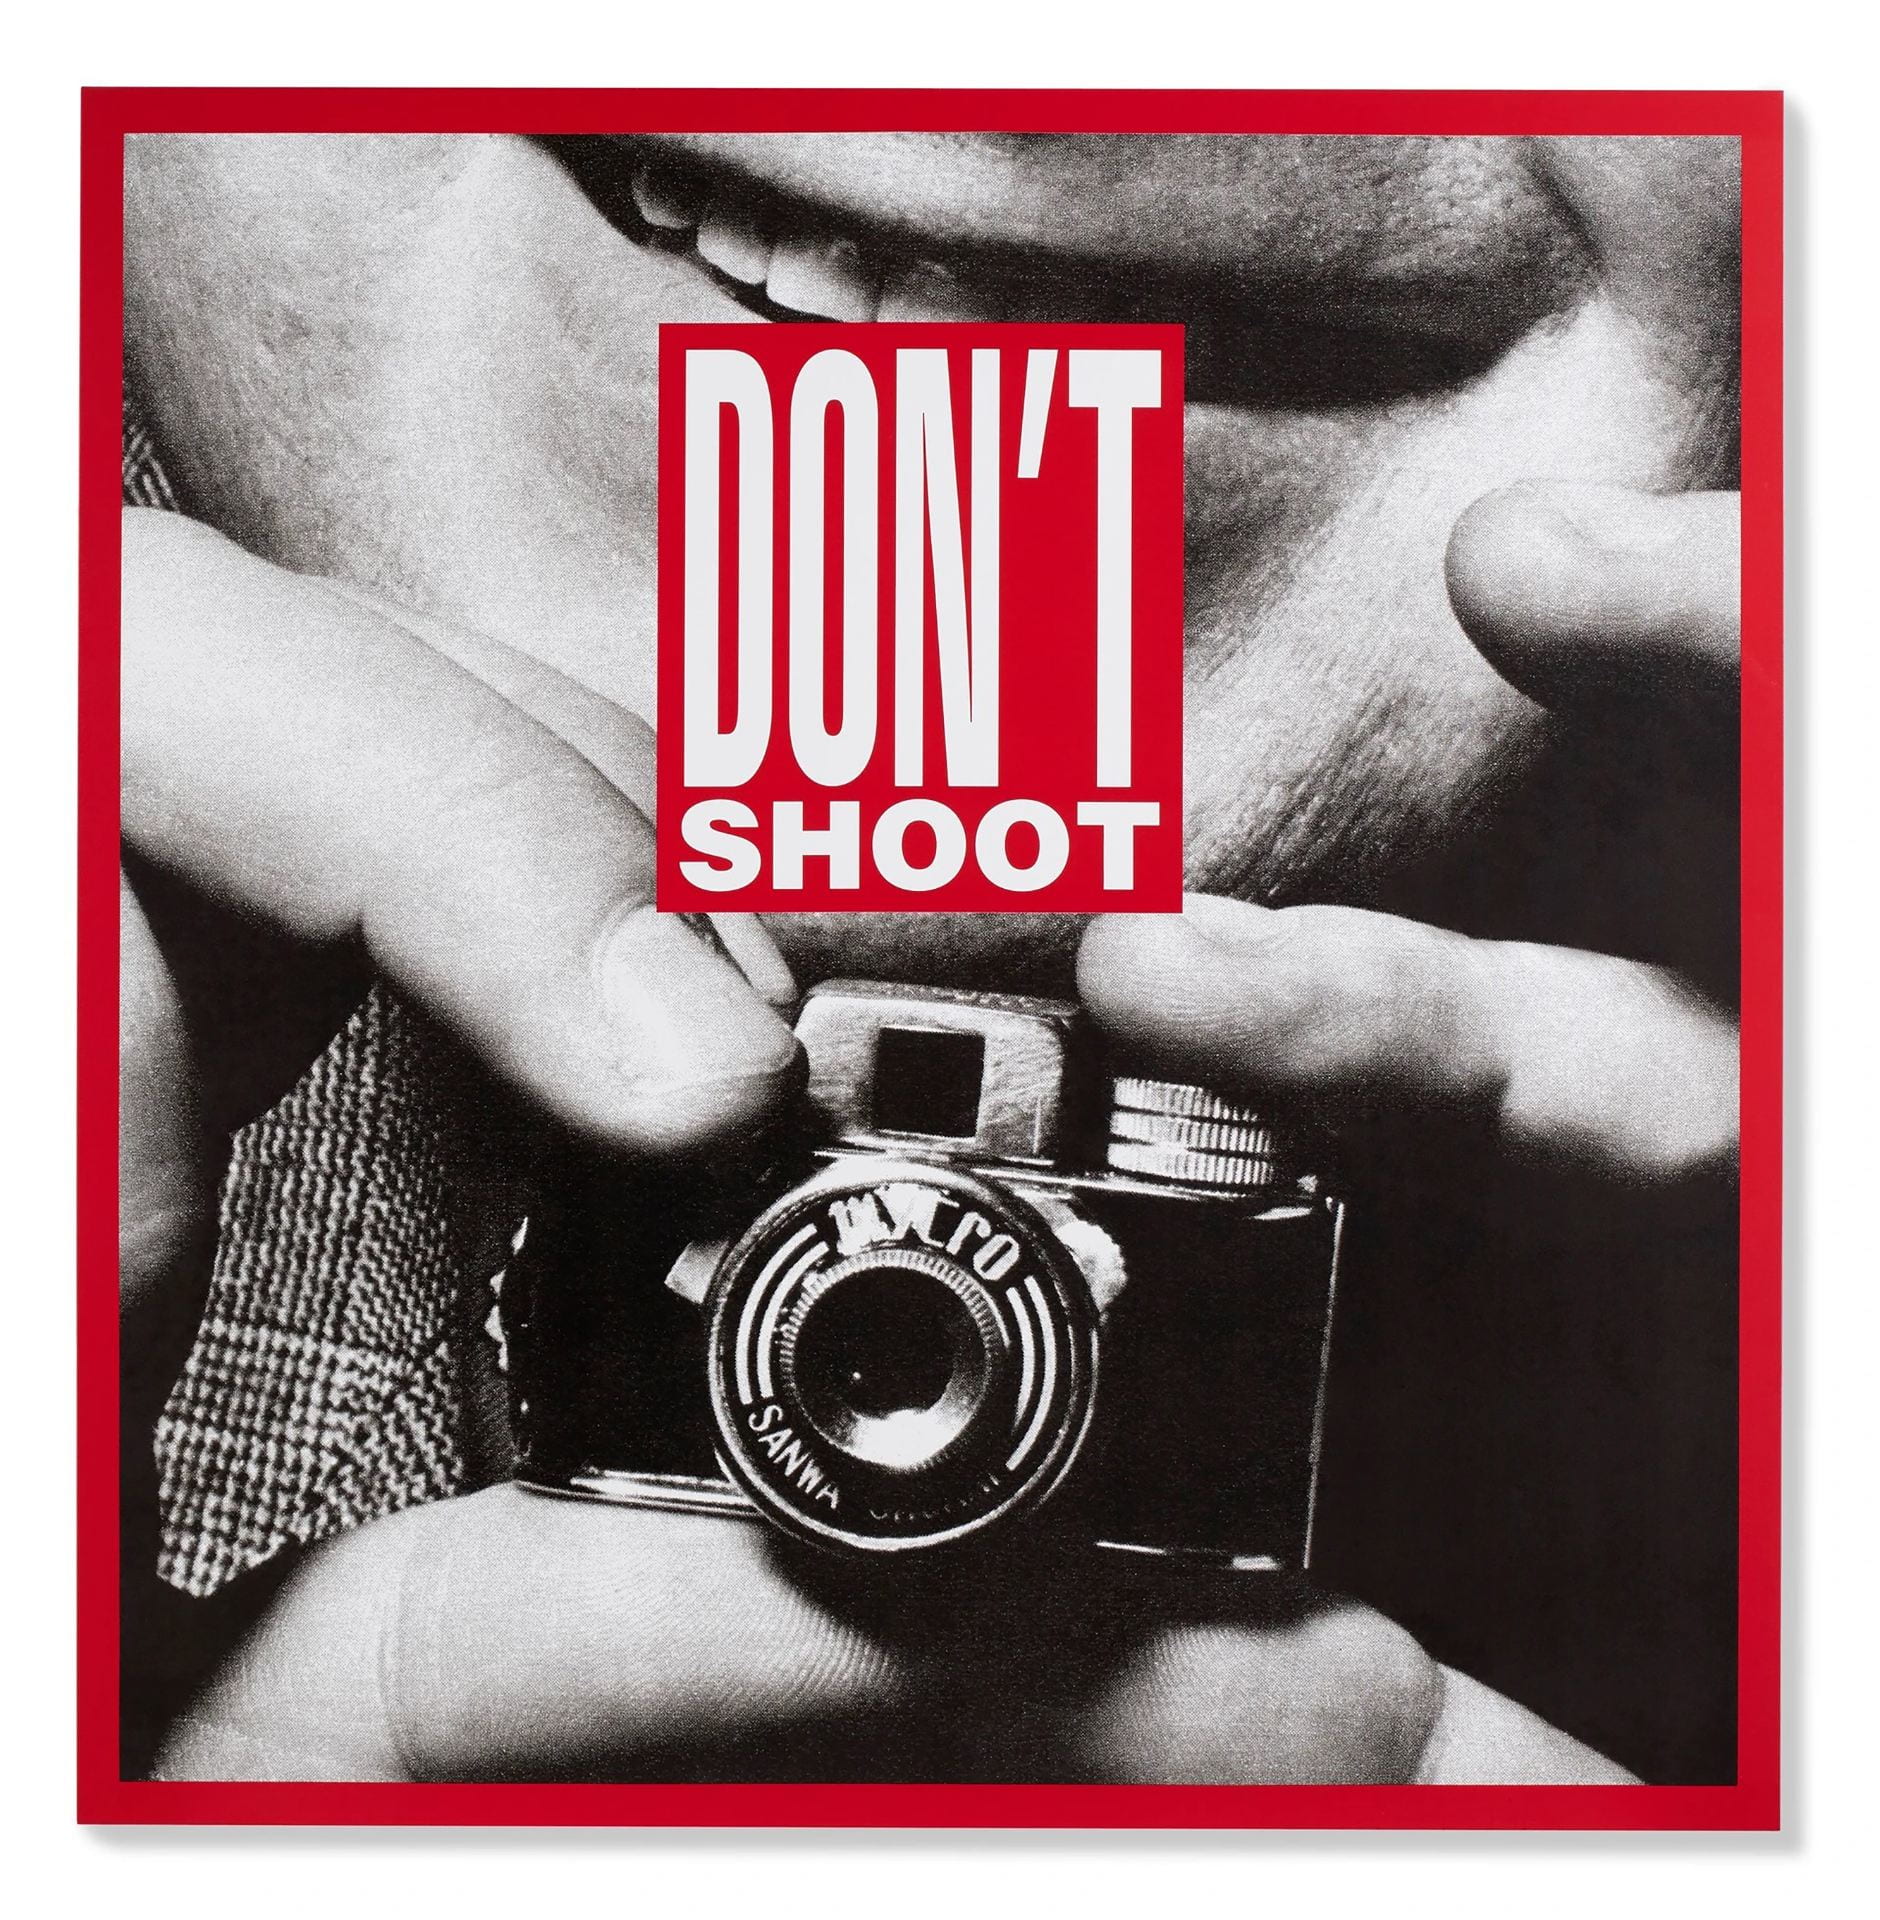
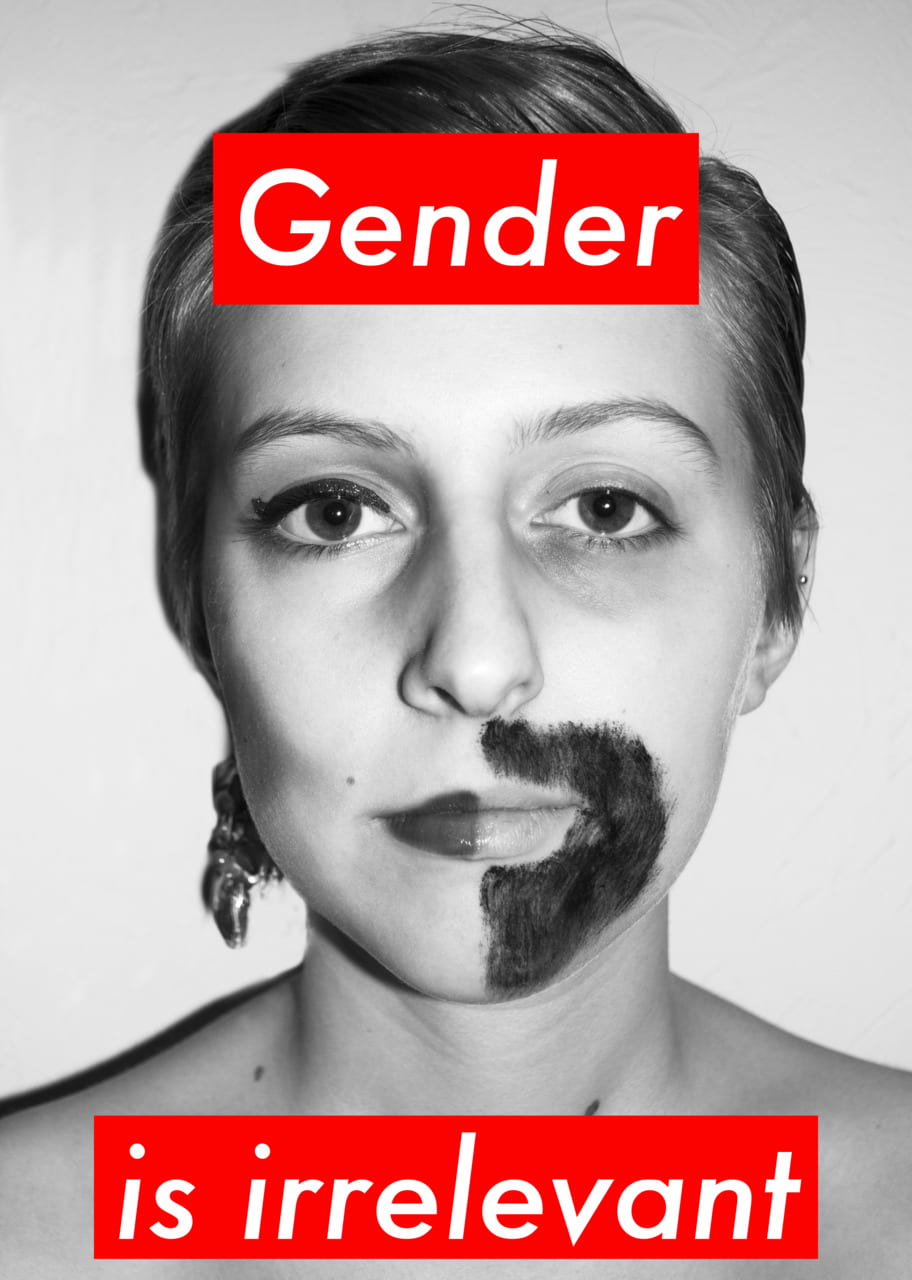
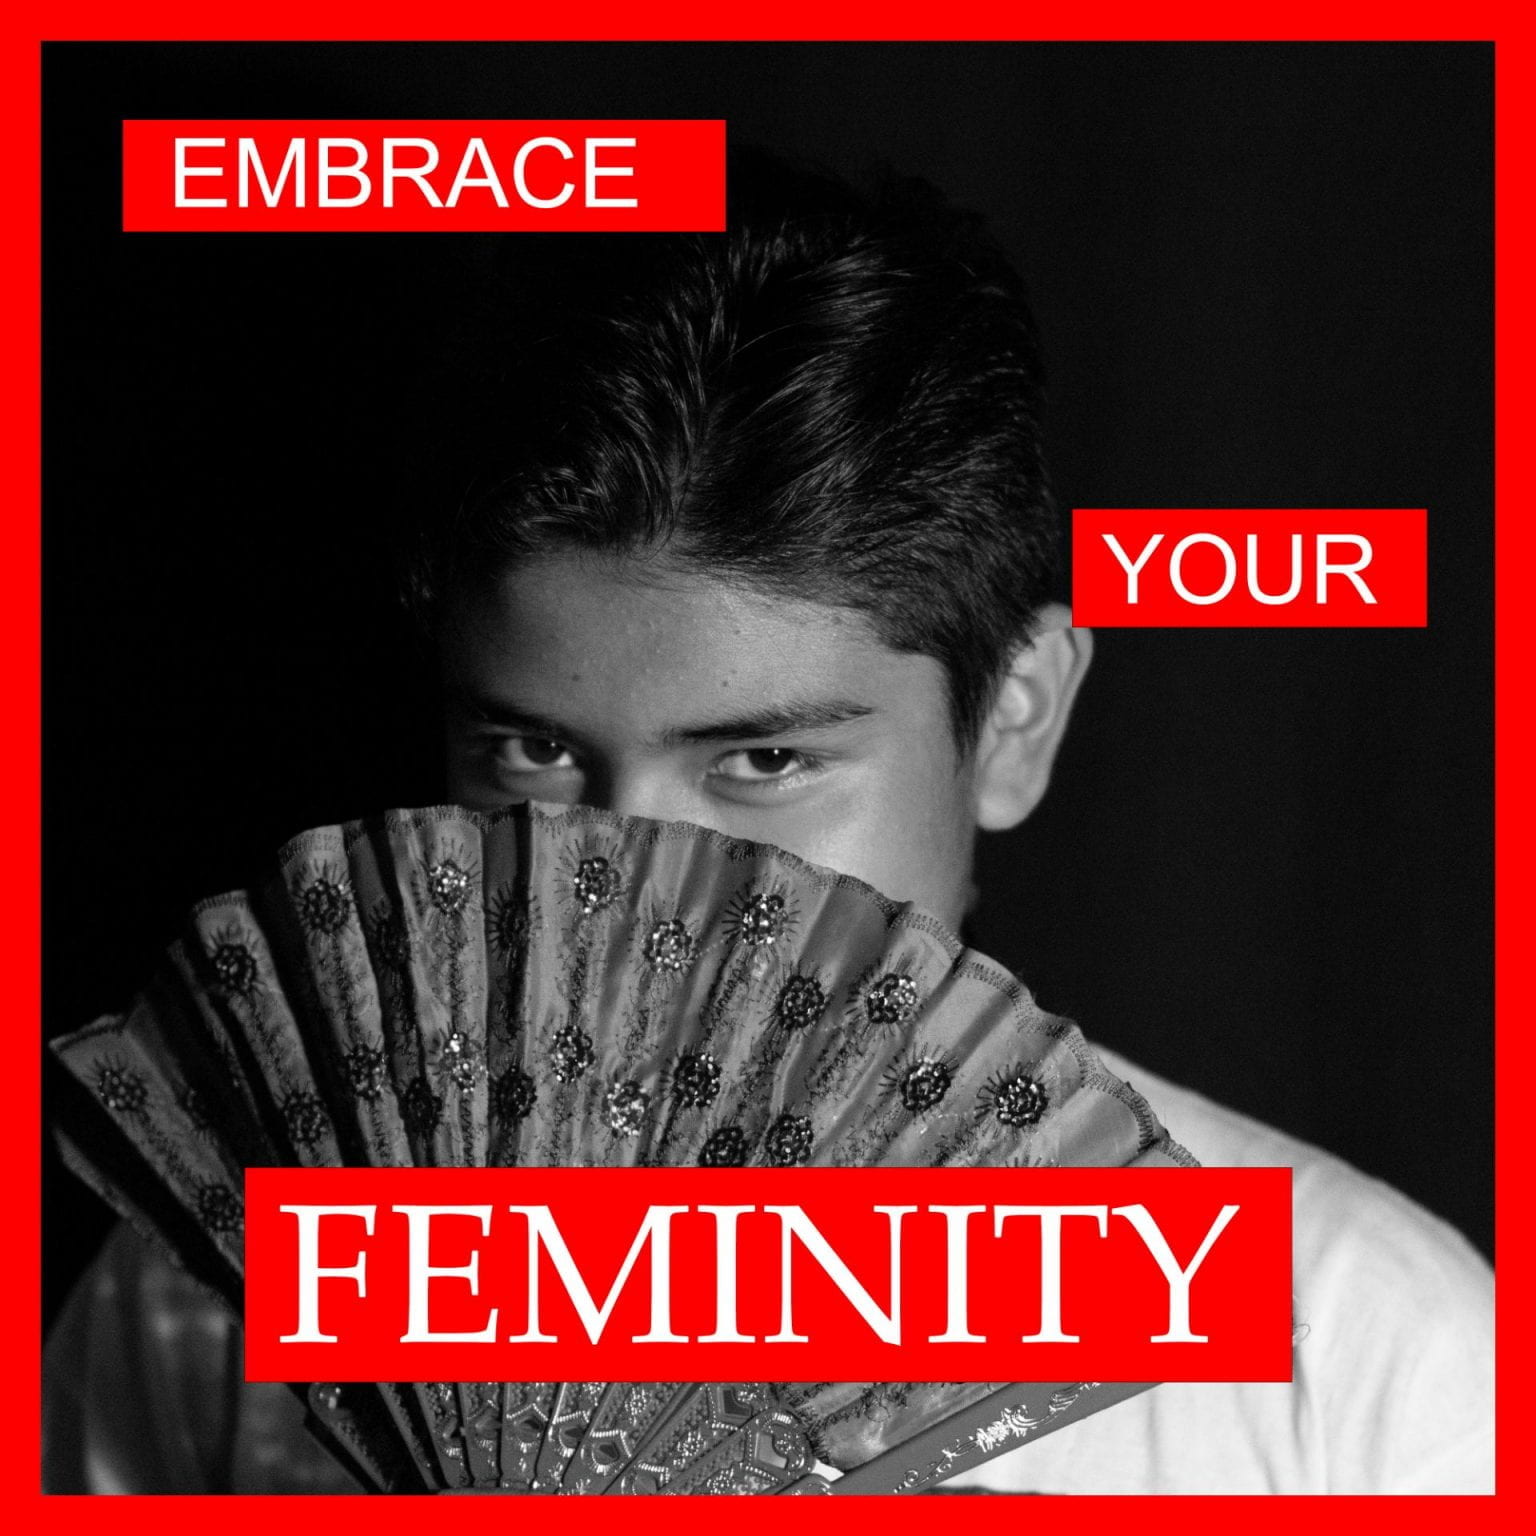
Barbara Kruger is an artist who creates conceptual art and collages. Look at this link to learn more about her. https://www.thebroad.org/art/barbara-kruger
Create a photograph similar to hers, with the same format (block text with red rectangle and red border, with an appropriate image you shot and edited to communicate your message. When done, reflect on your work and explain what you want your viewer to feel after viewing your Barbara Kruger style photograph.


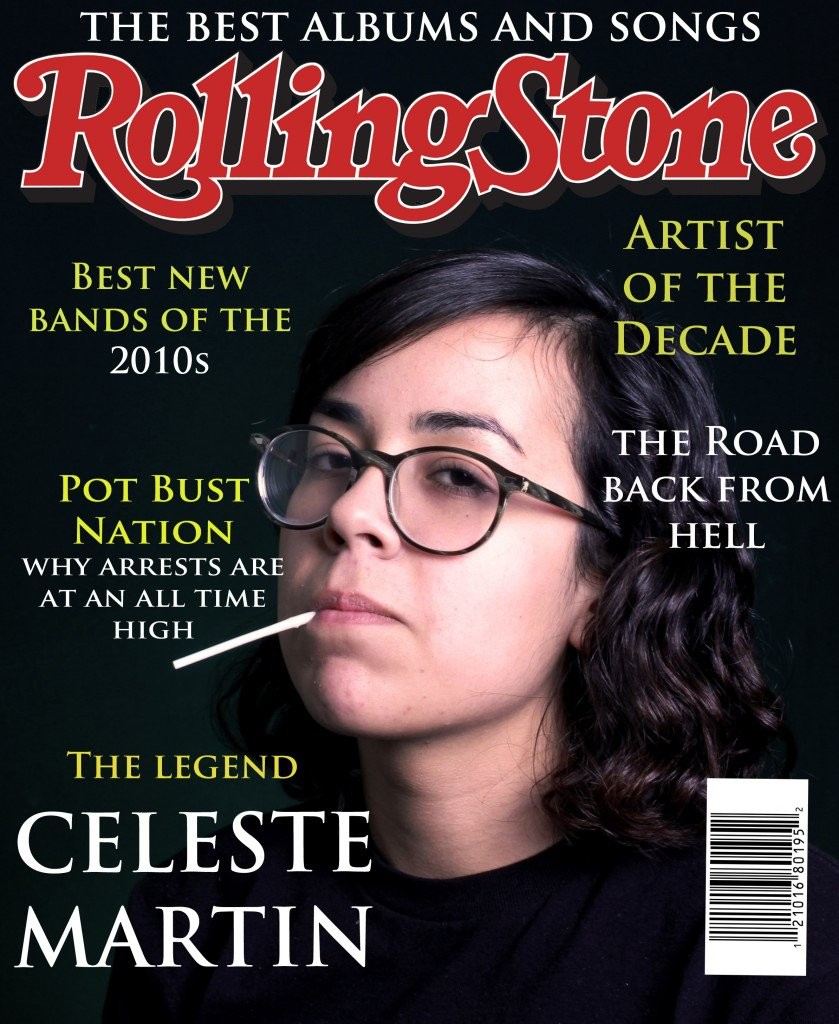
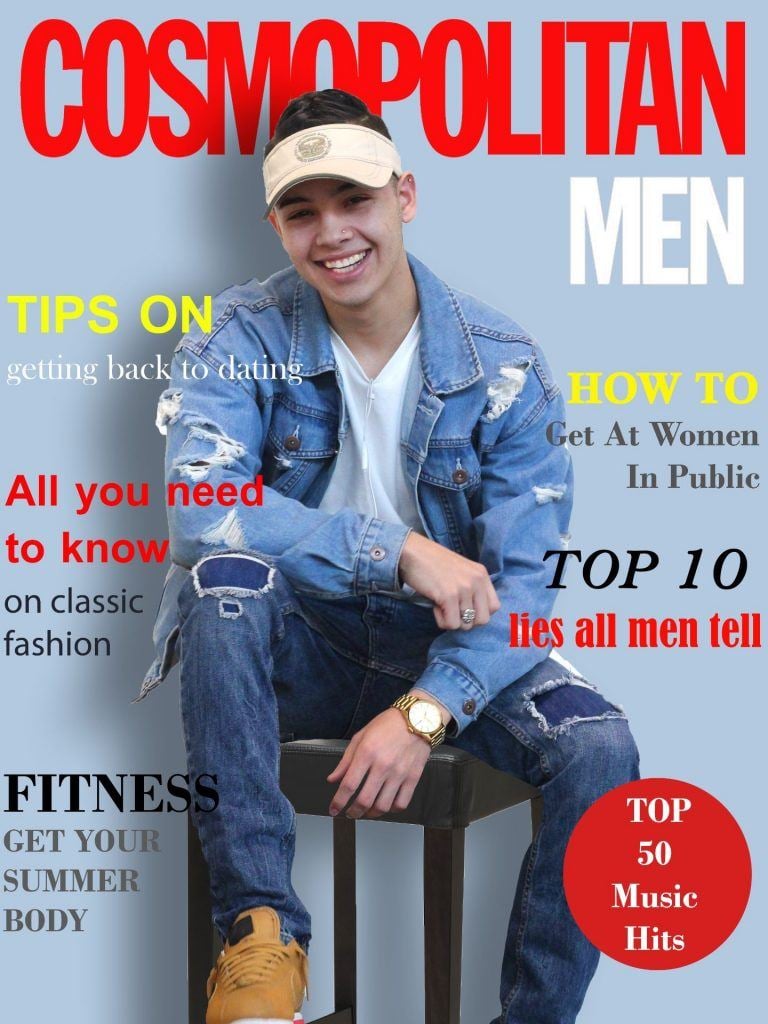
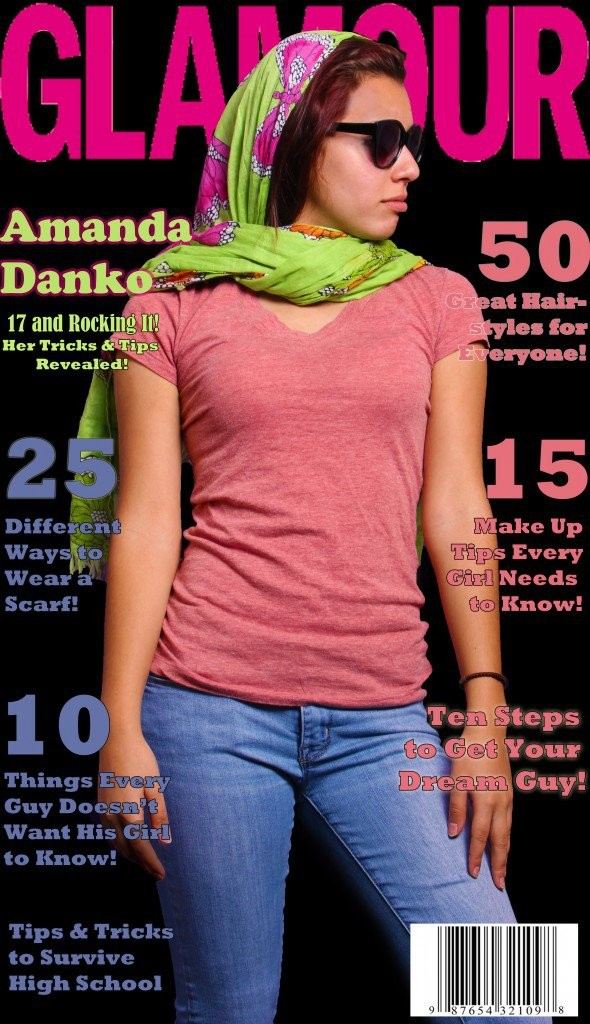
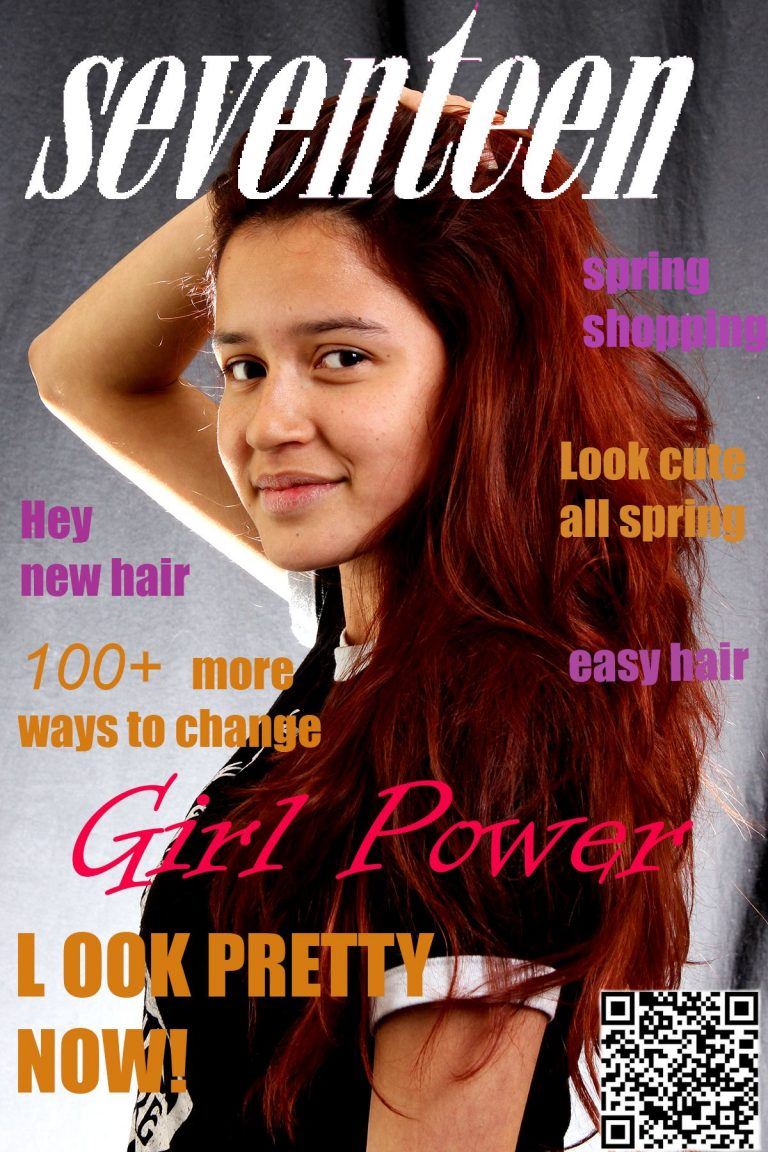
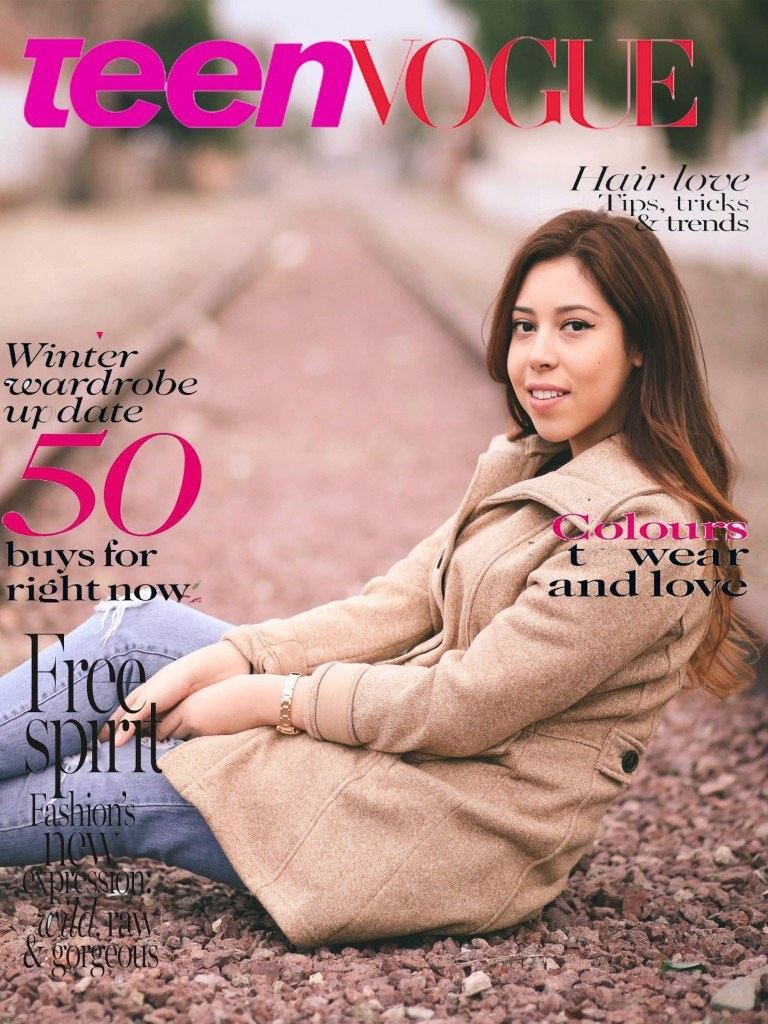
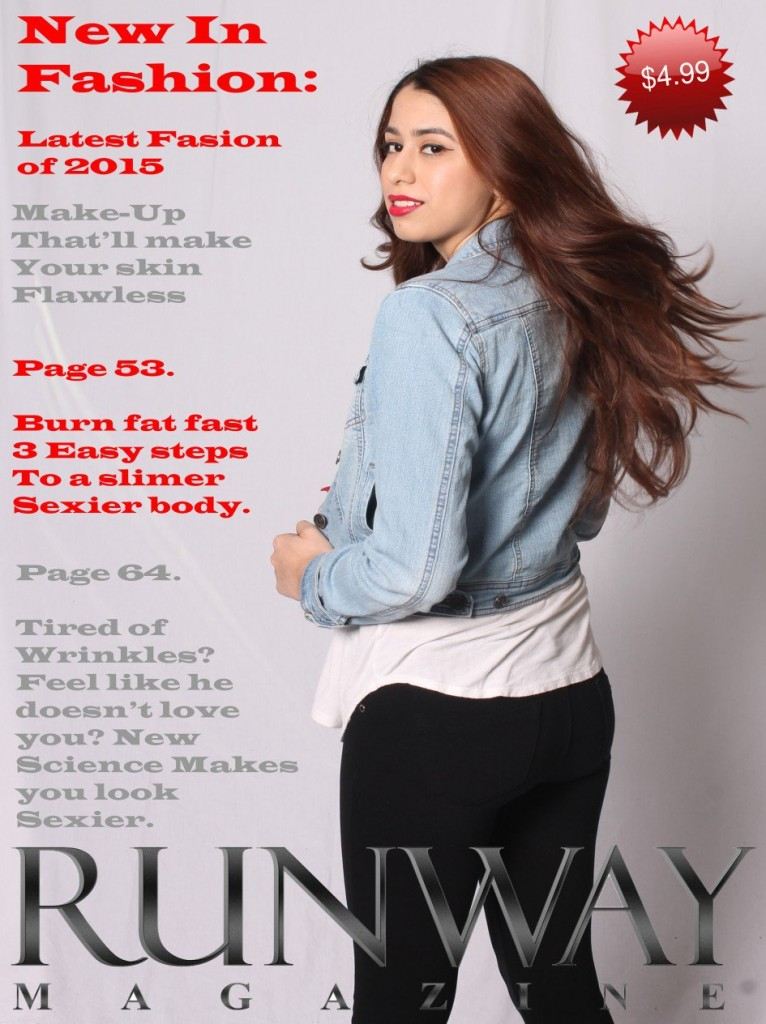
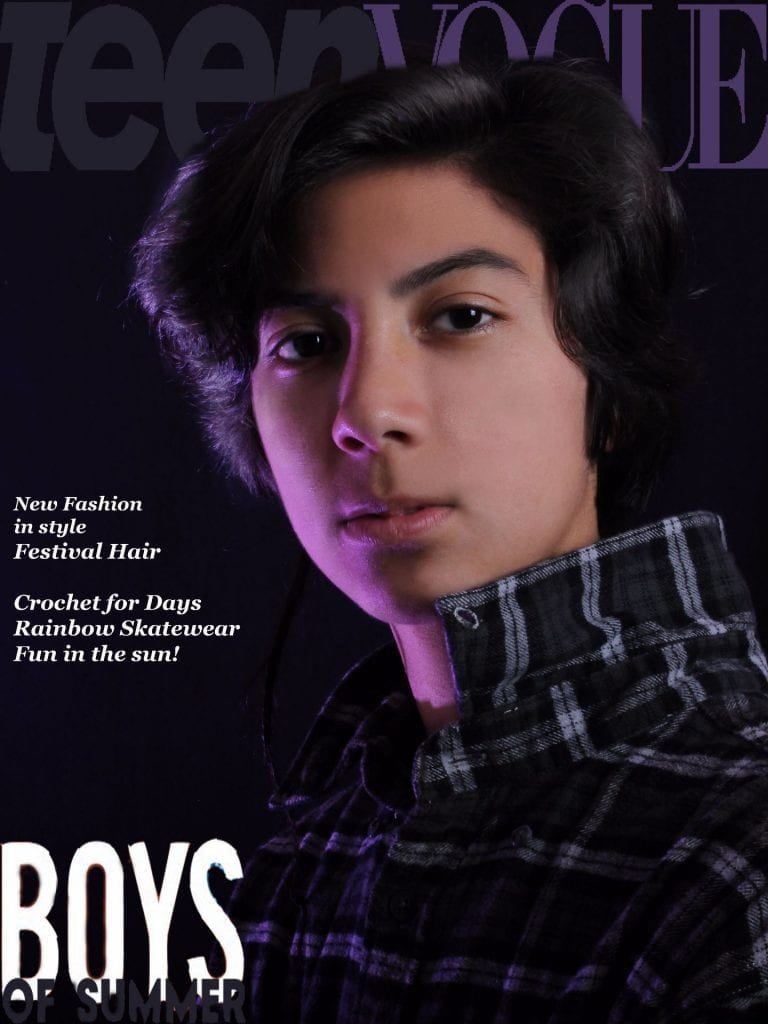
2. MAGAZINE COVER
Look at magazine covers online and post 3-5 covers you like and explain why these covers attracted your eye. Then create a magazine cover (9×12 @ 200 res)using your own photographic image. Include the name of the magazine and a list of articles, which would be within the magazine. Make it look as authentic as possible.


3. READ AND WRITE: 20 ESSENTIAL TIPS FOR EVERY PHOTOGRAPHER
Read the following link and list the 10 tips that you feel are most important to you and why!
https://phlearn.com/magazine/20-essential-photography-tips-every-photographer-needs-to-remember/
________________________________________________________
3 Assignments due Friday, April 19
1. POETRY AND PHOTOGRAPHY
Take a new photograph or use an existing photograph for this assignment, and edit it to perfection. Make a new document 11×14 or 14×11 @ 200 resolution. Move your photo into your new document and size to fit. Add a quote, poetry, song lyrics or your own words to your edited image. Format the text with the perfect font, color, and stroke or other layer style. Post to your blog.


2. LETTER TO NEXT YEARS PHOTO STUDENTS
Write a three paragraph letter to next year’s photo students. Talk about what you liked and did not like about the class, projects and workload, and any other pieces of advice you give to future Digital Photo students here at Jurupa.
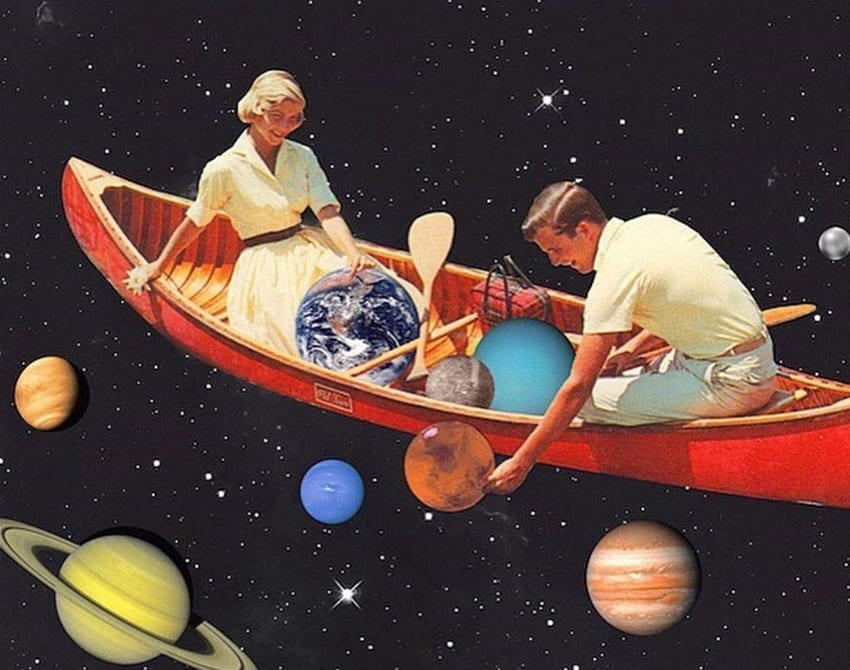
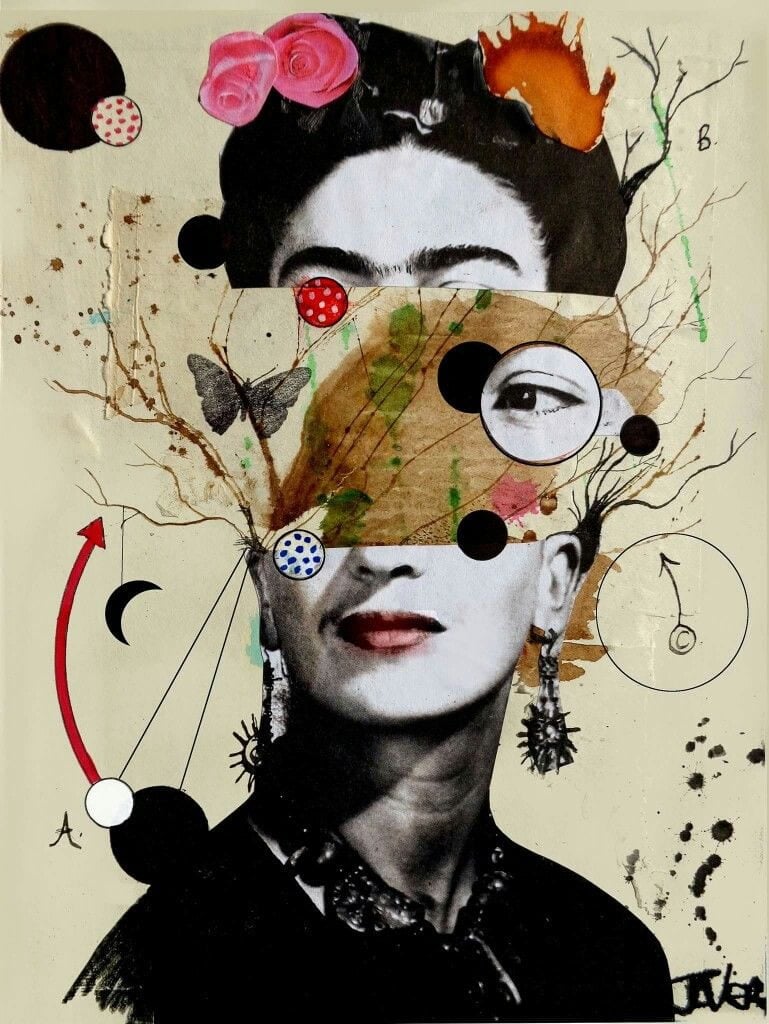
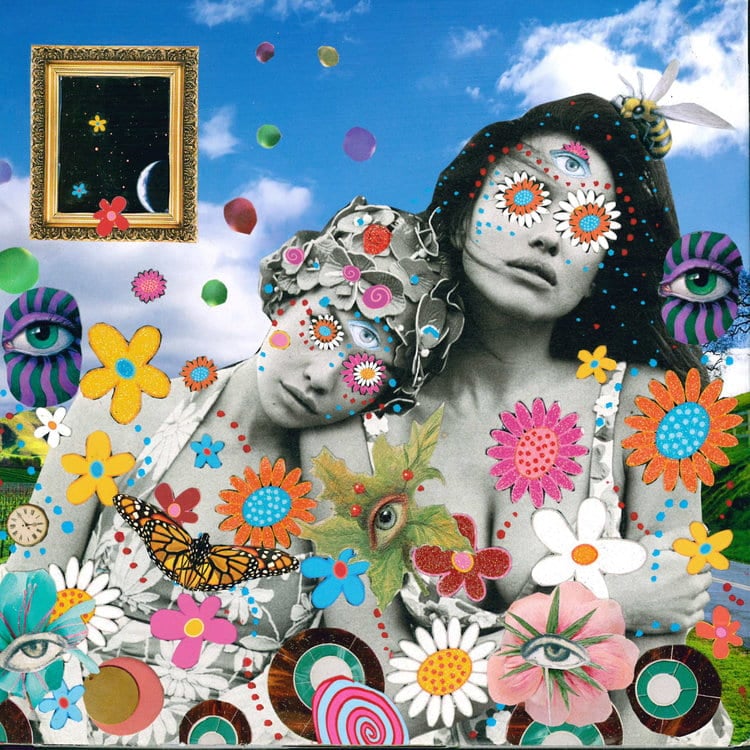
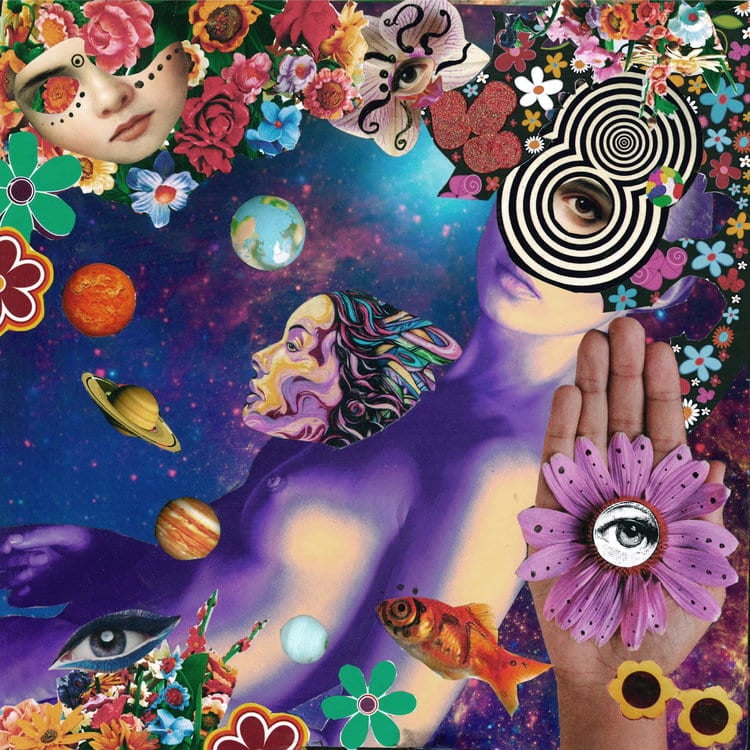
3. SURREALISTIC COLLAGE
Use Internet images to produce a surrealistic collage, 12×12 200 dpi. Think about the THEME and COMPOSITION to catch the viewer’s eye. Explain your concept and idea in the caption section when posting.
https://creativemarket.com/blog/design-it-yourself-surreal-collage
Collage is a technique of an art production where the artwork is made from an assemblage of different forms or images, creating a new whole.
A collage can include magazine or newspaper clippings, textiles, paint, bits of colored or handmade papers, portions of other artwork or texts, photographs and other found objects, glued to paper or canvas. The origins of collage can be traced back hundreds of years, but this technique made a dramatic reappearance in the early 20th century as an art form. The term collage was coined by both Georges Braque and Pablo Picasso in the beginning of the 20th century when collage became a distinctive part of modern art.
This is an opportunity to play with images, text and ideas to create artwork that creates connections between disparate images and ideas to create a surreal image or tell a story – whatever you want! Explore some examples of collage work done by masters of the technique to inspire you and then you will experiment and create using your own ideas. A range of images are available to you on the Internet, and you are encouraged to bring your own drawings, photographs or found imagery to use in your personal creations.


____________________________________________
3 Assignments Due Friday April 12:
1. Album Covers for Digital Audio Production Students
Collaborate with a digital audio production student to produce an album cover for their recordings. Make your album cover 12×12 @ 300 resolution.


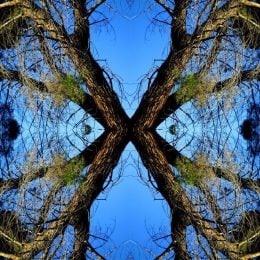
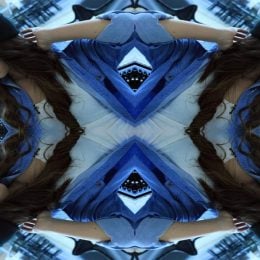
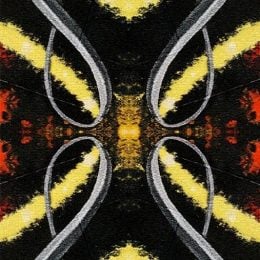
2. Mirror Imagery
Photograph an interesting photo with lots of lines. Put the edited photo in a new document and make a copy of the image to flip to make mirror imagery. Either 2 or 4 images would work for the mirror image. Post to blog. List 10 words to describe your photograph.


3. Buying a new digital camera writing reflection
Pretend you are going to buy a new digital camera. Go online to research. Try going to http://www.bhphotovideo.com/ Research different brands, types of digital cameras (dslr, point and shoot, mirrorless), cost, size and specifications of different cameras (megapixels, ISO settings, camera modes, flash settings, interchangeable lenses, battery life, shutter lag) Write a 400 word synopsis in academic language, on which camera you would choose to purchase based on their research, and why you would choose that particular camera. Post your synopsis to your blog.
_____________________________________________________________
Assignments due Monday April 8:
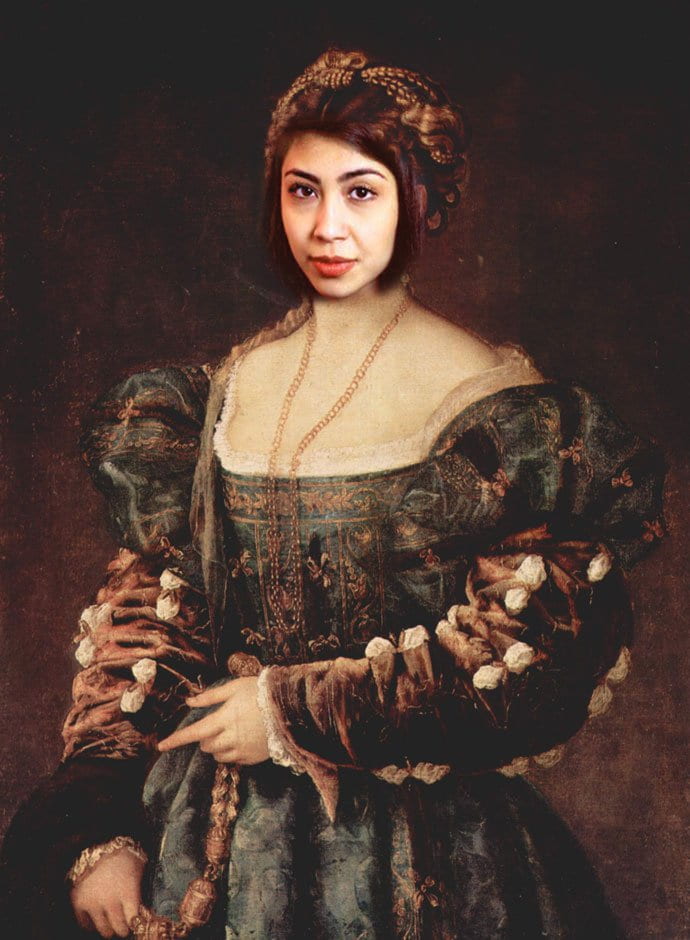
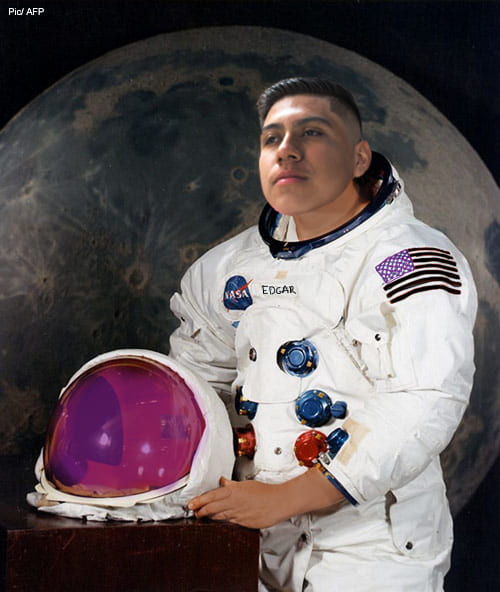
1. PUT YOURSELF IN HISTORY:
Create a document 9×12 with 150 resolution. Find a historic photograph online and insert in your document. Include yourself in the scene. Adjust size, color and resolution to match the historic photo to look as realistic as possible. Under your photo write a short reflection as to why you chose to be this person in history. Look at the link below for more samples.
https://cauchonphotoclass.edublogs.org/?s=history


2. PORTRAITS WITH MAKE UP
Take a beautiful portrait of someone, or use an existing portrait you took and apply make up to their face using Photoshop paint and brush tools. (Make sure the portrait is a head and shoulder shot.) Put makeup on 2 different portraits and post them to your blog. Read this link and about painting with brushes & make a blogpost explaining 5 important tips you learned from reading it.
https://helpx.adobe.com/photoshop/using/painting-tools.html


3. ARTIFICIAL INTELLIGENCE IN PHOTOGRAPHY
https://www.adorama.com/alc/ai-in-photography/
Read this link and write a 2-3 paragraph summarizing the article and your opinions on how to effectively use AI in photography.
____________________________________________________________________________________________________________________________
3 Assignments Due Tuesday, April 2
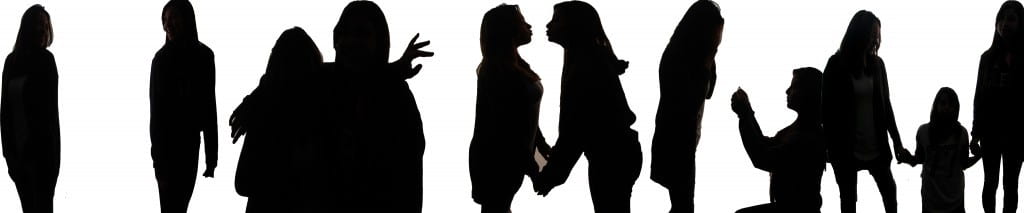
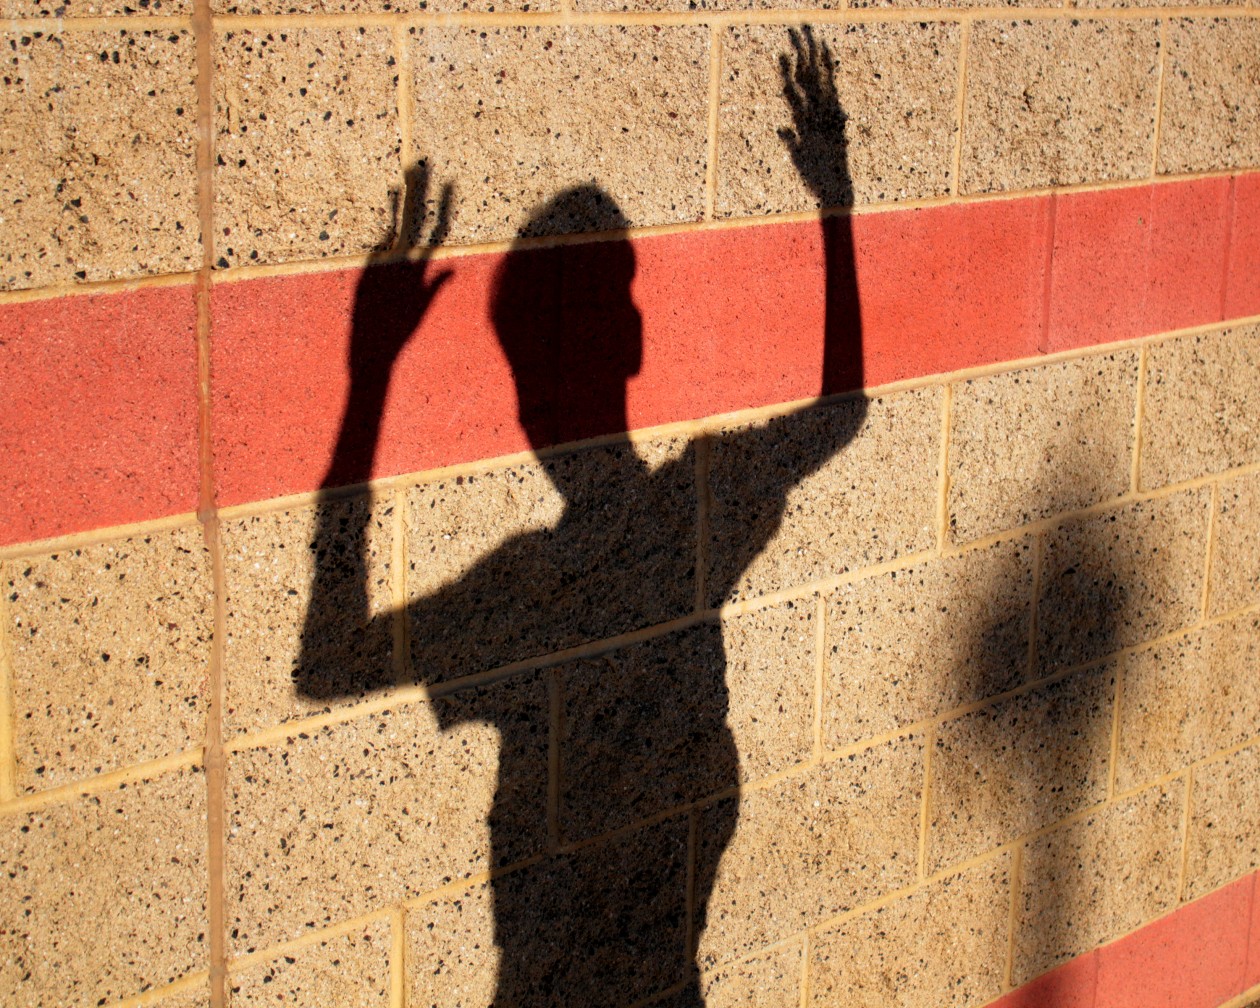
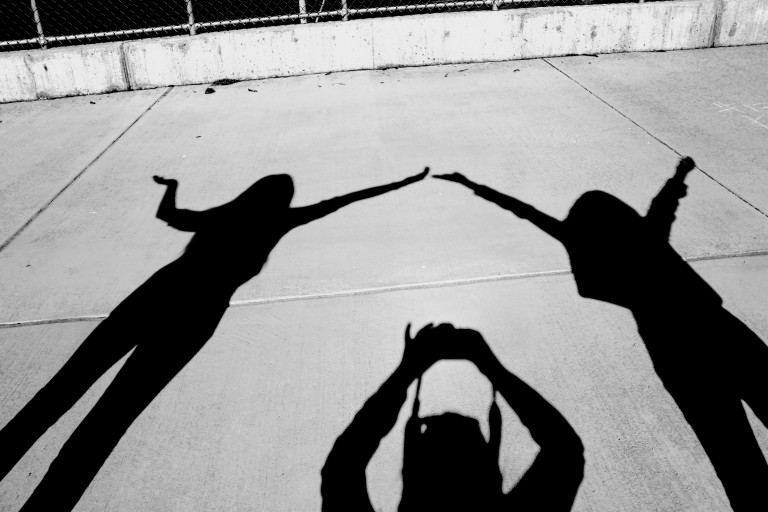
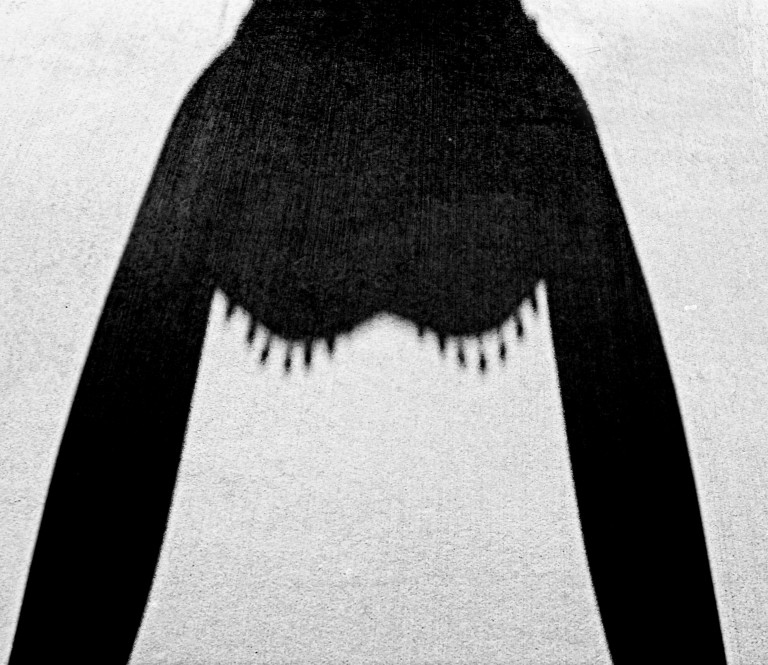
1. SILHOUETTE STORY
Think of a good concept for your silhouette photos and then take photos of backlit subjects to make high contrast silhouettes. You can edit them in Photoshop to give them more blacks and whites, and contrast. Use studio hot lights with two lights aimed at the background and turn the room light off to get more shadow on the subject(s). Meter for the background.


___________________
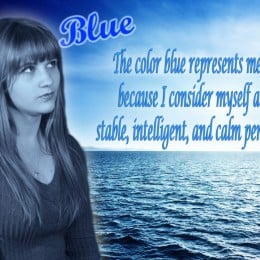
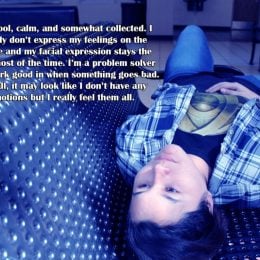
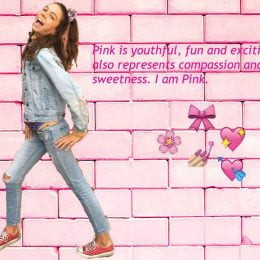
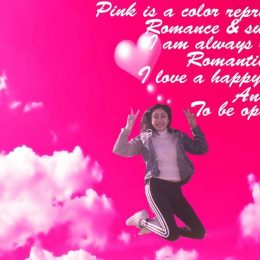
2. WHAT COLOR IS YOUR AURA?
Create a Photoshop Collage 12×9 or 9×12 300 resolution representing your favorite color. Include a photo of yourself that you took with the camera on self timer mode, the color you select and some writing about why this is YOUR color. Perhaps add a tint of your color to the image with Photo Filter tool. Post to blog.


__________________________
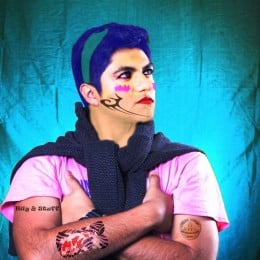
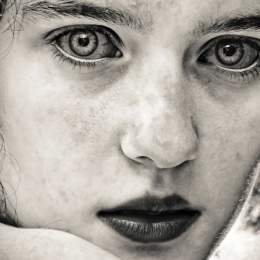
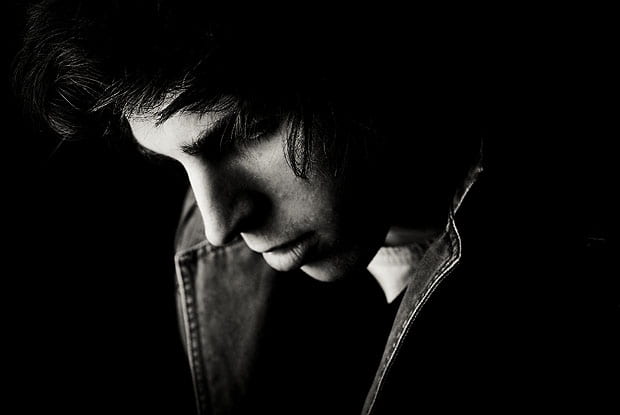
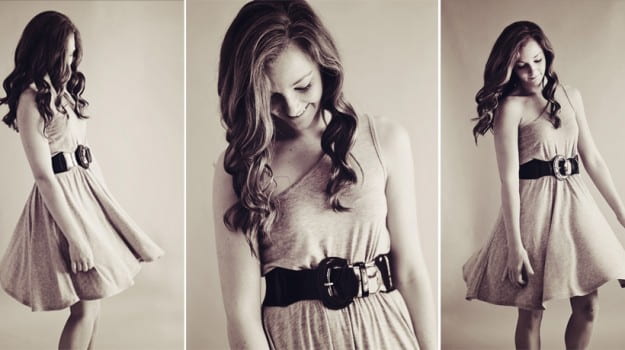
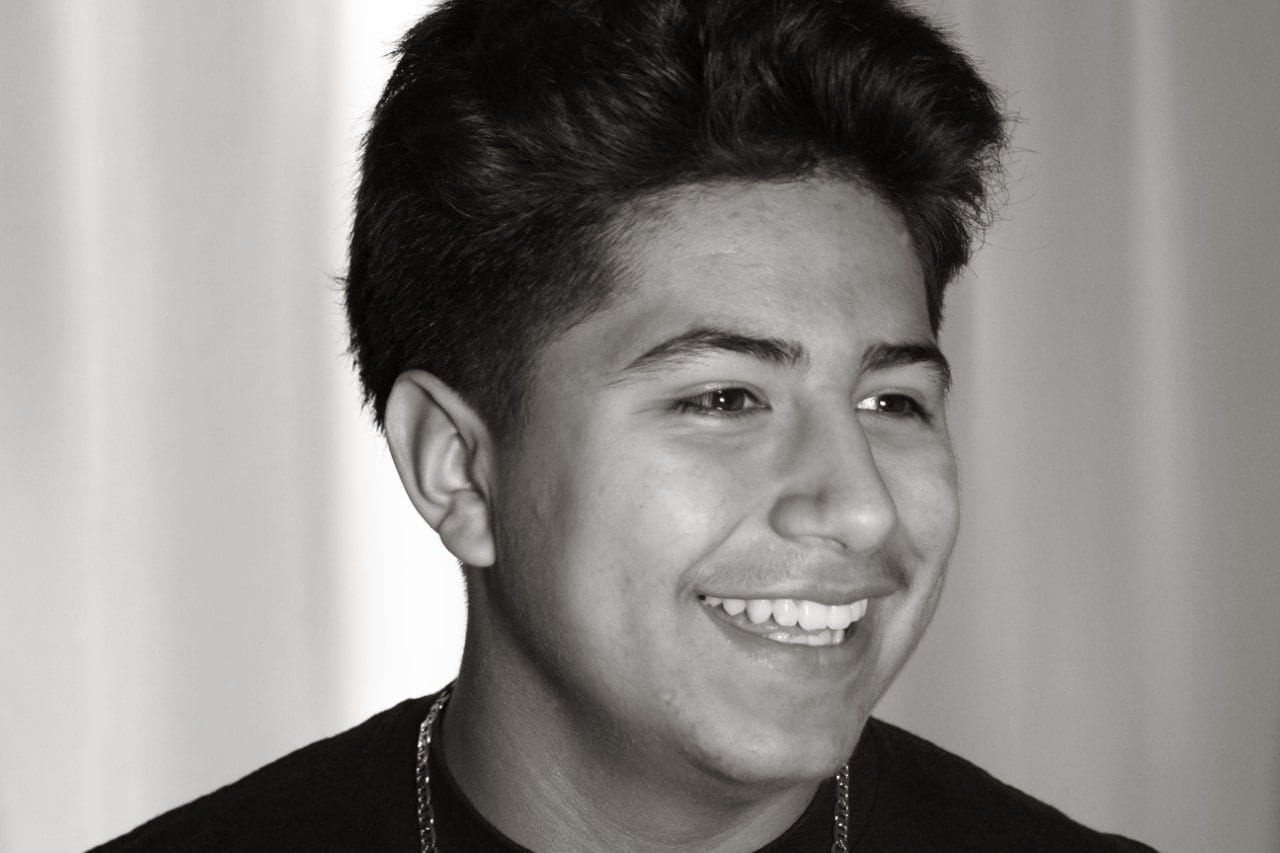
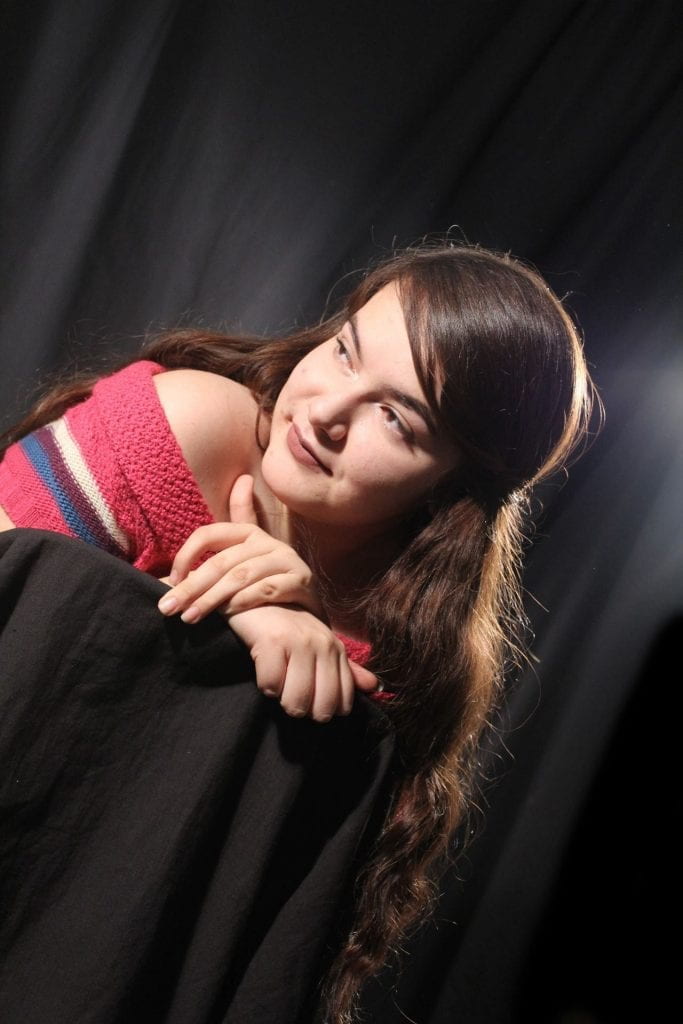
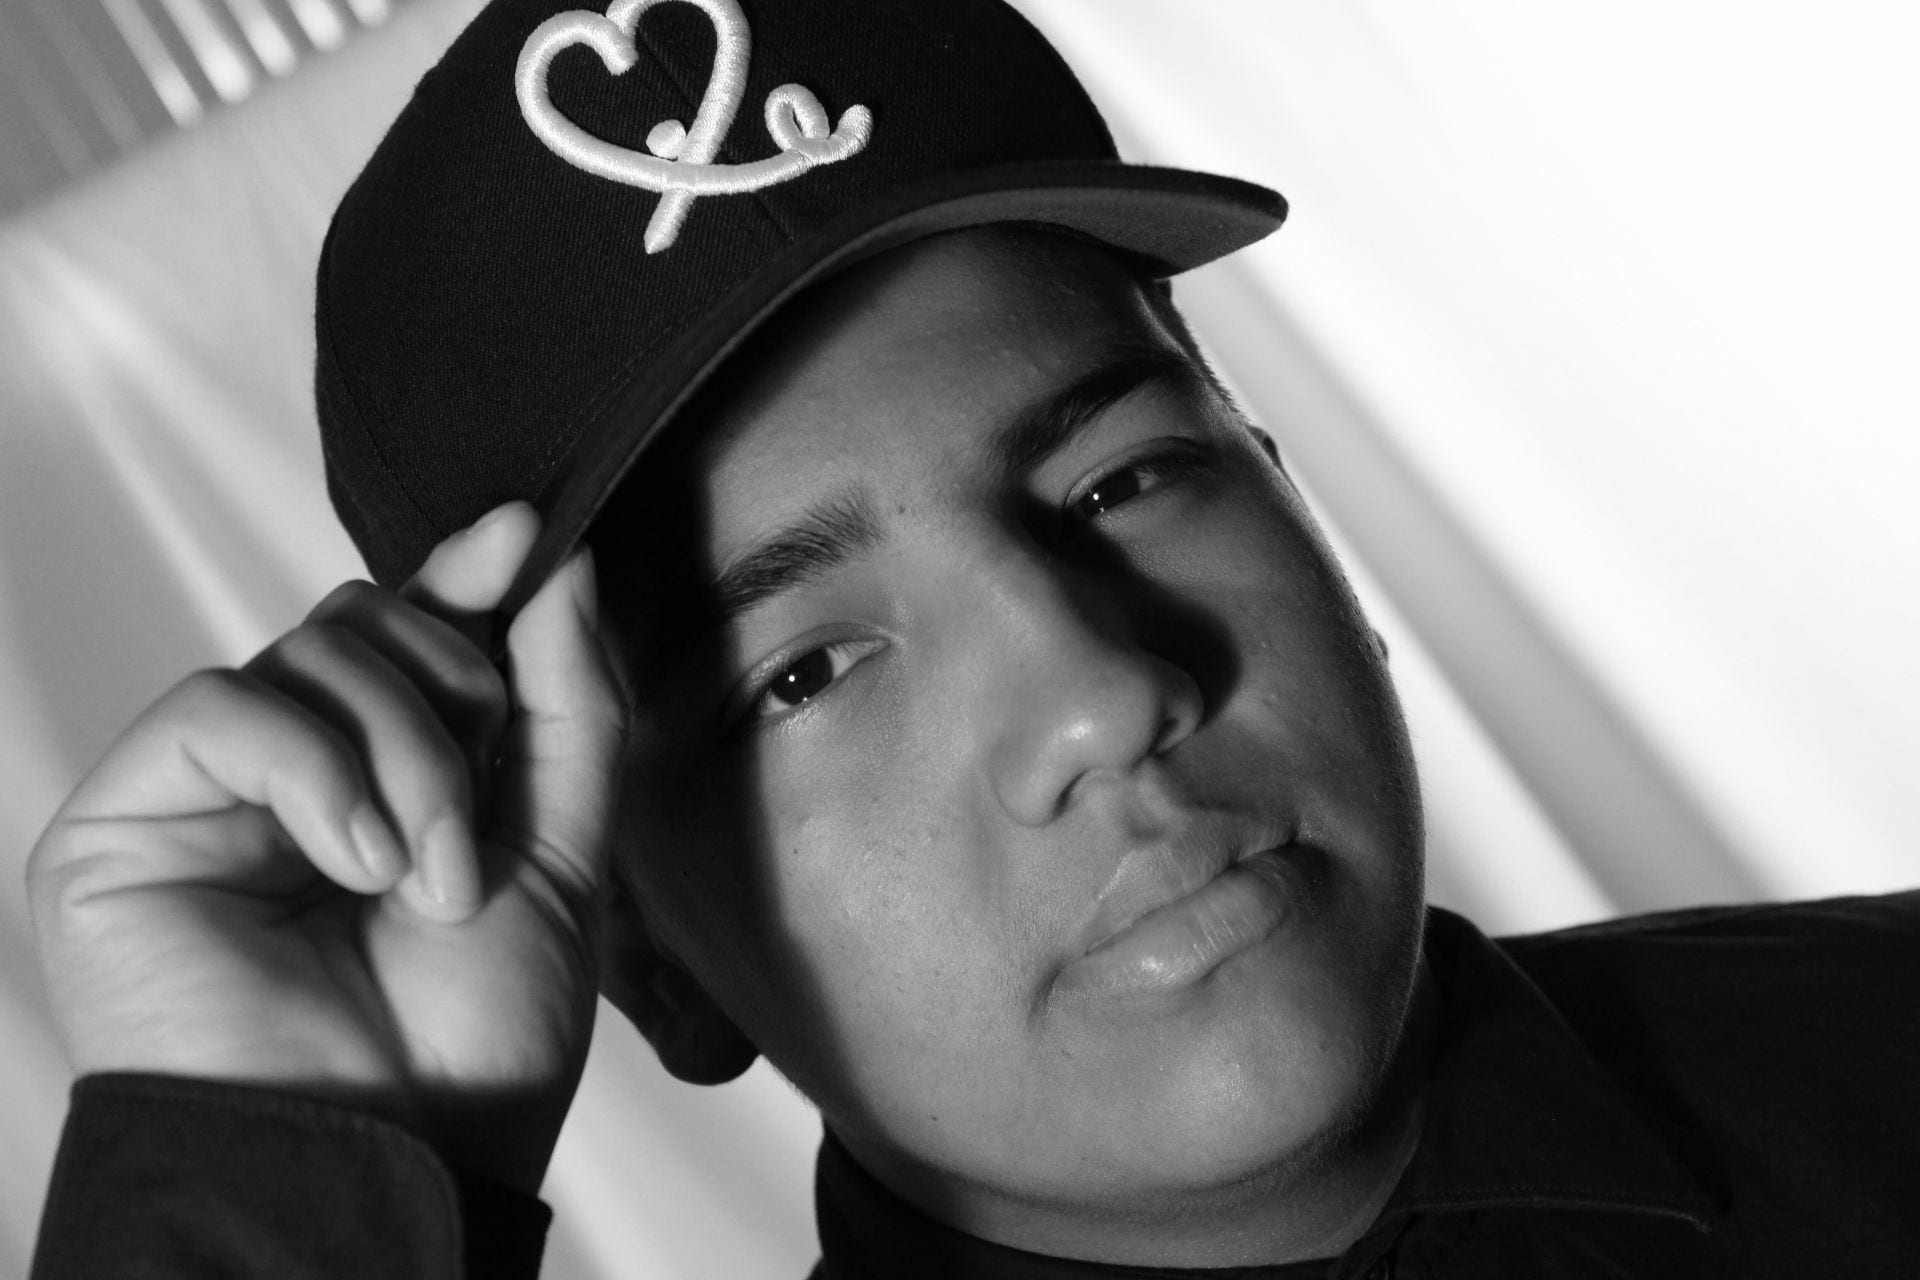
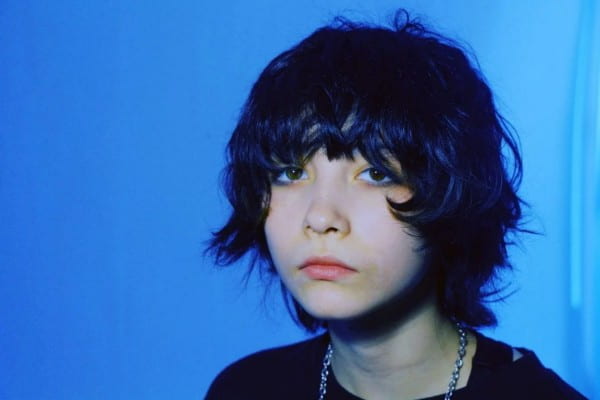
3. CLOSE UP PORTRAITS
Take close up portraits of some of your classmates. You can use any type of lighting you choose, but make sure to compose as a close up composition. Post 3 portraits of different individuals to your blog and include a list of 10 words in the caption section of each photograph to describe that person.


______________________________________________________________
3 Assignments due Friday, March 8
1. TAKE A VACATION
In this assignment you are going to go on a virtual vacation. Find a location online where you would like to go and digitally put yourself into that location. Make sure to match lighting and color balance to make it look realistic as possible. You must add 3 props into the scene (sunglasses, shopping bags, friends to go with you, etc…) Make your new document for all the elements in the image a 12×8 150 resolution. Under your work. include 1-3 sentences to explain why you would like to go on this vacation.
https://cauchonphotoclass.edublogs.org/?s=take+a+vacation


2. BLACK & WHITE & SHADES OF GRAY
Photograph for these elements of composition: leading line, texture, repeated patterns, rule of thirds and contrast. Using the monochromatic setting on the DSLR, photograph your images in black and white. Edit in PS or LR and post your top 3-5 images on your blog.
Read this links and write one paragraph giving a synopsis of the important points about black and white photography.
https://digital-photography-school.com/5-reasons-why-try-black-and-white-photography/
Black and White Photography: A Beginner’s Guide to Getting Started


3. TED TALK: HOW PHOTOGRAPHY CONNECTS US
Watch this Ted Talk on how photography connects us and on your blog make a post summarizing, critiquing, judging and evaluating what you got out of watching the video. Have at least 2 paragraphs.
https://www.ted.com/talks/david_griffin_on_how_photography_connects
_____________________________________________________________
3 Assignments Due Friday, March 1
1. External Flash Worksheet
Answer the following questions on your blog in a separate post:
1-When would you use external flash?
2-Do you need to meter the light if you use flash?
3-What does flash synchronization mean?
4-What does ETTL mean?
5-What will happen when you shoot faster than the camera sync speed?
6-Why do photographers bounce the flash and use a diffuser?
7– What is a slave?
8-What should you do if your image comes out too dark or too light?
2. MY FAVORITE TEACHER WITH BOUNCED FLASH
Photograph your favorite teacher with bounced external flash off camera with sync cord. Edit and post your best portrait and write a 3 paragraph reflection in academic language explaining why you like and admire this teacher. Give details, reasons and examples as to why you chose this teacher. Samples below:


3. FILL FLASH OUTSIDE
-Read this link, (or find another link online), about using FILL FLASH outside to fill in the shadows. Write 1 paragraph explaining what fill flash outside is and why you would need to use it to get perfect exposure on the subject and background.
Fill Flash in Photography: Get Useful Tips and Tricks (colorexpertsbd.com)
http://www.digital-photo-secrets.com/tip/195/using-a-flash-when-outside/
-Go outside and photograph a subject which is BACKLIT. Set your camera on AV to meter the natural light. Use a small aperture like f11 or 16 and a low ISO like 200 or 400. Make sure your flash is on ETTL and fill the subject in shadow with fill lighting from the external flash. Post 2-3 photos showing your understanding and good usage of fill flash.


++++++++++++++++++++++++++++++++++++++++++++++++++++++++++++++
4 Assignments due Friday February 16:
1. HDR PHOTOGRAPHY:
-Go online and research the meaning of HDR. Create a blogpost explaining what the term HDR in photography means and ways to achieve successful results.
-Photograph 5 different exposures of a landscape (on Manual) for this assignment. One at the perfect exposure, plus one and two stops underexposed and one and two stops overexposed. USE A TRIPOD for this!
-Save images in a folder and open Photoshop>File>Automate>Merge to HDR Pro
-Select your five landscape images and press ok. Photoshop will compile your images into one HDR image.
-You will probably need to do more adjustments to make it more vibrant and saturated. You could bring in cool clouds from the Internet to blend into your sky.
-Post to blog and please TITLE YOUR WORK!!! Write a 10 sentence critique of your own work and post under your image.


________________________________________________________
2. STUDIO PORTRAITS/ STILL LIFES WITH STROBES AND GELS :
Photograph 25 portraits/still lifes in the studio using the strobes and colored gels in the background. Edit your portraits in Lightroom and make cosmetic retouches in Photoshop. Post 9-12 final portraits on your blog. Writing critique: Find a portrait online that was shot with studio strobe lighting and write 5 sentences to describe the subject and their personality based on the photographers version of them. Evaluate the lighting used in the photograph and how you think the lights were arranged to get the results. Samples below:


3. WHAT EVERY BEGINNER NEEDS TO KNOW READ AND WRITE
Read this link: https://www.photographytalk.com/photography-articles/5082-13-camera-settings-every-beginner-needs-to-know
On your blog list the 13 setting every beginner should know and 1-2 sentences explaining what each one is.
4. INDEED JOB SEARCH
Look on https://www.indeed.com/
Find Photography Jobs (in LA or Fontana, or somewhere else you would like to live)
On your site list 5 jobs you would be interested in. List each job title and location and then answer these questions:
Do you meet the qualifications for the job?
What skills would you need to get the job?
Why would you want to have this job?
What is the starting pay for the job?
Would you be able to support yourself if you worked at this job?
Create a list of expenses you would have if you have if you lived on your own and worked at this job?
What are your actual career goals for your future?
++++++++++++++++++++++++++++++++++++++++++++++++++++++++++
++++++++++++++++++++++++++++++++++++++++++++++
1. MY FAVORITE TEACHER WITH BOUNCED FLASH
Photograph your favorite teacher with bounced external flash off camera with sync cord. Edit and post your best portrait and write a 3 paragraph reflection in academic language explaining why you like and admire this teacher. Give details, reasons and examples as to why you chose this teacher. Samples below:
2. FILL FLASH OUTSIDE
-Read this link, (or find another link online), about using FILL FLASH outside to fill in the shadows. Write 1 paragraph explaining what fill flash outside is and why you would need to use it to get perfect exposure on the subject and background.
Fill Flash in Photography: Get Useful Tips and Tricks (colorexpertsbd.com)
http://www.digital-photo-secrets.com/tip/195/using-a-flash-when-outside/
-Go outside and photograph a subject which is BACKLIT. Set your camera on AV to meter the natural light. Use a small aperture like f11 or 16 and a low ISO like 200 or 400. Make sure your flash is on ETTL and fill the subject in shadow with fill lighting from the external flash. Post 2-3 photos showing your understanding and good usage of fill flash.
3. External Flash Worksheet
Answer the following questions on your blog in a separate post:
1-When would you use external flash?
2-Do you need to meter the light if you use flash?
3-What does flash synchronization mean?
4-What does ETTL mean?
5-What will happen when you shoot faster than the camera sync speed?
6-Why do photographers bounce the flash and use a diffuser?
7– What is a slave?
8-What should you do if your image comes out too dark or too light?
++++++++++++++++++++++++++++++++++++++++++++++++++++++++++++++
3 Assignments due Friday, February 2:
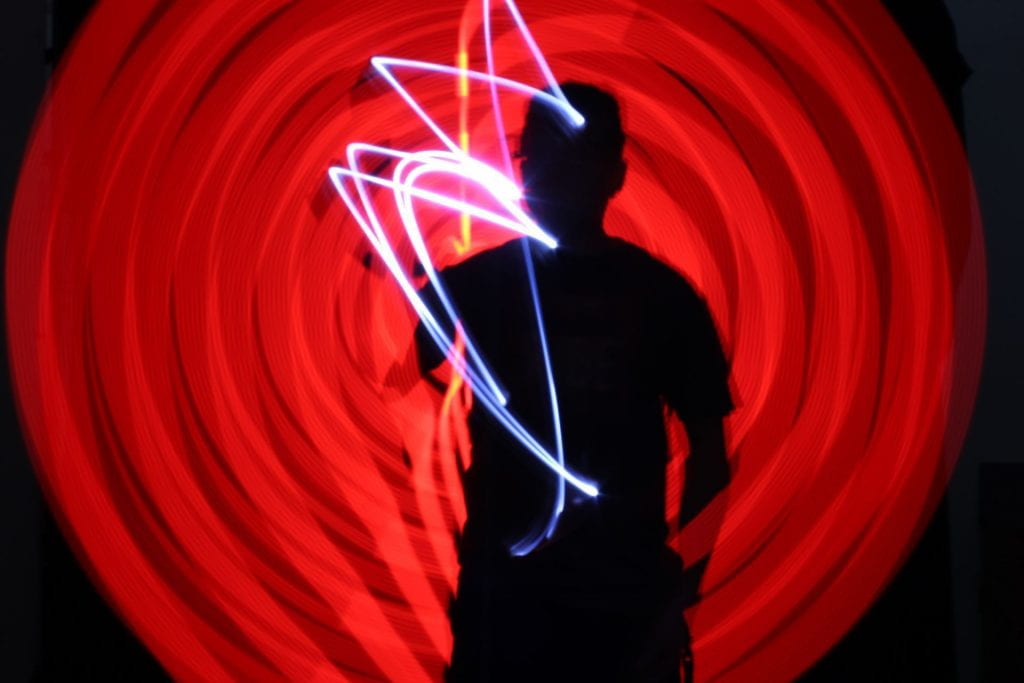
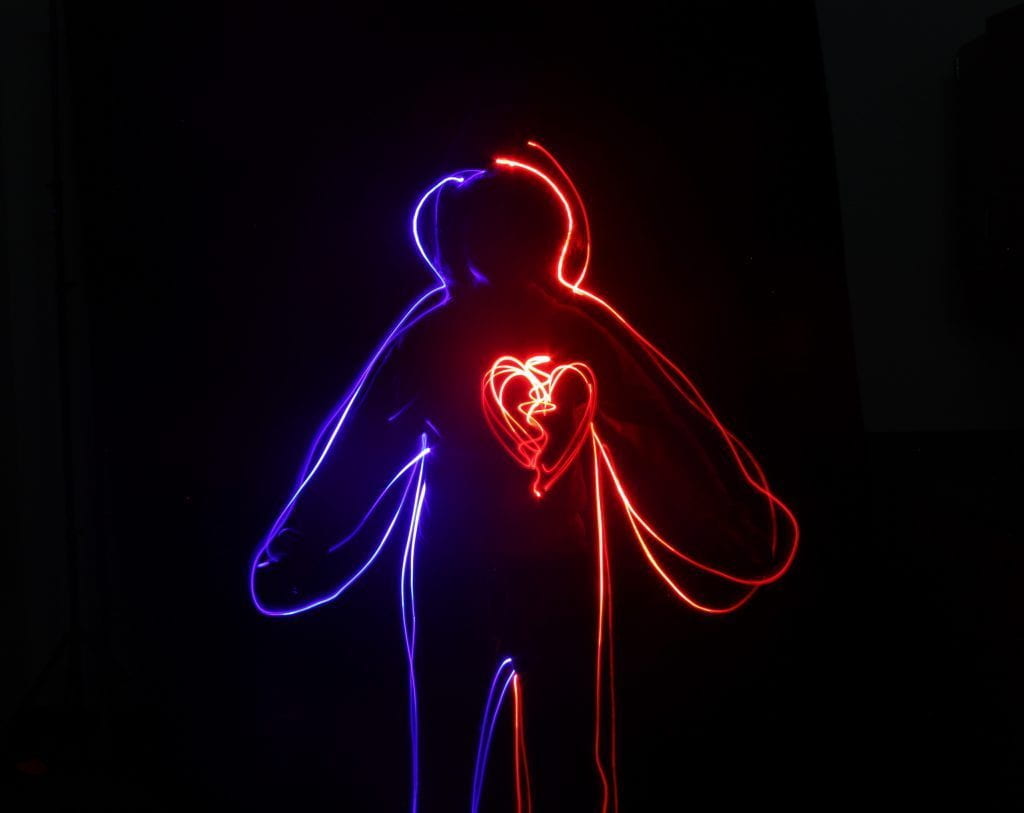
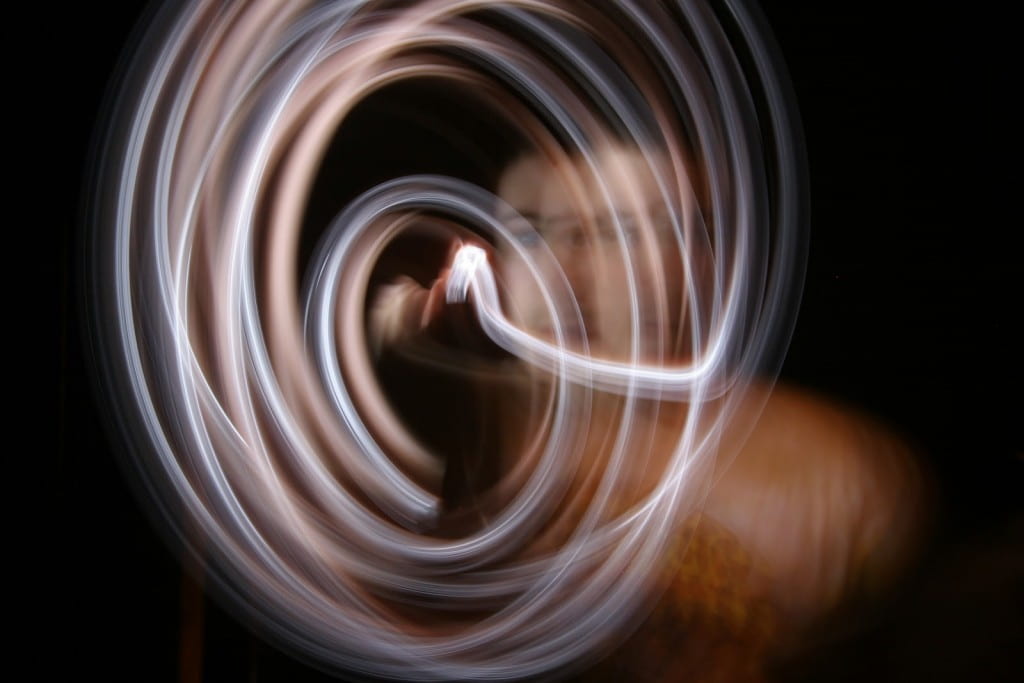
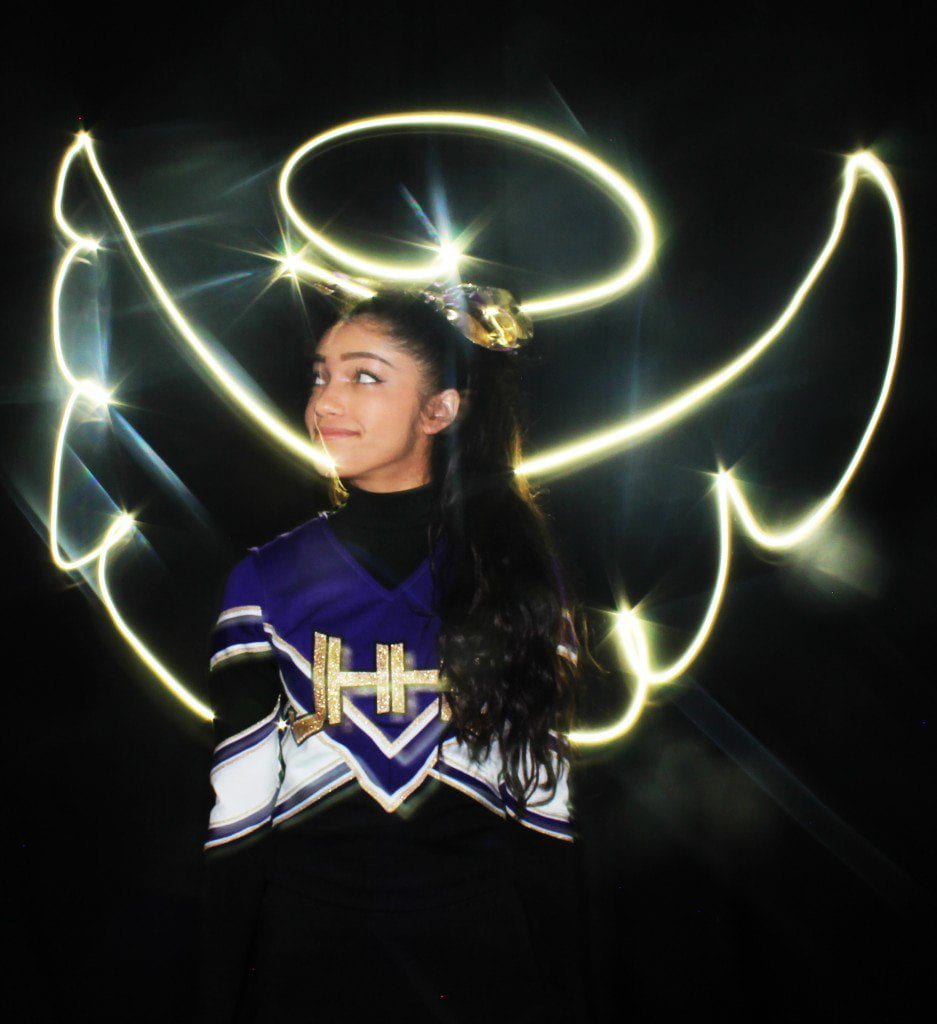
1. PAINTING WITH LIGHT
Go to a dark place to shoot for this assignment (back studio). Put the camera securely on a tripod and put your shutter speed at 10-20 seconds (not 10th of a sec, but 10 full seconds). You must put the camera on self timer to avoid camera shake. Shoot on manual and try your f stop at 11 or 16. ISO at 200. Pre focus on Manual focus mode, because the camera will not in autofocus in the dark. Wave finger lights in front of the frame during the exposure and check out the results! Try using the pixel stick to create even more cool light painting effects. Post 1 Painting with Light photos you took and edited on your blog. Critique: Find an amazing painting with light photo on the Internet and write a paragraph about how you think the photographer achieved the result and why you think it is so eye catching.


______________________________________________
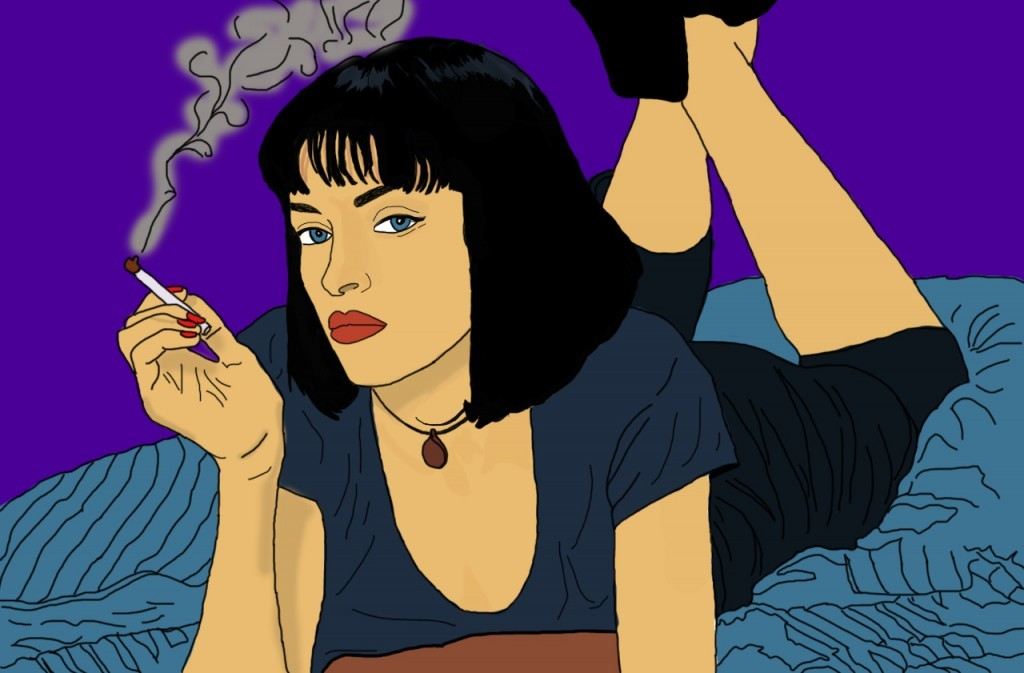
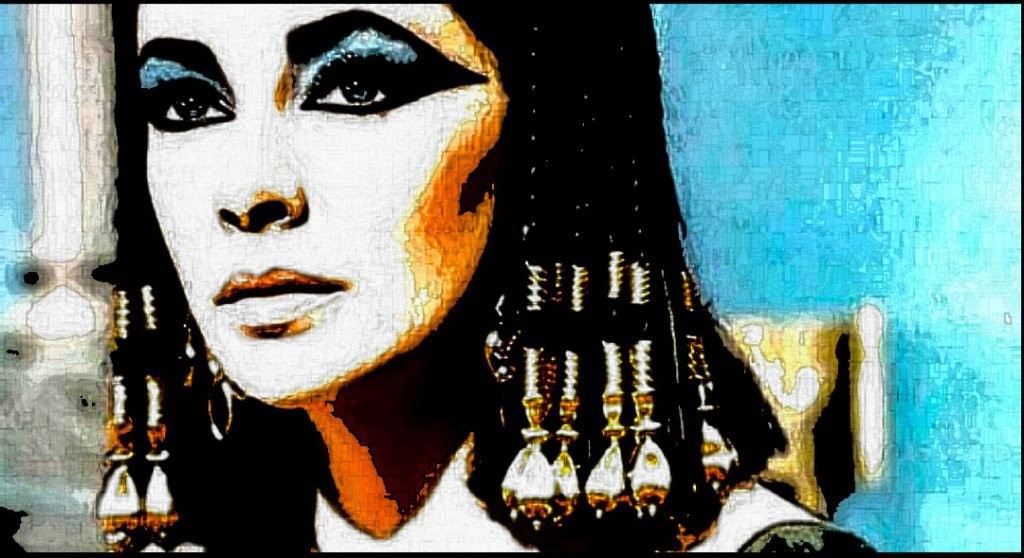
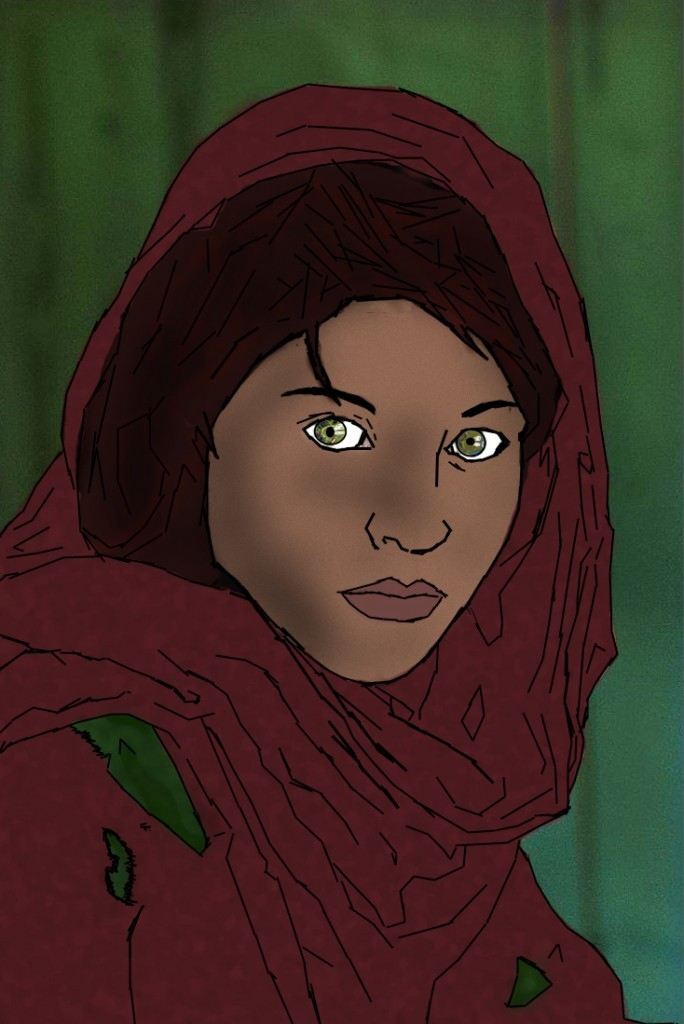
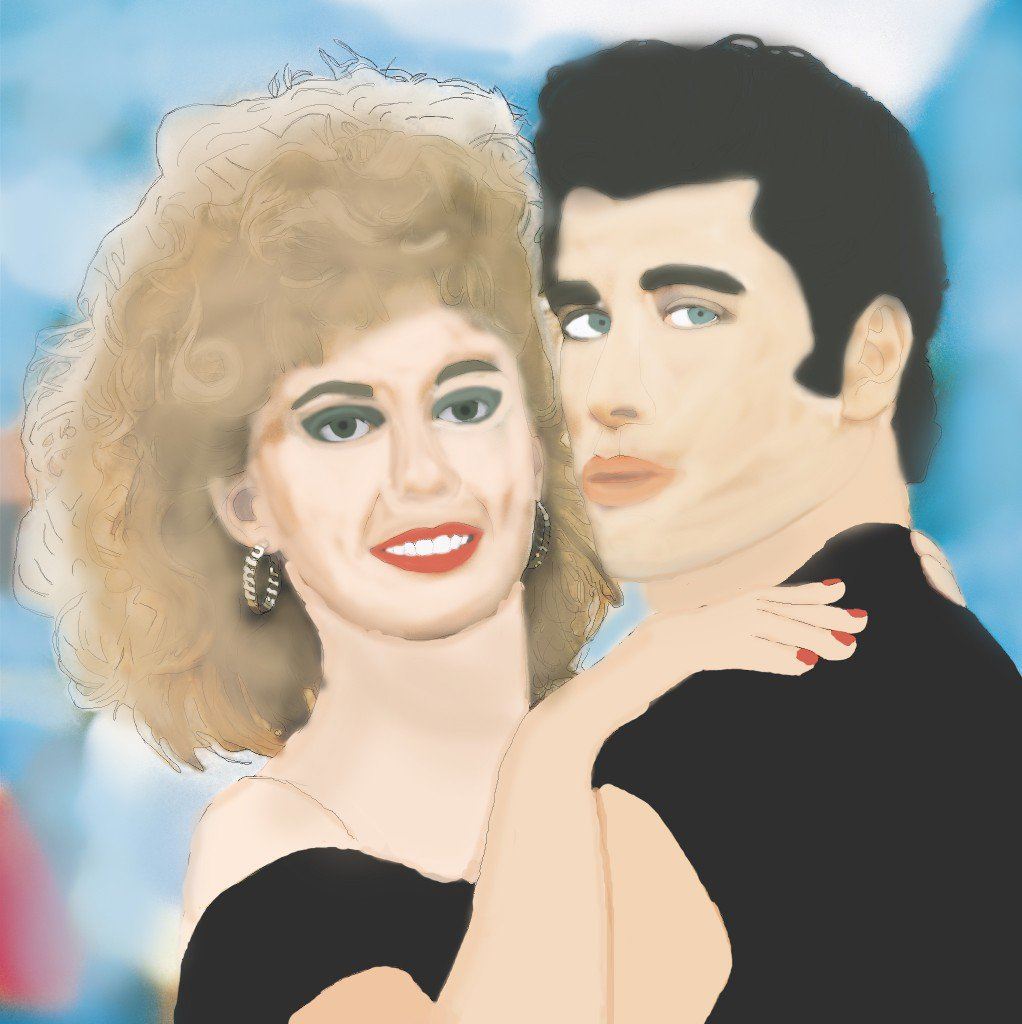
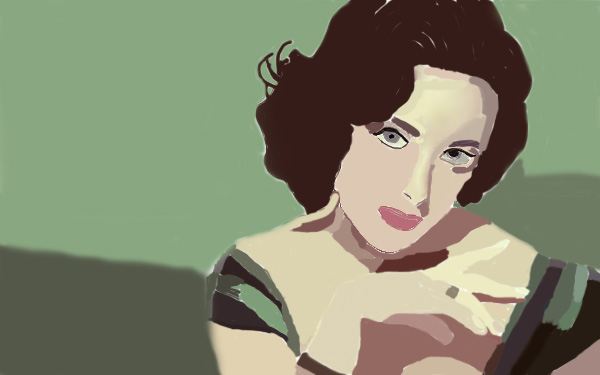
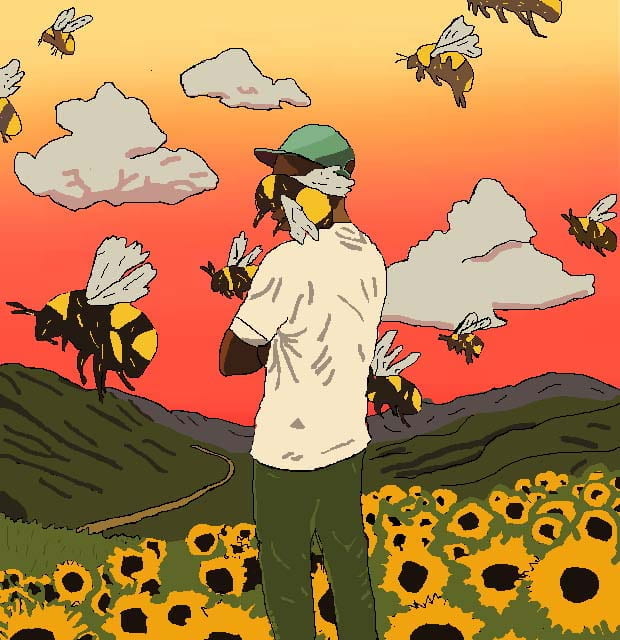
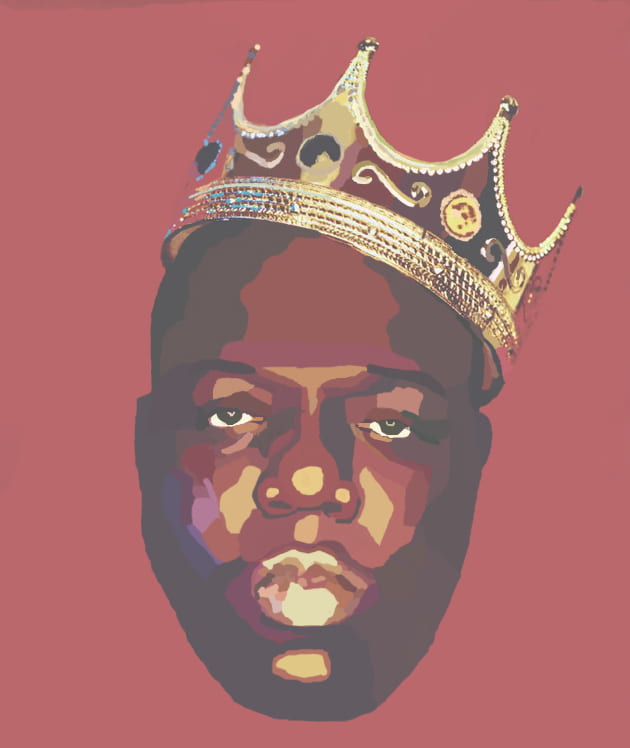
2. ILLUSTRATION OF AN ICONIC IMAGE
Make a new document 8×12 or 12×8 200 resolution. Paste the illustration you want to trace and fit to the correct size. Make a new blank layer to trace on and lock it. Trace the illustration with a thin pencil and then color it in with brushes and the paint bucket. Make sure to add a background to your illustration. Samples below:


______________________________________________
3. PHOTOJOURNALISM: CANDID MOMENTS WITH CAPTIONS (3-5 Candid Photos w/ captions for each)
Photograph candid moments and edit your images in Photoshop. In the caption section of each photo you post write a caption including who, what , where and why. For a critique look at the work of a famous photojournalist (example: photographer Henri Cartier Bresson ,who captured the “decisive moment”) On your blog post 2-3 of their photographs and write 10 sentences about their work and your opinion of their timing, composition and ability to capture the perfect moment. Student Samples below:


++++++++++++++++++++++++++++++++++++++++++++++++++++++++++++++
________________________________________________________
1. READ AND WRITE: INTRODUCTION TO USING STROBES
Read this article on beginning strobe use and then write a list of ten important information you got out of the article. Post the list to your blog. https://photography.tutsplus.com/articles/a-fundamental-introduction-to-studio-lighting-equipment–photo-6067
2. ADVERTISING/COMMERCIAL PHOTOGRAPHY
For this assignment you will create a photograph that would be used for advertising purposes. First you will research advertising photography on the Internet to generate ideas. Post 3 ads that you really like and write a sentence about why they catch your eye. Before you begin to create your advertisement, write a proposal by answering the following questions:
- Who is the client, or company you are representing?
- What is the product?
- Who is the target audience?
- Where would you expect to see this advertisement?
- What kind of lighting are you going to use to make this look professional?
- What props do you need?
Shoot the product and use of variety of compositions. Think about: lighting, composition, depth of field, product placement. Use Photoshop to tweak and enhance your photograph. Add necessary text and captions. Post your best advertising shot, EDITED, to your blog with the proposal. Samples below:


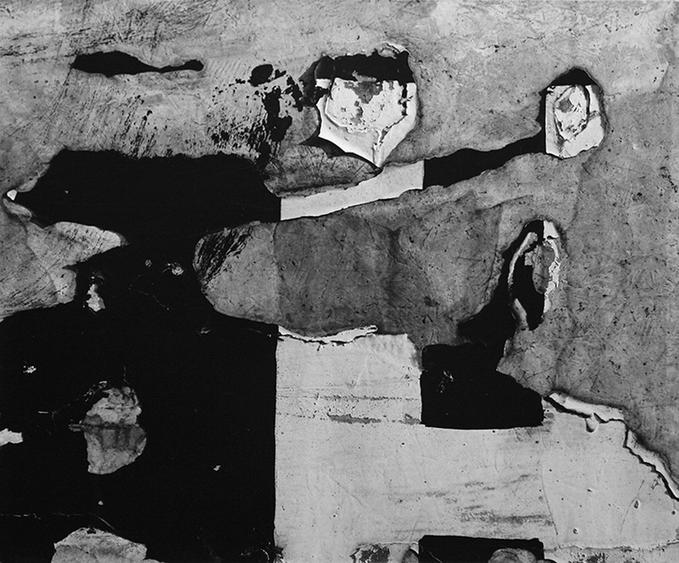
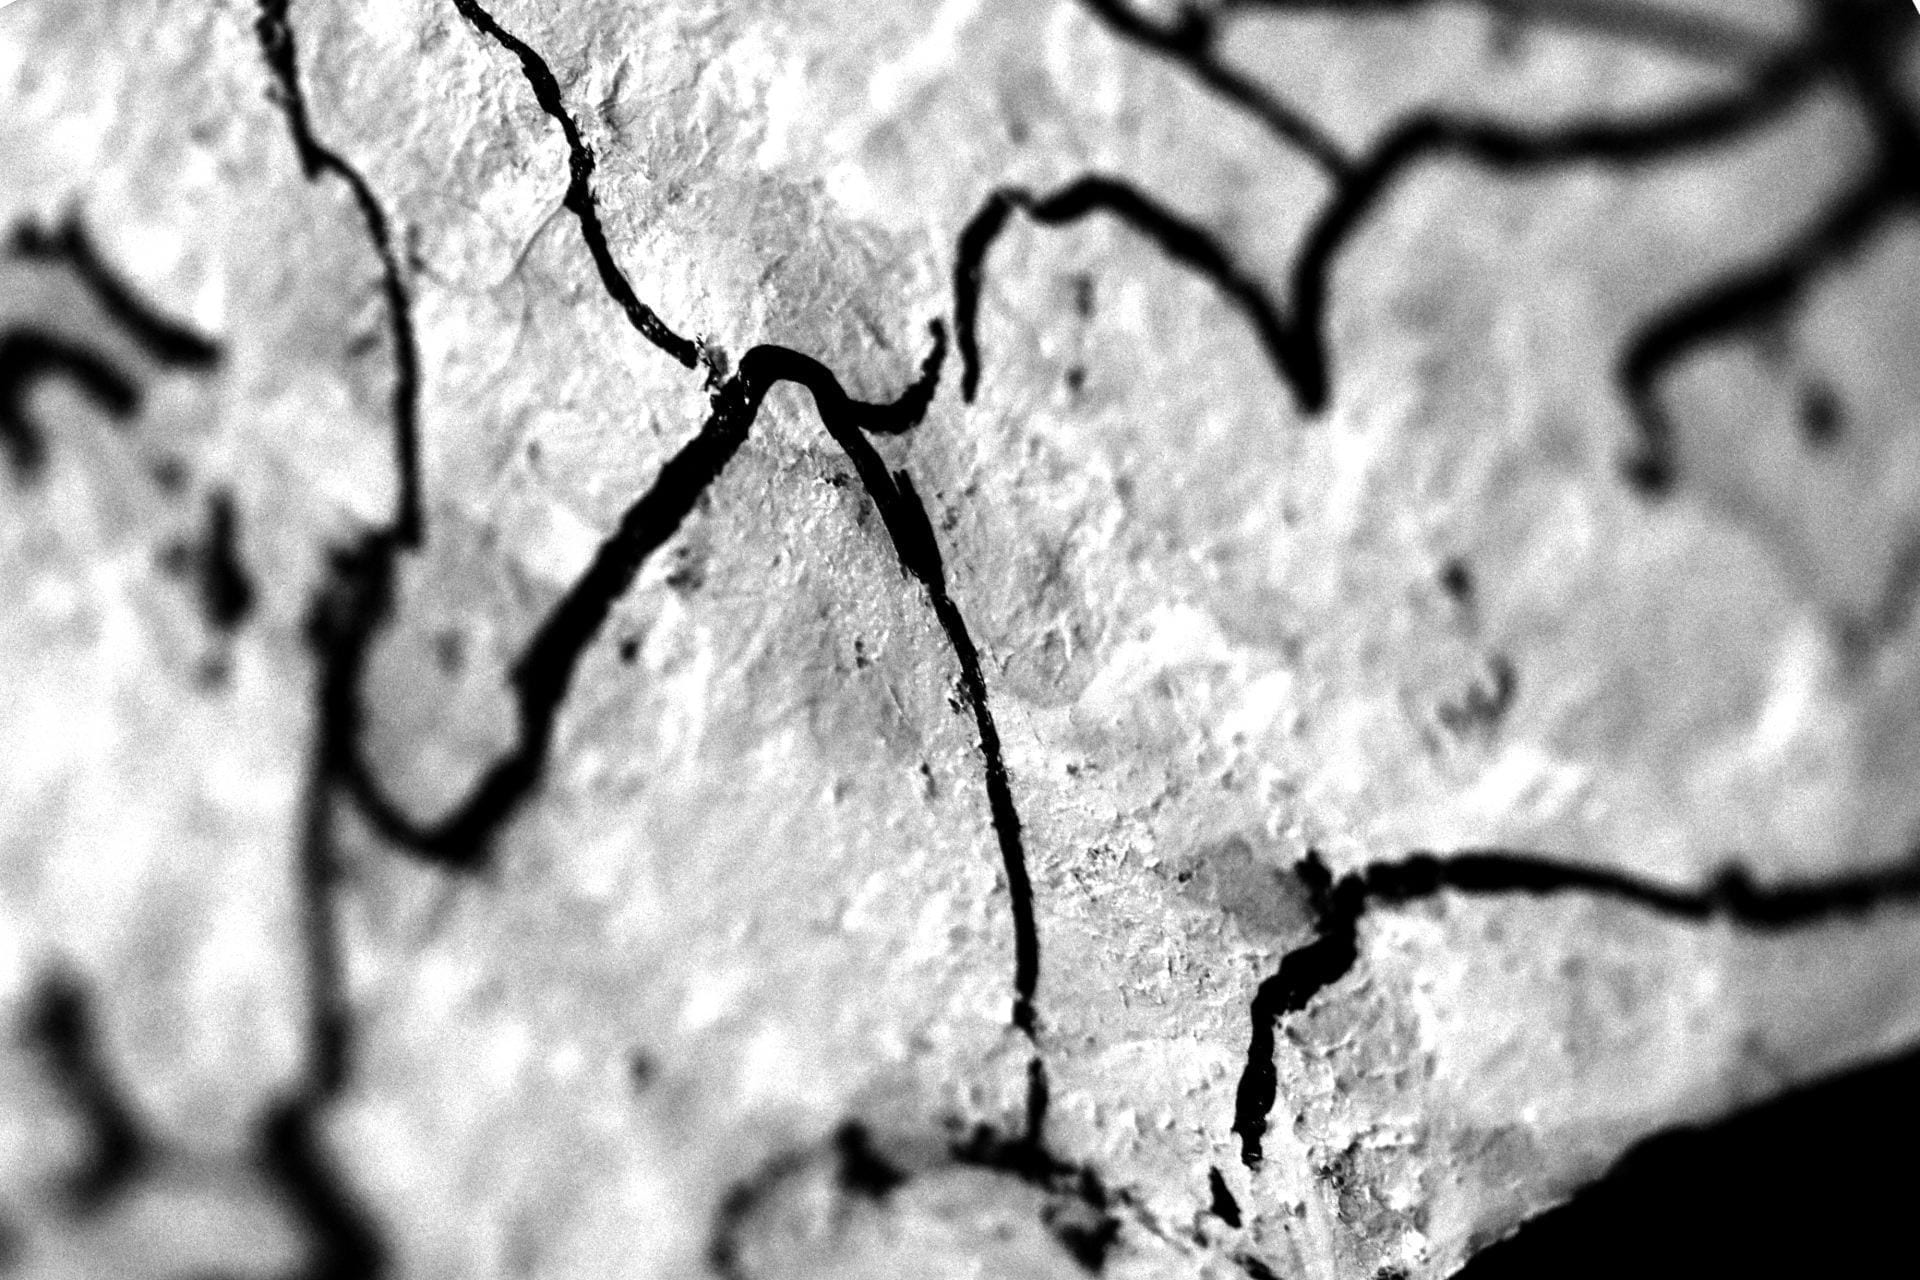
3. SHOOT LIKE AARON SISKIND
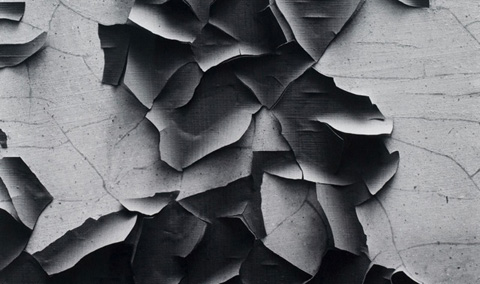
Research the work of Aaron Siskind, an American photographer who shot abstract black and white images, which focus on nature, architecture and human form. Take some photos on the MONOCHROME setting, in the style of Aaron Siskind, edit them with good density and contrast, and post 2-3 black and white images on your blog with the technical information in the caption of one of the photos.
Under your photographs, post a photo by Aaron Siskind and write three complete sentences describing his work and your opinion of his work.


++++++++++++++++++++++++++++++++++++++++++++++++++++++++++++++
YOUR PORTFOLIO: Due Friday, December 8
Create a portfolio folder on your desktop and include your portfolio photographs and collages in that folder. Produce your portfolio using Adobe Express. (Get from your Creative Cloud on your desktop) Publish the link and put the link on the Portfolio channel on Teams.
+++++++++++++++++++++++++++++++++++++++++++++++++++++++++++
3 Assignments due Wednesday, December 6
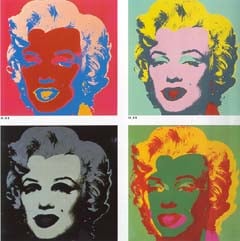
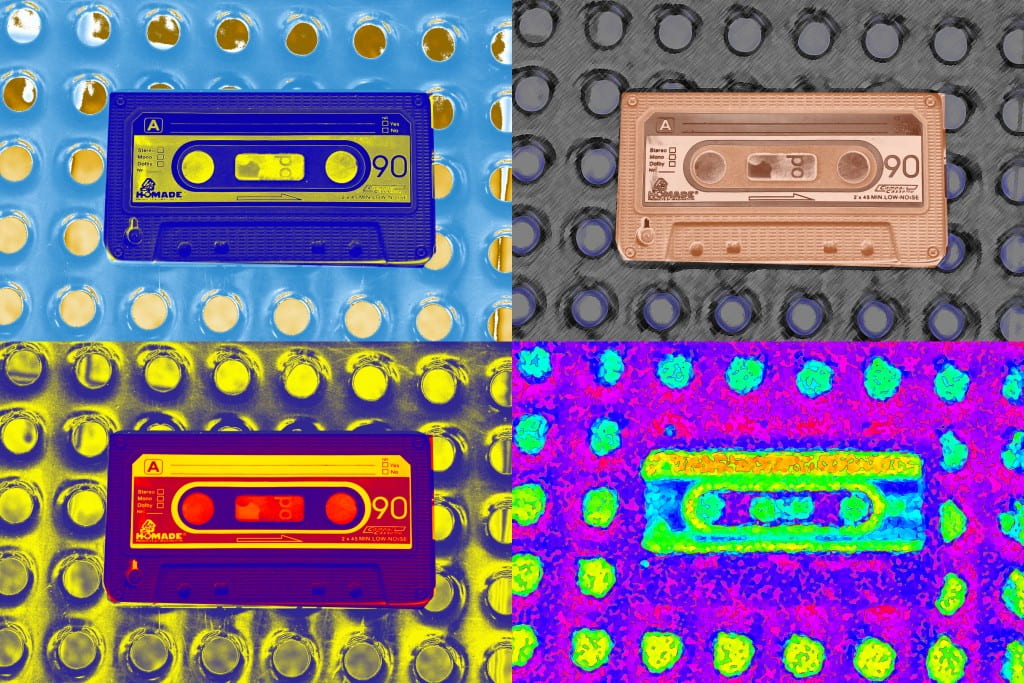
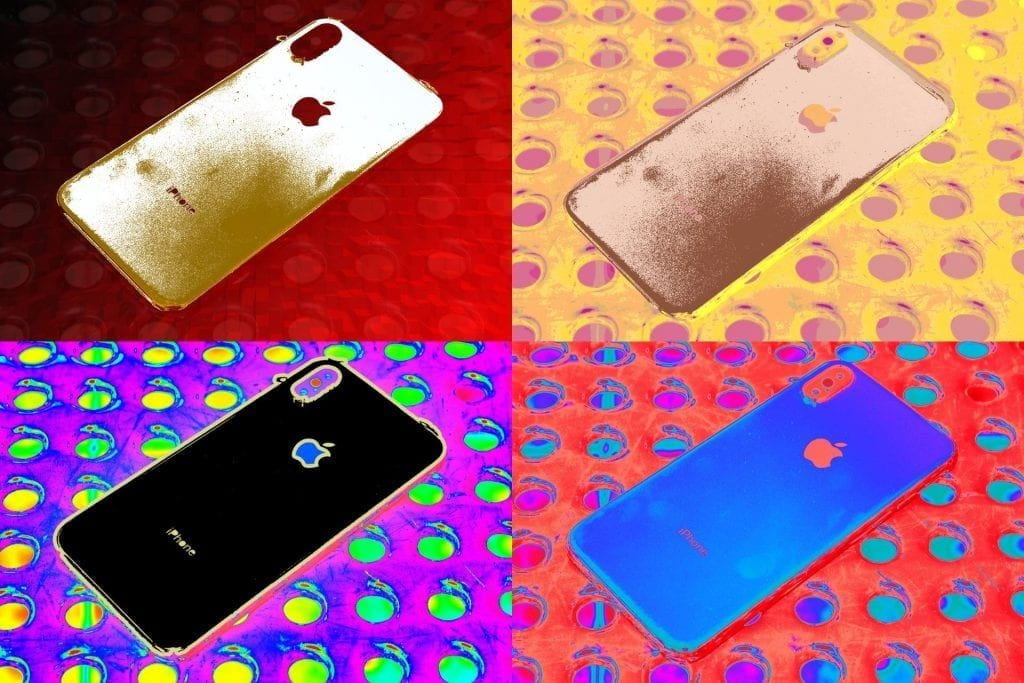
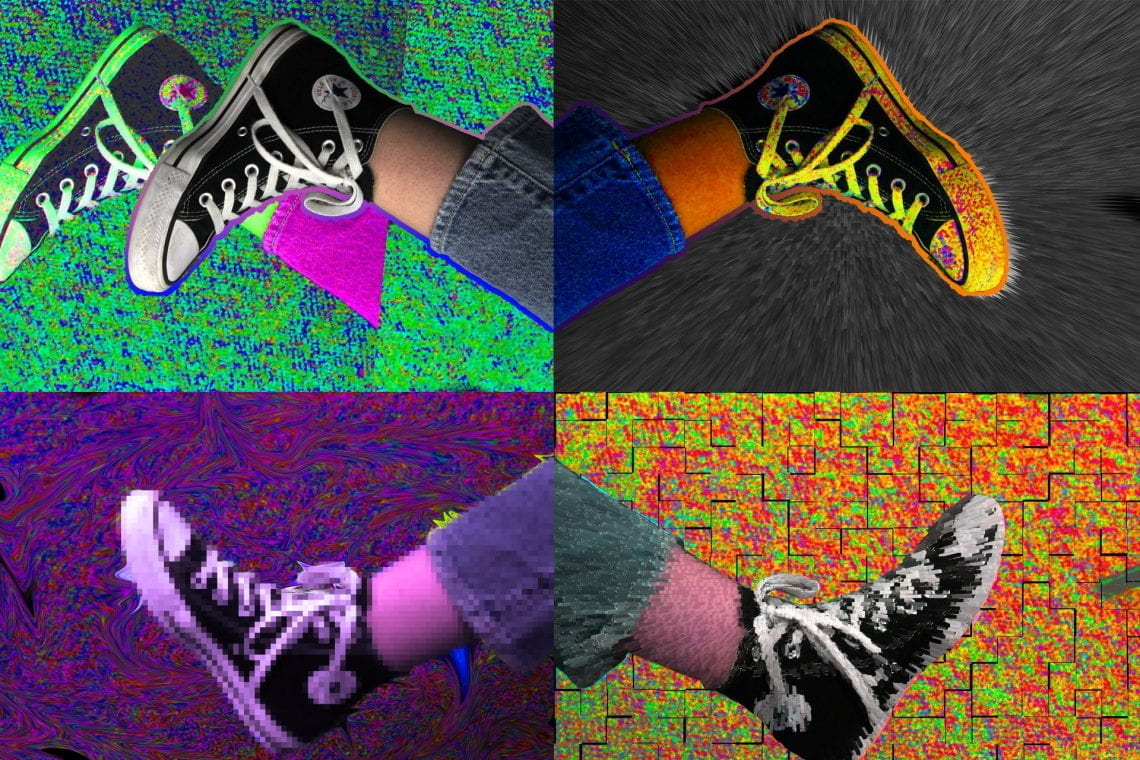
1. WARHOL/POPART
-For your Pop Art assignment you should photograph an object, which is POPULAR IN THE CULTURE TODAY.
-Make 4 copies of the photo you chose,4×4, 4×6 or 6×4 (200 res) each, labeling them Popart 1, Popart 2, Popart 3, Popart 4.
-Work on each picture separately, experimenting with filters, gradient maps, colors, patterns, and more….make sure there is contrast between the subject and the background!
-When you complete the 4 individual photos, merge the layers in each.
-Open a new document in Photoshop, 8×8, 8×10 or 10×8 (200 res)
-Move the four individual photos into the new document.
-Save as a jpeg and post
Find a pop artist online & answer to the following questions. Include a work by the artist.
- What is Pop Art?
- Why is this artist’s work considered Pop Art?
- Describe some of this artists work.
- Why did you pick this artist and why do you like his/her work?


————————
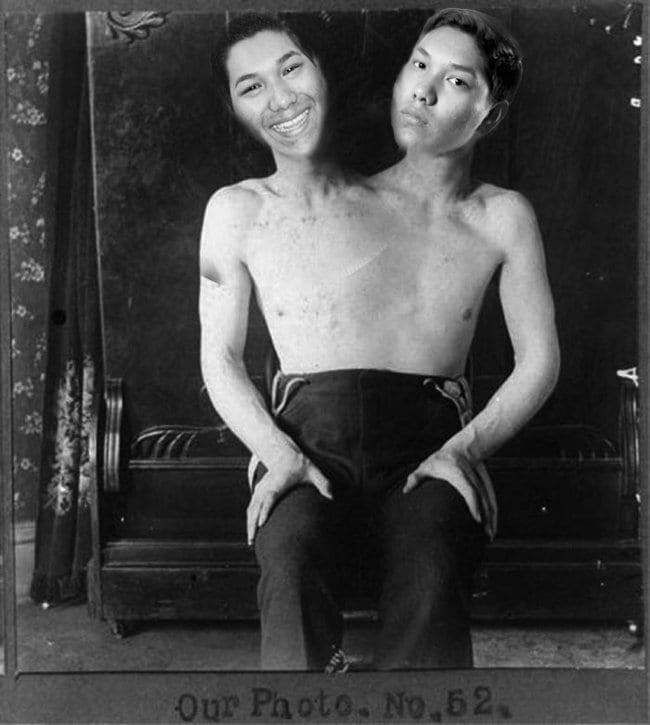
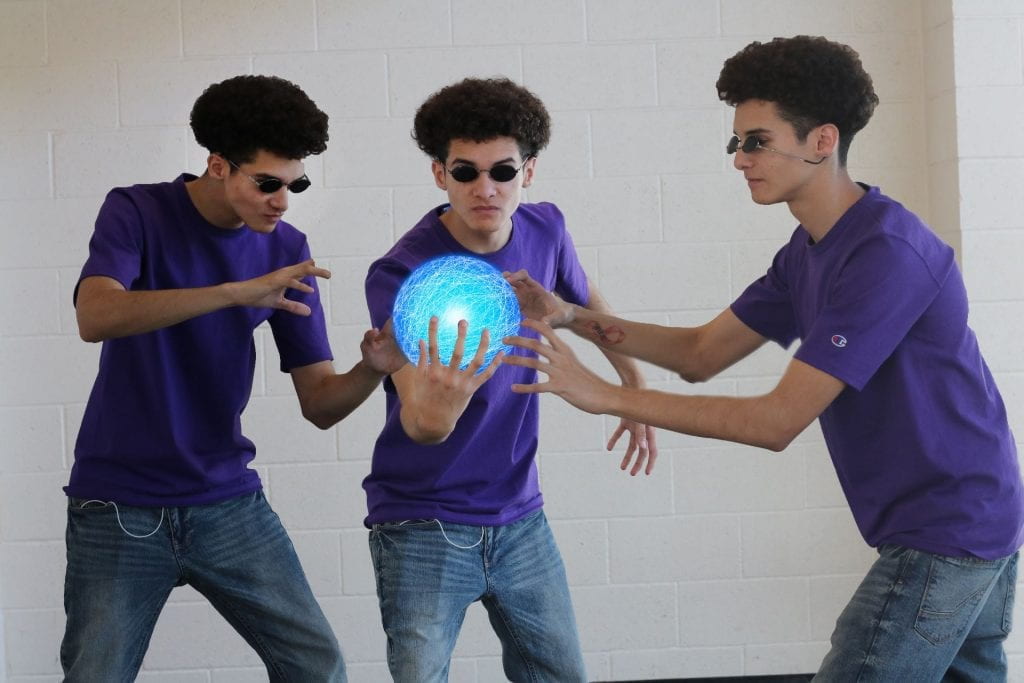
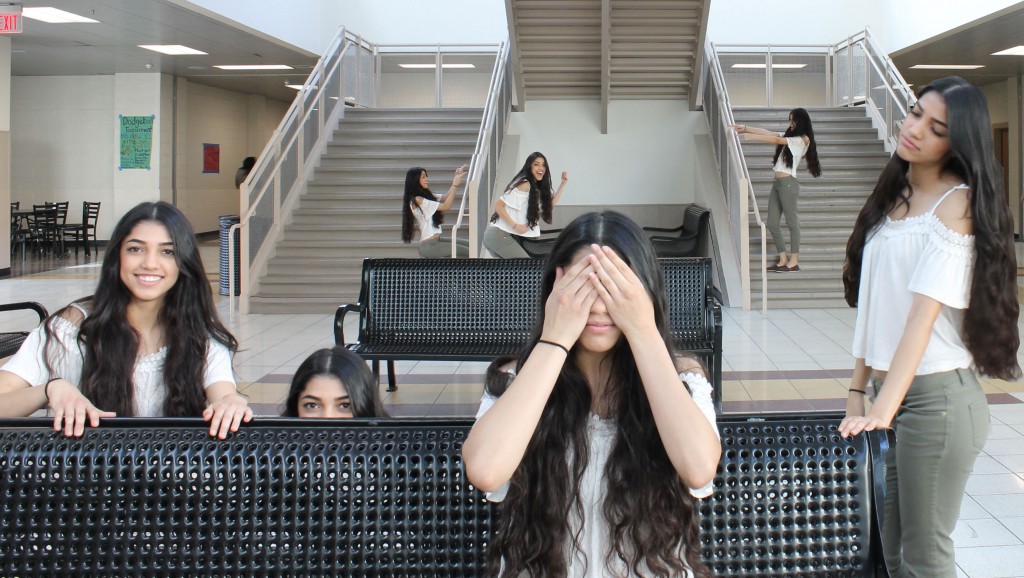
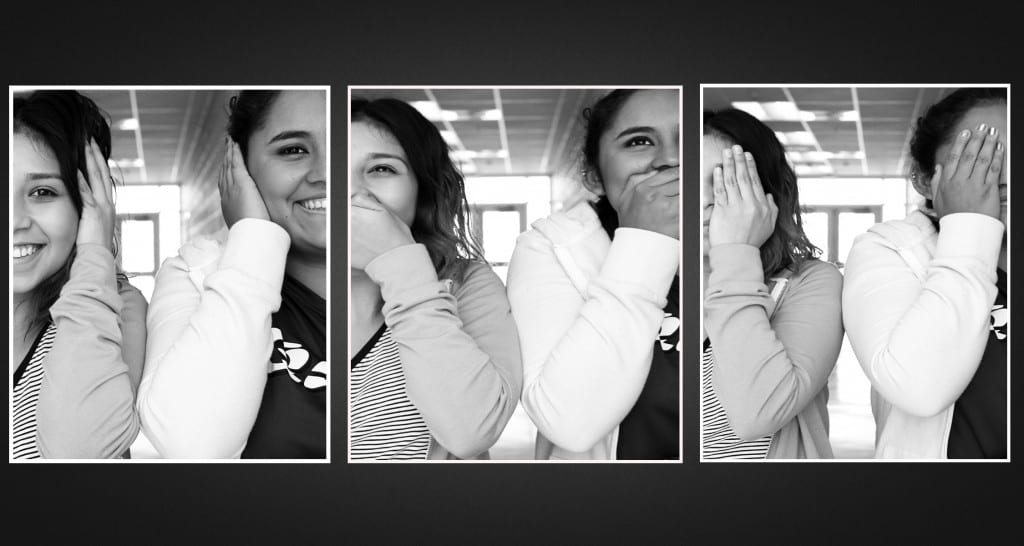
2. AM I TALKING TO MYSELF
Photograph several images of yourself or someone else in the same location, and put them all together in Photoshop to make it look as if you (or they) are relating to themselves in some way. Use one of the photos as the base image, and move the other subjects in the base image to create a unique photo for this Am I Talking To Myself assignment. Writing Critique: Make a blog post called My Inspiration and list 15-20 things, which inspire your creativity. Sample student work below:


—————–
3. RAW vs JPEG
Read this article and answer the following questions:
1. Explain the main differences between a raw and jpeg file.
2. Which file is bigger RAW or Jpeg?
3. Can you change a Raw file to a Jpeg, once your photos are the computer? How?
4. If you were shooting an important event would you shoot it RAW or Jpeg? Explain.
============================================
Photographer Research Project: Due Fri, Nov 17
You will research, produce and present a PowerPoint Slide Show about a famous, professional or influential photographer of your choice. The project is to have 20 slides and include the information below, and at least 10 photographs. You can choose from the enclosed list or pick a significant photographer of your choice. Questions to answer when doing photographer research project are below. You will be presenting your photographer to the class. Share your Photographer PowerPoint by posting in the teams channel called Photographer Presentation by Friday, November 17.
- What is the photographer’s real name and year he or she was born? Is he/she still alive?
- What is their style of photography (ex: photojournalism, editorial, documentary, advertising, portraits, magazine, sports, war)?
- Are there any special photography techniques this photographer uses in his/her work? (Think about composition, depth of field, history…)
- Who does the photographer work for?
- What type of cameras and lens does this photographer work with, and why?
- What type of lighting does this photographer primarily use and why?
- Who are some of your photographer’s early influences?
- Are there any interesting stories about this photographer or his/her work?
- What do you like (or not like) about their work, and why did you select this photographer?
Lindsay Adler-fashion, Robert Mapplethorpe – flowers, portraits, nudes, Annie Leibovitz – celebrity portraits, Danny Clinch – musicians, Edward Weston – black and white nudes, landscapes, Ansel Adams – black and white landscape, Cindy Sherman – self portraits, Diane Arbus – strange and different portraits, David Lachappelle – unique celebrity portraits, Imogen Cunningham – black and white, Eliot Porter – color landscape, Alfred Eisenstadt – candid photojournalism, Linda McCartney – musicians in the 60’s, Herb Ritts – celebrity portraits, Henry Cartier- Bresson -candid street, the decisive moment, Andy Warhol – bizarre pop art, Robert Frank -street, Paul Strand – black and white, Lewis Hine – child labor, James Nachtwey – war, Irving Penn – fashion, still lifes, Richard Avedon – portrait, cultural, Weegee – street photojournalism, Mark Seliger – celebrity portraits, Jerry Uelsmann – photo montage, Dorothea Lange – documentary, Anne Geddes – children, Kim Anderson – children, Nigel Barker– fashion, William Wegman – dogs, Man Ray – rayograms, fashion, portraits in the 20, Arnold Newman – environmental portraits, Steve McCurry – National Geographic portraits, Danny Lyon – street and documentary, Brad Mangin – sports, Neil Leifer – sports, Eugene Richards-documentary, Grant Britain-skateboarding, Gregory Crewdson– staged scenes, Harold Edgerton-science of fast and slow shutter speeds, Mary Ellen Mark-documentary, Nan Goldin– documentary, Robert Capa– war, Shirin Neshat-culture, Sebastiao Selgado- photojournalism, Helmut Newton– fashion, Yousuf Karsh– portraits, George Hurrell– portraits of Hollywood stars, Shepard Fairey-Activist art
==============================================
3 Assignments due Tuesday, November 14
1. HISTORY OF PHOTOGRAPHY TIMELINE
Go through the Powerpoint on the history of photography, and then research online to find more information. Use this timeline template to list what you think are the 12 most important inventions and events in the history of photography, in chronological order. Copy the template to your digital photo folder and open it in Photoshop. Use the text tool to fill in the boxes with important inventions in photography. Post the template to your blog in a post titled: History of Photography Timeline. Under the template list 3-5 events and/or inventions in photography which impressed you the most, and has the most impact on your life today. (2-3 paragraphs)

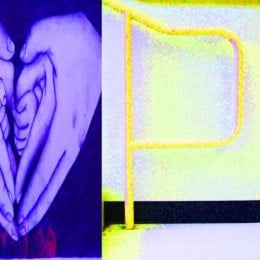
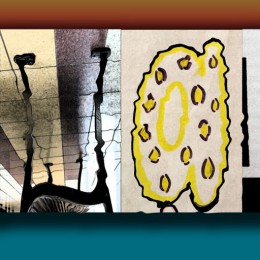
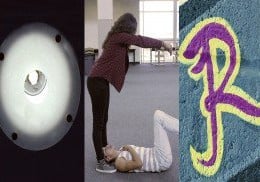
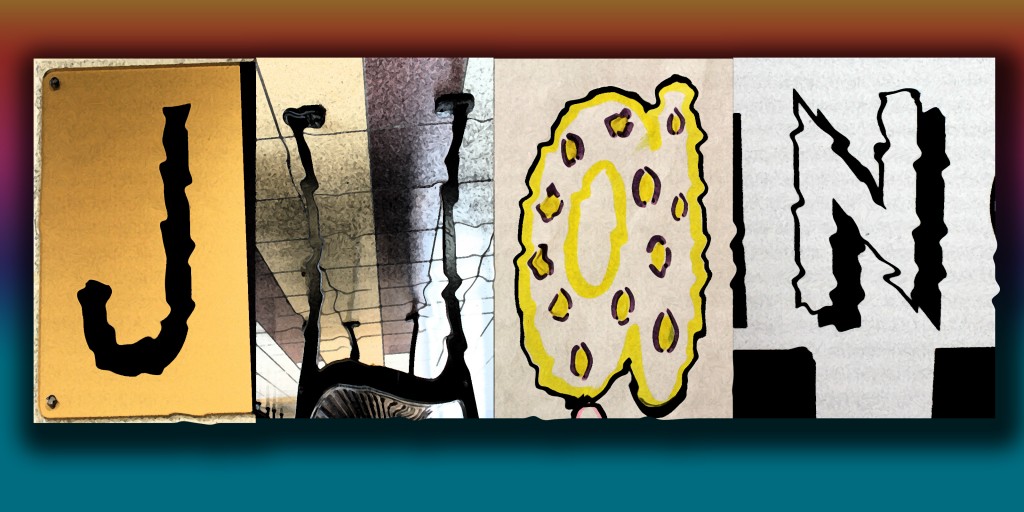
2. ALPHABET PHOTOGRAPHY
-Look for images which represent letters and create a word in photographs
-Edit your photos in PS and then make a new document to put the word in
. -Make your document 16×8 2oo resolution and fit your images in to make the word. If you need more space go to Image>Adjust>Canvas Size and resize bigger.
-Save as a jpeg and post to your blog.
-Critique: List 5 valuable things you learned in Photo class so far this year.


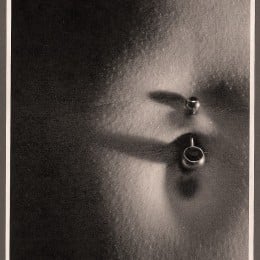
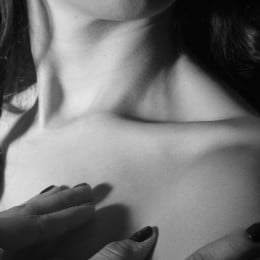
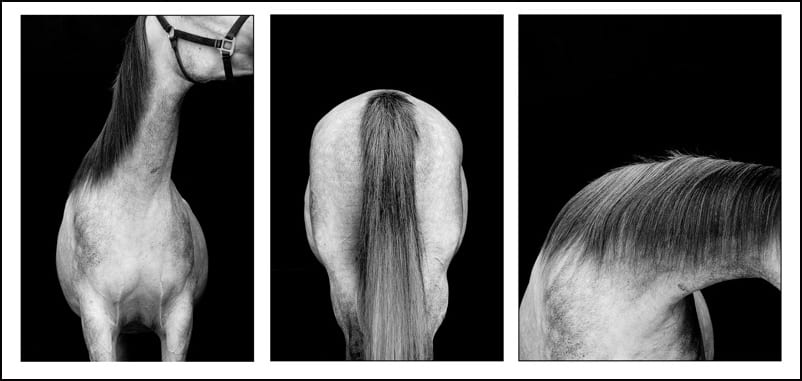
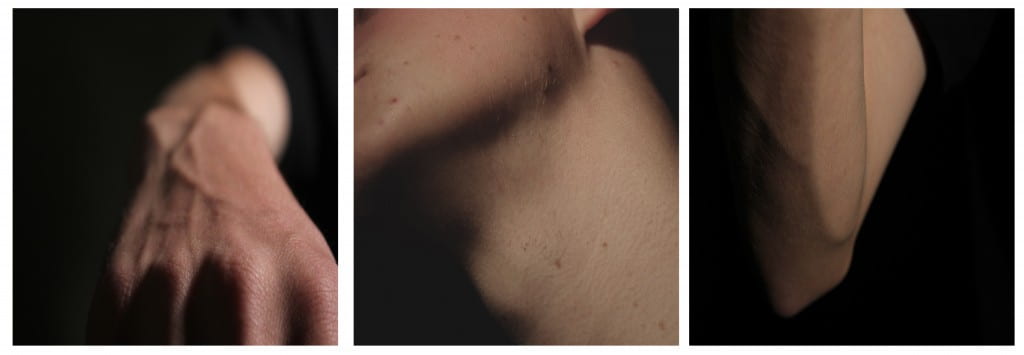
3. BODY, SHAPE, FORM
Photograph a part of the body, or something, which shows shape and form. Think about getting great QUALITY OF LIGHT and make your composition a strong Post 1 to 3 original photos you shot and edited. In the caption section of your image(s) write 10 words to describe your photos.


_________________________________________
4 Assignments due Friday November 3:
1. STUDIO PORTRAITS
Use the studio backdrop (white or black) to photograph PORTRAITS of classmates. Use the tungsten “hot lights” to light the portraits Make sure to put your white balance on TUNGSTEN or INCANDESENT and shoot at ISO 800. Go right up to the subject and meter them on MANUAL. Take at least 12 photographs and edit them in PS or LR. Post anywhere between 6 and 12 portraits as either a gallery or individually.. Include technical info: MASIL on one of the photos.
Critique: Find a studio portrait online and write a list of 25 words you would hashtag the photo if you posted it on Instagram. Include the photographers name if possible. In a separate blog post, answer these questions: 1. What is the purpose of the main light? 2. What is the purpose of the fill light? 3. List the lighting patterns.


2. CAMERA MODES
Read through this link on camera modes. On your blog make a new post writing 1 to 2 sentences about each camera mode.
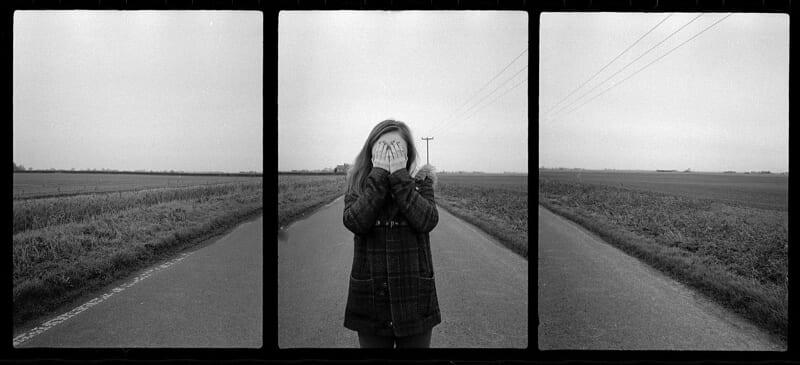
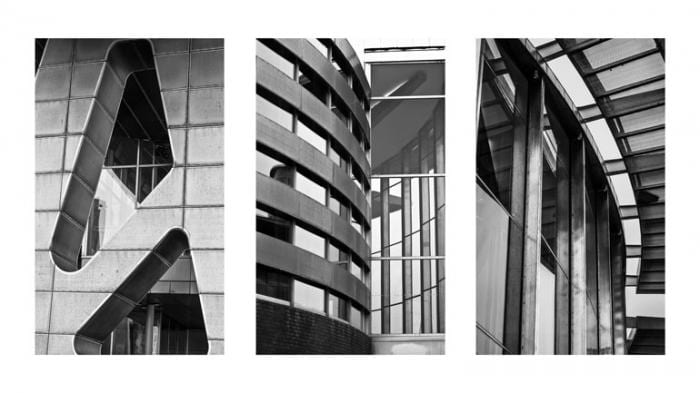
3. TRIPTYCH: BODY PARTS
Create a triptych image, putting three photos together using Photoshop.
Take photos of different parts of a subject with the DSLR camera, and then edit them individually with Lightroom or Photoshop.
Make a 25 x 8 in with 200 resolution document and put your three images together in a layout of your choosing. Extend the canvas size if you need more room.
Decide if you want a border or stroke, or a simple white/black background for your triptych.


4. PHOTOGRAPHY CAREER TREE
Look at the photography career tree and think about what career in the field you would be interested in. Answer these questions on your blog:
- Which photography related career(s) are you most interested in?
- After doing some research on the career, what are some of the job responsibilities?
- What is the basic salary (in the location you would like to live in)?
- What interests you about this field?
- What education and skills would you need to get a good job in the field?

3 Assignments due Monday, October 23:
1. SELF PORTRAIT WITH TEXT
Take a tripod and DSLR camera on self-timer mode and photograph a few self portraits (photographs you take of yourself). Edit your favorite photo in Photoshop and include some text within the image to create a mixed media selfie. In the caption section when you post include the MASIL and for a critique make a list of 25 words or phrases to describe yourself. Student samples below:


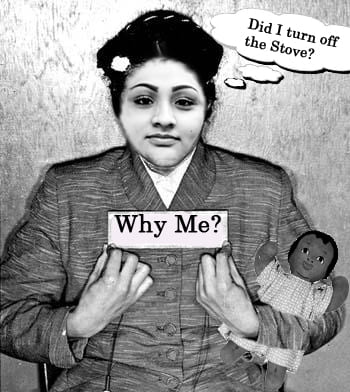
2. CONCEPTUAL SELF PORTRAIT
Take a photograph which represents something important about yourself, without showing your face in the photograph. In the caption section when you post include the MASIL and for a critique first define the word “conceptual” and then write a two to three paragraph reflection explaining how this photograph conceptually and visually shows something about you and what you are attempting to share about yourself with the viewer. Also, research the work of photographer Cindy Sherman. Post your favorite photo of hers on your blog and write 5 sentences explaining your opinion of her work and style and her ability to become famous from her self portrait photography series work. Student samples below:


3. Word Art
-Make a Photoshop document 4×6 or 6×4 (100 ppi)
-Find an interesting image on the Internet and use the move tool to move it into your document in Photoshop
-Size it with Control T + shift to fit in the document
-Make another document the same size as the first
-With the Text Tool, type a word or phrase in a thick black font
-Find a picture online to go inside of the word and copy and paste it into the document with the text
-Put the picture layer on top of the word layer
-Press Control +Alt + G to put the image inside the word.
-Merge the picture and text layers together (make the background layer invisible to not include it in the merge)
-Move the word with the picture in it in the other document with the Internet image, and save as a .jpeg. Post to blog.


———————-
Assignments due Tuesday, October 17:
1. TRAVEL POSTER
Use Photoshop to create a travel poster of where you want to go or where you have gone that you would like to go again. Look up pictures of the location. Create an 8×12 150 res canvas in Photoshop. Your travel poster must include a photo of the location, the name of the location, and a catch phrase. Be sure to add a layer style around all of the text. Explain why you would like to travel to that destination?


_______________
2. 100 MOST INFLUENTIAL IMAGES OF ALL TIME
https://www.boredpanda.com/top-100-world-photos-influential-all-time/?utm_source=google&utm_medium=organic&utm_campaign=organic
Post 3 of the most compelling photographs on the list. Include each photo with the name of the photographer and the story behind each photograph. Why did you select it?
______________
3. NATIONAL GEOGRAPHIC MAGAZINE COVER REVIEW
Go to the following site and pick your favorite 3 Nat Geo magazine covers.
https://www.coverbrowser.com/covers/national-geographic/17
On a blog post, explain why each one is your favorite, and include the three covers you chose in your post.
1. 50 PHOTOS EDITED IN LIGHTROOM
Take 50 different photos of the same subject. Vary the lighting and composition of your photographs. Edit your photographs in Lightroom and post the BEST 12 to 24 photos to your blog as a gallery.
As a critique for this assignment, list 3 differences and 3 similarities between Adobe Photoshop and Adobe Lightroom.
————-
2. WHITE BALANCE READ AND WRITE
http://digital-photography-school.com/introduction-to-white-balance/
Read this link on white balance and on your blog write a one paragraph synopsis of what you learned from reading the article. Under that list all the white balance settings and at least one sentence about each
______________________________________________________
PORTRAIT PHOTOGRAPHY TIPS
Due Friday September 29
Research on the Internet what makes a great portrait photograph and then make a list of 10 tips to create awesome portraits.
https://digital-photography-school.com/10-ways-to-take-stunning-portraits/
https://digital-photography-school.com/tips-for-doing-fall-portraits/
______________________________________________________________
ON LOCATION PORTRAITS WITH NATURAL LIGHT
Due Friday, September 29
-Take at least 10 portraits of a classmate on location using natural light
-Think about exposure, lighting, composition, posing and expression.
-If photographing inside, set your ISO to 3200 so your shutter speed does not go below 60th of a second. Outside you can use a lower ISO, like 200 or 400.
-Open your aperture up as wide as it will go and use a longer lens to get a shallow depth of field.
-Edit your photos in Photoshop and post between 3-10 EDITED photos of your subject (as a gallery or as individual photos)
-Critique: Find an on-location portrait online with natural lighting. Post that photo and make a list of 25 words you think of when you look at this photo.
-Include your technical info (MASIL) in the caption section of each photo.


DEPTH OF FIELD
-Read this link and write two paragraphs explaining in your own words what depth of field is in photography and the ways to control depth of field when shooting. Call this blogpost: Depth of Field Explained.
– Go outside and take two photographs of the same subject, trying to get two different depth of fields. Remember to first format the memory card, set WB to auto and ISO to 400, and be on Manual focusing. You will set the camera mode to AV (aperture priority). Make sure to focus on the same subject for both shots you take.
-In Photo #1, you will get a shallow depth of field. Zoom out to the longest focal length of the lens which is 55mm. Set the aperture on f5.6 (the widest aperture at 55mm) and take note of what the camera sets the shutter speed at. Make sure it is not below 60th of a second. Get in good and close to your subject
-In Photo #2, you will get a good depth of field. Put your lens at 18mm ( which is the widest lens mm on your lens). Set your aperture at f16, and take note of what the camera sets the shutter speed at. Make sure it is not below 60th of a second, or open up the aperture to f11. Stay a bit further back to get a better depth of field.
-Repeat the depth of field activity 2-3 times to make sure you get it right.
-In the lab, edit your photos for maximum impact and post each one (good and shallow depth of field) to your blog as individual photos or as a gallery. Include the technical info in the caption section of each (Mode, ISO, Shutter speed, Fstop, Focal length of lens.
– For the critique for this assignment you are to find two photos online- one which shows a good depth of field and one which shows a shallow depth of field. In the caption section when you post them guess at what you think the aperture, shutter speed and lens mm was for each photo.


_____________________________________________
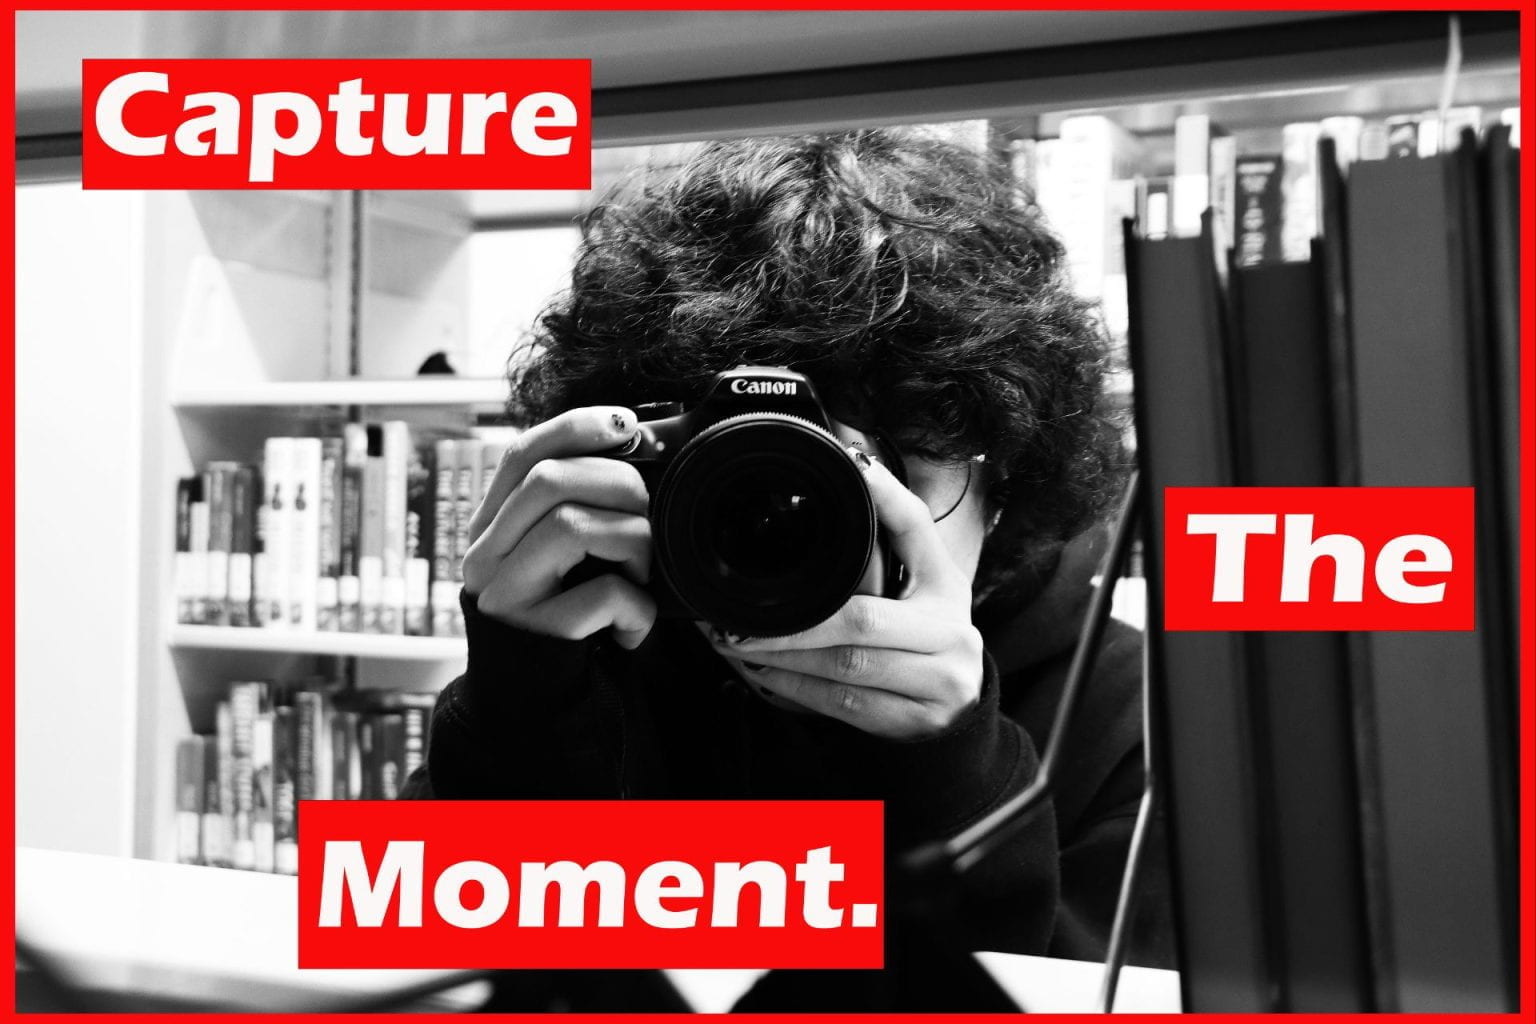
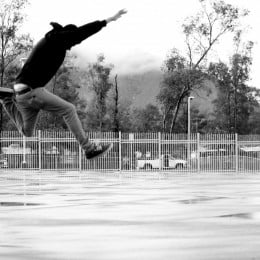
CAPTURING ACTION AND MOTION IN PHOTOGRAPHY
Due Tuesday, September 26
http://digital-photography-school.com/how-to-capture-motion-blur-in-photography/
https://digital-photography-school.com/8-tips-photographing-fast-action-sports/
-Take photos outside that capture ACTION SHARP. Try to “capture the moment”. Shoot at the shutter priority mode and auto focus AI SERVO . Make sure your shutter speed is above 125th of a second. ISO 400
-Take several photos and post your favorite 2 action shots, edited in Photoshop.
-Take action photos inside trying to capture MOTION BLUR. Try to “capture the moment”. Shoot at the shutter priority mode and auto focus AI SERVO mode. Make sure your shutter speed is 60th or below for more blur. Use a tripod to make sure stationary objects are not blurred.
Take several photos and post your favorite 2 motion blur shots , edited in Photoshop.
-Include technical info on all photos: MASIL
-Find 2 photos online, one showing action sharp and another showing motion blur. Guess what shutter speeds, f stops, and lens were used. Post as critique. Samples below:


______________________________________________
DIGITAL COLLAGE: ALL ABOUT ME
-Gather imagery online that represents at least five things about yourself, and put all elements in a folder in your digital photo folder, and call it All About Me Collage.
-In Photoshop, make an 8×10 or 10×8 @200 resolution document and title it All About Me Collage
-Select elements from the Internet images to move into your collage.
-Get good selections with the Object Select and Magic Wand tools, and remember to Mask and refine your selection if necessary. If you want soft edges you will go to select>modify>feather.
-Think about rules of good composition when designing your layout of elements and background. Move layers around from the layer palette.
-To blend layers for a unique effect, you use the move tool and use Shift+ to scroll through blend modes.
-Save your work as a psd until you are completely done with it, and then export as a jpeg to post to your blog.
-Write a two paragraph reflection about what how your collage visually represents you. Post under your work to your blog.


FRAMING A SUBJECT
Take at least 3 different photographs using framing in the composition. Post 2-3 of your photographs, EDITED of course. Include the technical info: MASIL. SAMPLES BELOW -Critique your own photographs you posted and answer these questions.
- Do I have a strong composition?
- How well did I edit my photographs?
- What would I do differently if I shot this assignment again?
- Do you think your photographs belong on the blog home page and should be considered one of the best from all the photo classes?
-


______________________________________________________
MANDALAS
Create 2 unique mandalas in Photoshop, using the shape tool and Internet imagery.
Make a new document 8×8 150 res and create each mandala, thinking about composition and symmetry.
Draw a circle with the elliptical shape tool.
Stroke the layer to see the circle. (Go to FX at the bottom of the layer palette.)
Use the shape tool to put in shapes.
Copy a shape by pressing alt with move tool.
To combine shapes into one layer, make any layer you do not want merged to be invisible, and then go to layer>merge visible.
To flip a layer, go to Edit>transform>transform either vertical or horizontal.
When you save each mandala, save as a .psd to keep the layers if you are still working on it. When completely done and ready to post, export as a.jpg. If you do not want the outside border when you post make sure to make the background layer invisible and export as a .png.


______________________________
SURREALISM
-Research online for the meaning of SURREALISM and post the definition of surrealism and one example of a surrealistic work of art or photograph.
-In 2 paragraphs, explain what surrealism is, and why you chose this image and what makes it surreal.
-Make sure to credit the artist. (Salvador Dali, Rene Magritte, and Jerry Uelsman are a few surrealistic artists)
-After practicing with Kim on the mountain, make your own surrealist piece by putting someone or something where they don’t belong. You can use Internet images for this.
-Make a 10×8 or 8×10 200 resolution document in Photoshop and bring in the images you chose for your surrealism. Practice selecting, masking and refining your selections.
-Export as a jpg and post to your blog along with the definition of surrealism and your critique of a surreal image from an artist from online.


_______________________________
ALTERNATIVE CAMERA ANGLES
-Go outside in brighter light and take 4 photographs of the same subject from 4 different camera angles- strait on, from above, from below, and then tilt the camera at any of the other 3 angles. Put your ISO at 400, and meter the scene on Manual to get the correct exposure. Keep your exposure the same on all 4 photos and make sure to keep the same subject in focus for all 4.
-Put your photos in your Digital Photo folder in your OneDrive: DIGITAL PHOTO>ANGLES
-Edit your photos in Photoshop with IMAGE ADJUSTMENTS and post all 4 of your photos to your blog (large). INCLUDE THE TECHNICAL INFORMATION: MASIL: Mode, Aperture, Shutter speed, ISO, and Focal Length of Lens
-Find one photo online which shows an interesting camera angle. Post it to your blog and write a 20 sentence critique explaining why you think this is such a successful photograph- compositionally and technically, and why you chose it.


_____________________________________________
START OF SCHOOL YEAR 2023-2024:
MAKE A BLOGSITE
Create a blogsite with edublogs. https://edublogs.org/
Join the class blog cauchonphoto.edublogs.org
Go to Dashboard/Appearance/ Customize/ Site Identity and put your first and last name and period.
Select a template, and design your site layout and design.
Go to Dashboard/Settings/Writing and change to the Classic editor and save.
Widgets: Write an About Me section as a Text Widget. Tell a little about yourself, 3-5 sentences. Add of photograph of yourself or something you like as an Image Widget.
PHOTO FOUNDATION
Read the following link and write a post on your blog explaining your understanding of the concepts aperture, shutter speed, ISO and camera modes. Title the blog post “What I learned about camera exposure and camera modes.
http://www.cambridgeincolour.com/tutorials/camera-exposure.htm
CAMERA SIMULATOR
Play around with the camera simulators and learn how to use the camera controls. Then practice with the camera in the classroom.
http://www.andersenimages.com/tutorials/exposure-simulator/
__________________________________
TEXTURE ASSIGNMENT (Due Friday August 18, 2023)
First format the card to get rid of the photos currently on camera.
Go outside in brighter light and photograph 5 images that demonstrate texture.
Put your ISO at 400, and meter the scene to get the correct exposure.
Create a folder in your OneDrive called DIGITAL PHOTO 2023. Put your photographs in a folder in your Digital Photo folder called TEXTURE.
Edit your photos in Adobe Photoshop with IMAGE ADJUSTMENTS and post 3 of your photos to your blog.
INCLUDE THE TECHNICAL INFORMATION (for each photo): MASIL: camera mode, aperture, shutter speed, ISO, and Focal length of lens.
Writing Critique: Find one photograph online which shows amazing texture. Write a two paragraph critique explaining why you think this is such a successful photograph and why you chose it. Be sure to use academic language, proper grammar and sentence structure.
*Post your 3 texture photos, technical information, and the online photo with the writing critique to your blog as a blogpost titled “TEXTURE”


COMPOSITION (Due Friday, August 18, 2023)
Read about what makes strong composition in a photograph and what catches the viewers eye. Composition Photos by Steve McCurry
Find 12 sample photos online which show good composition. Make a gallery of images in Edublogs. Post your gallery and write 12 complete sentences, (with capitals and periods), one sentence under each photo in the gallery before posting, to explain what element of composition each photo represents.
*Other elements which make good composition: Leading lines, Repeated Lines, Shapes, Patterns
______________________________________________Shadows and Light
-Take and edit 2 photos which show strong SHADOWS and CONTRAST. Save in your OneDrive-Digital Photo folder in a new folder called SHADOWS. .
-Include technical info with each photo (in the caption section): MASIL: F-stop, Shutter Speed, ISO, Mode, Focal Length of Lens
-Get a photo from the Internet showing shadows -Write a 10 sentence critique about the Internet photo discussing all the elements you see in the photograph.
-Post all parts of assignment to blog, in one blog post.


____________________________________________
END OF YR 2022- 2023
>PORTFOLIOS <
Create your photography portfolio using ADOBE EXPRESS https://www.adobe.com/express/
Make a folder in your Onedrive called Portfolio Images. Select your best 20 images you created either during this class or outside of class time.
Log into Adobe Express with your school credentials. Go to the Presentation or Slide Show tab
Add a title to your portfolio. Add an image to the header and then add introduction text about yourself, your hobbies, and your experiences in photography.
Keep adding your images with the Adobe Express layouts: single photos, photogrids, glideshows and split layouts.
Write a caption for each photograph, or series of photographs.
Begin and end your presentation with your strongest images.
Go to the share button and make sure to publish and update your portfolio often. Post your portfolio presentation as a widget on your site and also post to the Teams Channel Final Portfolios.
__________________________________________
3 Assignments due on your blog by Tuesday, April 25:
1. SILHOUETTE STORY
Think of a good concept for your silhouette photos and then take photos of backlit subjects to make high contrast silhouettes. You can edit them in Photoshop to give them more blacks and whites, and contrast. Use studio hot lights with two lights aimed at the background and turn the room light off to get more shadow on the subject(s). Meter for the background.
2. WHAT COLOR IS YOUR AURA?
Create a Photoshop Collage 12×9 or 9×12 300 resolution representing your favorite color. Include a photo of yourself that you took with the camera on self timer mode, the color you select and some writing about why this is YOUR color. Perhaps add a tint of your color to the image with Photo Filter tool. Post to blog.
3. CLOSE UP PORTRAITS
Take close up portraits of some of your classmates. You can use any type of lighting you choose, but make sure to compose as a close up composition. Post 3 portraits of different individuals to your blog and include a list of 10 words in the caption section of each photograph to describe that person.
___________________________________________
3 Assignments due Monday, April 17
1. TRIPTYCH: BODY PARTS
Create a triptych image, putting three photos together using Photoshop.
Take photos of different parts of a subject and edit them in PS or LR.
Make a 25 x 8 in with 200 resolution document and put your three images together in a layout of your choosing. Extend the canvas size if you need more room.
Decide if you want a border or stroke, or a simple white/black background for your triptych.
Post to your blog. Include a triptych from online which caught your attention and write three sentences explaining what you like about the composition.
2. METICULOUS PHOTOGRAPHY
Meticulous means to show great attention to detail, very careful and precise. For this assignment you will meticulously arrange everyday objects that can be found around your home.
First, look at the photography work of Emily Blincoe. http://www.emilyblincoe.com/arrangements
Select your favorite work by her and put it on your blog with a short explanation why this image caught your eye.
Find a variety of objects and items that can be used to create your meticulous arrangement.
Find a simple suitable background for your shot. This could be a plain pillow case, large piece of paper, or anything large enough with no pattern. Set up your arrangement and be meticulous and pay attention to details. Make sure you are in adequate lighting, and please remember how important good lighting is in photography.
Take a few photographs from above, looking straight down at your arrangement.(Lay Flat Composition) Go in as close as you can. Make sure your image is tack sharp! Never rely on just taking one shot.
Edit your favorite photograph with PS or LR and then post to your blog.
Meticulous arrangement of objects, which are then photographed have been used in advertising and commercial photography for years.
3. MASTERS OF PHOTOGRAPHY REFLECTION
Go to this site and find a photographer to write a 400 word reflection on. Why did you pick this photographer and what intrigues you about them and the photography they have created.
https://masters-of-photography.com/
________________________________________________________
ASSIGNMENTS DUE MONDAY APRIL 10:
1. BARBARA KRUGER STYLE
Barbara Kruger is an artist who creates conceptual art and collages. Look at this link to learn a little bit more about her https://www.thebroad.org/art/barbara-kruger. Create a photograph similar to hers, with the same format, block text in red rectangles with an appropriate image to communicate a message. When done, reflect on your work and explain what you want the viewer to feel after seeing your Barbara Kruger style photograph.


2. TRAVEL POSTER
Use Photoshop t0 create a travel poster of where you want to go or where you have gone that you would like to go again. Look up pictures of the location. Create an 8×12 150 res canvas in Photoshop. Your travel poster must include a photo of the location, the name of the location, and a catch phrase. Be sure to add a layer style around all of the text. Explain why you would like to travel to that destination?
3. ADVERTISING PHOTOGRAPHY
For this assignment you will create a photograph that would be used for advertising purposes. First you will research advertising photography on the Internet to generate ideas. Post 3 ads that you really like and write a sentence about why they catch your eye. Before you begin to create your advertisement, write a proposal by answering the following questions:
- Who is the client, or company you are representing?
- What is the product?
- Who is the target audience?
- Where would you expect to see this advertisement?
- What kind of lighting are you going to use to make this look professional?
- What props do you need?
Shoot the product and use of variety of compositions. Think about: lighting, composition, depth of field, product placement. Use Photoshop to tweak and enhance your photograph. Add necessary text and captions. Post your best advertising shot, EDITED, to your blog with the proposal. Samples below:
______________________________________________________________
ASSIGNMENTS DUE MONDAY APRIL 3:
1. HISTORY OF PHOTOGRAPHY TIMELINE
Watch the Powerpoint about the History of Photography Also go online and research the History of Photography. Use this timeline template to list the most important inventions and events in history in chronological order. Copy the template and open it in Photoshop. Fill in the boxes with dates and important inventions in photography. Post the template to your blog in a post titled: History of Photography Timeline. Under the template list 3-5 events and/or inventions in photography which impresses you the most, and has the most impact on your life today. (2-3 paragraphs)

2. BLACK & WHITE & SHADES OF GRAY
Photograph for these elements of composition: leading line, texture, abstraction, repeated patterns, rule of thirds and contrast. Using the monochromatic setting on the DSLR, photograph your images in black and white. Edit in PS or LR and post your top 3-5 images on your blog.
https://www.capturelandscapes.com/introduction-to-black-and-white-photography/
3. POETRY AND PHOTOGRAPHY
Take a new photograph for this assignment, and edit it to perfection. Make a new document 11×14 or 14×11 @ 200 resolution. Move your photo into your new document and size to fit. Add a quote, poetry, song lyrics or your own words to your edited image. Format the text with the perfect font, color, and stroke or other layer style. Post to your blog
_________________________
*3 Assignments Due Thursday, March 16 @ 3:30*
1. MAGAZINE COVER
Look online and find 3 magazine covers you like and post to your blog with a sentence or two explaining why you like them. Then, create a magazine cover using your own photographic image. Include a cover title and a list of articles, which would be within the magazine. Make your cover 9×12 @ 300 resolution.


2. WARHOL/POP ART
-For your Pop Art assignment you should photograph an object, which is POPULAR IN THE CULTURE TODAY.
-Make 4 copies of the photo you chose, 4×6 or 6×4 (200 res) each, labeling them Warhol 1, Warhol 2 and so on…
-Work on each picture separately, experimenting with filters, gradient maps, colors, patterns, and more….make sure there is contrast between the subject and the background!
-When you complete the 4 individual photos, merge the layers in each. -Open a new document in Photoshop, 8×12 or 12×8 (200res)
-Move the four individual photos into the new document. -Save as a jpeg and post
-Critique: Research and answer these questions about an interesting pop artist. Post one of his or her works with your answers to the following questions.
- What is Pop Art?
- Why is this artist’s work considered Pop Art?
- Describe some of this artists work.
- Why did you pick this artist and why do you like his/her work?
https://cauchonphotoclass.edublogs.org/?s=pop+art


3. COMMENTS ON THE BLOG
Look through some of the blogs in all the photography classes, and make three comments. Each comment must have at least three sentences. Remember grammar and punctuation. Put your name on the bottom of your comments. Email me that you made comments, whose blogs you made the comments on, and what you wrote.
_____________________________________________
*3 Assignments Due Friday, March 10*
1. 100 MOST INFLUENTIAL IMAGES OF ALL TIME
http://web.archive.org/web/20161208205759/http://100photos.time.com/
Post 3 of the most compelling photographs on the list. Include each photo with the name of the photographer and the story behind each photograph. Why did you select it?
2. NATIONAL GEOGRAPHIC MAGAZINE COVER REVIEW
Go to the following site and pick your favorite 3 Nat Geo magazine covers.
https://www.coverbrowser.com/covers/national-geographic/17
On a blog post, explain why each one is your favorite, and include the three covers you chose in your post.
3. TAKE A VACATION
In this assignment you are going to go on a virtual vacation. Find a location online where you would like to go and digitally put yourself into that location. Make sure to match lighting and color balance to make it look realistic as possible. You must add 3 props into the scene (sunglasses, shopping bags, friends to go with you, etc…) Make your new document for all the elements in the image a 12×8 150 resolution. Under your work. include 1-3 sentences to explain why you would like to go on this vacation.
https://cauchonphotoclass.edublogs.org/?s=take+a+vacation
__________________________________________
*3 assignments due Friday, March 3*
1. FILL FLASH OUTSIDE
-Read this link, (or find another link online), about using FILL FLASH outside to fill in the shadows. Write 1 paragraph explaining what fill flash outside is and why you would need to use it to get perfect exposure on the subject and background.
Fill Flash in Photography: Get Useful Tips and Tricks (colorexpertsbd.com)
-Go outside and photograph a subject which is BACKLIT. Set your camera on AV to meter the natural light. Use a small aperture like f11 or 16 and a low ISO like 200 or 400. Make sure your flash is on ETTL and fill the subject in shadow with fill lighting from the external flash. Post 2-3 photos showing your understanding and good usage of fill flash.
2. ILLUSTRATION OF AN ICONIC IMAGE
Make a new document 8×12 or 12×8, 200 resolution. Paste the illustration you want to trace and fit to the correct size. Make a new blank layer to trace on and lock it. Trace the illustration with a thin pencil and then color it in with brushes and the paint bucket. Make sure to add a background to your illustration.
https://cauchonphotoclass.edublogs.org/?s=illustrations


3. ALPHABET PHOTOGRAPHY
-Look for images which represent letters and create a word in photographs -Edit your photos in PS and then make a new document to put the word in. -Make your document 16×8 2oo resolution and fit your images in to make the word. If you need more space go to Image>Adjust>Canvas Size and resize bigger. -Save as a jpeg and post to your blog. -Critique: List 5 valuable things you learned in Photo class so far this year.
https://cauchonphotoclass.edublogs.org/?s=alphabet


______________________________________________
3 Assignments due on Friday, February 10:
1. PUT YOURSELF IN HISTORY:
Find a historic photograph online and include yourself in the scene. Adjust size, color and resolution to match the historic photo to look as realistic as possible. Under your photo write a short reflection as to why you chose to be this person in history.
2. PORTRAIT WITH MAKE UP
Take a beautiful portrait of someone, or use an existing portrait you took and apply make up to their face using Photoshop paint and brush tools. (Make sure the portrait is a head and shoulder shot.) Put makeup on 2 different portraits and post them to your blog. Read this link and watch the video about painting with brushes & make a blogpost explaining 5 important tips you learned from reading it.
https://helpx.adobe.com/photoshop/using/painting-tools.html
3. MY FAVORITE TEACHER
Photograph your favorite teacher with bounced external flash off camera with sync cord. Edit and post your best portrait and write a 3 paragraph reflection in academic language explaining why you like and admire this teacher. Give details, reasons and examples as to why you chose this teacher. Samples below:
++++++++++++++++++++++++++++++++++++++++++++++++++++++++++++++
1. HDR PHOTOGRAPHY: Due Friday, Feb 3
-Go online and research the meaning of HDR. Create a blogpost explaining what the term HDR in photography means and ways to achieve successful results.
-Photograph 5 different exposures of a landscape (on Manual) for this assignment. One at the perfect exposure, plus one and two stops underexposed and one and two stops overexposed. USE A TRIPOD for this!
-Save images in a folder and open Photoshop>File>Automate>Merge to HDR Pro
-Select your five landscape images and press ok. Photoshop will compile your images into one HDR image.
-You will probably need to do more adjustments to make it more vibrant and saturated. You could bring in cool clouds from the Internet to blend into your sky.
-Post to blog and please TITLE YOUR WORK!!! Write a 10 sentence critique of your own work and post under your image.
________________________________________________________
STUDIO PORTRAITS/ STILL LIFES WITH STROBES AND GELS : Due Friday February 3
READ AND WRITE: INTRODUCTION TO USING STROBES
Read this entire article on beginning strobe use and then write a two/three paragraph reflection on your blog detailing what the article is about and the most important things you got out of reading it. https://photography.tutsplus.com/articles/a-fundamental-introduction-to-studio-lighting-equipment–photo-6067
STUDIO PORTRAITS WITH STROBES AND GELS
Photograph 25 portraits/still lifes in the studio using the strobes and colored gels in the background. Edit your portraits in Lightroom and make cosmetic retouches in Photoshop. Post 9-12 final portraits on your blog. Writing critique: Find a portrait online that was shot with studio strobe lighting and write 5 sentences to describe the subject and their personality based on the photographers version of them. Evaluate the lighting used in the photograph and how you think the lights were arranged to get the results. Samples below:


______________________________________________
50 PHOTOS EDITED IN LIGHTROOM
Due Thursday Jan 26
Take 50 different photos of the same subject. Vary the lighting and composition of your photographs. Edit your photographs in Lightroom and post the BEST 12 to 24 photos to your blog as a gallery.
As a critique for this assignment, list 3 differences and 3 similarities between Adobe Photoshop and Adobe Lightroom.
_____________________________________________
SCAVENGER HUNT & LIGHTROOM EXPLORATION
Shoot for the scavenger hunt in pairs, and edit your photographs in Lightroom CC.
Share your edited photos with your partner via Lightroom or One drive.
Go to the Discover tab to browse, and also check out the Tutorials page.
Explore all the presets.
Post a gallery of all images, captioning each photo with the photographer’s name.
______________________________________________
>PORTFOLIOS <
Create your photography portfolio using Adobe Express.
Make a folder in your Onedrive called Portfolio Images. Select your best 10-15 images you created either during this class or outside of class time.
Log into Adobe Express with your school credentials. Go to the Presentation tab
Add a title to your portfolio. Add an image to the header and then add introduction text about yourself, your hobbies, and your experiences in photography.
Keep adding your images with the Adobe Express layouts: single photos, photogrids, glideshows and split layouts.
Write a caption for each photograph, or series of photographs.
End your portfolio with a few sentences about what you are looking to accomplish during the second semester in Digital Photography. Also, discuss your favorite assignments this semester and why you enjoyed creating the projects for those assignments. Also mention how you think your progress in this class is going and how you have developed as a competent photographer and image editor.
Go to the share button and make sure to publish and update your portfolio often. Post the link to your Portfolio on the PHOTO 1 PORTFOLIO channel in Teams by FRIDAY, DECEMBER 9.
_____________________________________________________________
3 assignments due Friday, December 2:
1. SELF PORTRAIT WITH TEXT
Take a tripod and DSLR camera on self-timer mode and photograph a few self portraits (photographs you take of yourself). Edit your favorite photo in Photoshop and include some text within the image to create a mixed media selfie. In the caption section when you post include the MASIL and for a critique make a list of 20 words or phrases to describe yourself. Student samples below:
2. CONCEPTUAL SELF PORTRAIT
Take a photograph which represents something important about yourself, without showing your face in the photograph. In the caption section when you post include the MASIL and for a critique first define the word “conceptual” and then write a two to three paragraph reflection explaining how this photograph conceptually and visually shows something about you and what you are attempting to share about yourself with the viewer. Also, research the work of photographer Cindy Sherman. Post your favorite photo of hers on your blog and write 5 sentences explaining your opinion of her work and style and her ability to become famous from her self portrait photography series work. Student samples below:
3. JUMP START YOUR PHOTOGRAPHY
Read this link and write a detailed list on your blog, of 20 ways to get inspired in your photography
http://www.diyphotography.net/25-ways-to-jump-start-photography-inspiration/
______________________________________________
3 Assignments due Friday, Nov 18:
1. PAINTING WITH LIGHT
-Go to a dark place to shoot for this assignment (back studio). Put the camera securely on a tripod and put your shutter speed at 20 to 30 sec (not 20th of a sec…but 20 full seconds). You must put the camera on self timer to avoid camera shake. Shoot on manual and try your fstop at 16 or 22, ISO at 100 or 200. -Pre focus on Manual focus mode, because the camera will not in autofocus! -Wave finger lights or pixel stick in front of the frame during the exposure and check out the results! -Post 1-6 painting with light photos you took and edited on your blog. Critique: Find an amazing painting with light photo on the Internet and write a paragraph about how you think the photographer achieved the result and why you think it is so eye catching.


2. AM I TALKING TO MYSELF
Photograph several images of yourself or someone else in the same location, and put them all together in Photoshop to make it look as if you (or they) are relating to themselves in some way. Use one of the photos as the base image, and move the other subjects in the base image to create a unique photo for this Am I Talking To Myself assignment. Writing Critique: Make a blog post called My Inspiration and list 15-20 things, which inspire your creativity. Sample student work below:
3. RAW vs JPEG
Read this article and answer the following questions:
1. Explain the main differences between a raw and jpeg file.
2. Which file is bigger RAW or Jpeg?
3. Can you change a Raw file to a Jpeg, once your photos are the computer? How?
4. If you were shooting an important event would you shoot it RAW or Jpeg? Explain.
____________________________________________________________
____________________________________________________________
1. STUDIO PORTRAITS
Use the studio backdrop (white or black) to photograph PORTRAITS of classmates. Use the tungsten “hot lights” to light the portraits Make sure to put your white balance on TUNGSTEN and shoot at ISO 800. Open your aperture wide so your shutter speed does not fall below 1/60th. Go right up to the subject and meter them on MANUAL.
Take at least 12 photographs and edit them in Photoshop. Post anywhere between 6 and 12 portraits as either a gallery or individually. Include technical info: MASIL on one of the photographs.
Critique: Find a studio portrait online and write a list of 25 words you would hashtag the photo if you posted it on Instagram. Include the photographers name if possible. In a separate blog post, answer these questions: 1. What is the purpose of the main light? 2. What is the purpose of the fill light? 3. List the lighting patterns.


2. WHITE BALANCE READ AND WRITE
http://digital-photography-school.com/introduction-to-white-balance/
Read this link on white balance and on your blog write a one paragraph synopsis of what you learned from reading the article. Under that list all the white balance settings and at least one sentence about each.
3. SHOOT LIKE AARON SISKIND
Research the work of Aaron Siskind, an American photographer who shot abstract black and white images, which focus on nature, architecture and human form. Take some photos on the MONOCHROME setting, in the style of Aaron Siskind, edit them with good density and contrast, and post 2-3 black and white images on your blog with the technical information in the caption of each photo. Under your photo, post a photo by Aaron Siskind and write three complete sentences describing his work and your opinion of his work.
-
- Cecil

_____________________________________________________________
PHOTOJOURNALISM: CANDID MOMENTS WITH CAPTIONS
(3-5 Photos with captions for each)
Photograph candid moments and edit your images in Photoshop. In the caption section of each photo you post write a caption including who, what, where and why. For a critique look at the work of photographer Henri Cartier Bresson ,who captured the “decisive moment.” On your blog post 2-3 of his photographs and write 10 sentences about his work and your opinion of his timing, composition and ability to capture the perfect moment. https://www.magnumphotos.com/photographer/henri-cartier-bresson/magnumphotos


_____________________________________________
Photographer Research Project: Due Thurs, October 20
You will research, produce and present a PowerPoint Slide Show about a famous, professional or influential photographer of your choice. The project is to have 20 slides and include the information below, and at least 10 photographs. You can choose from the enclosed list or pick a significant photographer of your choice. Questions to answer when doing photographer research project are below. You will be presenting your photographer to the class, so you can do the project by yourself, with a partner, or a team of three. Share your Photographer PowerPoint by posting in the teams channel called Photographer Presentation by Thursday, October 20.
- What is the photographer’s real name and year he or she was born? Is he/she still alive?
- What is their style of photography (ex: photojournalism, editorial, documentary, advertising, portraits, magazine, sports, war)?
- Are there any special photography techniques this photographer uses in his/her work? (Think about composition, depth of field, history…)
- Who does the photographer work for?
- What type of cameras and lens does this photographer work with, and why?
- What type of lighting does this photographer primarily use and why?
- Who are some of your photographer’s early influences?
- Are there any interesting stories about this photographer or his/her work?
- What do you like (or not like) about their work, and why did you select this photographer?
* Link to famous and hot new photographers in Teams Photographer Channel.
Robert Mapplethorpe – flowers, portraits, nudes * Annie Leibovitz – celebrity portraits * Danny Clinch – musicians * Edward Weston – black and white nudes,landscapes Ansel Adams – black and white landscape * Cindy Sherman – self portraits * Diane Arbus – strange and different portraits * David Lachappelle – unique celebrity portraits * Imogen Cunningham – black and white * Eliot Porter – color landscape Alfred Eisenstadt – candid photojournalism * Linda McCartney – musicians in the 60’s *Herb Ritts – celebrity portraits * Henry Cartier- Bresson -candid street, the decisive moment *Andy Warhol – bizarre pop art *Robert Frank -street *Mary *Paul Strand – black and white *Lewis Hind – child labor *James Nachtwey – war * Irving Penn – fashion, still lifes * Richard Avedon – portrait *Weegee – street photojournalism *Mark Seliger – celebrity portraits * Jerry Uelsmann – photo montage * Dorothea Lange – documentary *Anne Geddes – children *Kim Anderson – children *Nigel Barker- Fashion *William Wegman – dogs *Man Ray – rayograms, fashion, portraits in the 20 *Arnold Newman – environmental portraits * Steve McCurry – National Geographic portraits * Danny Lyon – street and documentary *Brad Mangin – sports *Neil Leifer – sports
____________________________________________
CAPTURING ACTION AND MOTION IN PHOTOGRAPHY
Due Friday October 14
-Read these online articles about capturing action and motion photography and write two to three paragraphs stating what you learned about action and motion photography techniques
How to Capture the Perfect Action Shot in Sports Photography
http://digital-photography-school.com/how-to-capture-motion-blur-in-photography/
-Take photos outside that capture ACTION SHARP. Try to “capture the moment”. Shoot at the shutter priority mode and auto focus AI SERVO . Make sure your shutter speed is above 125th of a second. ISO 400
-Take several photos and post your favorite 2 action shots, edited in Photoshop.
-Take action photos inside trying to capture MOTION BLUR. Try to “capture the moment”. Shoot at the shutter priority mode and auto focus AI SERVO mode. Make sure your shutter speed is 60th or below for more blur. Use a tripod to make sure stationary objects are not blurred.
Take several photos and post your favorite 2 motion blur shots , edited in Photoshop.
-Include technical info on all photos: MASIL
-Find 2 photos online, one showing action sharp and another showing motion blur. Guess what shutter speeds, f stops, and lens were used. Post as critique. Samples below:
_____________________________________________
CANDID MOMENTS WITH CAPTIONS
(3-5 Photos with captions for each)
Photograph candid moments and edit your images in Photoshop. In the caption section of each photo you post write a caption including who, what, where and why. For a critique look at the work of photographer Henri Cartier Bresson ,who captured the “decisive moment.” On your blog post 2-3 of his photographs and write 10 sentences about his work and your opinion of his timing, composition and ability to capture the perfect moment. Student Samples below:
_________________________________________
Assignments due Friday Oct 7, 2022
CAMERA MODES
Read through this link on camera modes. On your blog make a new post writing 1 sentences about each camera mode.
DEPTH OF FIELD
-Read these two links and write two paragraphs explaining in your own words what depth of field is in photography and the ways to control depth of field when shooting. Call this blogpost: Depth of Field Explained. http://www.macworld.com/article/1150150/depthoffield.html http://www.digitalcameraworld.com/2013/07/17/what-is-depth-of-field-how-aperture-focal-length-and-focus-control-whats-sharp/
– Go outside and take two photographs of the same subject, trying to get two different depth of fields. Remember to first format the memory card, set WB to auto and ISO to 400, and be on Manual focusing. You will set the camera mode to AV (aperture priority). Make sure to focus on the same subject for both shots you take.
-In Photo #1 You will get a shallow depth of field. Zoom out to the longest focal length of the lens which is 55mm. Set the aperture on f5.6 (the widest aperture at 55mm) and take note of what the camera sets the shutter speed at. Make sure it is not below 60th of a second. Get in good and close to your subject
-In Photo #2 You will get a good depth of field. Put your lens at 18mm ( which is the widest lens mm on your lens). Set your aperture at f16, and take note of what the camera sets the shutter speed at. Make sure it is not below 60th of a second, or open up the aperture to f11. Stay a bit further back to get a better depth of field.
-Repeat the depth of field activity 2-3 times to make sure you get it right.
-In the lab, edit your photos for maximum impact and post each one (good and shallow depth of field) to your blog(large photo size). Include the technical info in the caption section of each MASIL (Mode, Aperture, Shutter Speed, ISO, Lens mm)
– For the critique for this assignment you are to find two photos online- one which shows a good depth of field and one which shows a shallow depth of field. In the caption section when you post them guess at what you think the aperture, shutter speed and lens mm was for each photo.


WORD ART
-Make a Photoshop document 4×6 or 6×4 (100 dpi)
-Find an interesting image on the Internet and use the move tool to move it into your document in Photoshop.
-Size it with Control T to fit in the document
-With the Text Tool, type a word or phrase in a thick black font
-Find a picture online to go inside of the word and size it over the text
-Put the picture layer on top of the word layer
-Press Control +Alt + G to put the image inside the word.
–Merge the picture and text layers together (make the background layer invisible to not include it in the merge)
-Add a stroke around the word to help it stand out.
-Save as a jpeg and post to blog.


____________________________________________________________
1. DIGITAL COLLAGE: ALL ABOUT ME
-Gather imagery online that represents at least five things about yourself.
-In Photoshop, make an 8×10 or 10×8 @200 resolution document and title it All About Me Collage
-Select elements from the Internet images to move into your collage.
-Get good selections wirh the Object Select and Magic Wand tools. remember to Mask and refine your selection if necessary. If you want soft edges you will go to select>modify>feather.
-Think about rules of good composition when designing your layout of elements and background. Move layers around from the layer palette.
-To blend layers for a unique effect, you use the move tool and use Shift+ to scroll through blend modes.
-Save your work as a psd until you are completely done with it, and then save as a jpeg to post to your blog.
-Write a two paragraph reflection about what how your collage visually represents you. Post under your work to your blog.
2. FRAMING A SUBJECT
Take at least 3 different photographs using framing in the composition. Post 2-3 of your photographs, EDITED of course. Include the technical info: MASIL. SAMPLES BELOW -Critique your own photographs you posted and answer these questions.
- Do I have a strong composition?
- How well did I edit my photographs?
- What would I do differently if I shot this assignment again?
- Do you think your photographs belong on the blog home page and should be considered one of the best from all the photo classes?
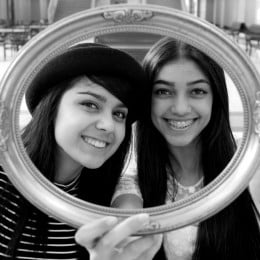

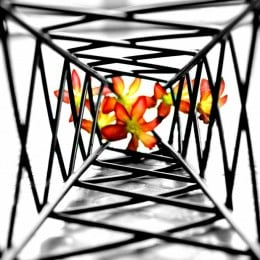
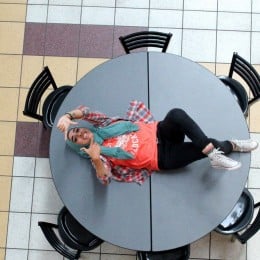


3. DSLR CAMERAS AND LENSES POWERPOINT SYNOPSIS
Look through the Powerpoint and make a list of 25 importamt facts you learned about DSLR cameras and lenses.
_____________________________________________________________
1. MANDALAS (Due Wed, Sept 14)
Create 2 unique mandalas in Photoshop, using the shape tool and Internet imagery.
Make a new document 8×8 100 res and create each mandala, thinking about composition and symmetry.
Draw a circle with the elliptical marquee tool.
Press control and J to make the selection its own layer.
Stroke the layer to see the circle.
Use the shape tool to put in shapes.
Copy a shape by pressing alt with move tool.
To combine shapes into one layer, make any layer you do not want merged to be invisible, and then go to layer>merge visible.
To flip a layer, go to Edit>transform>transform either vertical or horizontal.
When you save each mandala, save as a .png, not .jpeg.
When you post it will only show the circle, not the white document.(If you are not done with your mandala be sure to save it as a .psd while you are still working on it.)
2. PORTRAIT READ AND WRITE (Due Wed, Sept 14)
Read this article about creating powerful portraits, and write a list of 15 important tips you learned from reading it.
https://digital-photography-school.com/using-composition-create-powerful-portraits/
3. ON LOCATION PORTRAITS WITH NATURAL LIGHT (Due Wednesday, Sept 14)
-Take at least 10 portraits of a classmate on location using natural light
-Think about exposure, lighting, composition, posing and expression. (Make sure your subject does not have on the yellow vest in the portrait photographs you are taking.)
-Set your ISO to 1600 or 3200 so your shutter speed does not go below 60th of a second. Open your aperture up as wide as it will go.
-Edit your photos in Photoshop and post between 3-10 EDITED photos of your subject (as a gallery or as individual photos)
-Critique: Find an on-location portrait online with natural lighting. Post that photo and make a list of 25 words or phrases you think of when you look at this photo. Include the photographers name if possible.
-****Include your technical info in the caption section of each photo. MASIL
***Include your technical info in the caption section of each photo. MASIL


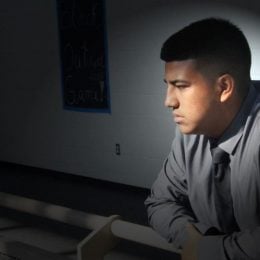


____________________________________________________________
ALTERNATIVE CAMERA ANGLES (Due Fri, Sept 2)
Go outside in brighter light and take 4 photographs of the same subject from 4 different camera angles- strait on, from above, from below, and then tilt the camera at any of the other 3 angles. Put your ISO at 400, and meter the scene on Manual to get the correct exposure. Keep your exposure the same on all 4 photos and make sure to keep the same subject in focus for all 4.
-Put your photos in a folder on your h drive: DIGITAL PHOTO>ANGLES
-Edit your photos in Photoshop with IMAGE ADJUSTMENTS and post all 4 of your photos to your blog (large). INCLUDE THE TECHNICAL INFORMATION: MASIL: Mode, Aperture, Shutter speed, ISO, and Focal Length of Lens
-Find one photo online which shows an interesting camera angle. Post it to your blog and write a 20 sentence critique explaining why you think this is such a successful photograph- compositionally and technically, and why you chose it.
SURREALISM (Due Fri, Sept 2)
After practicing with Kim on the mountain, make your own surrealist piece by putting someone or something where they don’t belong. Make a 10×8 or 8×10 150 resolution document in Photoshop and bring in Internet images for this assignment. Practice selecting, masking and refining your selections. Look at the work of surrealist artists Salvador Dali, Rene Magritte, and Jerry Uelsman and explore other surrealist artists and photographers online. Post your surrealism work in a blog post and also include a work by a surrealist artist who inspires you. Write a 100 word reflection, critiquing their surrealism, and mention how you think you did on your surrealism work.
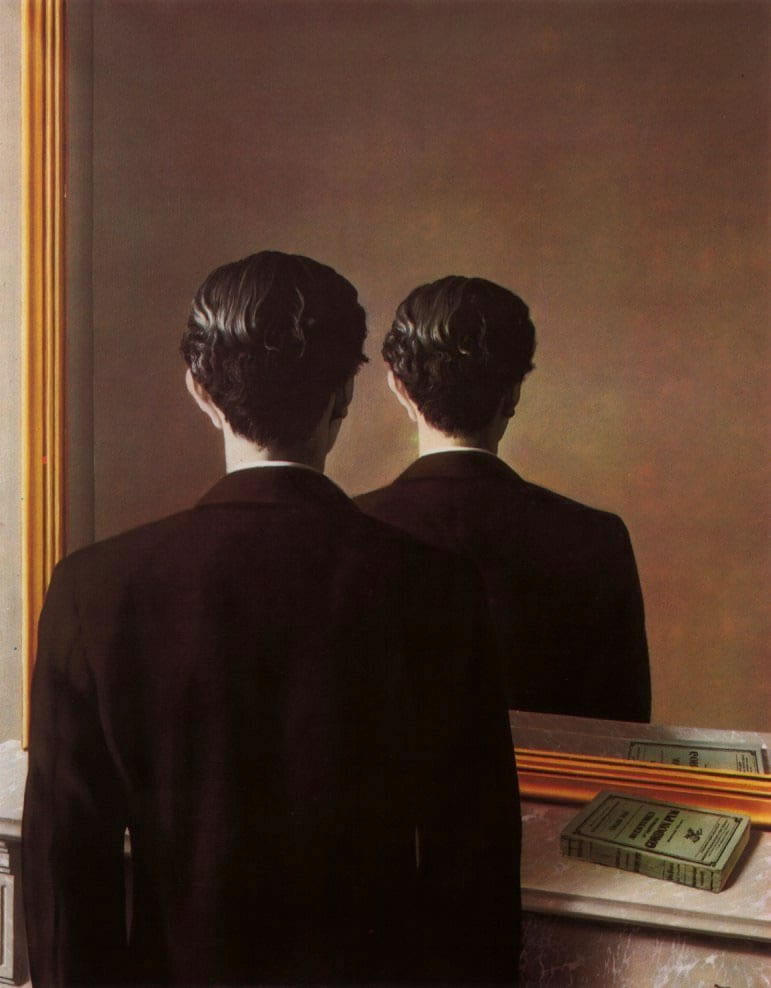
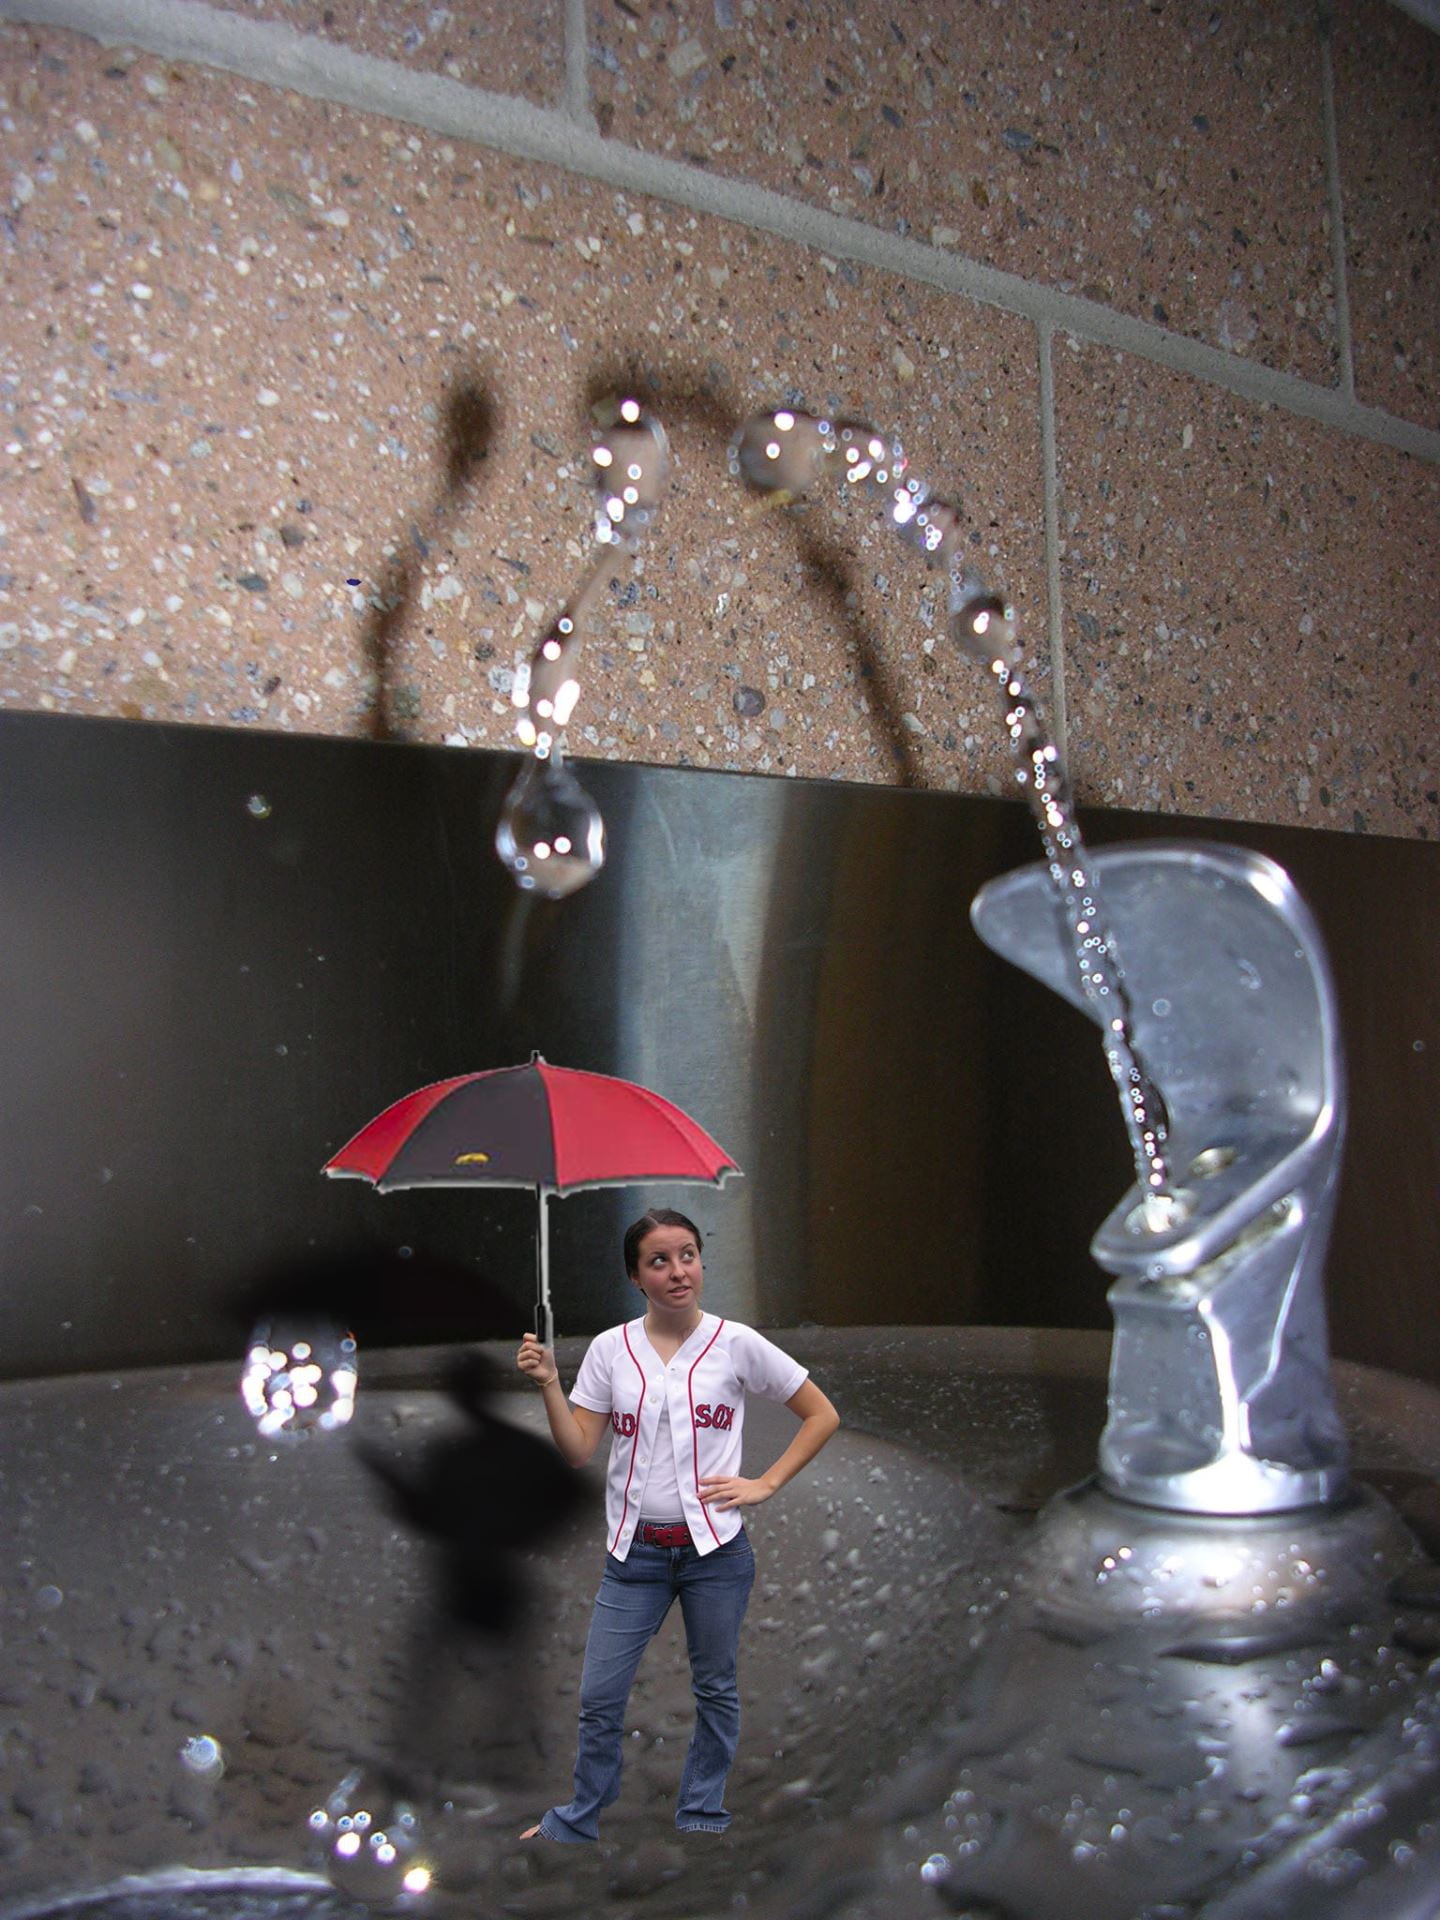


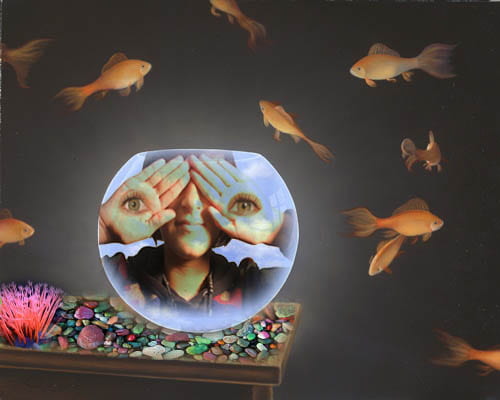

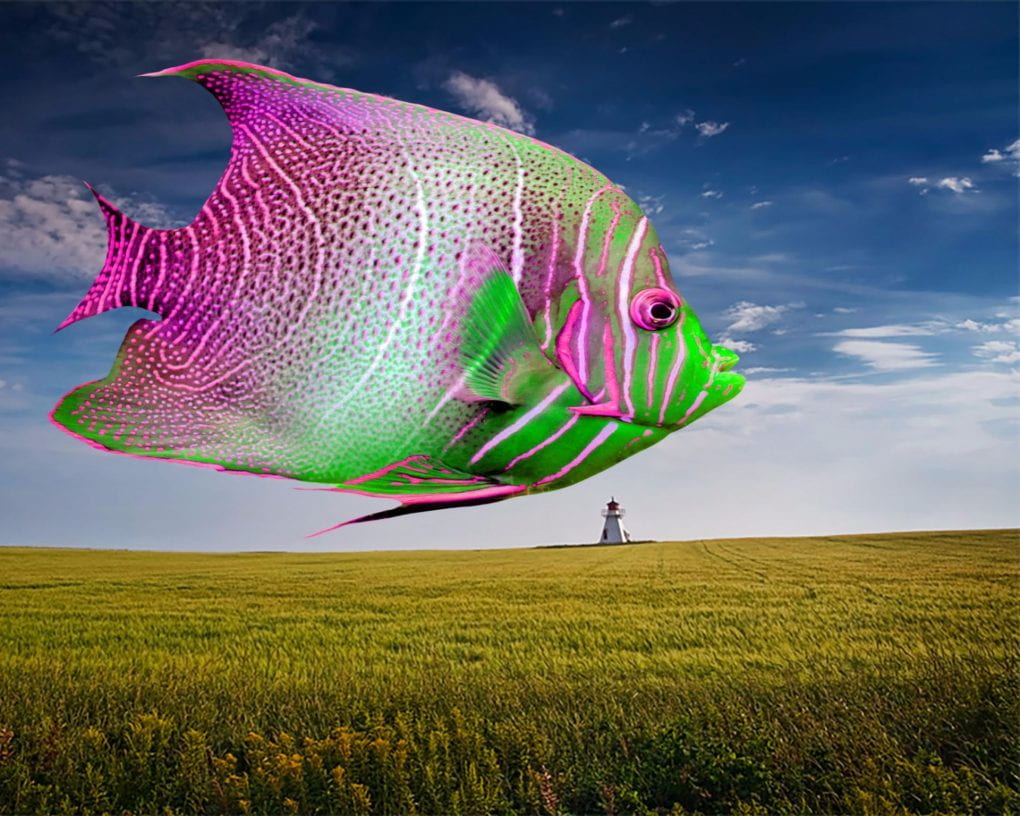
__________________________________________________________________________________________________________________________________________
First assignments:
1. MAKE A BLOGSITE
Create a blogsite with edublogs. https://edublogs.org/
Join the class blog cauchonphoto.edublogs.org
Go to Dashboard/Appearance/ Customize/ Site Identity and put your first and last name and period.
Select a template, and design your site layout and design.
Go to Dashboard/Settings/Writing and change to the Classic editor and save.
Widgets: Write an About Me section as a Text Widget. Tell a little about yourself, 3-5 sentences. Add of photograph of yourself or something you like as an Image Widget.
2. PHOTO FOUNDATION
Read the following link and write a post on your blog explaining your understanding of the concepts aperture, shutter speed, ISO and camera modes. Title the blog post “What I learned about camera exposure and camera modes.
http://www.cambridgeincolour.com/tutorials/camera-exposure.htm
3. CAMERA SIMULATOR
Play around with the camera simulators and learn how to use the camera controls. Then practice with the camera in the classroom.
http://www.canonoutsideofauto.ca/play/
http://www.andersenimages.com/tutorials/exposure-simulator/
4. TEXTURE ASSIGNMENT
Go outside in brighter light and photograph 5 images that demonstrate texture.
Put your ISO at 400, and meter the scene to get the correct exposure.
Create a folder in your OneDrive called DIGITAL PHOTO 2022. Put your photographs in a folder in your Digital Photo folder called TEXTURE.
Edit your photos in Adobe Photoshop with IMAGE ADJUSTMENTS and post 3 of your photos to your blog.
INCLUDE THE TECHNICAL INFORMATION (for each photo): aperture, shutter speed, ISO, and camera mode
Writing Critique; Find one photograph online which shows amazing texture. Write a two paragraph critique explaining why you think this is such a successful photograph and why you chose it. Be sure to use academic language, proper grammar and sentence structure.


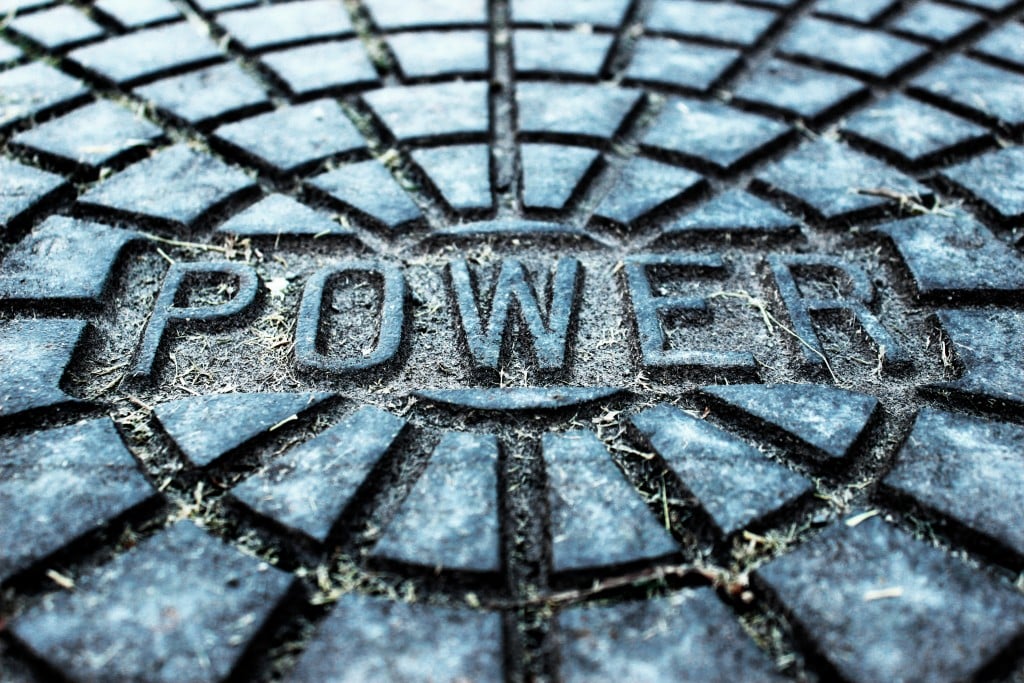


SHADOWS AND LIGHT (Due Monday, Aug 29)
-Take and edit 2 photos which show strong SHADOWS and CONTRAST
-Include technical info with each photo (in the caption section): MASIL: f-stop, Shutter Speed, ISO, Mode, Lens
-Get a photo from the Internet showing shadows -Write a 10 sentence critique about the Internet photo
-Post all parts of assignment to blog, in one blog post.
COMPOSITION (Due Monday, Aug 29)
Read about what makes strong composition in a photograph and what catches the viewers eye. Composition Photos by Steve McCurry
Find 12 sample photos online which show good composition. Make a gallery of images in Edublogs. Post your gallery and write 12 complete sentences, (with capitals and periods), one sentence under each photo in the gallery before posting, to explain what element of composition each photo represents.
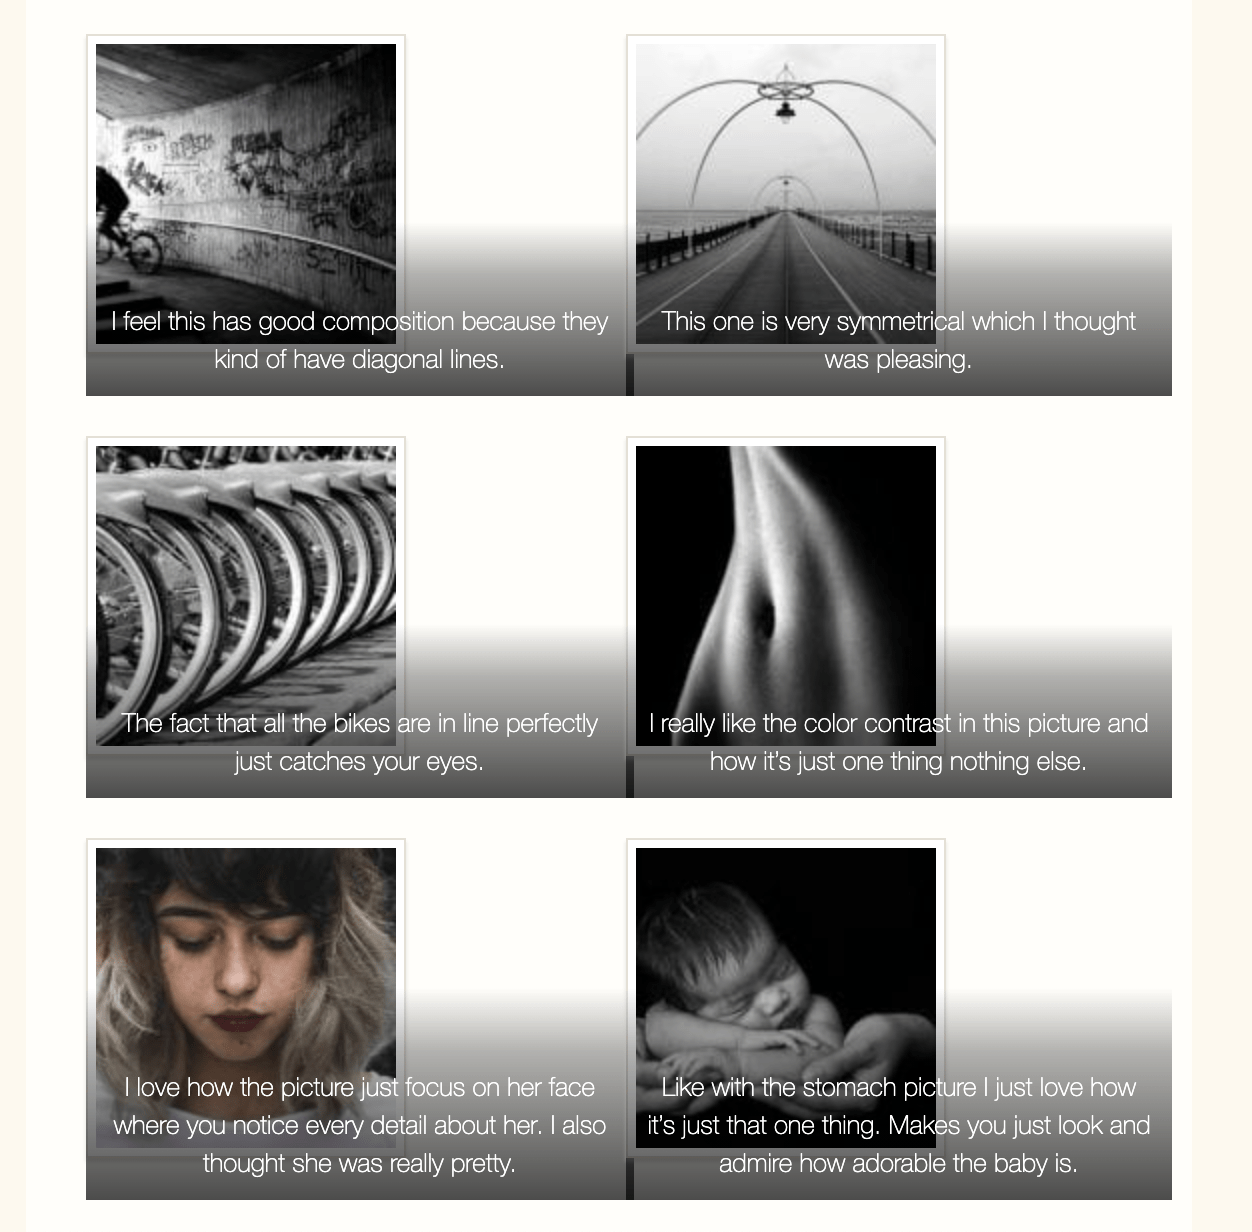

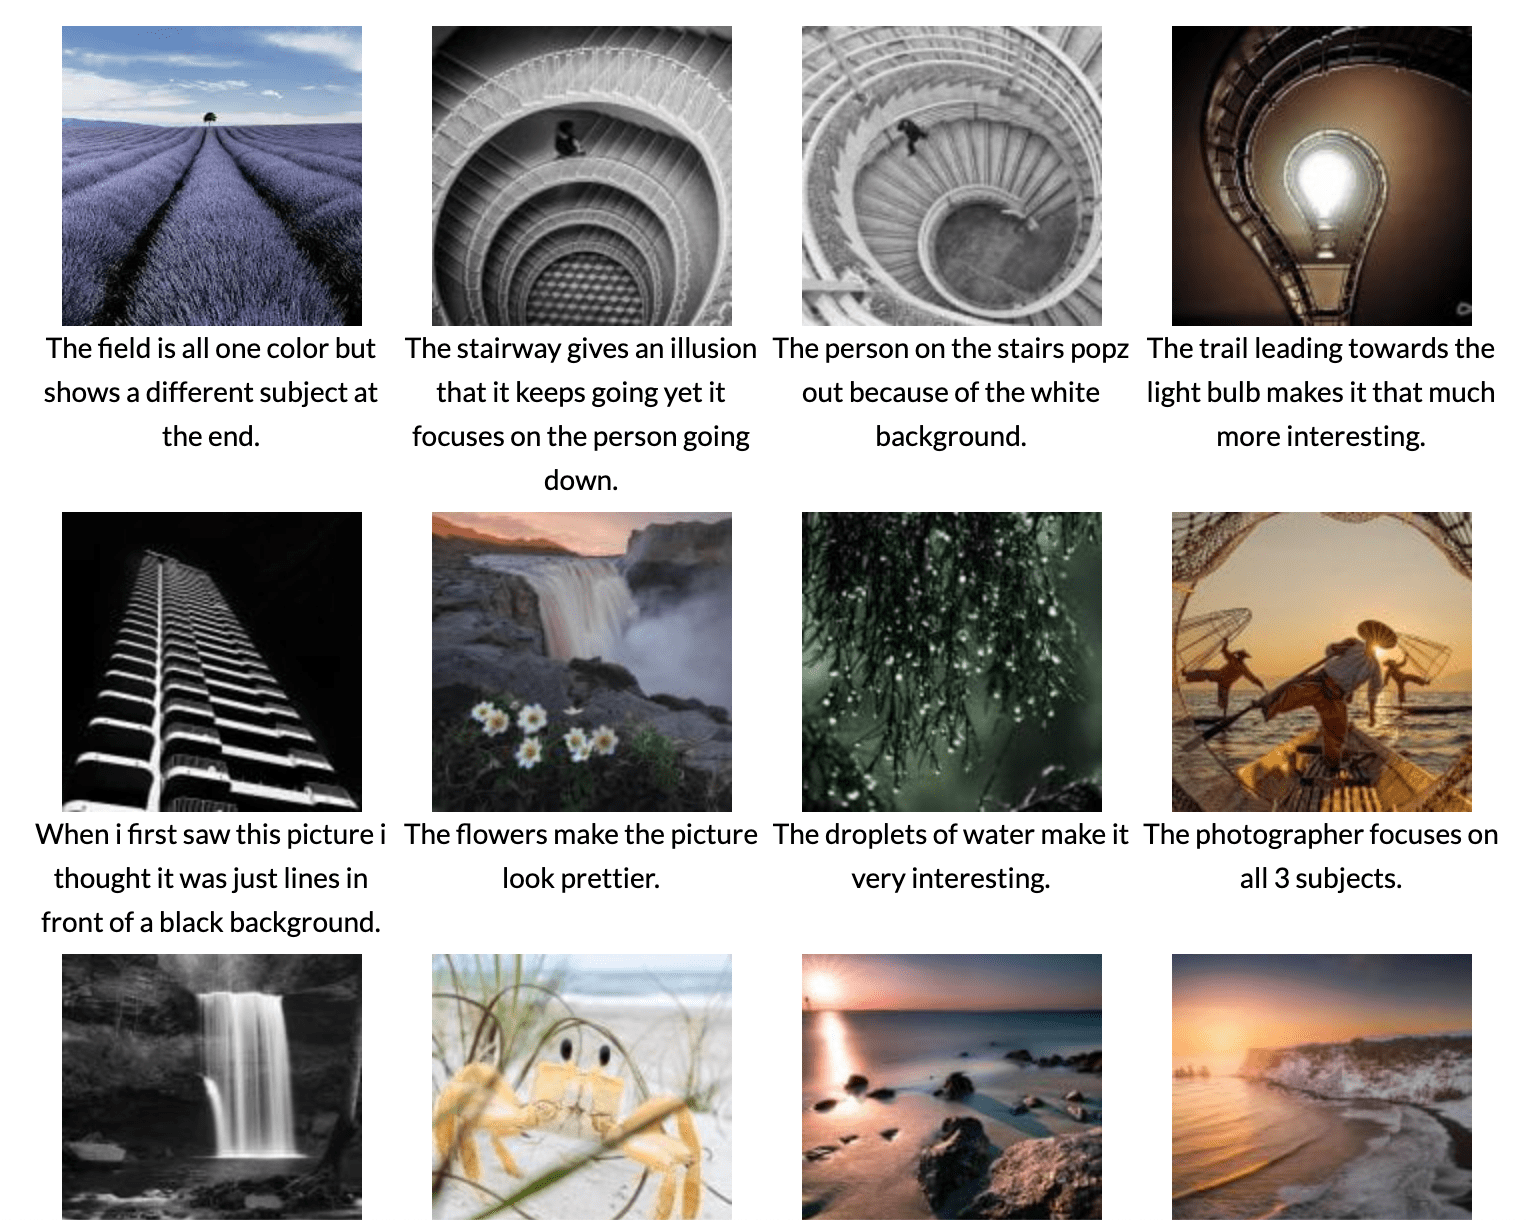
_______________________________________
END OF YEAR 2021-2022
+++++++++++++++++++++++++++++++++++++++
PORTFOLIO
Create a portfolio folder on your desktop and include you portfolio photographs and collages in that folder. Produce your portfolio using Lightroom Classic. Add a beginning slide with your name, captions with your images, transitions and music, and an end slide with a quote you love. It will export as an mp4.
LIGHTROOM CLASSIC PORTFOLIO SLIDESHOW:
Make a new catalog in Lightroom Classic. Save to desktop.
Make slideshow in YOUR catalog
Import your Portfolio Photo Folder from desktop
With photos all selected create a collection
Organize and rearrange in Library
Edit in Develop
In Library module, go to metadata for each image and add a caption
Go to Slideshow module and on each photo go to ABC and then caption to move caption where you want and choose color
In slideshow choose background and wash color, stroke, timing and import music.
Make sure to have an intro slide with your name on it, and an end slide with an inspirational quote.
Preview slideshow, then play and save by EXPORTING to your desktop.
_____________________________________________
3 Assignments due Monday, May 2
1. BARBARA KRUGER STYLE
Barbara Kruger is an artist who creates conceptual art and collages. Look at this link to learn a little bit more about her https://www.thebroad.org/art/barbara-kruger. Create a photograph similar to hers, with the same format, block text in red rectangles with an appropriate image to communicate a message. When done, reflect on your work and explain what you want the viewer to feel after seeing your Barbara Kruger style photograph.
2. TRAVEL POSTER
Use Photoshop t0 create a travel poster of where you want to go or where you have gone that you would like to go again. Look up pictures of the location. Create an 8×12 150 res canvas in Photoshop. Your travel poster must include a photo of the location, the name of the location, and a catch phrase. Be sure to add a layer style around all of the text. Explain why you would like to travel to that destination?
3. RAW vs JPEG
Read this article and answer the following questions:
1. Explain the main differences between a raw and jpeg file.
2. Which file is bigger RAW or Jpeg?
3. Can you change a Raw file to a Jpeg, once your photos are the computer? How?
4. If you were shooting an important event would you shoot it RAW or Jpeg? Explain.
3 Assignments Due Monday, April 25, 2022
1. 100 MOST INFLUENTIAL IMAGES OF ALL TIME
http://web.archive.org/web/20161208205759/http://100photos.time.com/
Post 3 of the most compelling photographs on the list. Include each photo with the name of the photographer and the story behind each photograph. Why did you select it?
2. METICULOUS PHOTOGRAPHY
Meticulous means to show great attention to detail, very careful and precise. For this assignment you will meticulously arrange everyday objects that can be found around your home.
First, look at the photography work of Emily Blincoe. http://www.emilyblincoe.com/arrangements
Select your favorite work by her and put it on your blog with a short explanation why this image caught your eye.
Find a variety of objects and items that can be used to create your meticulous arrangement.
Find a simple suitable background for your shot. This could be a plain pillow case, large piece of paper, or anything large enough with no pattern. Set up your arrangement and be meticulous and pay attention to details. Make sure you are in adequate lighting, and please remember how important good lighting is in photography.
Take a few photographs from above, looking straight down at your arrangement. Go in as close as you can. Make sure your image is tack sharp! Never rely on just taking one shot.
Edit your favorite photograph with PS or LR and then post to your blog.
Meticulous arrangement of objects, which are then photographed have been used in advertising and commercial photography for years.
3. SURREALISTIC COLLAGE
Use Internet images to produce a surrealistic collage, 12×12 200 dpi. Think about the THEME and COMPOSITION to catch the viewer’s eye. Explain your concept and idea in the caption section when posting.
https://creativemarket.com/blog/design-it-yourself-surreal-collage
Collage is a technique of an art production where the artwork is made from an assemblage of different forms or images, creating a new whole.
A collage can include magazine or newspaper clippings, textiles, paint, bits of colored or handmade papers, portions of other artwork or texts, photographs and other found objects, glued to paper or canvas. The origins of collage can be traced back hundreds of years, but this technique made a dramatic reappearance in the early 20th century as an art form. The term collage was coined by both Georges Braque and Pablo Picasso in the beginning of the 20th century when collage became a distinctive part of modern art.
This is an opportunity to play with images, text and ideas to create artwork that creates connections between disparate images and ideas to create a surreal image or tell a story – whatever you want! Explore some examples of collage work done by masters of the technique to inspire you and then you will experiment and create using your own ideas. A range of images are available to you on the Internet, and you are encouraged to bring your own drawings, photographs or found imagery to use in your personal creations.
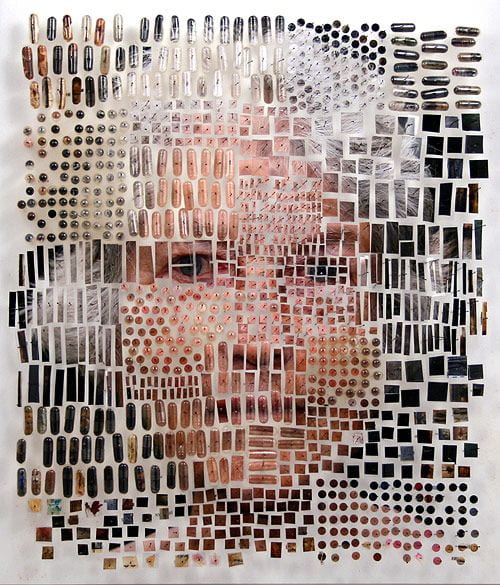

____________________________________________
Assignments due Friday, April 15
1. SHOOTING FOR GOOD COMPOSITION
Take 25 photographs which you think demonstrate strong composition. Edit your photos in LIGHTROOM and post 12 of them as a gallery. In the caption of each write a sentence explaining why the photo has good composition. See students samples:
https://cauchonphotoclass.edublogs.org/?s=good+composition
2. PORTRAITS WITH MAKE UP
Photograph a friend or relative or use some existing portraits you took, and edit them in Photoshop. Use brushes, colors and lower opacities to apply makeup to their face. Create two unique portraits to post to your blog. Go to this link to see some student samples.
https://cauchonphotoclass.edublogs.org/?s=makeup
3. MASTERS OF PHOTOGRAPHY REFLECTION
Go to this site and find a photographer to write a 300 word reflection on. Why did you pick this photographer and what intrigues you about them and the photography they have created.
https://masters-of-photography.com/
______________________________________________________
New Assignments due Wednesday, April 6:
1. STUDIO PORTRAITS WITH STROBES AND GELS
Photograph 25 portraits in the studio using the strobes and colored gels in the background. Edit your portraits in Lightroom and make cosmetic retouches in Photoshop. Post 9-12 final portraits on your blog. Writing critique: Find a portrait online that was shot with studio strobe lighting and write 20 sentences to describe the subject and their personality based on the photographers version of them. Evaluate the lighting used in the photograph and how you think the lights were arranged to get the results. Samples below:

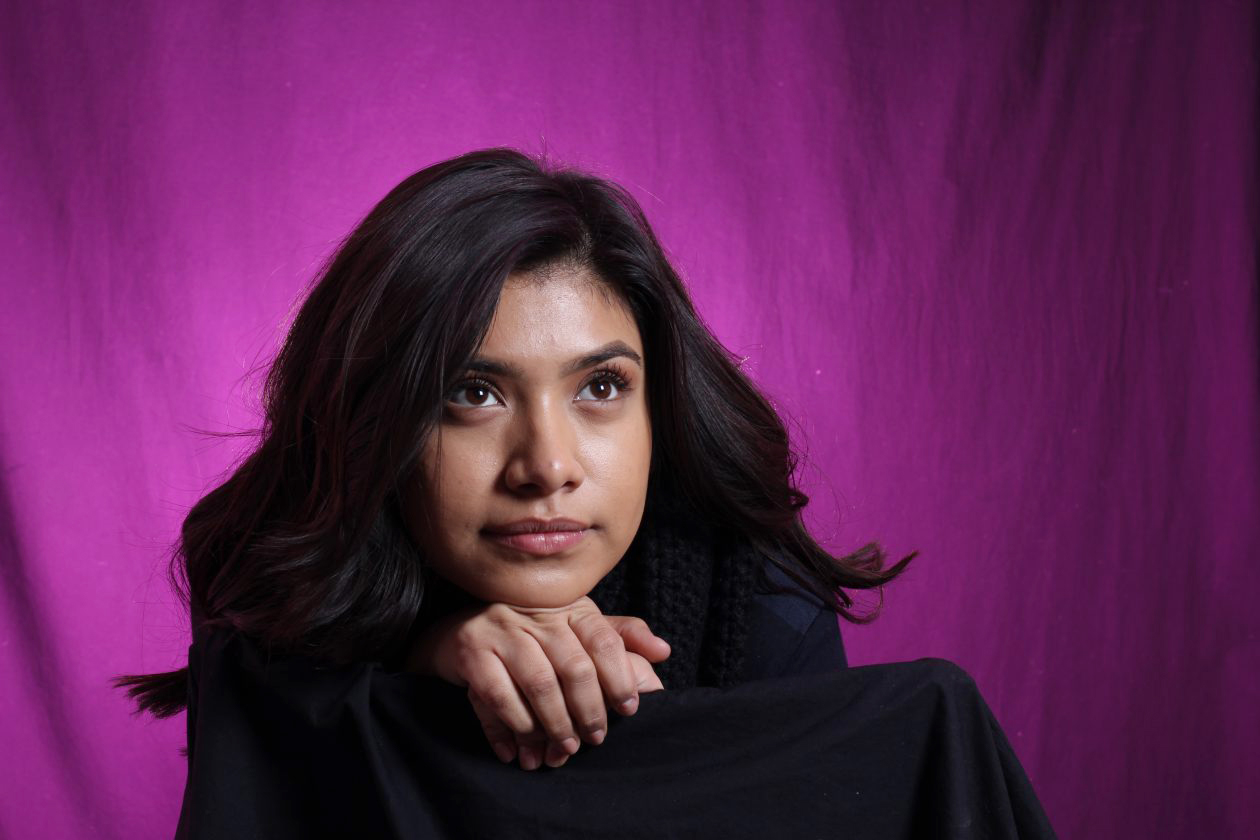
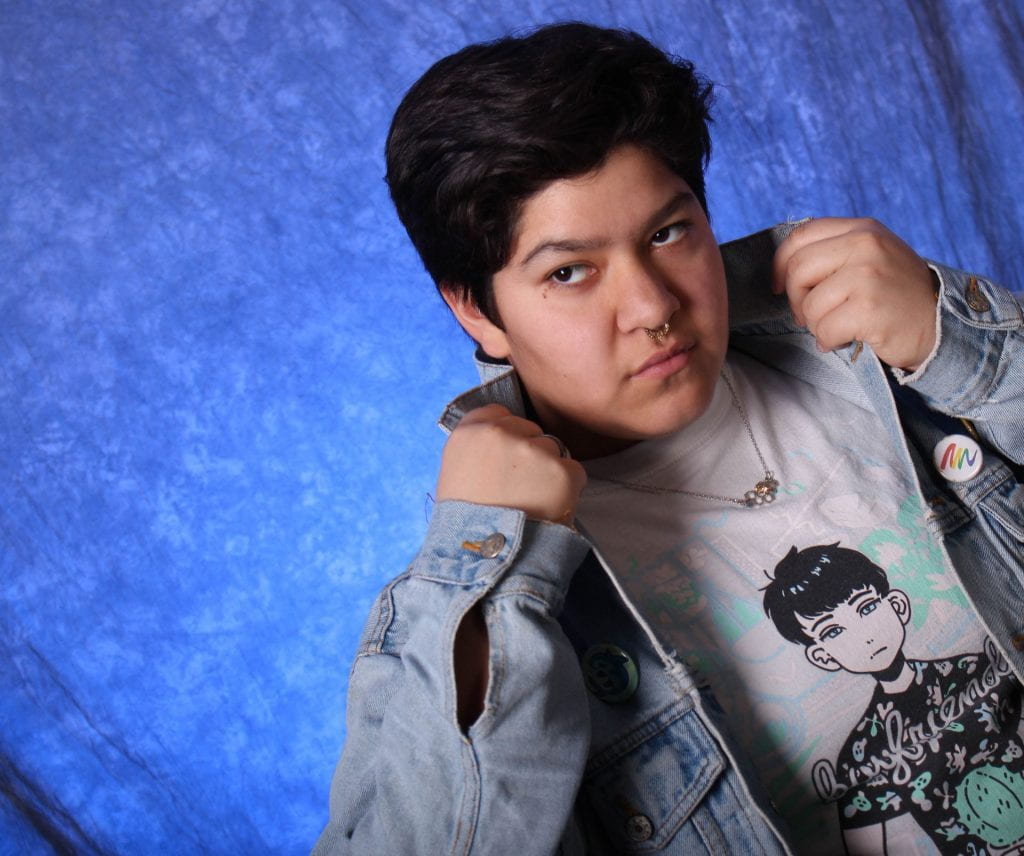

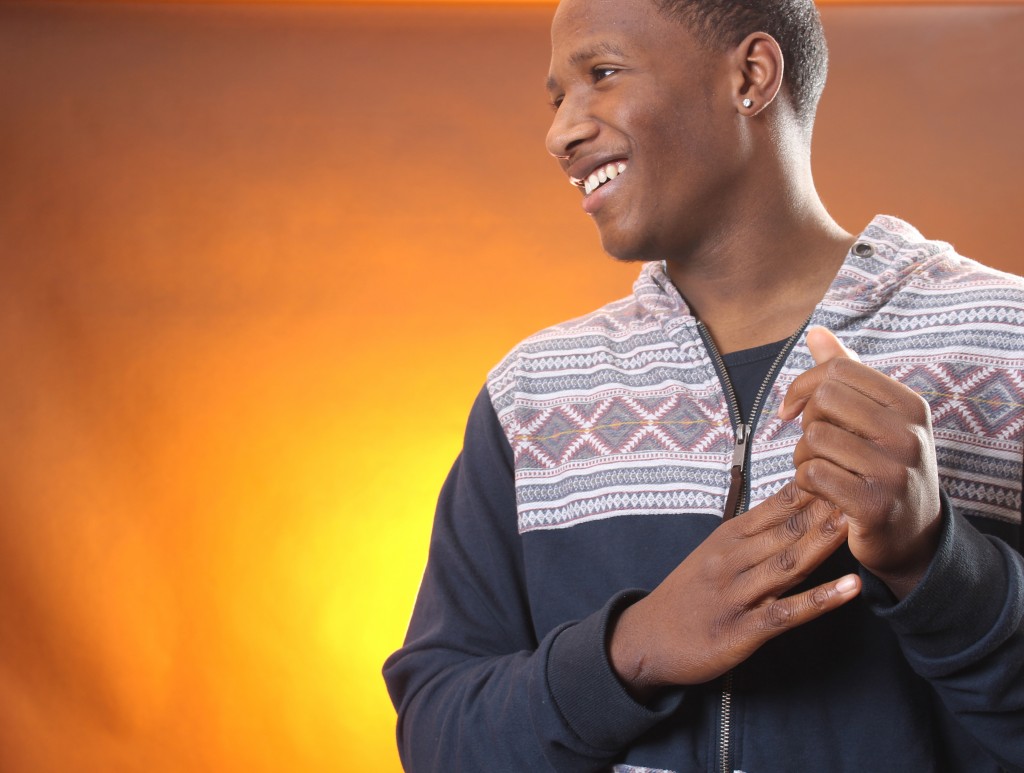
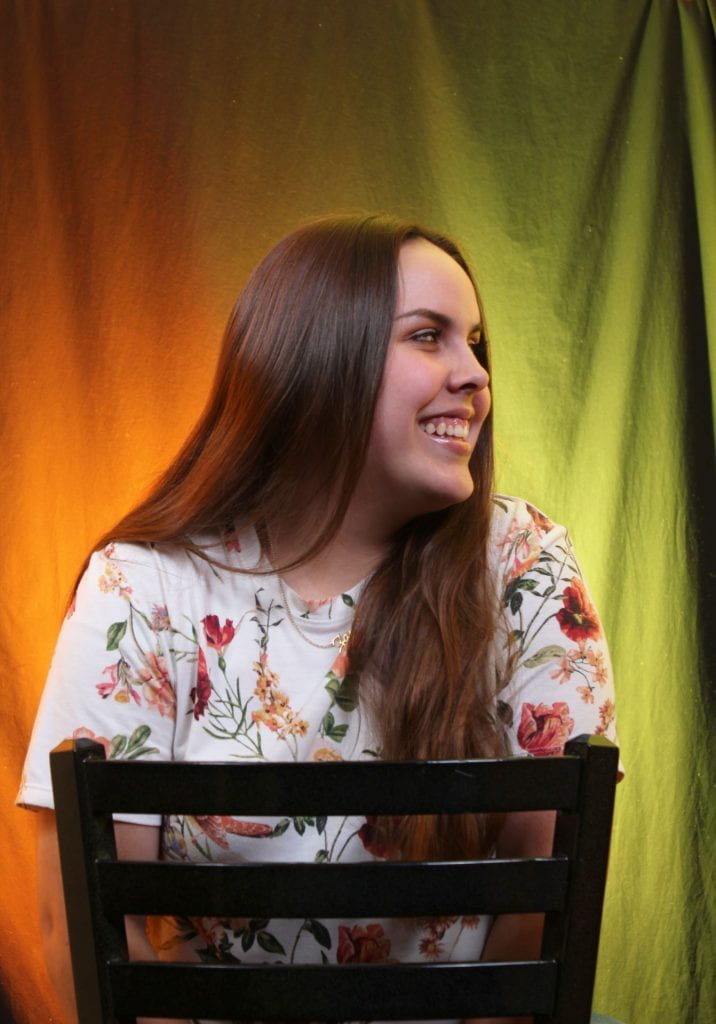

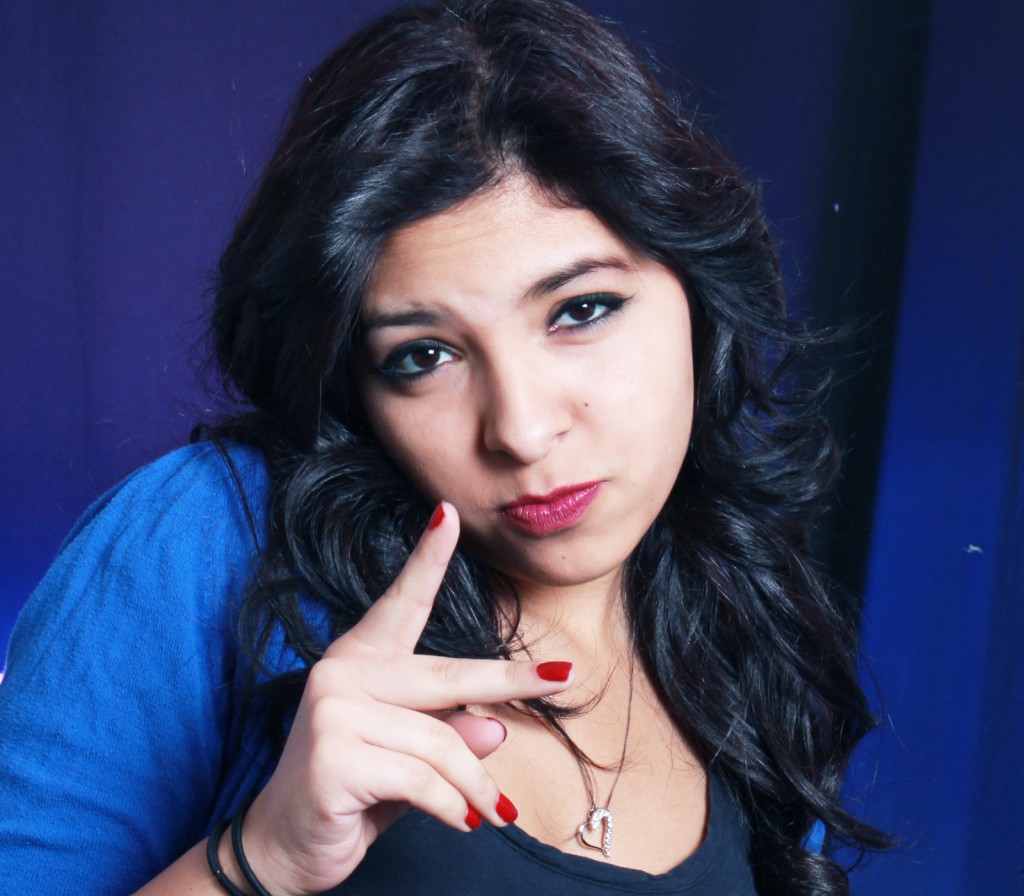
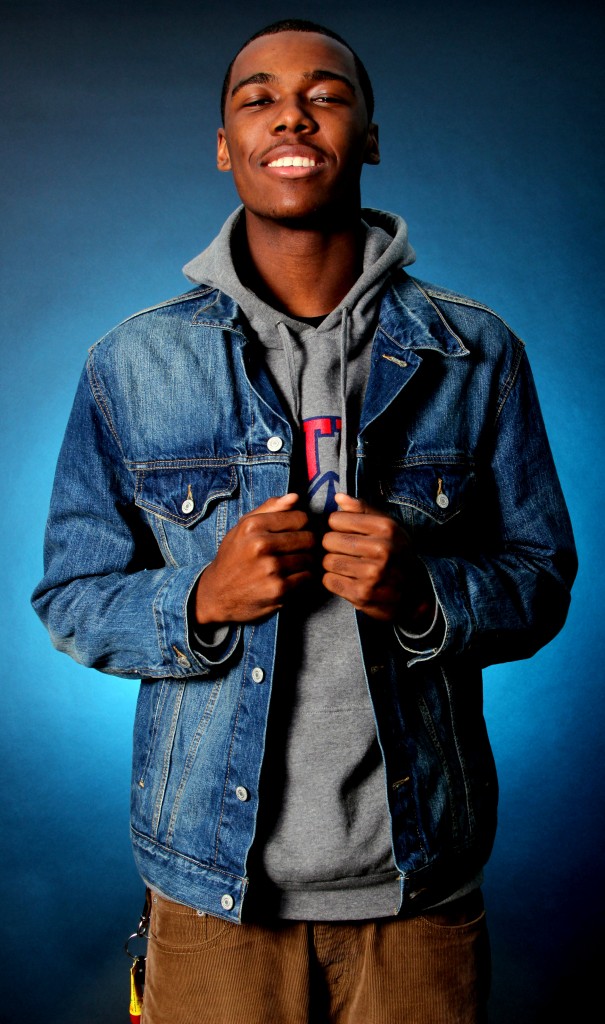
2. OTHER WORLDLY LANDSCAPES
Photograph some landscapes with the DSLR camera using a small aperture to get a good depth of field. Edit your photographs in Photoshop to enhance them and make them dreamlike and otherworldly, resembling that of a world other than the actual world. Post two landscapes to your blog and write a short reflection on what you did in Photoshop to enhance your landscape.

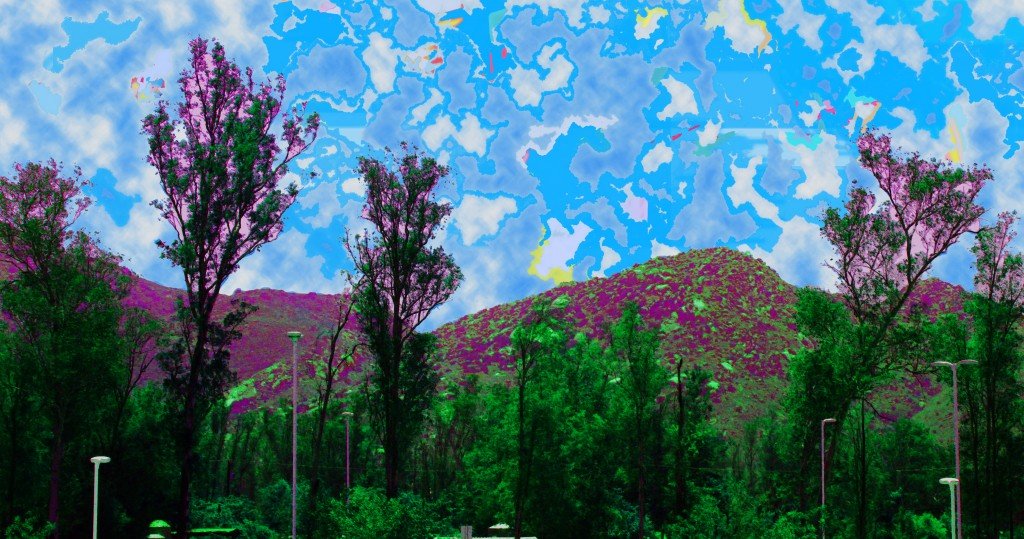
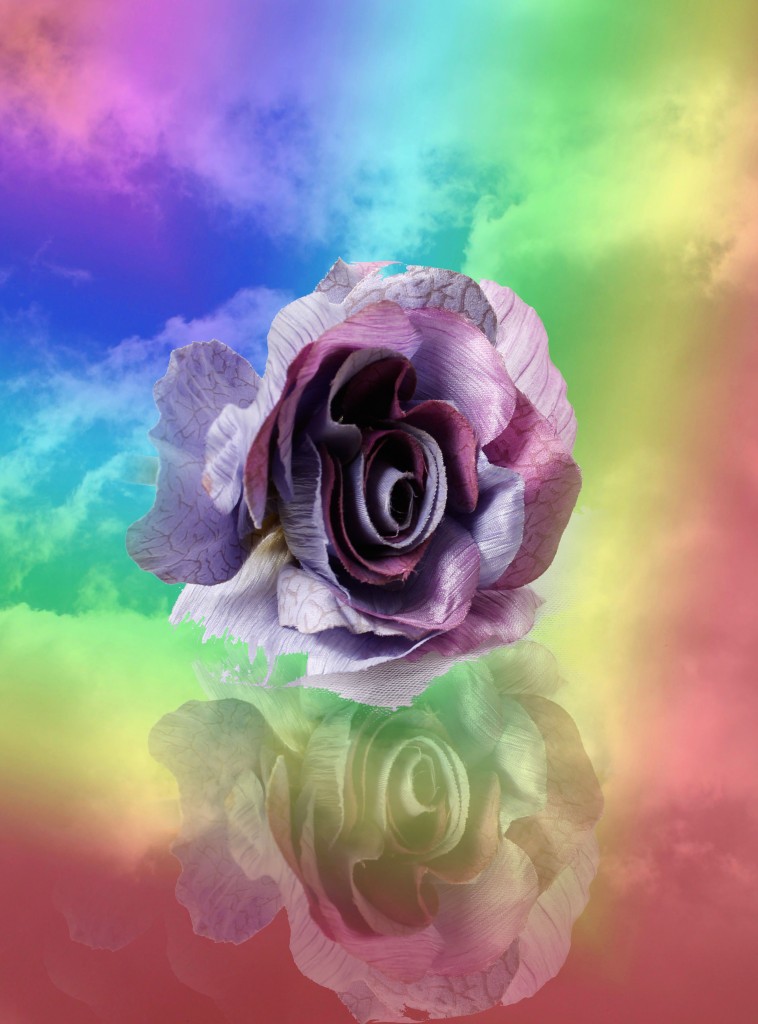
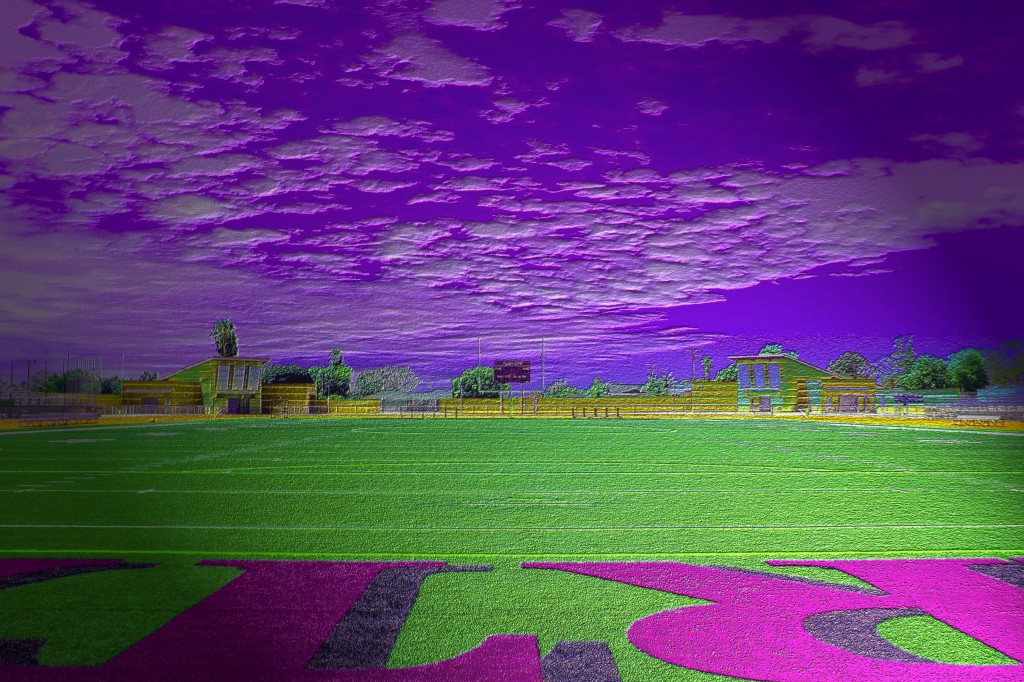
3. TOUCH SERIES
Take photos of people touching in some way, and put them together as a series. Edit them to perfection with LR or PS, and then include the photos in a series, within one document. (You can start with a 30×10 in @200 dpi document, and then get more canvas space if necessary.)


___________________________________________
Assignments due Friday, March 18
1. Poetry and Your Photography:
- Take a new photo for this assignment
- Make a new document 8×12 or 12×8 @200 res
- Move your photo into your new document and size to fit.
- Add a quote, poetry, song lyrics or your own words to your edited image
- Post to your blog
- In a writing critique answer these questions:
- Why did you choose these words to go with this image?
- How do you think an audience would interpret your work?
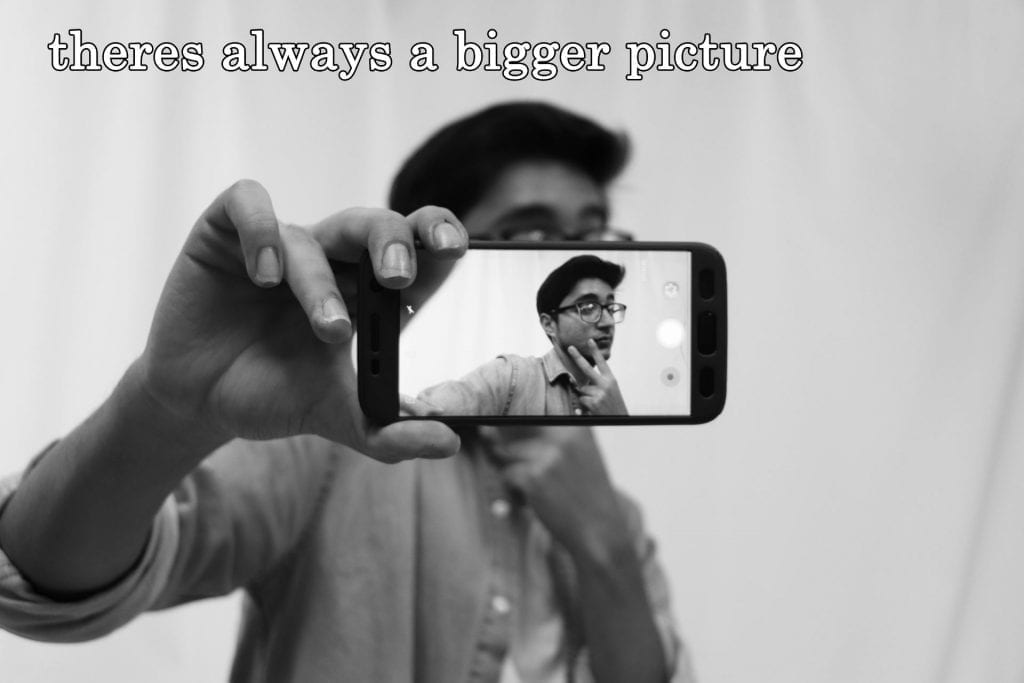
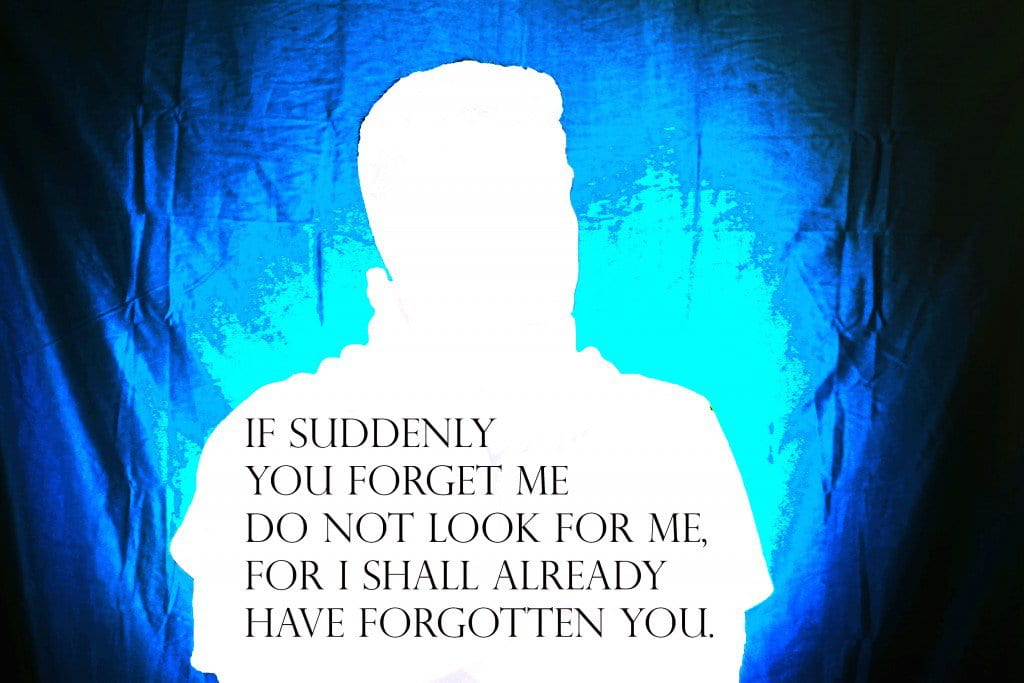


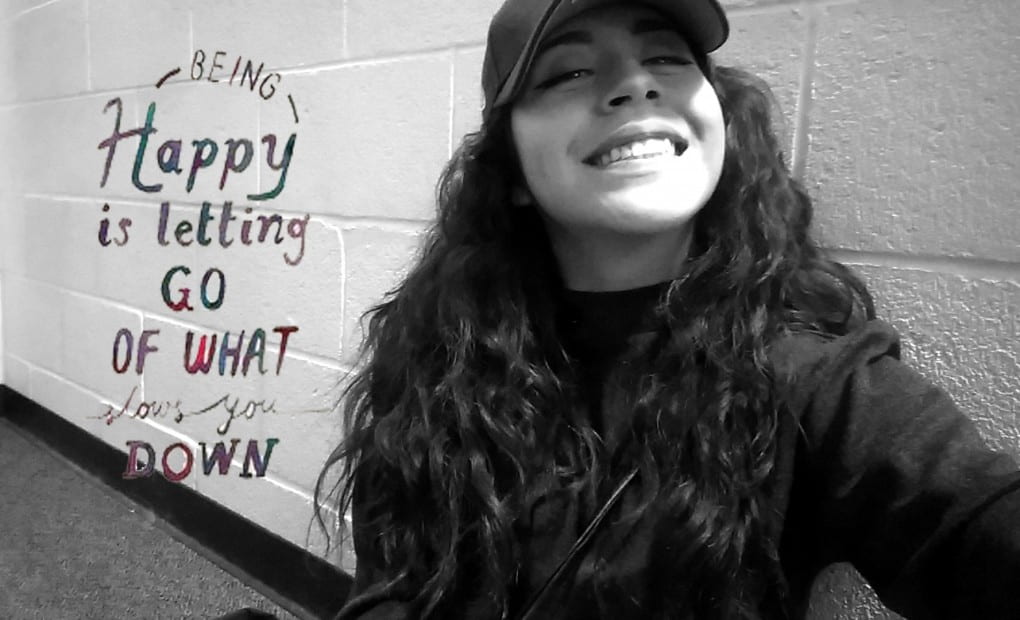
2. Put Yourself in History:
Find a historic photograph online and include yourself in the scene. Adjust size, color and resolution to match the historic photo to look as realistic as possible. Under your photo write a short reflection as to why you chose to be this person in history.
3 Assignments due March 11
1. ALPHABET PHOTOGRAPHY
Look for images which represent letters and create a word in photographs. Edit your photos in Photoshop and then make a new document to put the word in. Make your document 30×8 inches with 2oo resolution and fit your images in to make the word. If you need more space go to Image>Canvas Size and resize bigger. Save as a jpeg and post to your blog.


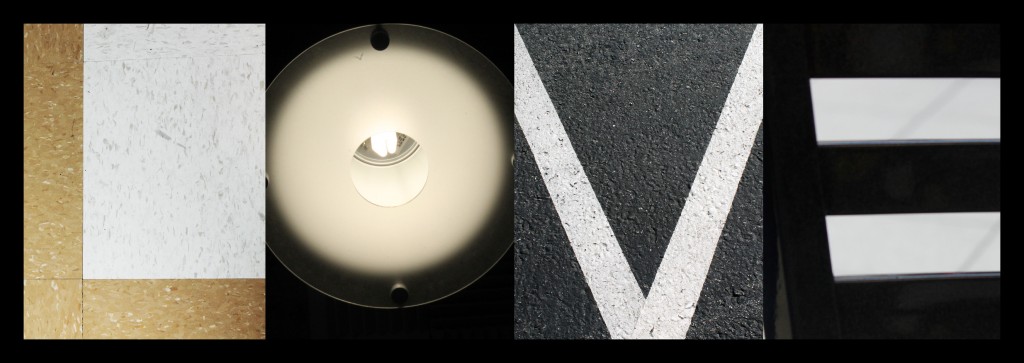


2. FILL FLASH OUTSIDE
-Read this link, (or find another link online), about using FILL FLASH outside to fill in the shadows. Write 1 paragraph explaining what fill flash outside is and why you would need to use it to get perfect exposure on the subject and background.
Fill Flash in Photography: Get Useful Tips and Tricks (colorexpertsbd.com)
http://www.digital-photo-secrets.com/tip/195/using-a-flash-when-outside/
-Go outside and photograph a subject which is BACKLIT. Set your camera on AV to meter the natural light. Use a small aperture like f11 or 16 and a low ISO like 200 or 400. Make sure your flash is on ETTL and fill the subject in shadow with fill lighting from the external flash. Post 2-3 photos showing your understanding and good usage of fill flash.
3. NATIONAL GEOGRAPHIC MAGAZINE COVER REVIEW
Go to the following site and pick your favorite 3 Nat Geo magazine covers.
https://www.coverbrowser.com/covers/national-geographic/17
On a blog post, explain why each one is your favorite, and include the three covers you chose in your post.
—————————————————————————-
3 Assignments Due Thursday, March 3
1. SILHOUETTE STORY
Think of a good concept for your silhouette photos and then take photos of backlit subjects to make high contrast silhouettes. You can edit them in Photoshop to give them more blacks and whites, and contrast. Use studio hot lights with two lights aimed at the background and turn the room light off to get more shadow on the subject(s). Meter for the background.

2. PAINTING WITH LIGHT
Go to a dark place to shoot for this assignment (back studio). Put the camera securely on a tripod and put your shutter speed at 10-20 seconds (not 10th of a sec, but 10 full seconds). You must put the camera on self timer to avoid camera shake. Shoot on manual and try your f stop at 8 or 11. ISO at 200. Pre focus on Manual focus mode, because the camera will not in autofocus in the dark. Wave finger lights in front of the frame during the exposure and check out the results! Try using the pixel stick to create even more cool light painting effects. Post 1 Painting with Light photos you took and edited on your blog. Critique: Find an amazing painting with light photo on the Internet and write a paragraph about how you think the photographer achieved the result and why you think it is so eye catching.
3. ARTICLE READ AND WRITE
Read this article about silhouette photography and write a brief synopsis and evaluation of it. What did you get out of reading it?
https://www.nytimes.com/1983/10/30/arts/camera-dramatic-effects-possible-with-silhouettes.html
____________________________________
Assignment due Tuesday, February 22 @3:30 pm
1. WHAT IS YOUR COLOR
Create a Photoshop Collage 12×9 or 9×12 300 resolution representing your favorite color. Include a photo of yourself that you took with the camera on self timer mode, the color you select and some writing about why this is YOUR color. Perhaps add a tint of your color to the image with Photo Filter tool. Post to blog.
2. CULTURAL IDENTITY PHOTOGRAPHS
Take 3 photos that represent your culture. For example, you can take a picture of clothing, food, traditions, family, music, or sports. Make sure you have good composition and lighting in the photographs. After you have your three photographs shot and edited with PS or LR explain how each photo relates to your culture. You can use your cellphone camera and apps like Snapseed and Lightroom Mobil for editing on this assignment. Post to your blog assignment page and teams.
3. CULTURAL PHOTOGRAPHY: READ AND RESPOND
Read this article on cultural photography. Respond by writing a 3-paragraph response (in academic language.) Explain what the article is about and the most interesting facts that you found from reading it. You will need to review, analyze, and evaluate. Post to your blog assignment page and teams.
https://amworkshops.com/tips-techniques/what-is-cultural-photography/
______________________________________
2 Assignments due Friday, Feb 11
1. YOUR FAVORITE TEACHER (with bounced external off camera flash)
Use bounced external flash off camera with sync cord, to take some nice portraits of your favorite teacher. Edit with PS or LR and post your best portrait of your favorite teacher. Write a 3 paragraph reflection in academic language explaining why you like and admire this teacher. Give details, reasons and examples as to why you chose this teacher. Samples below:


2. HISTORY OF PHOTOGRAPHY TIMELINE
Watch the Powerpoint about the History of Photography
Also go online and research the History of Photography. Use this timeline template to list the most important inventions and events in history in chronological order. Copy the template and open it in Photoshop. Fill in the boxes by using the text tool to make a text box in each rectangle. Write dates and important inventions /inventors in photography. Post the template to your blog in a post titled: History of Photography Timeline. Under the template list 1-2 events and/or inventions in photography which impresses you the most, and has the most impact on your life today.
Assignments Due Thursday February 3:
1. On Location Portraits or Still Life Photos using Bounced External Flash
-Use the Canon digital camera and an external bounced flash to photograph Portraits or Still Life’s on location. Practice shooting with the flash on the hot shoe of the camera, bounced with a softening diffuser. Set your camera on Manual, Auto White Balance, ISO 400, F8 @ 60th of a second shutter speed. Photograph at least 10 portraits or still lives’ and post your top 3-5 edited images to your blog.


2. External Flash Worksheet
Answer the following questions on your blog in a separate post: -When would you use external flash? -Do you need to meter the light if you use flash? -What does flash synchronization mean? -What does ETTL mean? -What will happen when you shoot faster than the camera sync speed? -Why do photographers bounce the flash and use a diffuser? – What is a slave? -What should you do if your image comes out too dark or too light?
3. Flash Photo Compare
Find two portraits online- one where the photographer used flash inside, and one where flash was not used. Make 5 comparisons between the two photos. Post the photos and your comparisons in a separate blog post. This assignment is the critique portion of the flash assignment.
4. Take a Vacation
In this assignment you are going to go on a virtual vacation. Find a location online where you would like to go and digitally put yourself into that location. Make sure to match lighting and color balance to make it look realistic as possible. You must add 3 props into the scene (sunglasses, shopping bags, friends to go with you, etc…) Make your new document for all the elements in the image a 12×8 150 resolution. Under your work. include 1-3 sentences to explain why you would like to go on this vacation.
_____________________________________
3 Assignments due on Wednesday, Jan 26 @ 3:30
1. ADVERTISING/COMMERCIAL PHOTOGRAPHY
For this assignment you will create a photograph that would be used for advertising purposes. First you will research advertising photography on the Internet to generate ideas. Post 3 ads that you really like and write a sentence about why they catch your eye. Before you begin to create your advertisement, write a proposal by answering the following questions:
- Who is the client, or company you are representing?
- What is the product?
- Who is the target audience?
- Where would you expect to see this advertisement?
- What kind of lighting are you going to use to make this look professional?
- What props do you need?
Shoot the product and use of variety of compositions. Think about: lighting, composition, depth of field, product placement. Use Photoshop to tweak and enhance your photograph. Add necessary text and captions. Post your best advertising shot, EDITED, to your blog with the proposal. Samples below:
2. READ AND WRITE: INTRODUCTION TO USING STROBES
Read this entire article on beginning strobe use and then write a three paragraph reflection on your blog detailing what the article is about and the most important things you got out of reading it. https://photography.tutsplus.com/articles/a-fundamental-introduction-to-studio-lighting-equipment–photo-6067
3. 50 PHOTOS EDITED IN LIGHTROOM
Take 50 different photos of the same subject. Vary the lighting and composition of your photographs. Edit your photographs in Lightroom and post the BEST 12 to 20 photos to your blog as a gallery.
>PORTFOLIOS <
Create your photography portfolio using Adobe Spark https://spark.adobe.com/sp
Make a folder in your Onedrive called Portfolio Images. Select your best 10-15 images you created either during this class or outside of class time.
Log into Adobe Spark with your school credentials. Go to the Presentation tab
Add a title to your portfolio. Add an image to the header and then add introduction text about yourself, your hobbies, and your experiences in photography.
Keep adding your images with the Adobe Spark layouts: single photos, photogrids, glideshows and split layouts.
Write a caption for each photograph, or series of photographs.
End your portfolio with a few sentences about what you are looking to accomplish during the second semester in Digital Photography. Also, discuss your favorite assignments this semester and why you enjoyed creating the projects for those assignments. Also mention how you think your progress in this class is going and how you have developed as a competent photographer and image editor.
Go to the share button and make sure to publish and update your portfolio often. Email me (caucrg@fusd.net)the link to your portfolio by FRIDAY, DECEMBER 10.
________________________________________________________
3 ASSIGNMENTS DUE MONDAY DECEMBER 6:
1. WARHOL/POPART
-For your Pop Art assignment you should photograph an object, which is POPULAR IN THE CULTURE TODAY.
-Make 4 copies of the photo you chose,4×4, 4×5 or 4×5 (200 res) each, labeling them Warhol 1, Warhol 2 and so on
-Work on each picture separately, experimenting with filters, gradient maps, colors, patterns, and more….make sure there is contrast between the subject and the background!
-When you complete the 4 individual photos, merge the layers in each.
-Open a new document in Photoshop, 8×8, 8×10 or 10×8 (200 res)
-Move the four individual photos into the new document.
-Save as a jpeg and post
Find a pop artist online & answer to the following questions. Include a work by the artist.
- What is Pop Art?
- Why is this artist’s work considered Pop Art?
- Describe some of this artists work.
- Why did you pick this artist and why do you like his/her work?

2. HDR PHOTOGRAPHY
-Go online and research the meaning of HDR. Create a blogpost explaining what the term HDR in photography means and ways to achieve successful results. Include an HDR landscape photo from the Internet with your post.
-Photograph 5 different exposures of a landscape (on Manual) for this assignment. One at the perfect exposure, plus one and two stops underexposed and one and two stops overexposed. USE A TRIPOD for this!
-Save images in a folder and open Photoshop>File>Automate>Merge to HDR Pro
-Select your five landscape images and press ok. Photoshop will compile your images into one HDR image.
-You will probably need to do more adjustments to make it more vibrant and saturated. You could bring in cool clouds from the Internet to blend into your sky.
-Post to blog and write a 10 sentence critique of your own work and post under your image.
3. Read and Write: Why Photography is so important
Read this article about why photography is so important. Write a two paragraph reflection discussing some ways you feel photography is important to you. Post to blog
—————————————————————————-
3 Assignments due Friday, November 19
1. AM I TALKING TO MYSELF
Photograph several images of yourself or someone else in the same location, and put them all together in Photoshop to make it look as if you (or they) are relating to themselves in some way. Use one of the photos as the base image, and move the other subjects in the base image to create a unique photo for this Am I Talking To Myself assignment.
Writing Critique: Make a blog post called My Inspiration and list 10 things which inspire your creativity. Sample student work below:
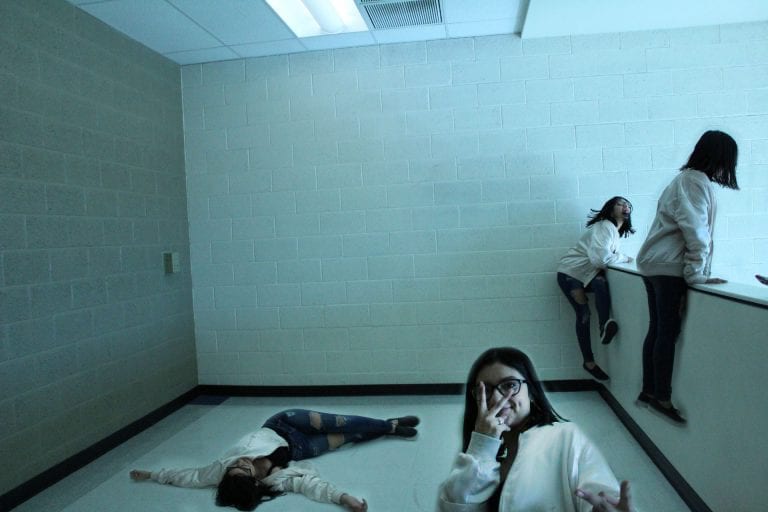
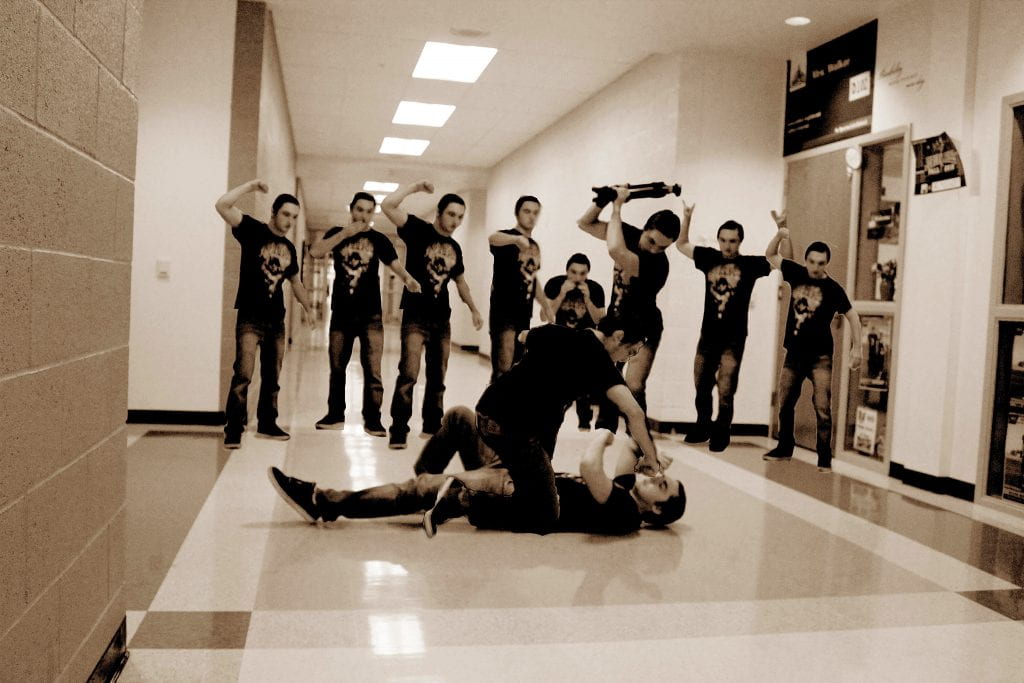

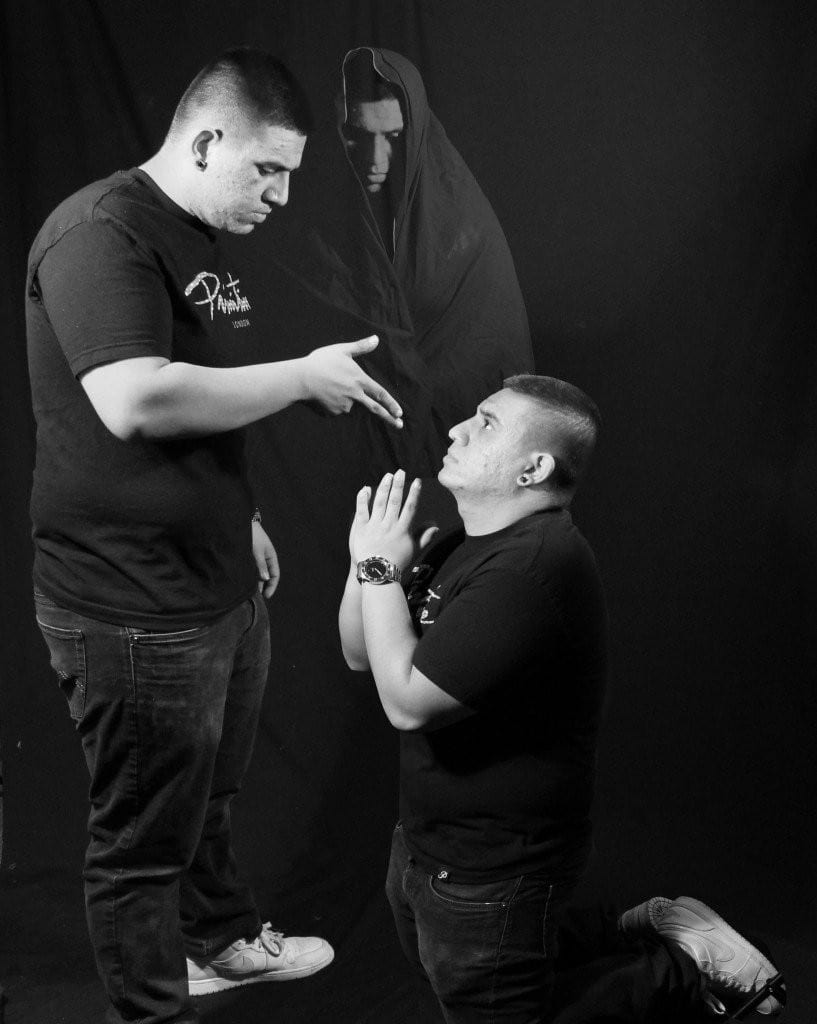


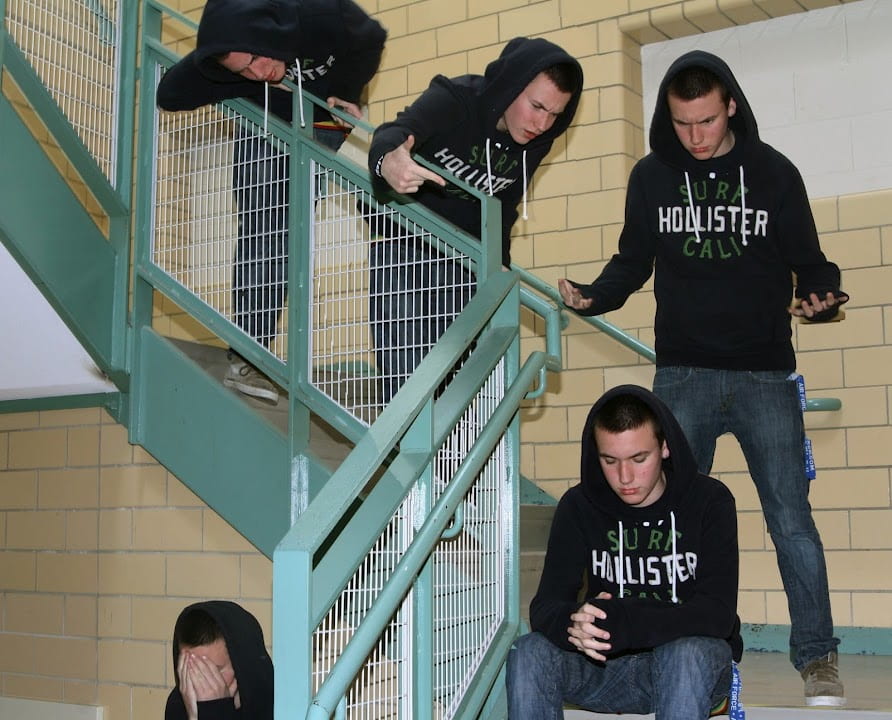


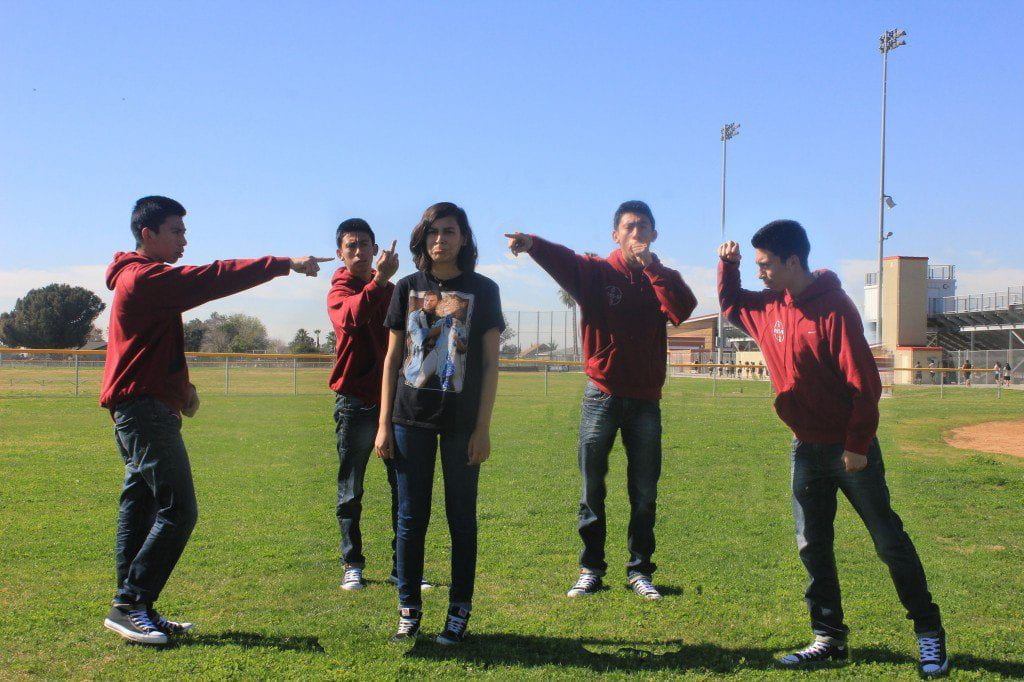


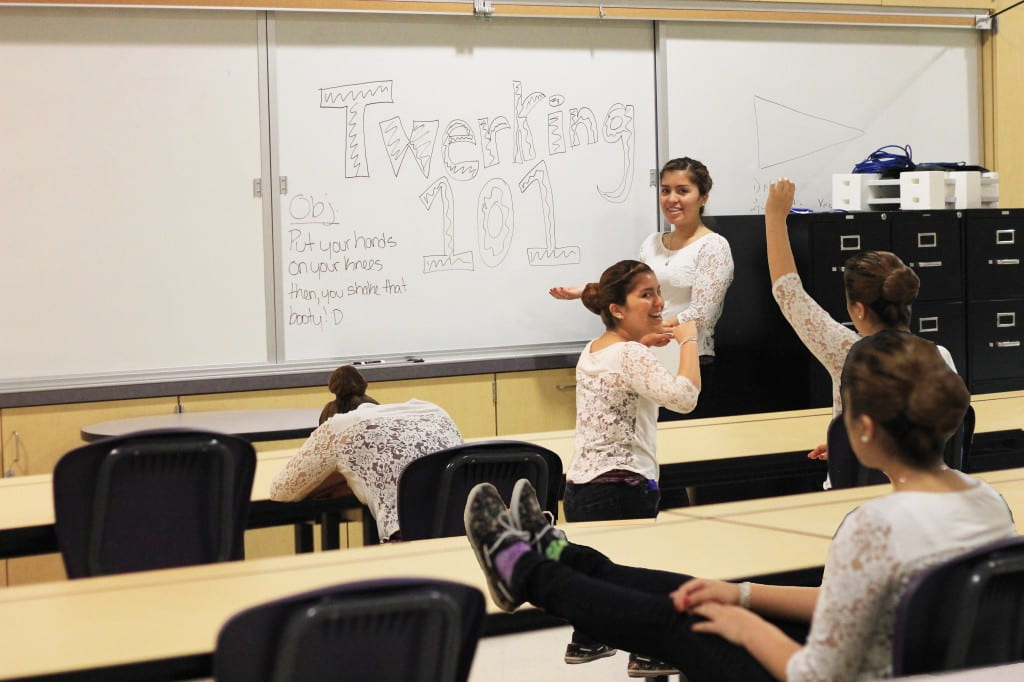

2. SHOOT LIKE AARON SISKIND
Research the work of Aaron Siskind, an American photographer who shot abstract black and white images, which focus on nature, architecture and human form. Take some photos on the MONOCHROME setting, in the style of Aaron Siskind, edit them with good density and contrast, and post 2-3 black and white images on your blog with the technical information in the caption of one of the photos.
Under your photographs, post a photo by Aaron Siskind and write three complete sentences describing his work and your opinion of his work.
3. LENSES READ AND WRITE
Read this article about lenses and on your blog list 20 important facts you learned about camera lenses.
http://digital-photography-school.com/choosing-lenses-when-to-use-which-lens-and-why/
___________________________________________________
Photographer Research Project
(Due Wednesday, November 3, 2021)
You will produce and present a PowerPoint Slide Show about a professional and influential photographer of your choice. The project is to be between 10 and 15 slides and include the information below and at least 10 photographs. You can choose from the enclosed list or pick a significant photographer of your choice. Questions to answer when doing photographer research project are below. Share your presentation with me via OneDrive by Friday, November 5)
- What is the photographer’s real name and year he or she was born? Is he/she still alive?
- What is their style of photography (ex: photojournalism, editorial, documentary, advertising, portraits, magazine, sports, war)?
- Are there any special photography techniques this photographer uses in his/her work? (Think about composition, depth of field, history…)
- Who does the photographer work for?
- What type of cameras and lens does this photographer work with, and why?
- What type of lighting does this photographer primarily use and why?
- Who are some of your photographer’s early influences?
- Are there any interesting stories about this photographer or his/her work?
- What do you like (or not like) about their work, and why did you select this photographer?
* STUDIO PORTRAITS *
(Due Monday, November 8)
Use the studio backdrop (white or black) to photograph PORTRAITS of classmates. Use the tungsten “hot lights” to light the portraits Make sure to put your white balance on TUNGSTEN and shoot at ISO 800. Open your aperture wide so your shutter speed does not fall below 1/60th. Go right up to the subject and meter them on MANUAL.
Take at least 12 photographs and edit them in Photoshop. Post anywhere between 6 and 12 portraits as either a gallery or individually. Include technical info: MASIL on one of the photographs.
Critique: Find a studio portrait online and write a list of 25 words you would hashtag the photo if you posted it on Instagram. Include the photographers name if possible. In a separate blog post, answer these questions: 1. What is the purpose of the main light? 2. What is the purpose of the fill light? 3. List the lighting patterns.
* MIRROR IMAGE *
(Due Monday, November 8)
Photograph an interesting image with lots of lines. Edit the photograph and then size it down to 4×4 inches with 300 dpi (with the crop tool). Make a new document, 8×8 inches with 300 dpi and move your original sized photograph into the new document. Make a copy and flip it horizontal. Make another copy and flip it vertical. Make a fourth copy and flip it horizontal to get the mirror image effect. Merge visible and post to blog.


______________________________________________________
3 PHOTO ASSIGNMENTS DUE WEDNESDAY, OCTOBER 27
1. Illustration of an Iconic Image
Make a new document 8×12 or 12×8 200 resolution. Paste the illustration you want to trace and fit to the correct size. Make a new blank layer to trace on and lock it. Trace the illustration with a thin pencil and then color it in with brushes and the paint bucket. Make sure to add a background to your illustration. Samples below:


2. Photojournalism: Candid Moments with Captions
(3-5 Photos with captions for each)
Photograph candid moments and edit your images in Photoshop. In the caption section of each photo you post write a caption including who, what , where and why. For a critique look at the work of a famous photojournalist (example: photographer Henri Cartier Bresson ,who captured the “decisive moment”) On your blog post 2-3 of their photographs and write 10 sentences about their work and your opinion of their timing, composition and ability to capture the perfect moment. Student Samples below:
3. JPG vs RAW
Research on line what a jpg file is and also what a raw file is. On your blog make a post comparing and contrasting jpg vs raw file formats. (two paragraphs)
FAMOUS PHOTOJOURNALISTS
-
- Lynsey Addario
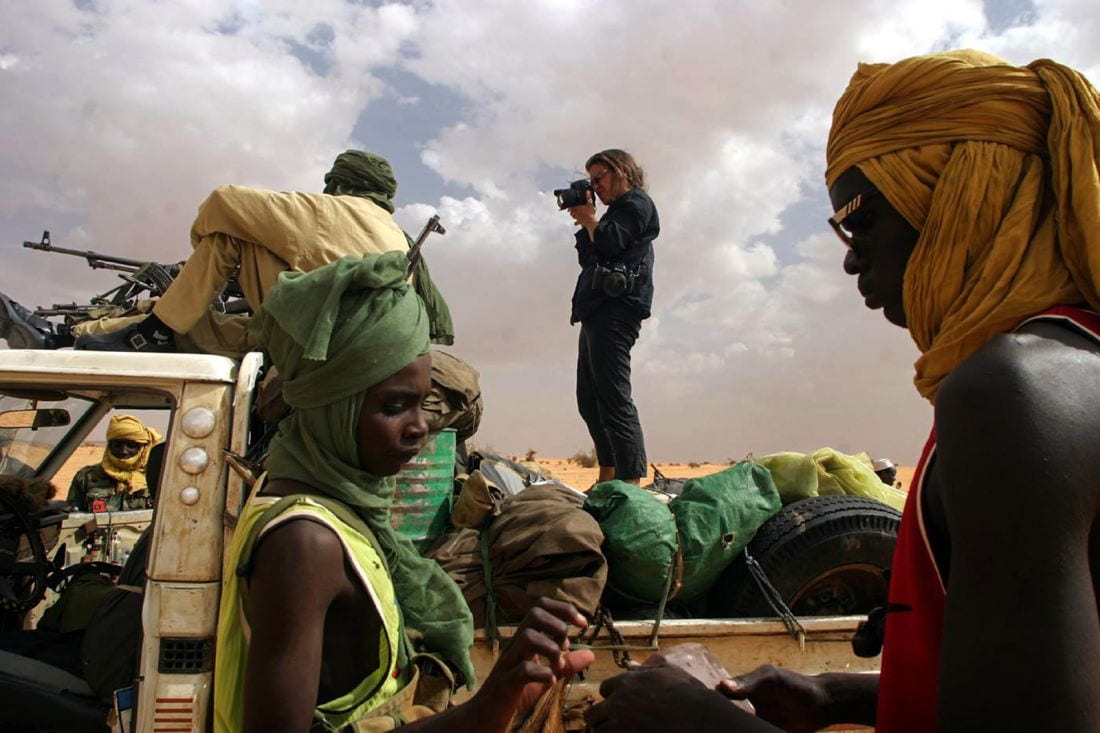
-

- Henri Cartier Bresson

-

- Sebastiao Selgado
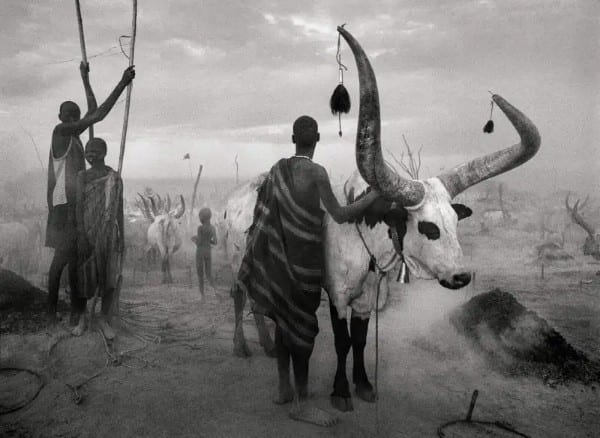
-
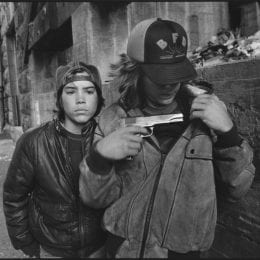
- Mary Ellen Mark
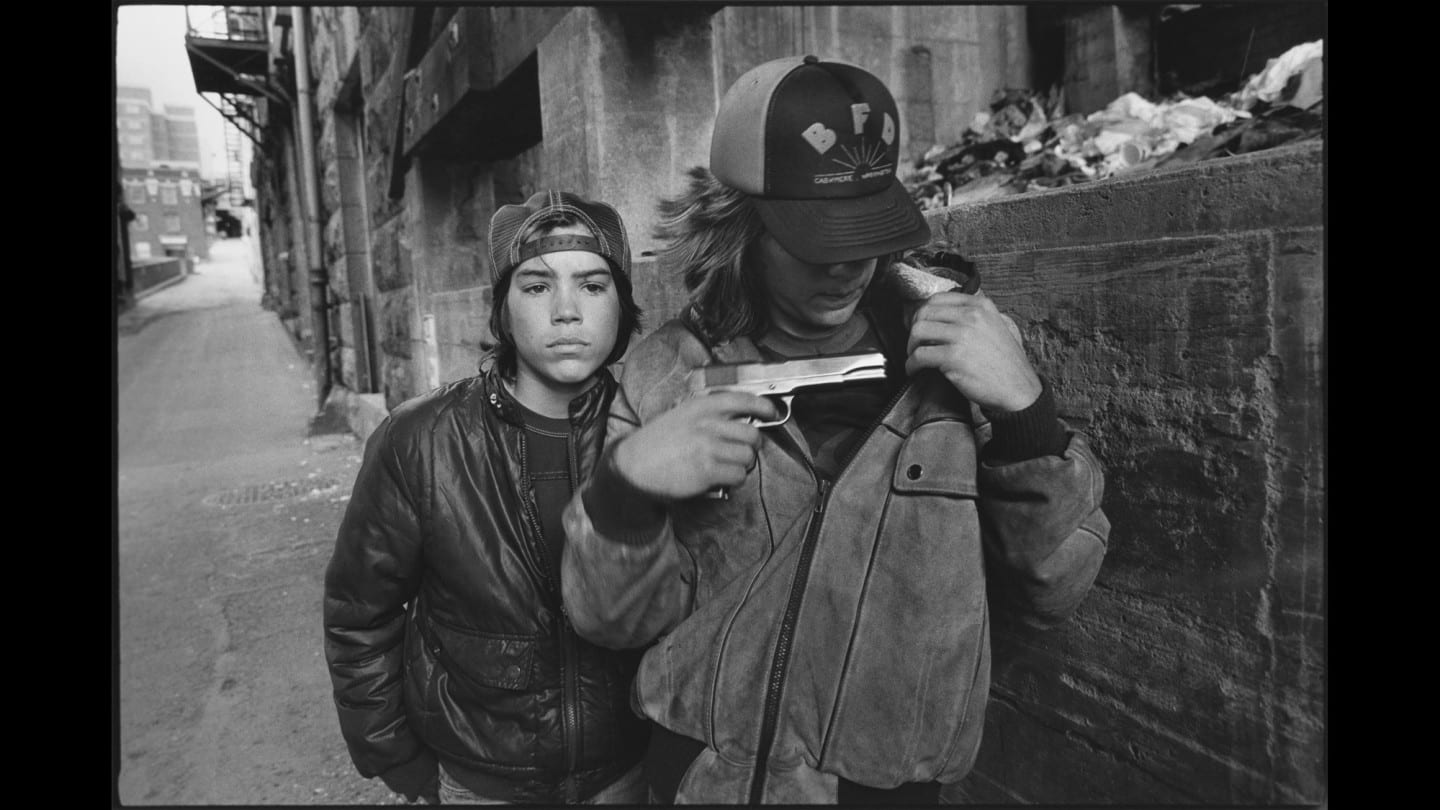
-

- Alfred Eisenstaedt
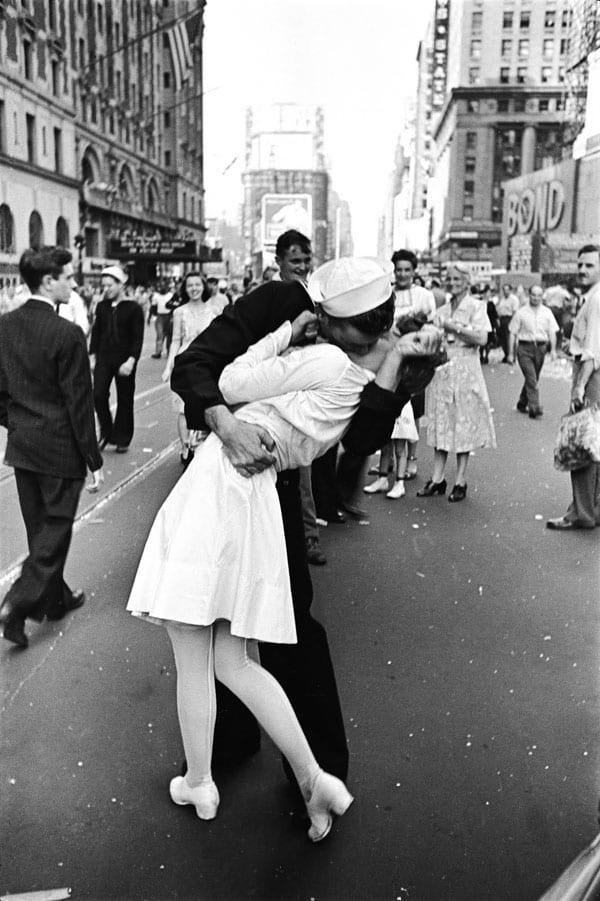
-
- James Nachtwey
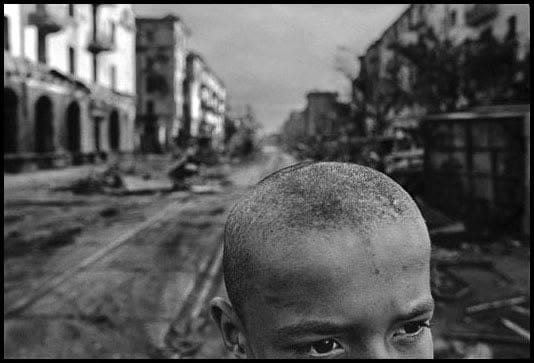
-

- Carol Guzy
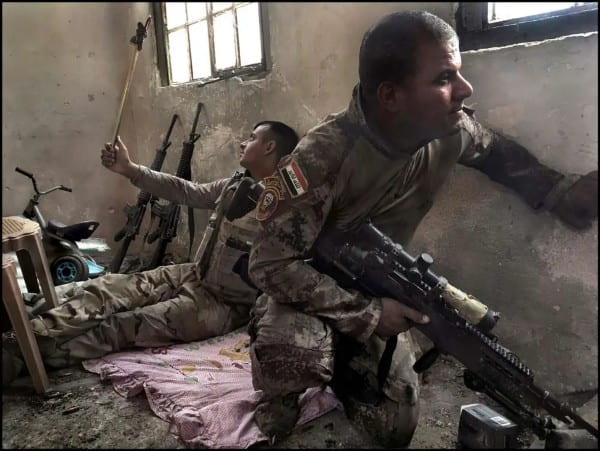
-

- Robert Capa

-

- Steve McCurry
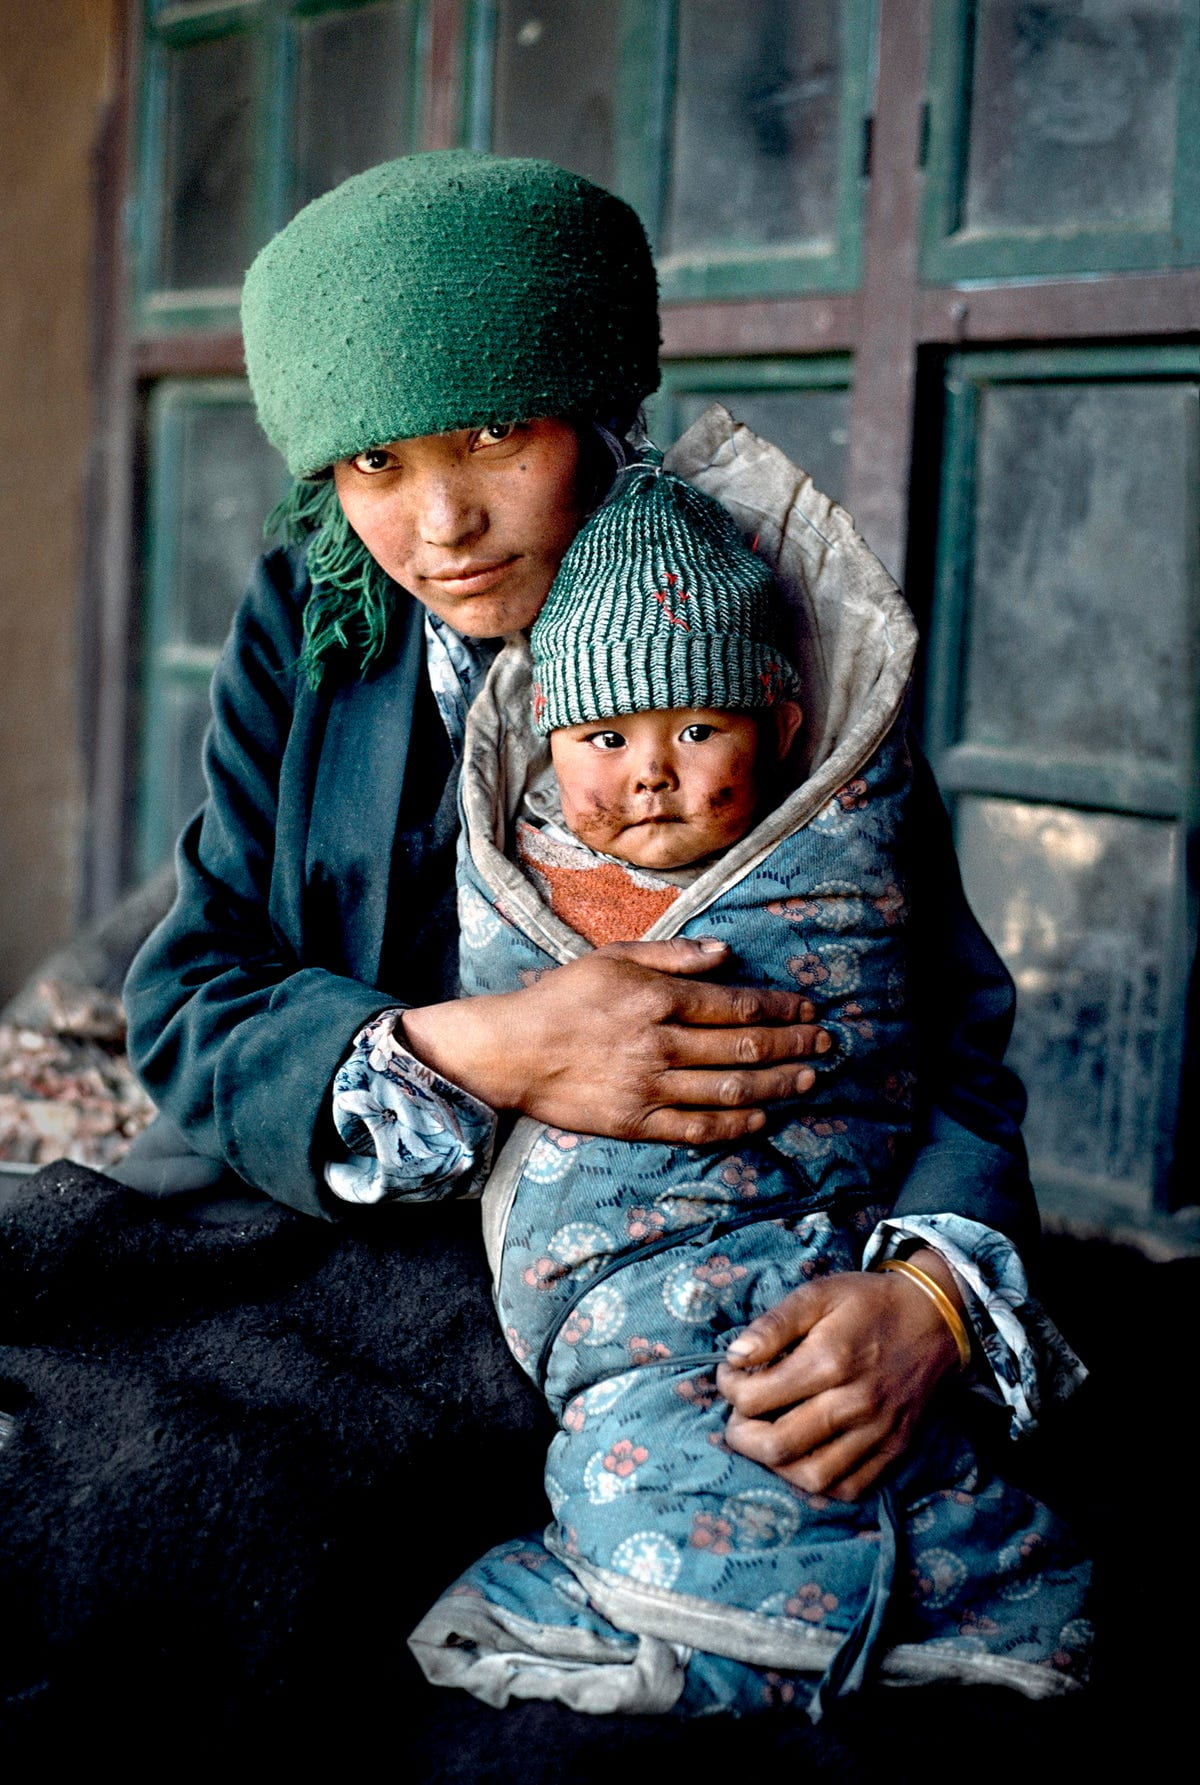
-
- Margaret Bourke White
-
- Jim Marshall

-

- Dorothea Lange
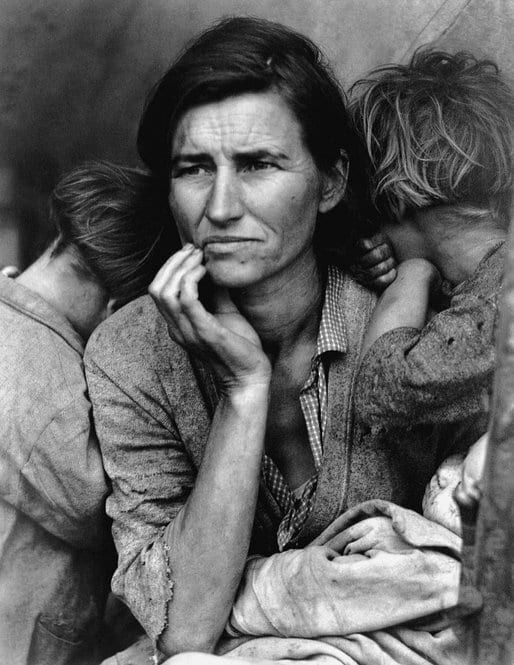
-

- Eddie Adams
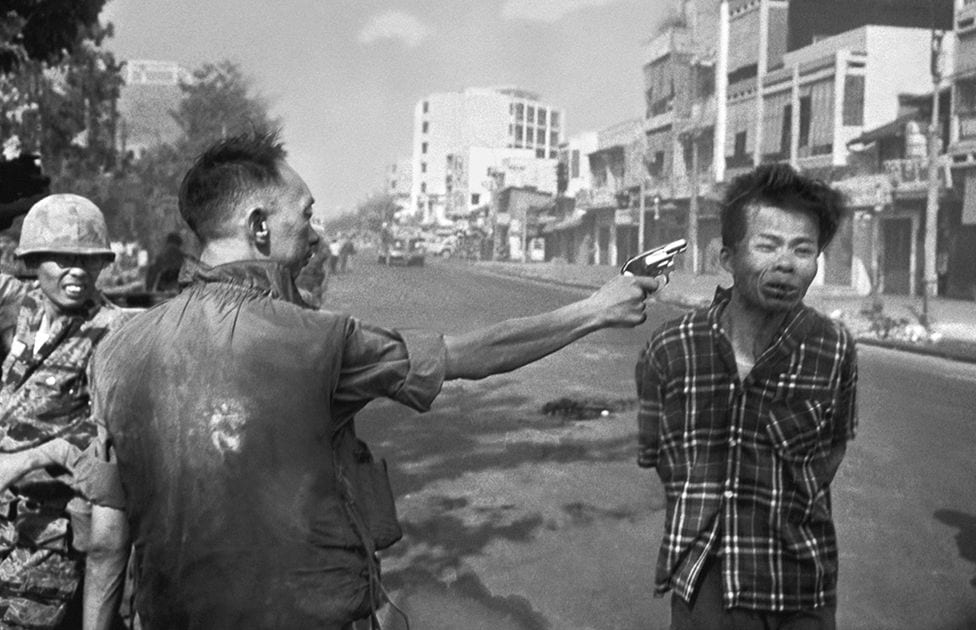
-

- Eugene Richards

-
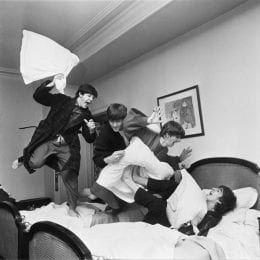
- Harry Benson
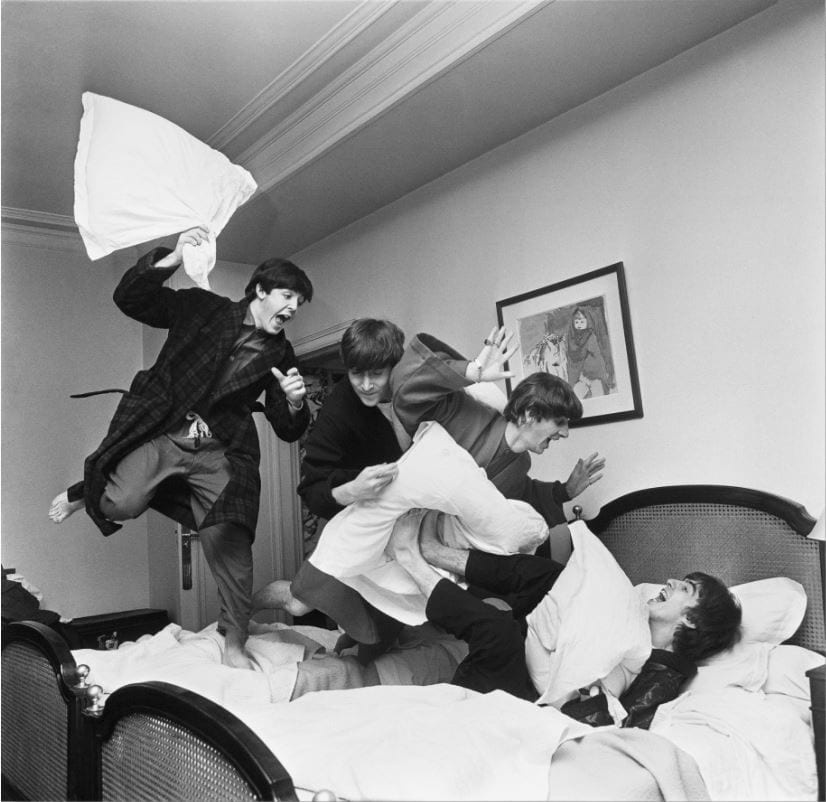
____________________________________
4 Assignments Due Wednesday, October 13
1. WORD ART
-Make a Photoshop document 4×6 or 6×4 (100 dpi)
-Find an interesting image on the Internet and use the move tool to move it into your document in Photoshop.
-Size it with Control T to fit in the document
-With the Text Tool, type a word or phrase in a thick black font
-Find a picture online to go inside of the word and size it over the text
-Put the picture layer on top of the word layer
-Press Control +Alt + G to put the image inside the word.
–Merge the picture and text layers together (make the background layer invisible to not include it in the merge)
-Add a stroke around the word to help it stand out.
-Save as a jpeg and post to blog.
2. ON LOCATION PORTRAITS WITH NATURAL LIGHT
-Take at least 10 portraits of a classmate on location using natural light
-Think about exposure, lighting, composition, posing and expression.
-If photographing outside, set your ISO to 3200 so your shutter speed does not go below 60th of a second. Outside you can use a lower ISO, like 200 or 400.
-Open your aperture up as wide as it will go and use a longer lens to get a shallow depth of field.
-Edit your photos in Photoshop and post between 3-10 EDITED photos of your subject (as a gallery or as individual photos)
-Critique: Find an on-location portrait online with natural lighting. Post that photo and make a list of 25 words you think of when you look at this photo.
-Include your technical info (MASIL) in the caption section of each photo.
3. PORTRAIT PHOTOGRAPHY TIPS
Research on the Internet what makes a great portrait photograph and then make a list of 10 tips to create awesome portraits.
https://www.shutterstock.com/blog/best-natural-light-tips
4. WHITE BALANCE READ AND WRITE
http://digital-photography-school.com/introduction-to-white-balance/
Read this link on white balance and on your blog write a 8-10 sentence synopsis of what you learned from reading the article. Under that list all the white balance settings and at least one sentence about each.
___________________________________
2 Assignments due Monday, October 4:
1. DIGITAL COLLAGE: ALL ABOUT ME
-Gather imagery online that represents at least five things about yourself.
-In Photoshop, make an 8×10 or 10×8 @150 resolution document and title it All About Me Collage
-Select elements from the Internet images to move into your collage.
-After you get a good selection with the magic wand or magnetic lasso, remember to go in Mask and refine your selection. If you want soft edges you will go to select>modify>feather.
-Think about rules of good composition when designing your layout of elements and background. Move layers around from the layer palette.
-To blend layers for a unique effect, you use the move tool and use Shift+ to scroll through blend modes.
-Save your work as a psd until you are completely done with it, and then save as a jpeg to post to your blog.
-Write a three paragraph reflection about what how your collage visually represents you. Post under your work in your blog.
________________________________________________
2. FRAMING A SUBJECT
Take at least 3 different photographs using framing in the composition. If photographing inside, be sure to change your ISO to 3200. If shooting outside, have your ISO at 400. Use any camera mode you prefer, and manual or auto focus. Post 2-3 of your photographs, edited with Photoshop. Include the technical info: MASIL. Samples below. Critique your own photographs you posted and answer these questions.
- What camera metering mode did I use and why?
- Do I have a strong composition?
- How well did I edit my photographs?
- What would I do differently if I shot this assignment again?
- Do you think your photographs belong on the blog home page and should be considered one of the best from all the photo classes?
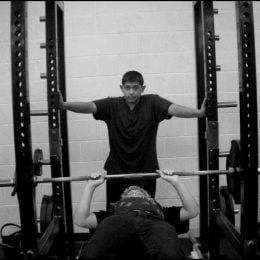


________________________________________________
CAPTURING ACTION AND MOTION IN PHOTOGRAPHY
(Due Friday, Sept 24)
-Read these online articleS about capturing action and motion photography and write two to three paragraphs stating what you learned about action and motion photography techniques
How to Capture the Perfect Action Shot in Sports Photography
http://digital-photography-school.com/how-to-capture-motion-blur-in-photography/
-Take photos outside that capture ACTION SHARP. Try to “capture the moment”. Shoot at the shutter priority mode and auto focus AI SERVO . Make sure your shutter speed is above 125th of a second. ISO 400
-Take several photos and post your favorite 2 action shots, edited in Photoshop.
-Take action photos inside trying to capture MOTION BLUR. Try to “capture the moment”. Shoot at the shutter priority mode and auto focus AI SERVO mode. Make sure your shutter speed is 60th or below for more blur. Use a tripod to make sure stationary objects are not blurred.
Take several photos and post your favorite 2 motion blur shots , edited in Photoshop.
-Include technical info on all photos: MASIL
-Find 2 photos online, one showing action sharp and another showing motion blur. Guess what shutter speeds, f stops, and lens were used. Post as critique. Samples below:
_____________________________________________________________
3 Assignments Due Friday, September 17:
1. DEPTH OF FIELD
-Read this link and write two paragraphs explaining in your own words what depth of field is in photography and the ways to control depth of field when shooting. Call this blogpost: Depth of Field Explained.
– Go outside and take two photographs of the same subject, trying to get two different depth of fields. Remember to first format the memory card, set WB to auto and ISO to 400, and be on Manual focusing. You will set the camera mode to AV (aperture priority). Make sure to focus on the same subject for both shots you take.
-In Photo #1, you will get a shallow depth of field. Zoom out to the longest focal length of the lens which is 55mm. Set the aperture on f5.6 (the widest aperture at 55mm) and take note of what the camera sets the shutter speed at. Make sure it is not below 60th of a second. Get in good and close to your subject
-In Photo #2, you will get a good depth of field. Put your lens at 18mm ( which is the widest lens mm on your lens). Set your aperture at f16, and take note of what the camera sets the shutter speed at. Make sure it is not below 60th of a second, or open up the aperture to f11. Stay a bit further back to get a better depth of field.
-Repeat the depth of field activity 2-3 times to make sure you get it right.
-In the lab, edit your photos for maximum impact and post each one (good and shallow depth of field) to your blog as individual photos or as a gallery. Include the technical info in the caption section of each (Mode, ISO, Shutter speed, Fstop, Focal length of lens.
– For the critique for this assignment you are to find two photos online- one which shows a good depth of field and one which shows a shallow depth of field. In the caption section when you post them guess at what you think the aperture, shutter speed and lens mm was for each photo.


MANDALAS
Create 2 unique mandalas in Photoshop using the shape tool and Internet imagery.
Make a new document 8×8 100 res and create each mandala, thinking about composition and symmetry.
Draw a circle with the shape tool and put a stroke around it. It will appear on the layer pallet as its own layer. If you want to add a color, style or gradient to it, do that when you make the circle.
Use the shape tool to put in shapes.
Make sure to fill each layer with a color, style or gradient.
Copy a shape by pressing alt with move tool.
To combine shapes into one layer, make any layer you do not want merged to be invisible, and then go to layer>merge visible.
To flip a layer, go to Edit>transform>transform either vertical or horizontal, or use a keyboard shortcut (control+T) with the move tool.
When you save each mandala, save as a .psd if you still are working on it and want to save the layers. Save as a .png and make the bottom layer invisible if you just want to post the circle. Save as a .jpeg if you want the 8×8 square around the circle.
Make 2 mandalas and post both to your blog.


3. FILE FORMATS
https://digital-photography-school.com/understanding-all-the-different-image-file-formats/
Read all about digital file formats. On your blog list each file format and one sentence about each which describes how it saves the file and what makes it different from the other file formats.
______________________________________
Assignments Due Thursday, September 9 (completed)
1. ALTERNATIVE CAMERA ANGLES
-Go outside in brighter light and take 4 photographs of the same subject from 4 different camera angles- strait on, from above, from below, and then tilt the camera at any of the other 3 angles. Put your ISO at 400, and meter the scene on Manual to get the correct exposure. Keep your exposure the same on all 4 photos and make sure to keep the same subject in focus for all 4.
-Put your photos in your Digital Photo folder on your Desktop: DIGITAL PHOTO>ANGLES
-Edit your photos in Photoshop with IMAGE ADJUSTMENTS and post all 4 of your photos to your blog (large). INCLUDE THE TECHNICAL INFORMATION: MASIL: Mode, Aperture, Shutter speed, ISO, and Focal Length of Lens
-Find one photo online which shows an interesting camera angle. Post it to your blog and write a 20 sentence critique explaining why you think this is such a successful photograph- compositionally and technically, and why you chose it.
2. SURREALISM
After practicing with Kim on the mountain, make your own surrealist piece by putting someone or something where they don’t belong. Make a 10×8 or 8×10 150 resolution document in Photoshop and bring in Internet images for this assignment. Practice selecting, masking and refining your selections. Look at the work of surrealist artists Salvador Dali, Rene Magritte, and Jerry Uelsman and explore other surrealist artists and photographers online. Post your surrealism work in a blog post and also include a work by a surrealist artist who inspires you. Write a 100 word reflection, critiquing their surrealism, and mention how you think you did on your surrealism work.
3. CAMERA MODES
http://digital-photography-school.com/digital-camera-modes
Read through this link on camera modes. On your blog make a new post writing 2 sentences about what each camera mode does.
___________________________________________________________
2020-2021
1. MAKE A BLOG
Create a blogsite with edublogs. https://edublogs.org/
Join the class blog cauchonphoto.edublogs.org
Select a template, and design your site layout and design.
Widgets: Write an About Me section as a Text Widget. Tell a little about yourself, 3-5 sentences. Add of photograph of yourself or something you like as an Image Widget.
2. PHOTO FOUNDATION
Read the following link and write a post on your blog explaining your understanding of the concepts aperture, shutter speed, ISO and camera modes. Title the blog post “What I learned about camera exposure and camera modes.
http://www.cambridgeincolour.com/tutorials/camera-exposure.htm
3. CAMERA SIMULATOR
Play around with the camera simulators and learn how to use the camera controls. Then practice with the camera in the classroom.
https://camerasim.com/camerasim-free-web-app/ http://www.canonoutsideofauto.ca/play/
4. TEXTURE (Due Friday Aug 20)
Go outside in brighter light and photograph 5 images that demonstrate texture.
Put your ISO at 400, and meter the scene to get the correct exposure.
Put your photographs in a folder on your H drive: DIGITAL PHOTO>TEXTURE ASSIGNMENT
Edit your photos in Adobe Photoshop with IMAGE ADJUSTMENTS and post 3 of your photos to your blog.
INCLUDE THE TECHNICAL INFORMATION (for each photo): aperture, shutter speed, ISO, and camera mode
Find one photograph online which shows amazing texture. Write a two paragraph critique explaining why you think this is such a successful photograph and why you chose it. Be sure to use academic language, proper grammar and sentence structure.


COMPOSITION- Due Tuesday, Aug 31
Read about what makes strong composition in a photograph and what catches the viewers eye. Find 12 sample photos online which show good composition. Make a gallery of images in Edublogs. Post your gallery and write 12 complete sentences, (with capitals and periods), one sentence under each photo in the gallery before posting, to explain what element of composition each photo represents.
SHADOWS AND LIGHT ASSIGNMENT- Due Tue, Aug 31
-Photograph 3 photos which show strong shadow and light – Save your photos in your Digital Photo folder on your Desktop, in a new folder called Shadows. – Edit 2 of your shadow photos with Photoshop – Include the technical info with each photos: MASIL: Mode, Aperture, Shutter Speeed, ISO, Lens Focal Length – Pick a photo from the Internet showing shadows -and write 10 complete sentences describing the elements in the shadow photo you chose from the Internet and why you like it. – Post your 2 photos, technical info, internet image and writing critique to your blog.
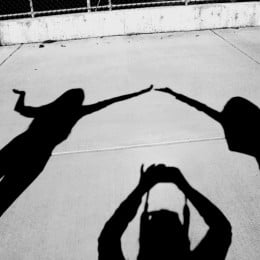
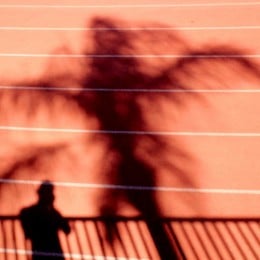
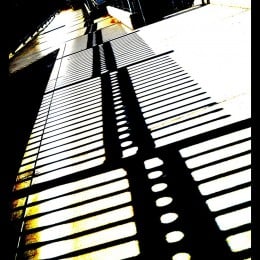
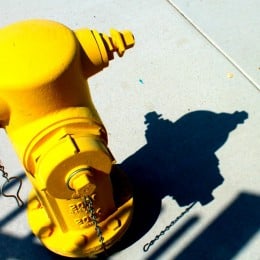
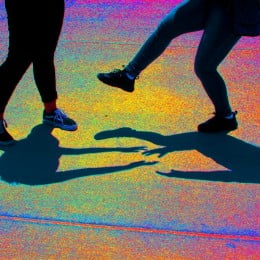
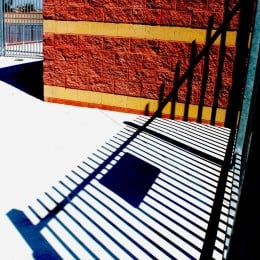
______________________________________________________________________________________________________________
2020-2021
1. AM I TALKING TO MYSELF
Photograph several images of yourself or someone else in the same location, and put them all together in Photopea to make it look as if you (or they) are relating to themselves in some way. Use one of the photos as the base image, and move the other subjects in the base image to create a unique photo for this Am I Talking To Myself assignment. Writing Critique: Make a blog post called My Inspiration and list 1o things which inspire your creativity. Sample student work below:
2. WORD ART
-Make a Photopea document 4×6 or 6×4 (100 dpi)
-Find an interesting image on the Internet and use the move tool to move it into your document in Photopea
-Size it with Control T + shift to fit in the document
-With the Text Tool, type a word or phrase in a thick black font
-Find a picture online to go inside of the word and size it over the text
-Put the picture layer on top of the word layer
-Press Control +Alt + G to put the image inside the word.
–Merge the picture and text layers together (make the background layer invisible to not include it in the merge)
-Add a stroke around the word to help it stand out.
-Save as a jpeg and post to blog.
3. PORTRAITS WITH CHARACTER
Read the following link and write a list of five tips you learned about making portraits with personality.
https://photography.tutsplus.com/articles/identifying-and-capturing-personality-in-your-portraits–photo-9618
Photograph someone who you spend a lot of time with these days, and try to capture their true personality. Good portraiture requires a team effort between photographer and subject. This will probably require you to photograph at least 20 photos of them. Think about getting good quality of lighting and COMPOSITION. Try different angles and backgrounds. Edit your photos with your favorite apps, and make sure to touch up any imperfections with Snapseed’s Healing Tool, or the app Touch Retouch, and post between 2-6 of them to a PORTRAIT PAGE on your blog.
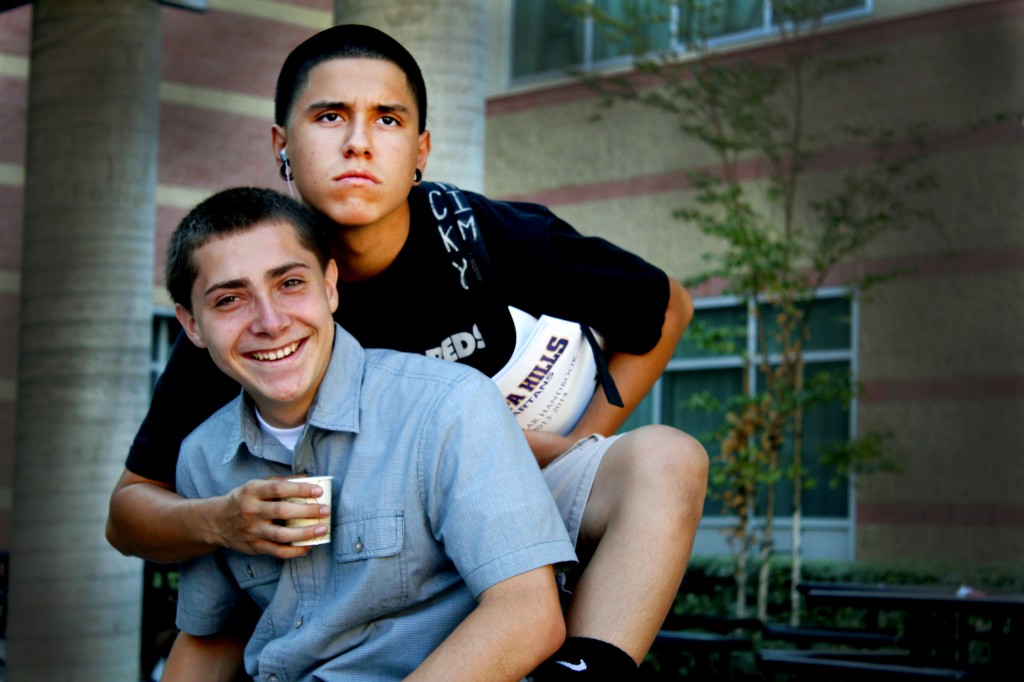


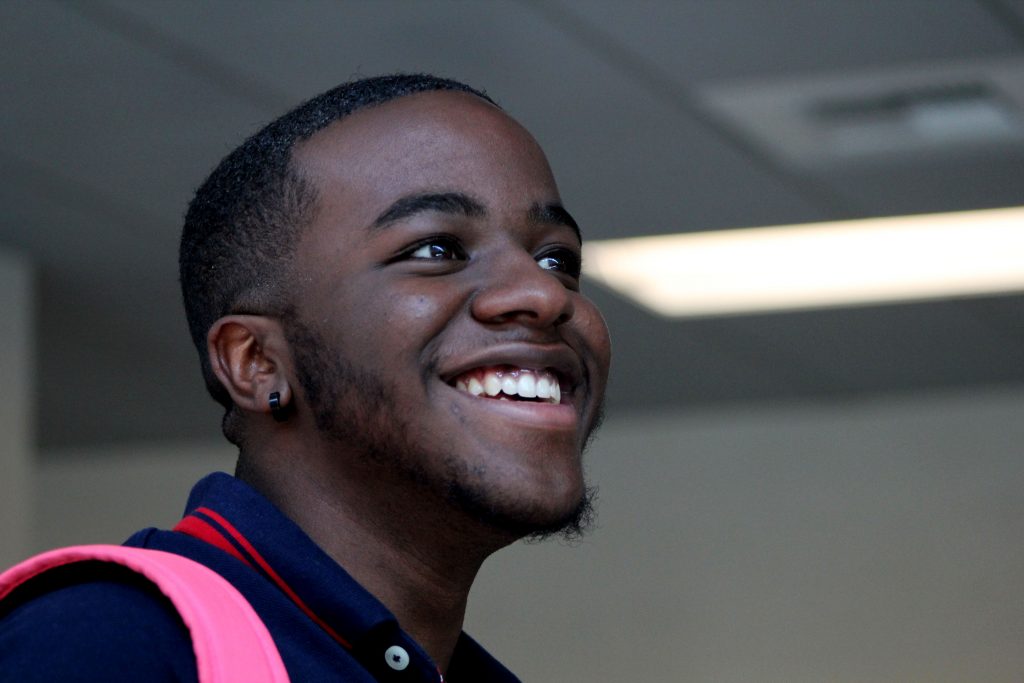
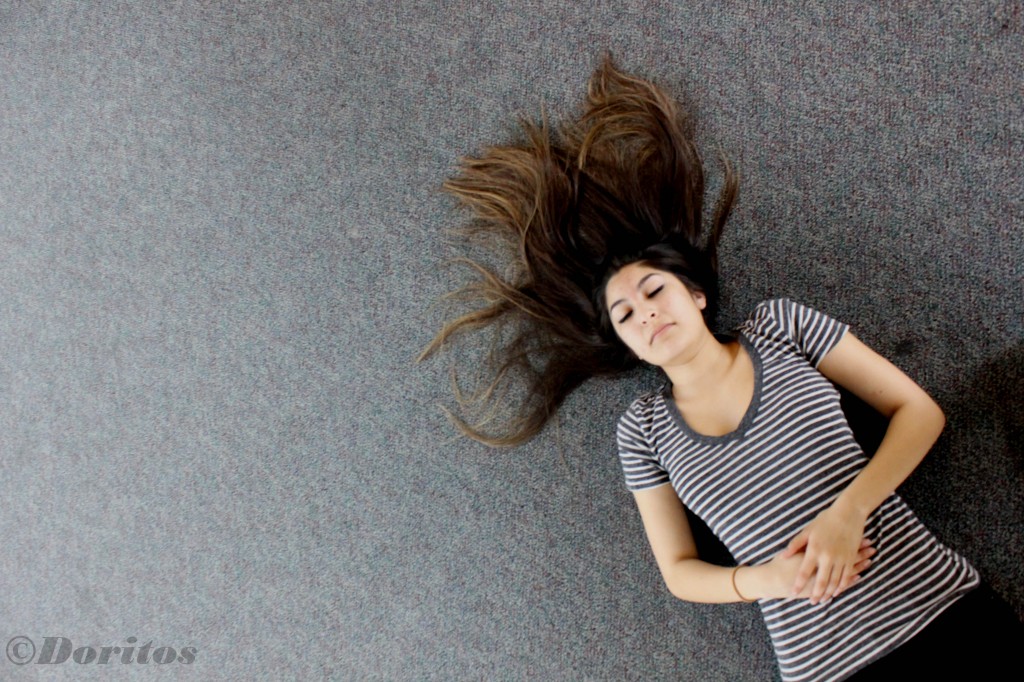


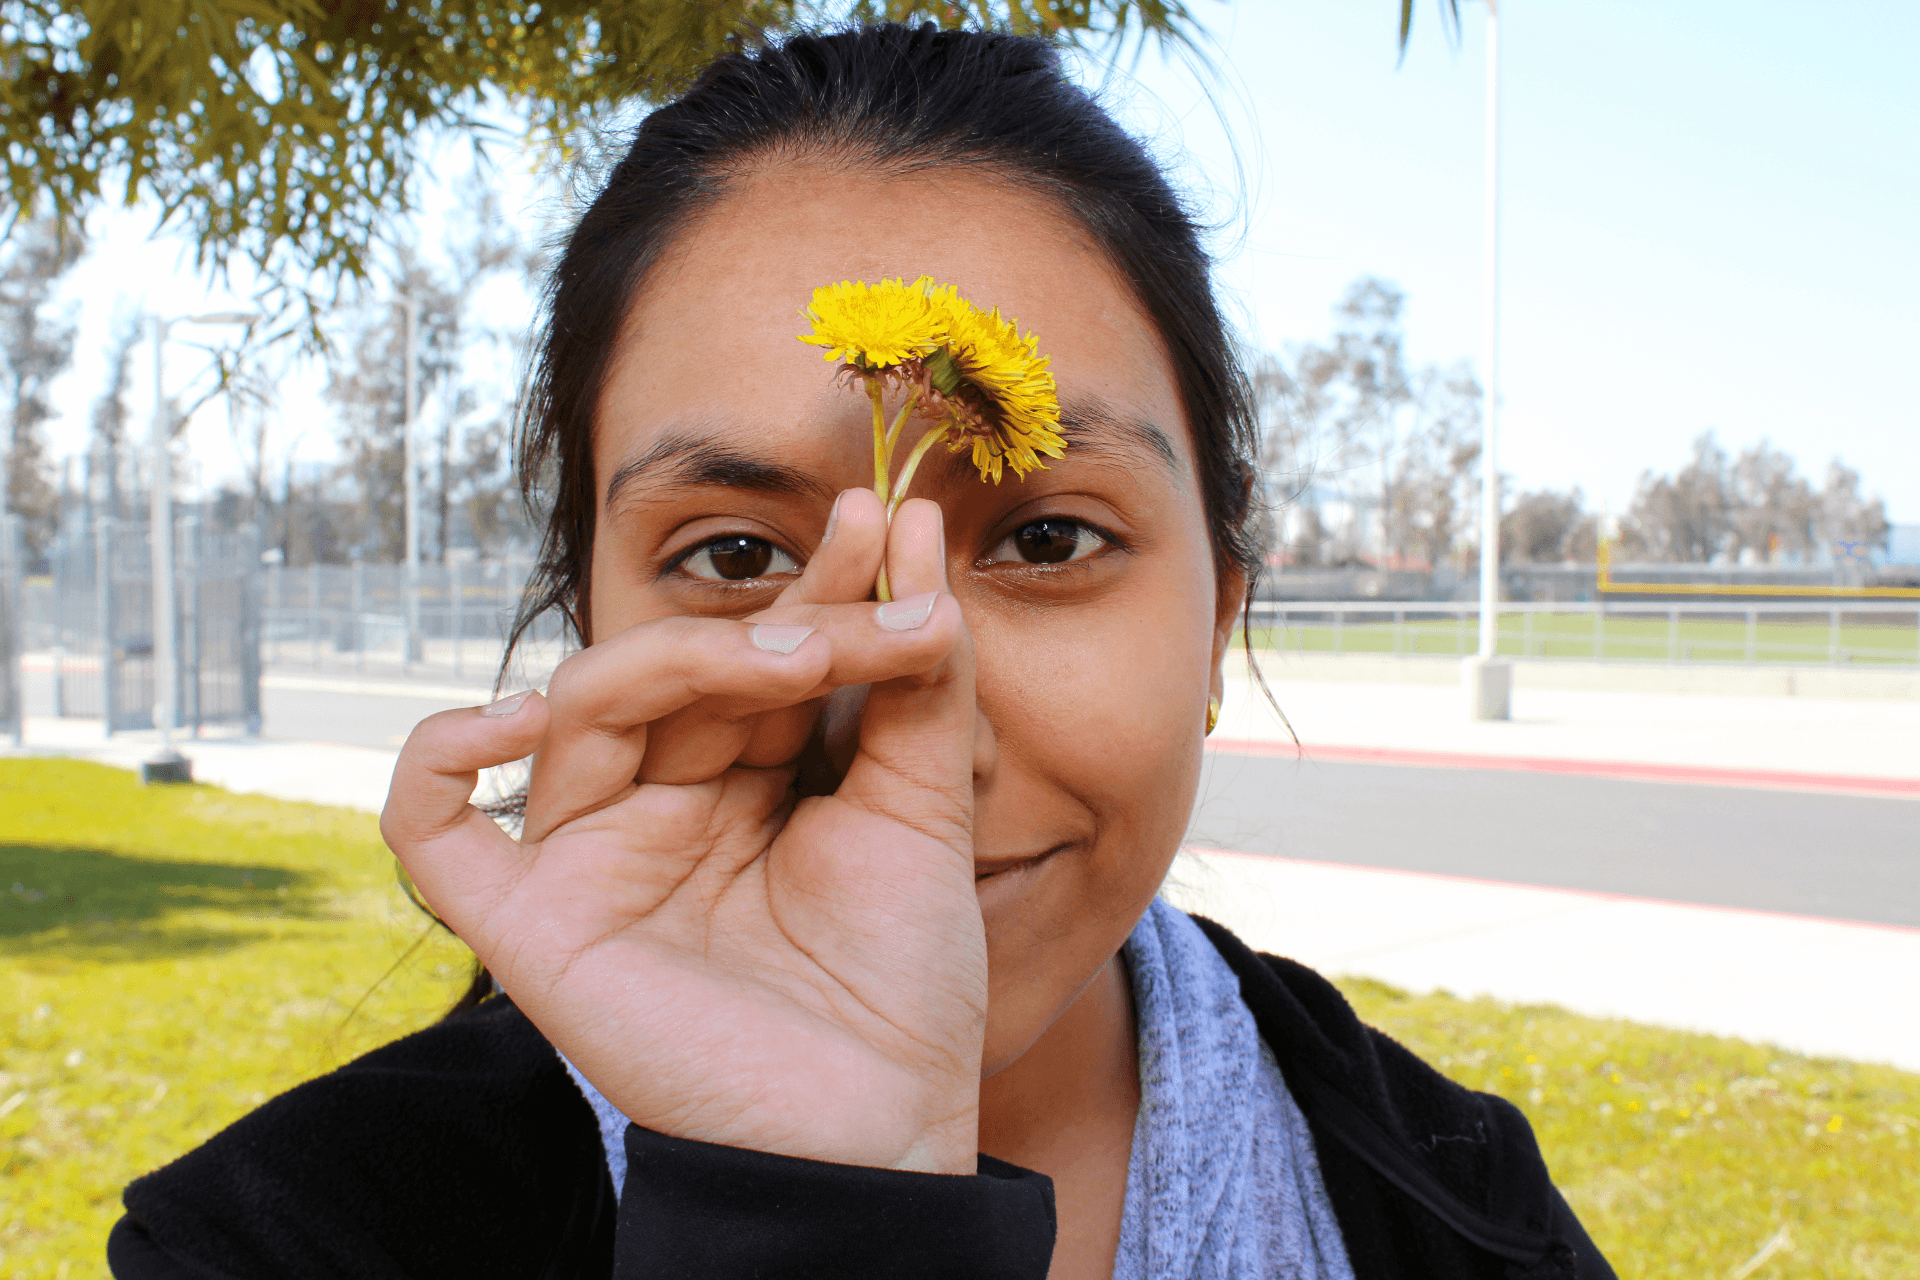
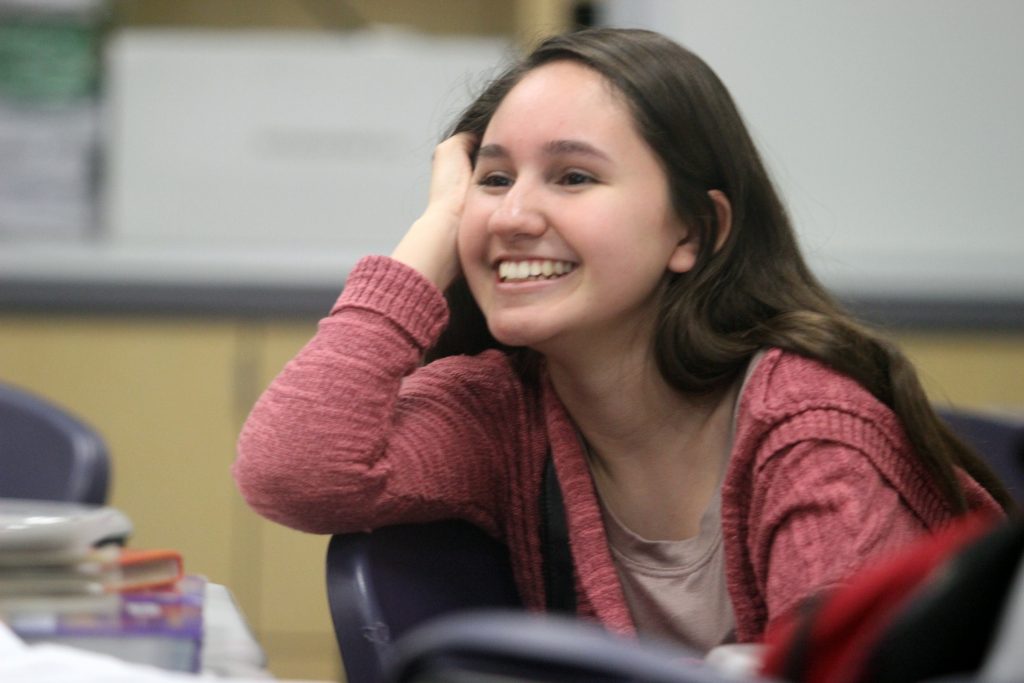
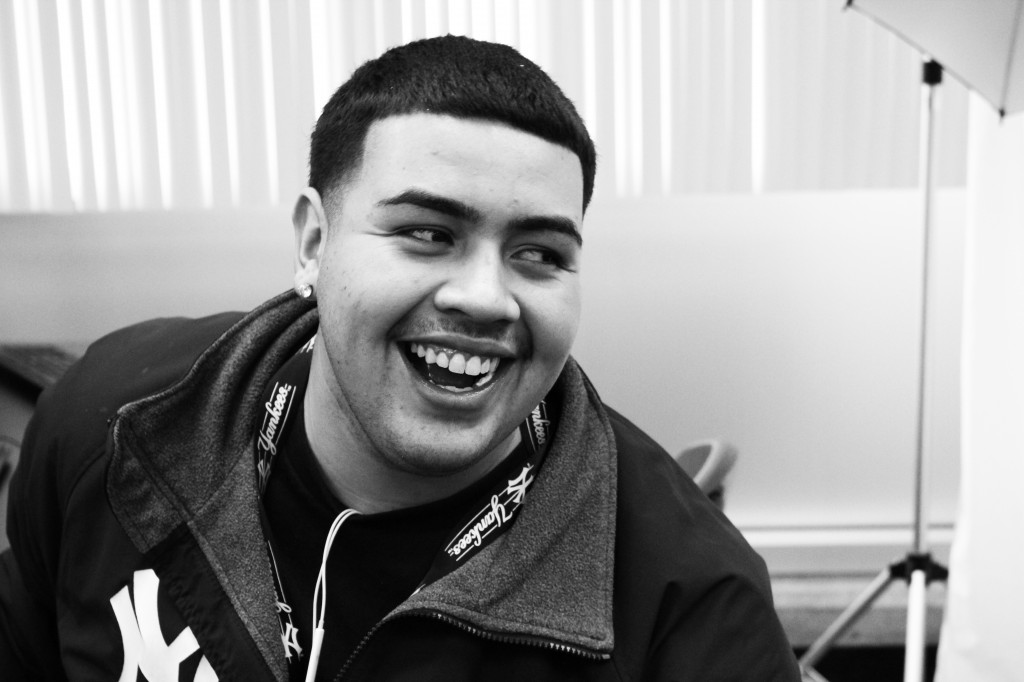

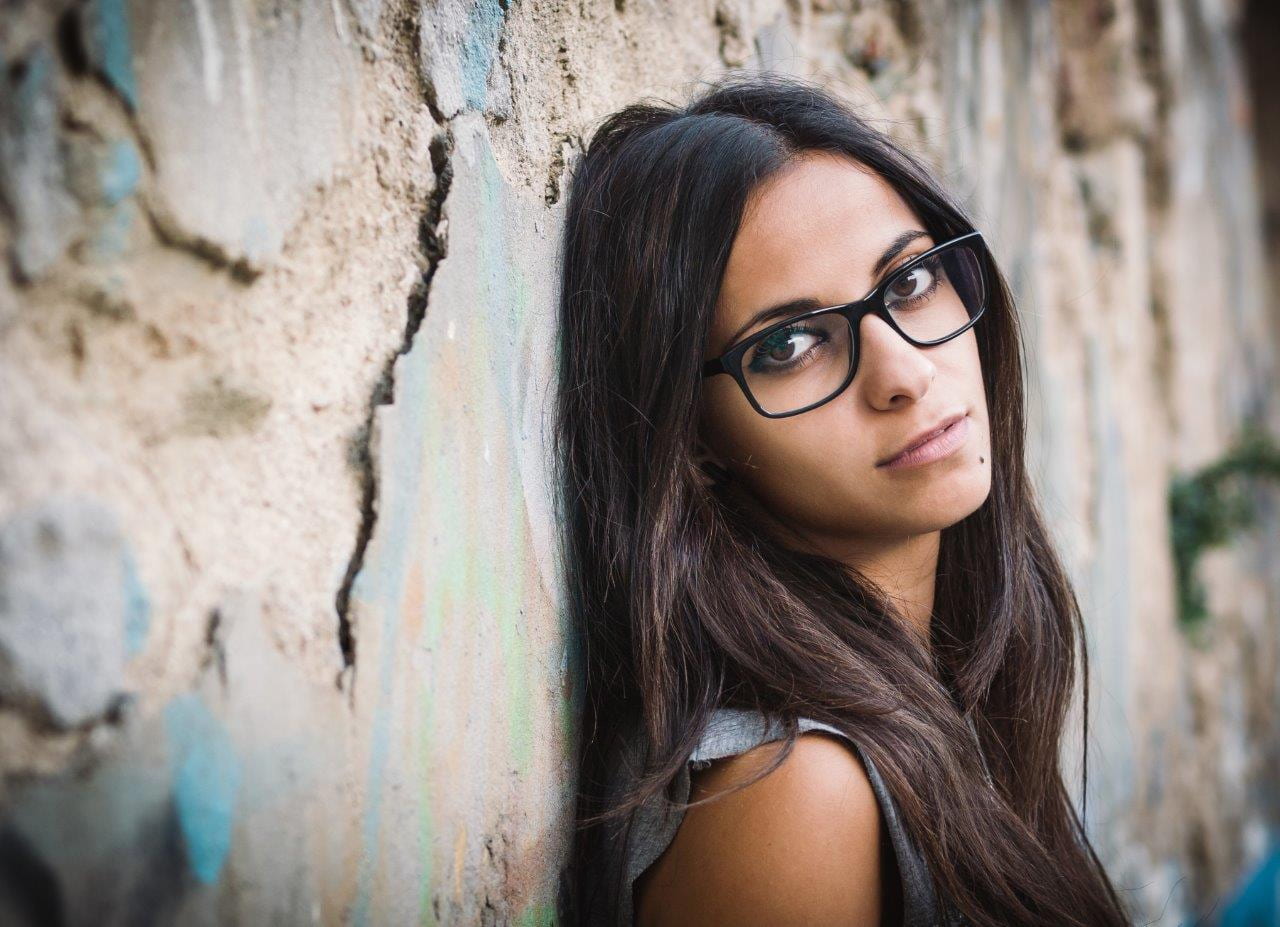

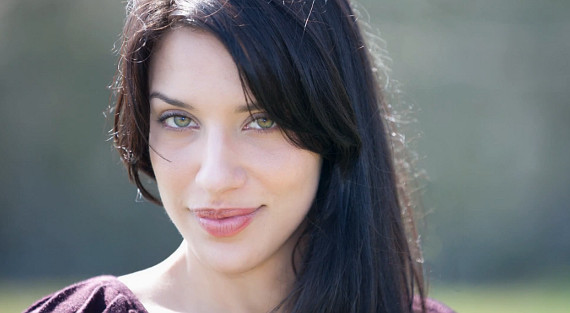

4. HDR LANDSCAPES:
Go online and research the meaning of HDR photography.
Create a blogpost explaining what the term HDR in photography means and ways to achieve successful results.
Photograph landscapes with GOOD COMPOSITION and LIGHTING, and edit with an HDR app, like Simply HDR, or Snapseed HDR tool. You could also enhance editing with Lightroom Mobil HDR features. Make sure to add lots of saturation and perhaps double expose with some clouds to get that perfect HDR image.
Post 1-3 awesome landscapes to a LANDSCAPE PAGE on your blog.


++++++++++++++++++++++++++++++++++++++++++++++
NEXT ASSIGNMENTS DUE TUESDAY, DEC 8 @ 11:30pm
1. BODY, SHAPE, FORM
Photograph a part of the body, or something, which shows shape and form. Think about getting great QUALITY OF LIGHT and make your composition a strong one. Edit your photo(s) with your favorite editing app. Create either a strong single image, or a diptych, triptych or series. Use an app like piccollage or diptic to layout series work. In the caption section of your image, write the name of the app(s) you used to edit your work, and also write 10 words to describe your final image.

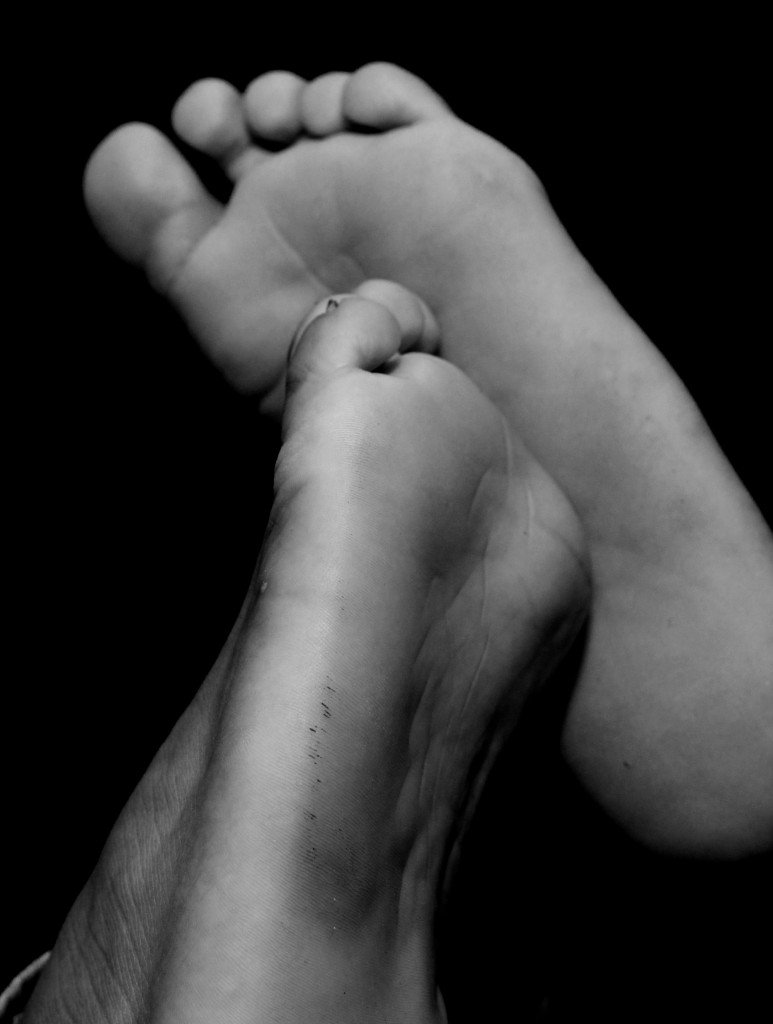
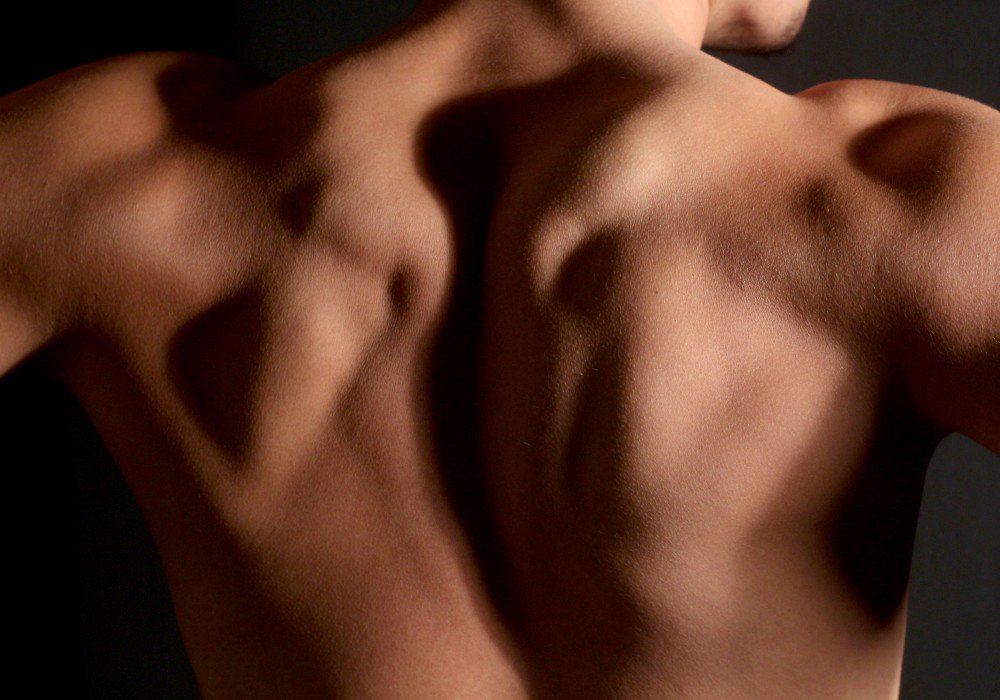

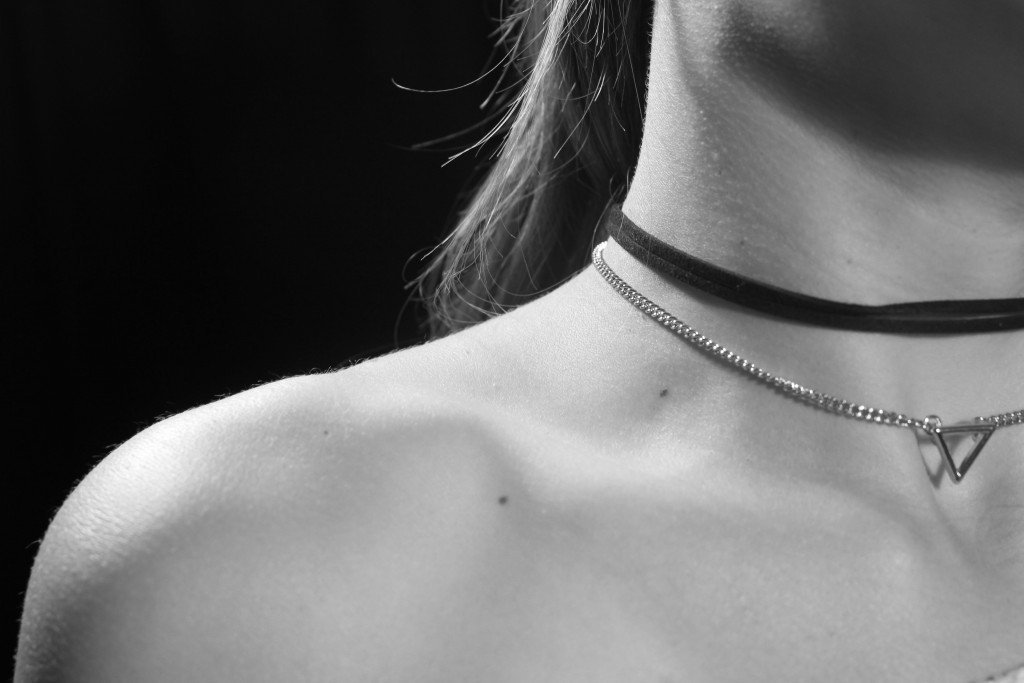
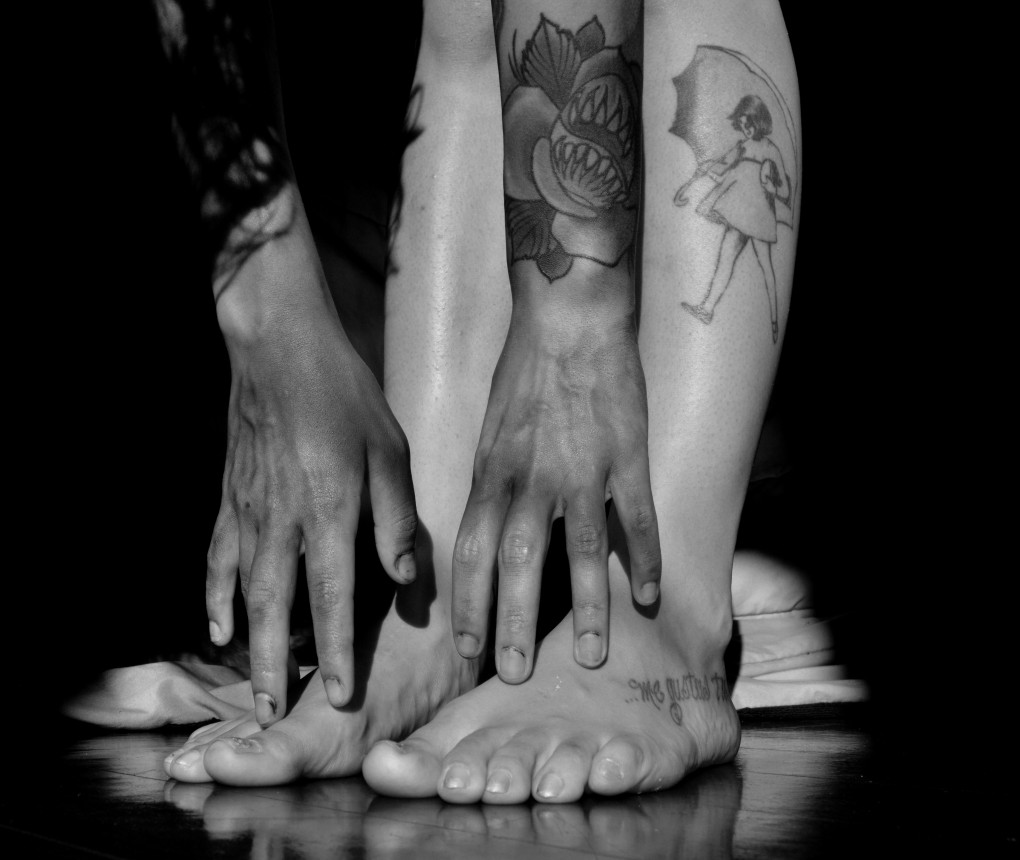
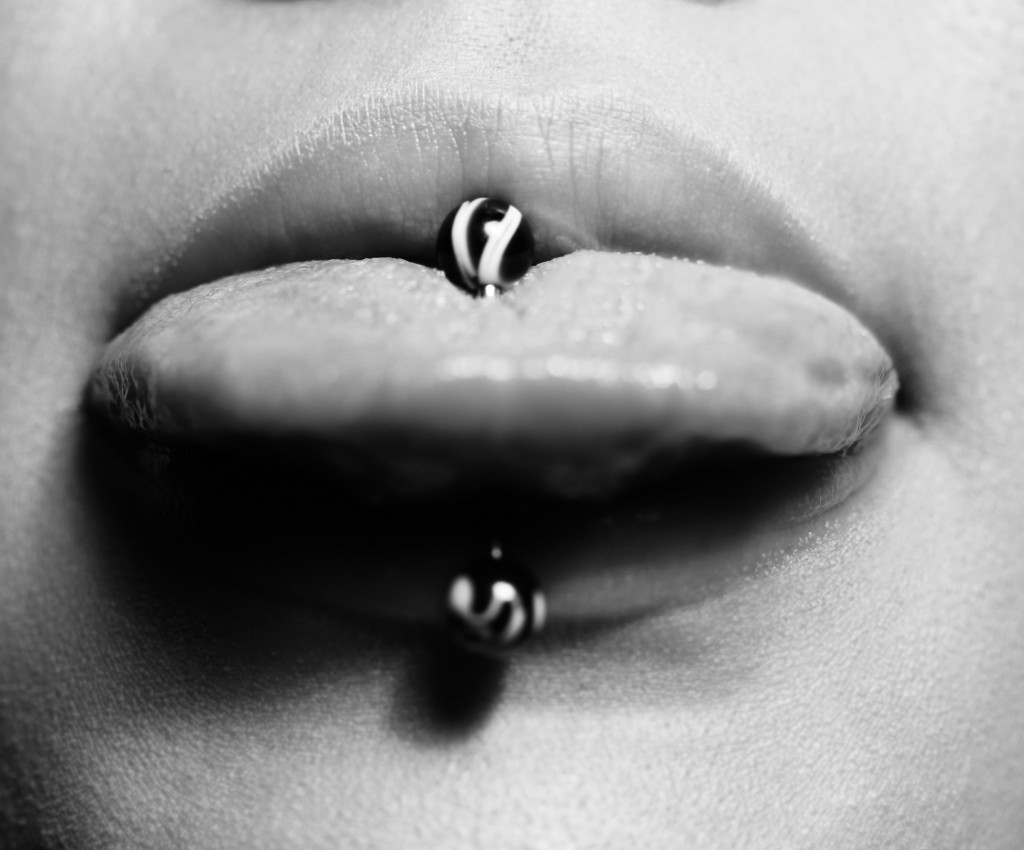
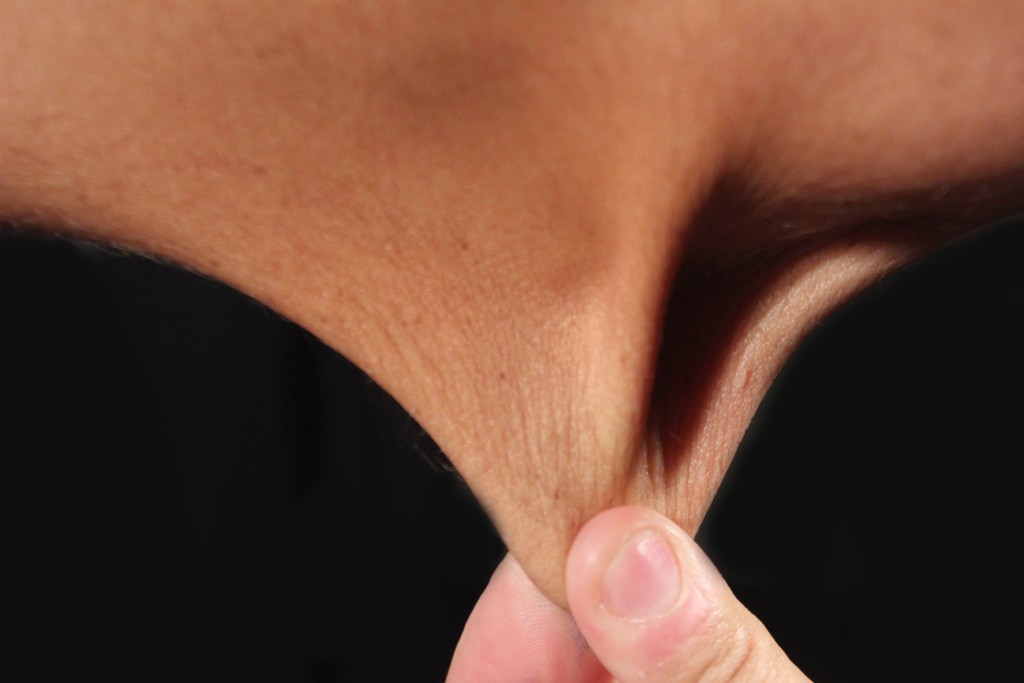
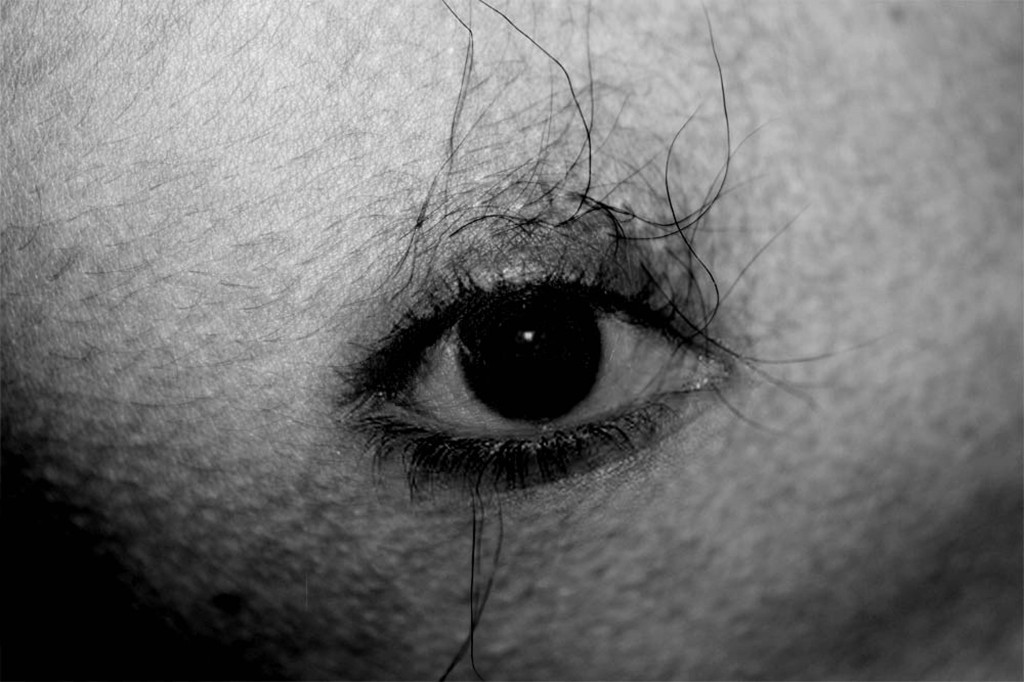
2. SHOOT LIKE AARON SISKIND
Research the work of Aaron Siskind, an American photographer who shot abstract black and white images, which focus on nature, architecture and human form.
Take some photos in the style of Aaron Siskind, and edit them with good density and contrast with your favorite editing app.
In the caption section of your image, write the name of the app(s) you used to edit your work
Post 2-3 black and white images on your blog, and under your photos, post a photo by Aaron Siskind and write three complete sentences describing his work and your opinion of his work.
3. CANDID MOMENTS/PHOTOJOURNALISM
(3-5 Photos with captions for each)
*Research the meaning of photojournalism and think about telling a story with your photography. Make a blog post detailing the job description and equipment needed to be a photojournalist.
*Photograph candid moments and edit your photos with your favorite app. (Black and white is always a good choice for photojournalism.)
*In the caption section of each photo you post, write a caption including who, what, where and why.
For a critique, look at the work of photographer Henri Cartier Bresson , who always captured the “decisive moment”. On your blog post 2-3 of his photographs and write 10 sentences about his work and your opinion of his timing, composition and ability to capture the perfect moment. Student Samples below:


4. CAREERS
Make a blog post and list at least 10 different fields of photography and areas where photographers can make a living. Research the average pay for each. Then, reflect on which field you could see yourself working in someday. It is more than ok if you really do not want to work in the field, or if you would do photography work on a part time basis. If you are interested in pursuing another field, how could you incorporate photography into your potential career choice. What is your future career choice?
______________________________________
Photographer Research Project: Due Monday Nov 23
You will research, produce and present a PowerPoint Slide Show about a famous, professional or influential photographer of your choice. The project is to have 20 slides and include the information below, and at least 10 photographs. You can choose from the enclosed list or pick a significant photographer of your choice. Questions to answer when doing photographer research project are below. You will be presenting your photographer to the class, so you can do the project by yourself, with a partner, or a team of three. Share your Photographer Powerpoint with me via Onedrive, or email by Monday, November 23.
- What is the photographer’s real name and year he or she was born? Is he/she still alive?
- What is their style of photography (ex: photojournalism, editorial, documentary, advertising, portraits, magazine, sports, war)?
- Are there any special photography techniques this photographer uses in his/her work? (Think about composition, depth of field, history…)
- Who does the photographer work for?
- What type of cameras and lens does this photographer work with, and why?
- What type of lighting does this photographer primarily use and why?
- Who are some of your photographer’s early influences?
- Are there any interesting stories about this photographer or his/her work?
- What do you like (or not like) about their work, and why did you select this photographer?
* Link to famous and hot new photographers in the General Channel post feed in Teams
Robert Mapplethorpe – flowers, portraits, nudes * Annie Leibovitz – celebrity portraits * Danny Clinch – musicians * Edward Weston – black and white nudes,landscapes Ansel Adams – black and white landscape * Cindy Sherman – self portraits * Diane Arbus – strange and different portraits * David Lachappelle – unique celebrity portraits * Imogen Cunningham – black and white * Eliot Porter – color landscape Alfred Eisenstadt – candid photojournalism * Linda McCartney – musicians in the 60’s *Herb Ritts – celebrity portraits * Henry Cartier- Bresson -candid street, the decisive moment *Andy Warhol – bizarre pop art *Robert Frank -street *Mary *Paul Strand – black and white *Lewis Hind – child labor *James Nachtwey – war * Irving Penn – fashion, still lifes * Richard Avedon – portrait *Weegee – street photojournalism *Mark Seliger – celebrity portraits * Jerry Uelsmann – photo montage * Dorothea Lange – documentary *Anne Geddes – children *Kim Anderson – children *Nigel Barker- Fashion *William Wegman – dogs *Man Ray – rayograms, fashion, portraits in the 20 *Arnold Newman – environmental portraits * Steve McCurry – National Geographic portraits * Danny Lyon – street and documentary *Brad Mangin – sports *Neil Leifer – sports
____________________________________________
NEW ASSIGNMENTS DUE WED, NOV 18 @ 3:10:
1. TRIPTYCH: BODY PARTS
Create a triptych image, putting three photos together using Photopea.
Take photos of different parts of a subject with the Lightroom Mobil camera, and then edit them individually with Lightroom Mobil editing feature.
Export to your camera roll and save on your Onedrive to use Photopea on your laptop computer to make the triptych image.
Make a 25 x 8 in with 200 resolution document and put your three images together in a layout of your choosing. Extend the canvas size if you need more room.
Decide if you want a border or stroke, or a simple white/black background for your triptych.
Post to your blog. Include a triptych from online which caught your attention and write three sentences explaining what you like about the composition.
2. COLLAGE: WHAT IS YOUR COLOR
Create a Photopea Collage 12×9 or 9×12, 200 resolution, representing the color of your personality.
Include a photo of yourself, the color you select and some writing about why this is YOUR color. Also add a tint of your color.
Post to blog.


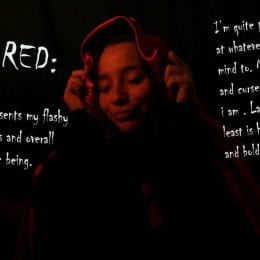


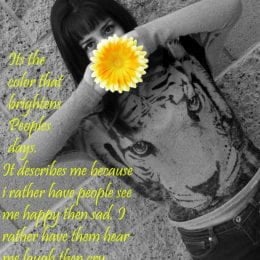
3. HISTORY OF PHOTOGRAPHY TIMELINE
Go through the Powerpoint on the history of photography, and then research online to find more information. Use this timeline template to list what you think are the 12 most important inventions and events in the history of photography, in chronological order. Copy the template to your digital photo folder and open it in Photopea. Use the text tool to fill in the boxes with important inventions in photography. Post the template to your blog in a post titled: History of Photography Timeline. Under the template list 3-5 events and/or inventions in photography which impressed you the most, and has the most impact on your life today. (2-3 paragraphs)
___________________________________________
4 ASSIGNMENTS DUE TUESDAY NOVEMBER 10 @ 3:10
1. BIRDS EYE / BUGS EYE DIPTYCH
Take two photos of the same object from two different camera angles, birds eye (from above) and bugs eye (from below). Edit your photos with Lightroom Mobil or Snapseed and then save them to your one drive to open in Photopea on your laptop. Create a new document 16×8 with 200 resolution. Transform your 2 images to fit within your new document, and create a diptych image. You could add a background and a stroke around each photograph. Save your finished work as a jpeg and post to your blog. As a writing critique for this assignment create a list of 25 words to describe yourself. Samples below:


2. METICULOUS PHOTOGRAPHY
Meticulous means to show great attention to detail, very careful and precise. For this assignment you will meticulously arrange everyday objects that can be found around your home.
First, look at the photography work of Emily Blincoe. http://www.emilyblincoe.com/arrangements
Select your favorite work by her and put it on your blog with a short explanation why this image caught your eye.
Search you home for a variety of objects and items that can be used to create your meticulous arrangement.
Find a simple suitable background for your shot. This could be a plain pillow case, large piece of paper, or anything large enough with no pattern. Set up your arrangement and be meticulous and pay attention to details. Make sure you are in adequate lighting, and please remember how important good lighting is in photography.
Take a few photographs from above, looking straight down at your arrangement. Go in as close as you can. Make sure your image is tack sharp! Never rely on just taking one shot.
Edit your favorite photograph with Lightroom Mobil and then post to your blog.
Meticulous arrangement of objects, which are then photographed have been used in advertising and commercial photography for years.
3. DOUBLE EXPOSURES
Double exposure photography is a technique that layers two different exposures on a single image, combining two photographs into one. Double exposure creates a surreal feeling for your photos and the two photographs can work together to convey deep meaning or symbolism.
A double exposure was an analogue technique, used to superimpose two or more images together in an enlarger in the darkroom. Thanks to today’s photo editing technology, you can create a double exposure in post processing. The blending of two worlds into a single image is almost magical.
For this assignment you will create at least 2 double exposed images using the Snapseed app on your phone.
Look at these two tutorials before you begin to create your double exposures.
https://www.youtube.com/watch?v=wayf853hRgk
https://www.guidingtech.com/double-exposure-snapseed/
Post your double exposures to your blog, and list 10 words you would use to describe your images.
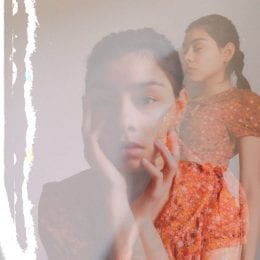
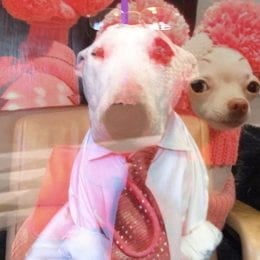


4. 100 MOST INFLUENTIAL PHOTOS OF ALL TIME
Read this link and on your blog pick 3 of the most influential photos to write about. Include the story behind the photo and what intrigues you about it. Make sure to post the three photos with your writing.
______________________________________________
ASSIGNMENTS DUE FRIDAY, OCTOBER 30 @ 3:10
1. CAPTURING ACTION AND MOTION
Read this online article about capturing action and motion photography and write two to three paragraphs stating what you learned about action and motion photography techniques.
http://digital-photography-school.com/how-to-capture-motion-blur-in-photography/
-Take photos outside that capture ACTION SHARP. Try to “capture the moment”. Shoot with your cellphone through the LIGHTROOM MOBIL app. Make sure your shutter speed is above 125th of a second. ISO 400. Take several photos and post your favorite 2 action shots, edited in Lightroom Mobil.
-Take photos inside trying to capture MOTION BLUR. Try to “capture the moment”. Shoot with your cellphone through the LIGHTROOM MOBIL app. Make sure your shutter speed is below a 60th of a second. ISO 400. Take several photos and post your favorite 2 motion blur shots, edited in Lightroom mobil. Use a tripod, or put your camera on something steady to make sure stationary objects are not blurred. Take several photos and post your favorite 2 shots, edited in Lightroom Mobil
-Include technical info on all photos: Aperture, Shutter Speed and ISO
-Find 2 photos online, one showing action sharp and another showing motion blur. Guess what shutter speeds, f stops, and lens were used. Post as critique. Samples below:


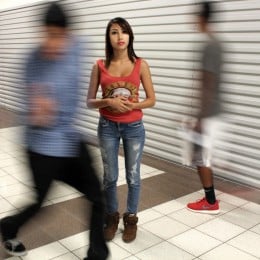


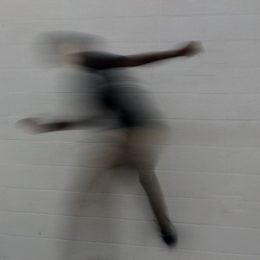

2. DIGITAL COLLAGE: ALL ABOUT ME
-Gather imagery online that represents at least five things about yourself.
-In Photopea, make an 8×10 or 10×8 @150 resolution document and title it All About Me Collage
-Select elements from the Internet images to move into your collage.
-After you get a good selection with the magic wand or magnetic lasso, remember to go in Mask and refine your selection. If you want soft edges you will go to select>modify>feather.
-Think about rules of good composition when designing your layout of elements and background
-Move layers around from the layer palette, if you want to change what is on top of another element.
-Use blend modes to blend layers. Use the move tool and press shift and + on the keyboard to scroll through blend modes.
-Add a layer style to each of the elements you include in your collage. Get layer styles from the eff icon at the bottom of your layer palette.
-Save your work as a psd until you are completely done with it, and then save as a jpeg to post to your blog.
-Write a three paragraph reflection about what how your collage visually represents you. Post under your work in your blog.
___________________________________________
ASSIGNMENTS DUE FRIDAY, OCTOBER 16 @ 3:10
1. SURREALISM
After practicing with Kim on the mountain, make your own surrealist piece by putting someone or something where they don’t belong. Make a 10×8 or 8×10 150 resolution (dpi) document in Photopea and bring in Internet images for this assignment. Practice selecting, masking and refining your selections. Post to your blog, and make up a name for you work to include in the title of the post.
Look at the work of surrealist artists Salvador Dali, Rene Magritte, and Jerry Uelsman and explore other surrealist artists and photographers online. Include a work by a surrealist artist who inspires you in your blog post, and write a 100 word reflection, critiquing their work, and what you think they are trying to convey to the viewer.


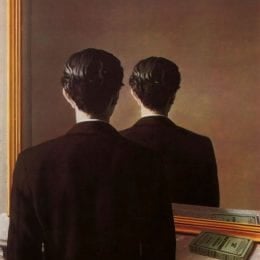
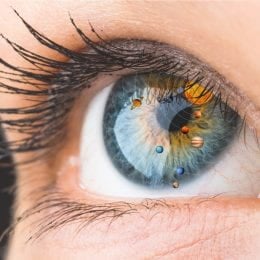


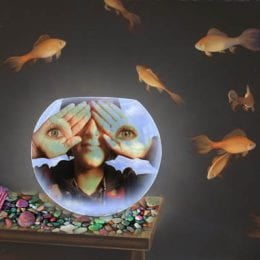

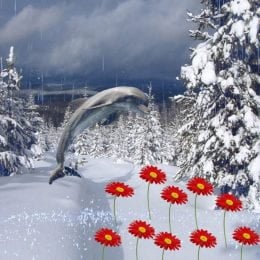
2. FRAMING A SUBJECT
-Take at least 3 different photographs using framing in the composition. Post 2-3 of your photographs, EDITED with Photopea.
-Critique your own photographs you posted and answer these questions
- Do I have a strong composition?
- How well did I edit my photographs?
- What would I do differently if I shot this assignment again?
- Do you think your photographs belong on the blog home page and should be considered one of the best from all the photo classes?
3. FILE FORMATS
https://digital-photography-school.com/understanding-all-the-different-image-file-formats/
Read all about digital file formats. On your blog list each file format and one sentence about each which describes how it saves the file and what makes it different from the other file formats.
________________________________________
Assignments Due Thursday, Oct 8
1. *MANDALAS*
Create 2 unique mandalas using the online editor, Photopea https://www.photopea.com/ using the shape tool and Internet imagery.
Make a new document 8×8 100 res and create each mandala, thinking about composition and symmetry.
Draw a circle with the shape tool and put a stroke around it. It will appear on the layer pallet as its own layer. If you want to add a color or gradient to it, do that when you make the circle.
Use the shape tool to put in shapes.
Make sure to fill each layer with a color or gradient.
Copy a shape by pressing alt with move tool.
To combine shapes into one layer, make any layer you do not want merged to be invisible, and then go to layer>merge visible.
To flip a layer, go to Edit>transform>transform either vertical or horizontal, or use a keyboard shortcut (control+alt+T) with the move tool.
When you save each mandala, save as a .psd if you still are working on it and want to save the layers. (ONLY IF YOU HAVE PHOTOSHOP. IF NOT A .PSD WILL NOT OPEN) Save as a .png and make the bottom layer invisible if you just want to post the circle. Save as a .jpeg if you want the 8×8 square around the circle.
Make 2 mandalas and post both to your blog.
2. *OUTDOOR NATURAL LIGHT PORTRAITS*
Read these links and make a blog post list 5 tips you learned about how to photograph great portraits. https://digital-photography-school.com/13-tips-for-improving-outdoor-portraits/
https://posterjack.ca/blogs/inspiration/top-10-portrait-photography-composition-tips
Photograph a person outside in nice soft lighting. Try to avoid having the background brighter than the subject. This will throw the camera meter off, and the background will be better exposed than the subject. You will need to do some editing to have the subject not be dark.
Take 5 photos of this person and consider what you want your depth of field to be. Utilize camera angles and different perspectives.
Edit your photos using Photopea. https://www.photopea.com/
Include the technical info under the caption section of each photo. You can find that in Photopea. Go to File>File Info to get the aperture, shutter speed, ISO and Lens Focal Length.
Post 2-3 portrait photos to your blog with the technical info in the caption section of each photo, and title the post with the name of the person you photographed.


3. *CAMERA MODES*
http://digital-photography-school.com/digital-camera-modes
Read through this link on camera modes. On your blog make a new post titled “Camera Modes”. List each camera mode and write 2 sentences about what each camera mode does.
_________________________________________
ASSIGNMENTS DUE WEDNESDAY, SEPTEMBER 30 @2:10
1. READ AND WRITE : LENSES
Read this article about lenses and on your blog list 20 important facts you learned about camera lenses. http://digital-photography-school.com/choosing-lenses-when-to-use-which-lens-and-why/
2. ALTERNATIVE CAMERA ANGLES
-Go outside in brighter light and take 4 photographs of the same subject from 4 different camera angles- strait on, from above, from below, and then tilt the camera at any of the other 3 angles.
-Edit your photos with Snapseed’s tune image feature, and add any filtration you desire to achieve the results that satisfy your own visual aesthetic. Import one of the four photos into ProCam to access the technical information aperture, shutter speed, and ISO, and add to the caption section of the last of the 4 photos you post. Post all 4 photos (as a gallery or individually) in one blog post and title the post “Alternative Camera Angles”.
-Find one photo online which shows an interesting camera angle. Post it to your blog and write a critique explaining why you think this is such a successful photograph- compositionally and technically, and why you chose it. Include the photographers name in the caption section of this photo, or the link to where you got the image from.


3. CONCEPTUAL SELF PORTRAIT
Take a photograph which represents something important about yourself, without showing your face in the photograph. Edit your photos with Snapseed’s tune image feature, and add any filtration you desire to achieve the results that satisfy your own visual aesthetic. In the caption section when you post include the technical info aperture, shutter speed and ISO for your photo (import your photo to ProCam for the info)
Write a reflection (300-500 words), defining the word “conceptual” and then explain how this photograph conceptually and visually represents something about you and what you are attempting to share about yourself with the viewer.
Also, research the work of photographer Cindy Sherman. Post your favorite photo of hers on your blog and write 5 sentences explaining your opinion of her work and style and her ability to become famous from her self portrait photography series work. Student samples below:
_________________________________________
DEPTH OF FIELD / Due Wednesday, September 23 @ 2:10
-Read these two links and write two paragraphs explaining in your own words what depth of field is in photography and the ways to control depth of field when shooting. Call this blogpost: “Depth of Field Explained”.
http://www.macworld.com/article/1150150/depthoffield.html
– Then go outside and take two photographs of the same subject, trying to get two different depth of fields, shallow and good.
– Remember the three things which control depth of field are the length of the lens, how wide the aperture is and how close or far you are to the subject.
– Using your cellphone, and photographing using the ProCam app on auto mode you can control depth of field by contolling how far you are from the subject (close for shallow, farther away for good D of F. Unfortunately we cannot control the length of the lens and the aperture with the cell phone.
– Use the Lens Blur feature in Snapseed to enhance the depth of field in each photo. (background blurry for shallow d of f, background sharp for good d of f.)
– Edit your photos in Snapseed for your own visual aesthetic.
– Post your two photo to your blog and title the post “Depth of Field”
– Include the technical info in the caption section of each ( ISO, Shutter speed, Aperture)
– For the critique for this assignment you are to find two photos online- one which shows a good depth of field and one which shows a shallow depth of field. In the caption section when you post them guess at what you think the aperture, shutter speed and lens mm was for each photo.


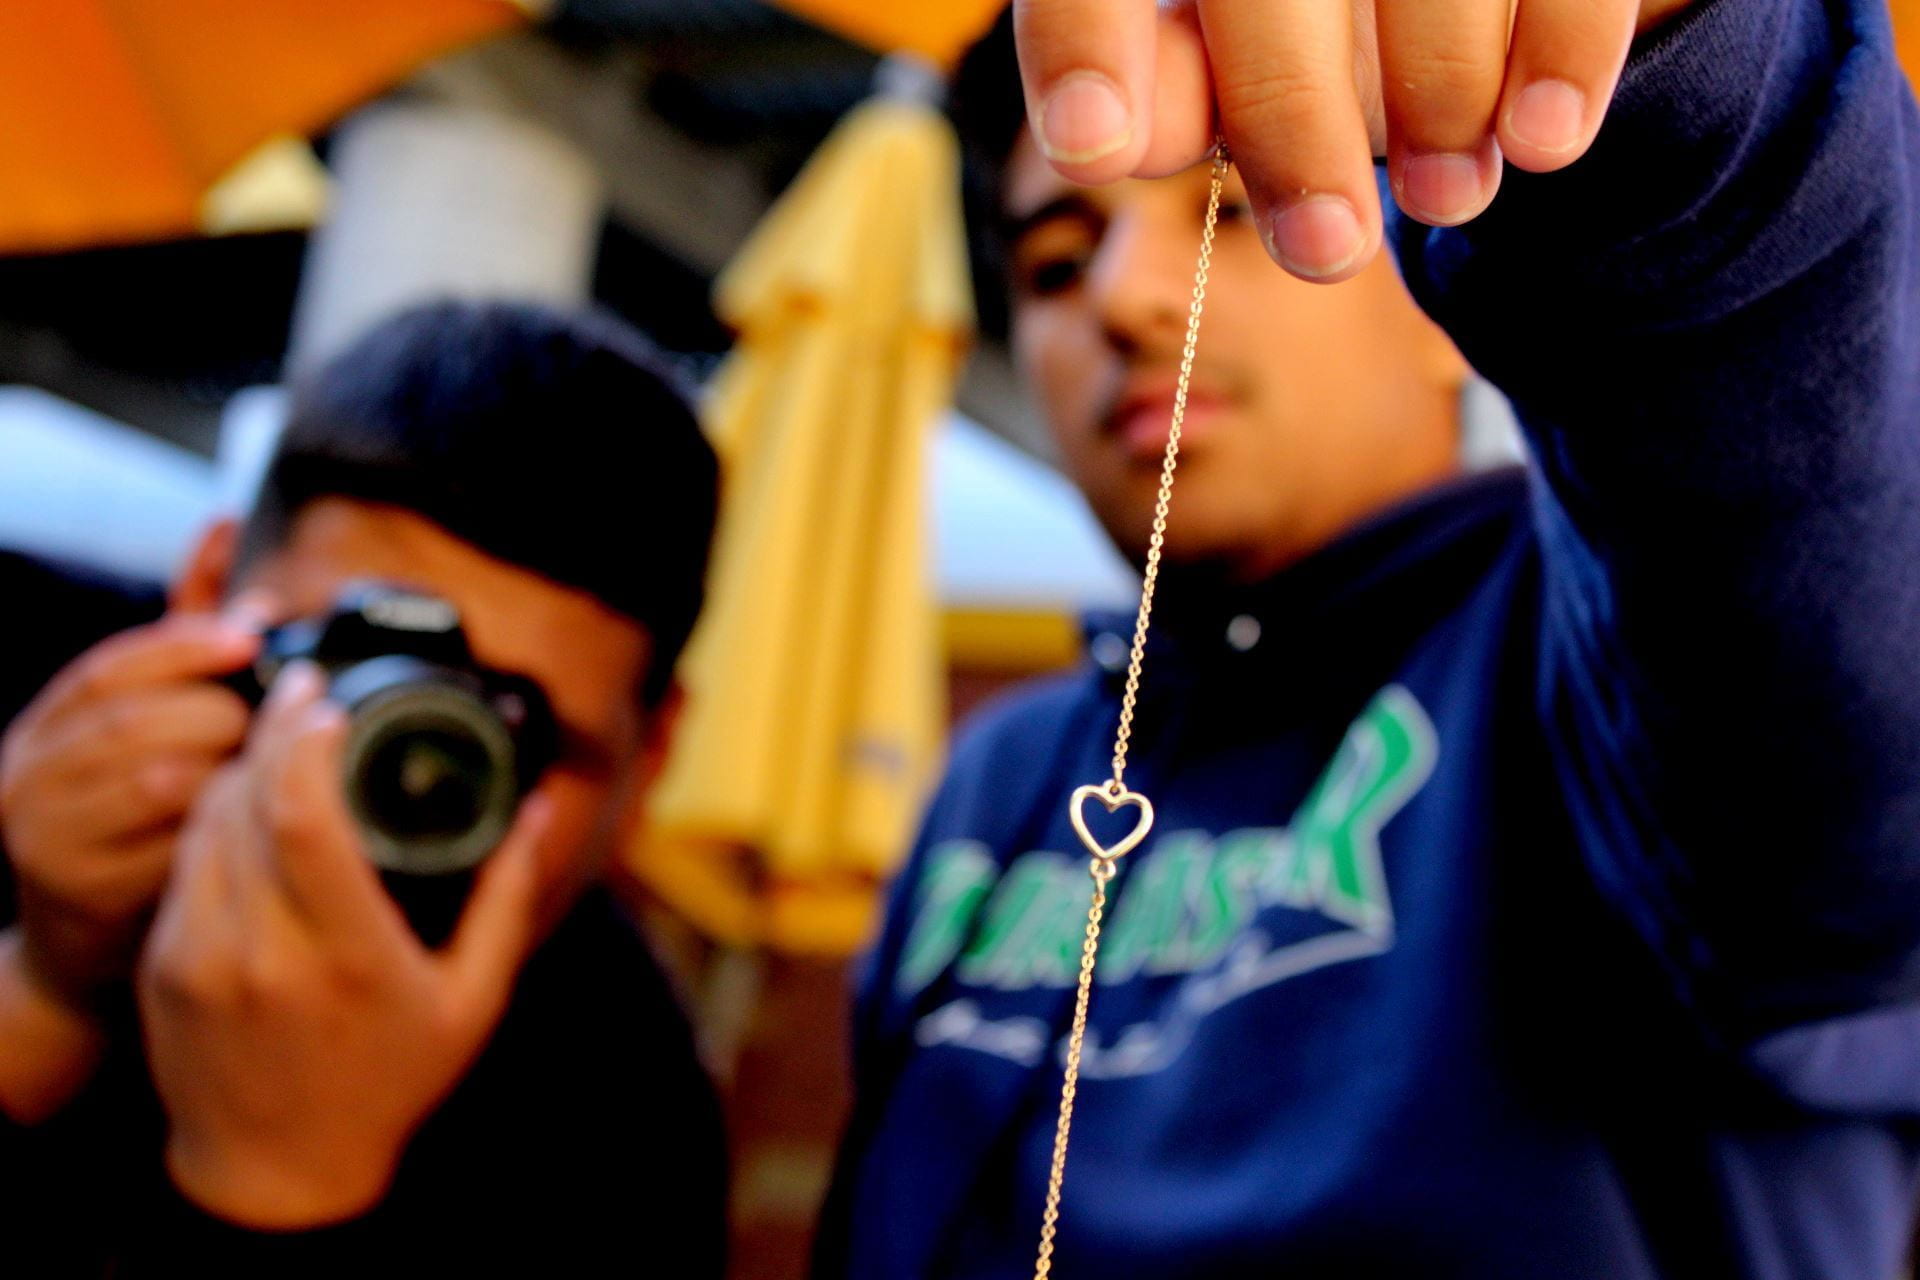
*ASSIGNMENTS DUE WEDNESDAY, SEPTEMBER 16*
1. FIRST PHOTO SHOOT: TEXTURE
Take five photos which you think shows good texture.
Take the photos with your cell phone through the ProCam app (free on either Android or Apple).
Try adjusting your ISO and see how your shutter speed changes.
After you take the photo, you will have access to the technical information, aperture, shutter speed, and ISO. When you post the photos include the technical information in the caption section of the photo.
Think about getting good composition and lighting.
Edit your photos with Snapseed’s Tune Image features. Adjust highlights, shadows, contrast, saturation, brightness, warmth and exposure as necessary.
Post 3 of your photos to your blog. INCLUDE THE TECHNICAL INFORMATION (for each photo): aperture, shutter speed, and ISO. Put that info in the caption section of each photo.
Find one photo online which shows amazing texture. Write a two paragraph critique explaining why you think this is such a successful photograph and why you chose it. Be sure to use academic language, proper grammar and sentence structure.
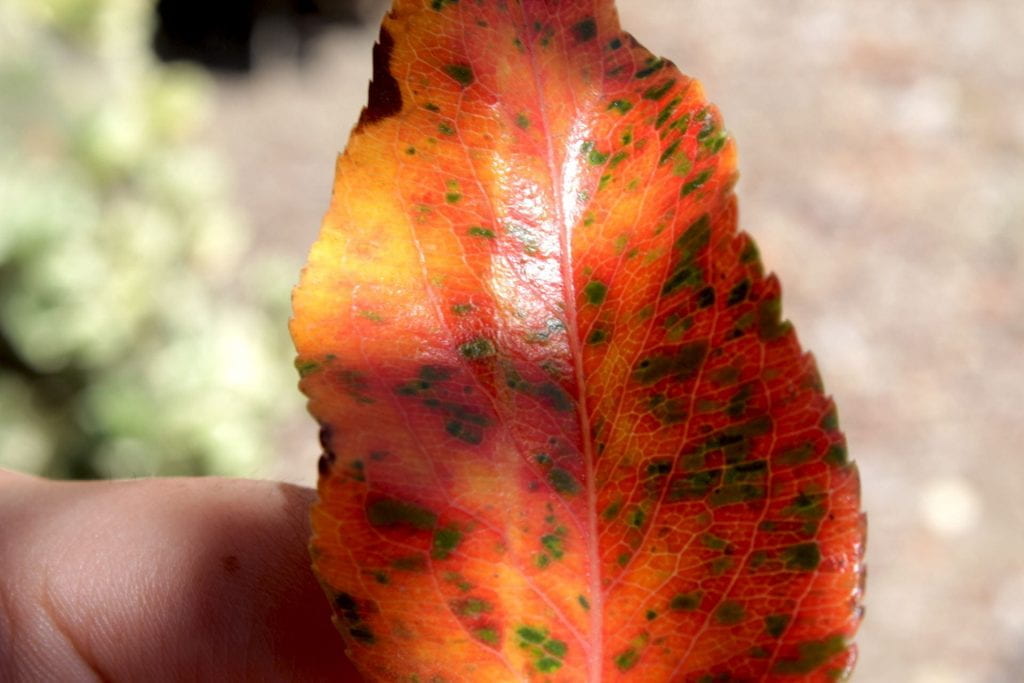

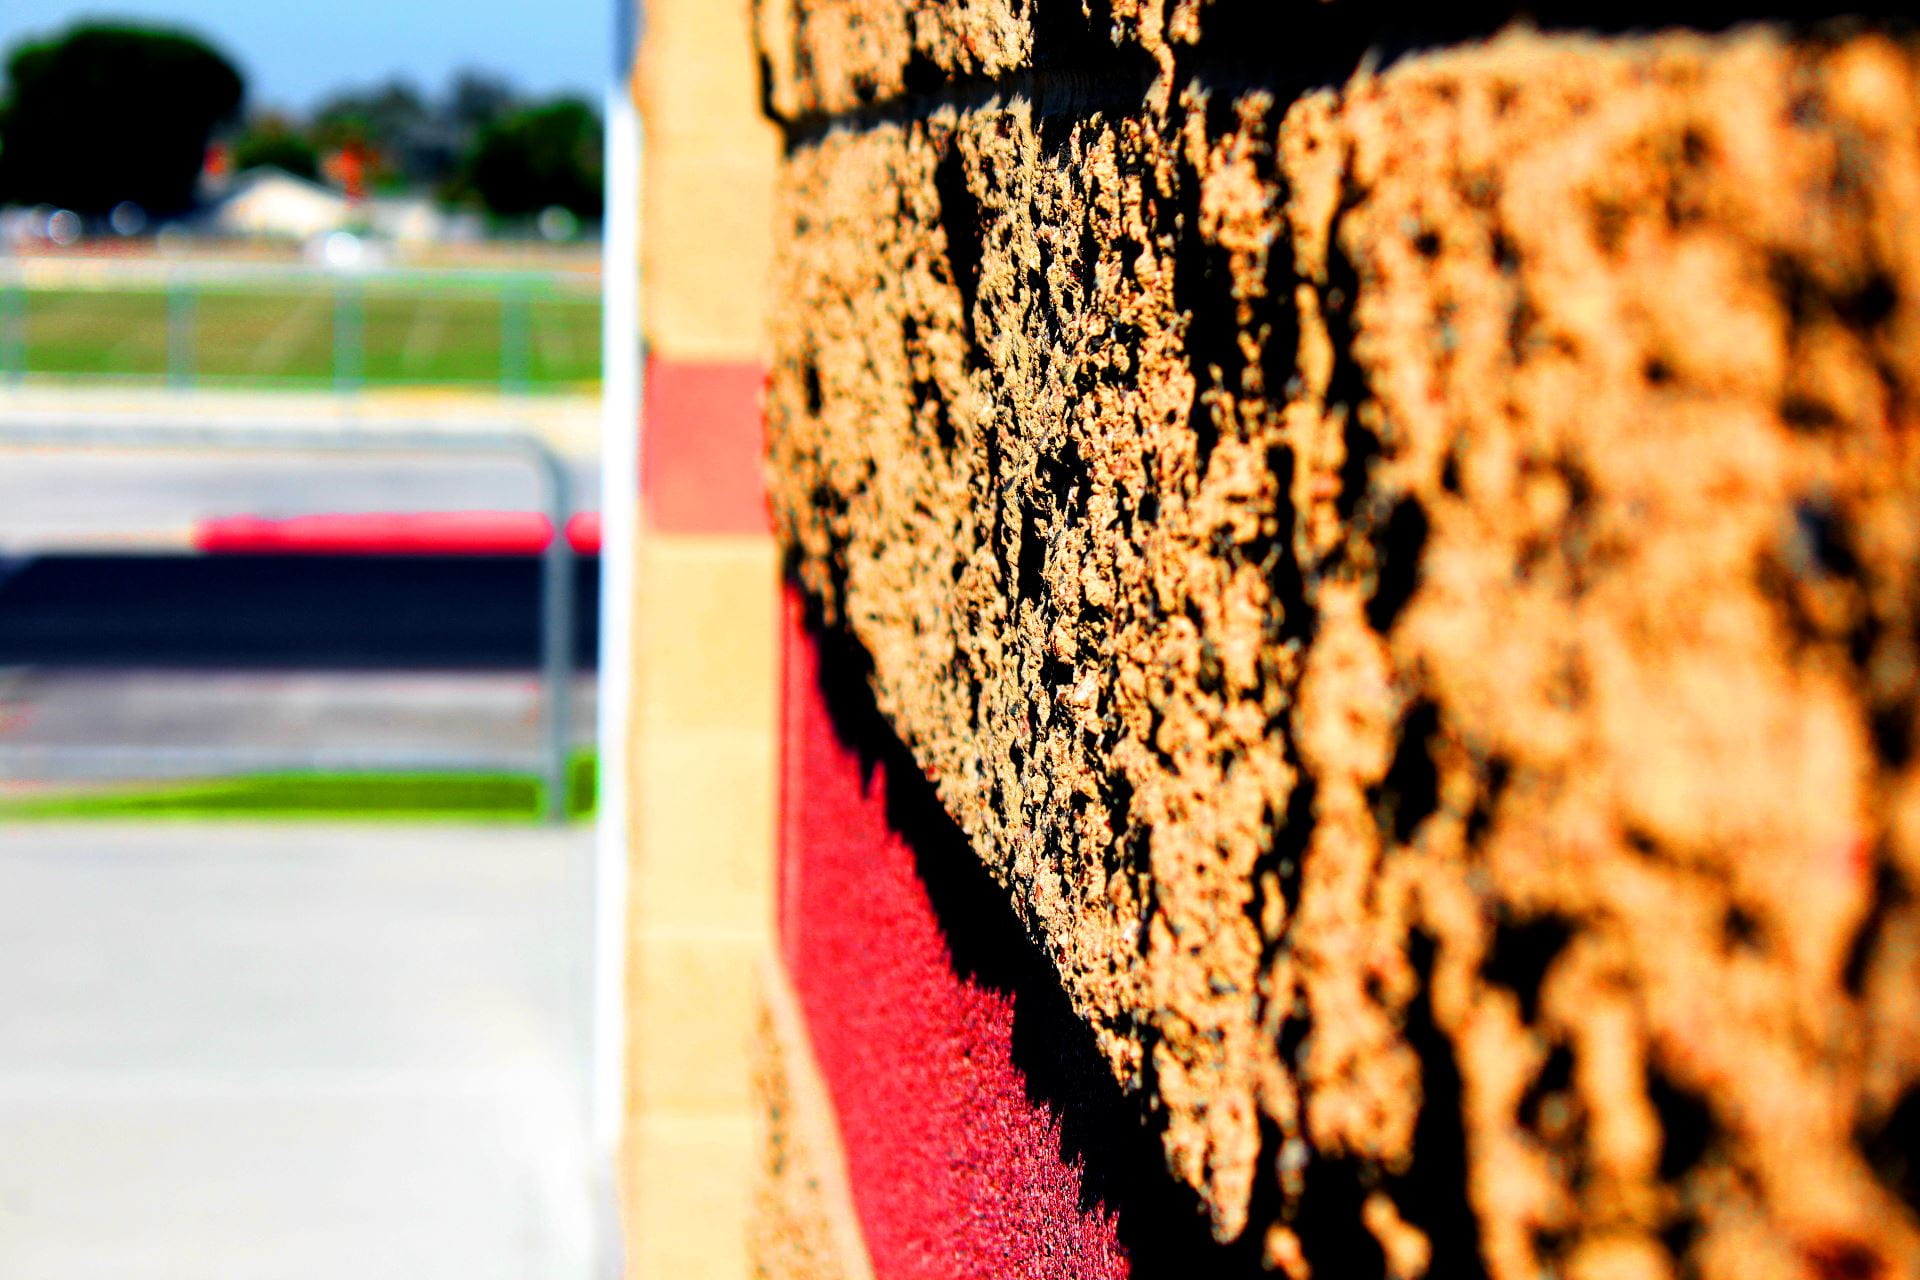

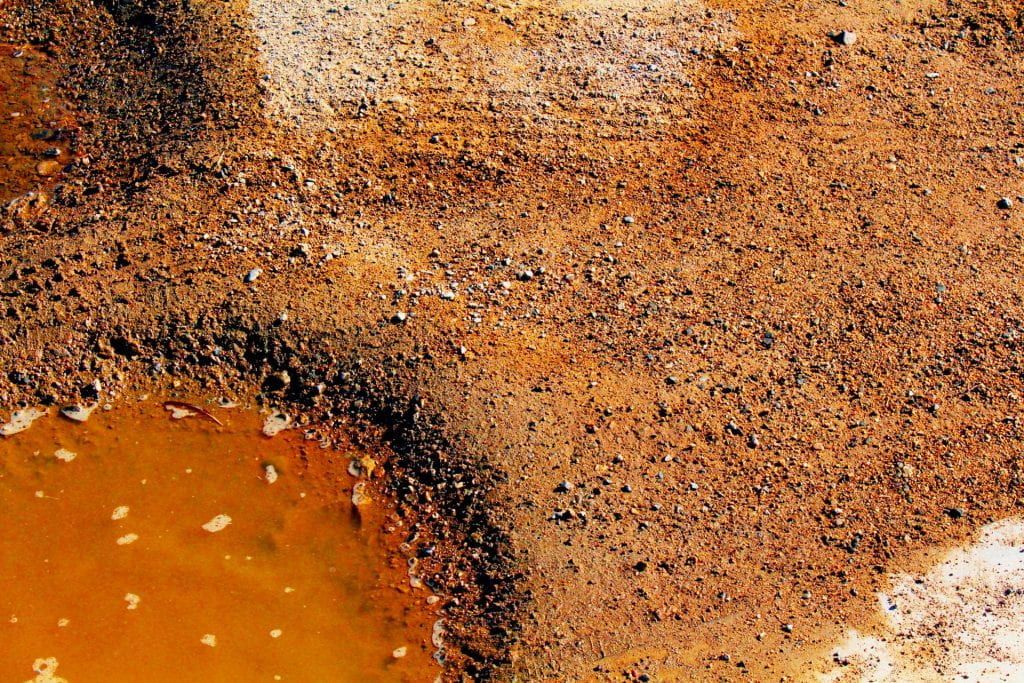

2. SHADOWS AND LIGHT
-Photograph 3 photos which show strong shadow and light using the procam app. Think about contrast in the composition.
-Edit your shadow photos with Snapseed for excellent contrast.
-Include a border by going into the snapseed frame options.
-Include the technical info with each photo: F-stop, Shutter Speed, ISO
-Pick a photo from the Internet showing shadows and include in blog post.
-Write 10 complete sentences describing the elements in the shadow photo you chose from the Internet and why you like it.
-Post your 3 photos, technical info, internet image and writing critique to your blog as a blog post. Please name your blogpost “Shadows and Light”


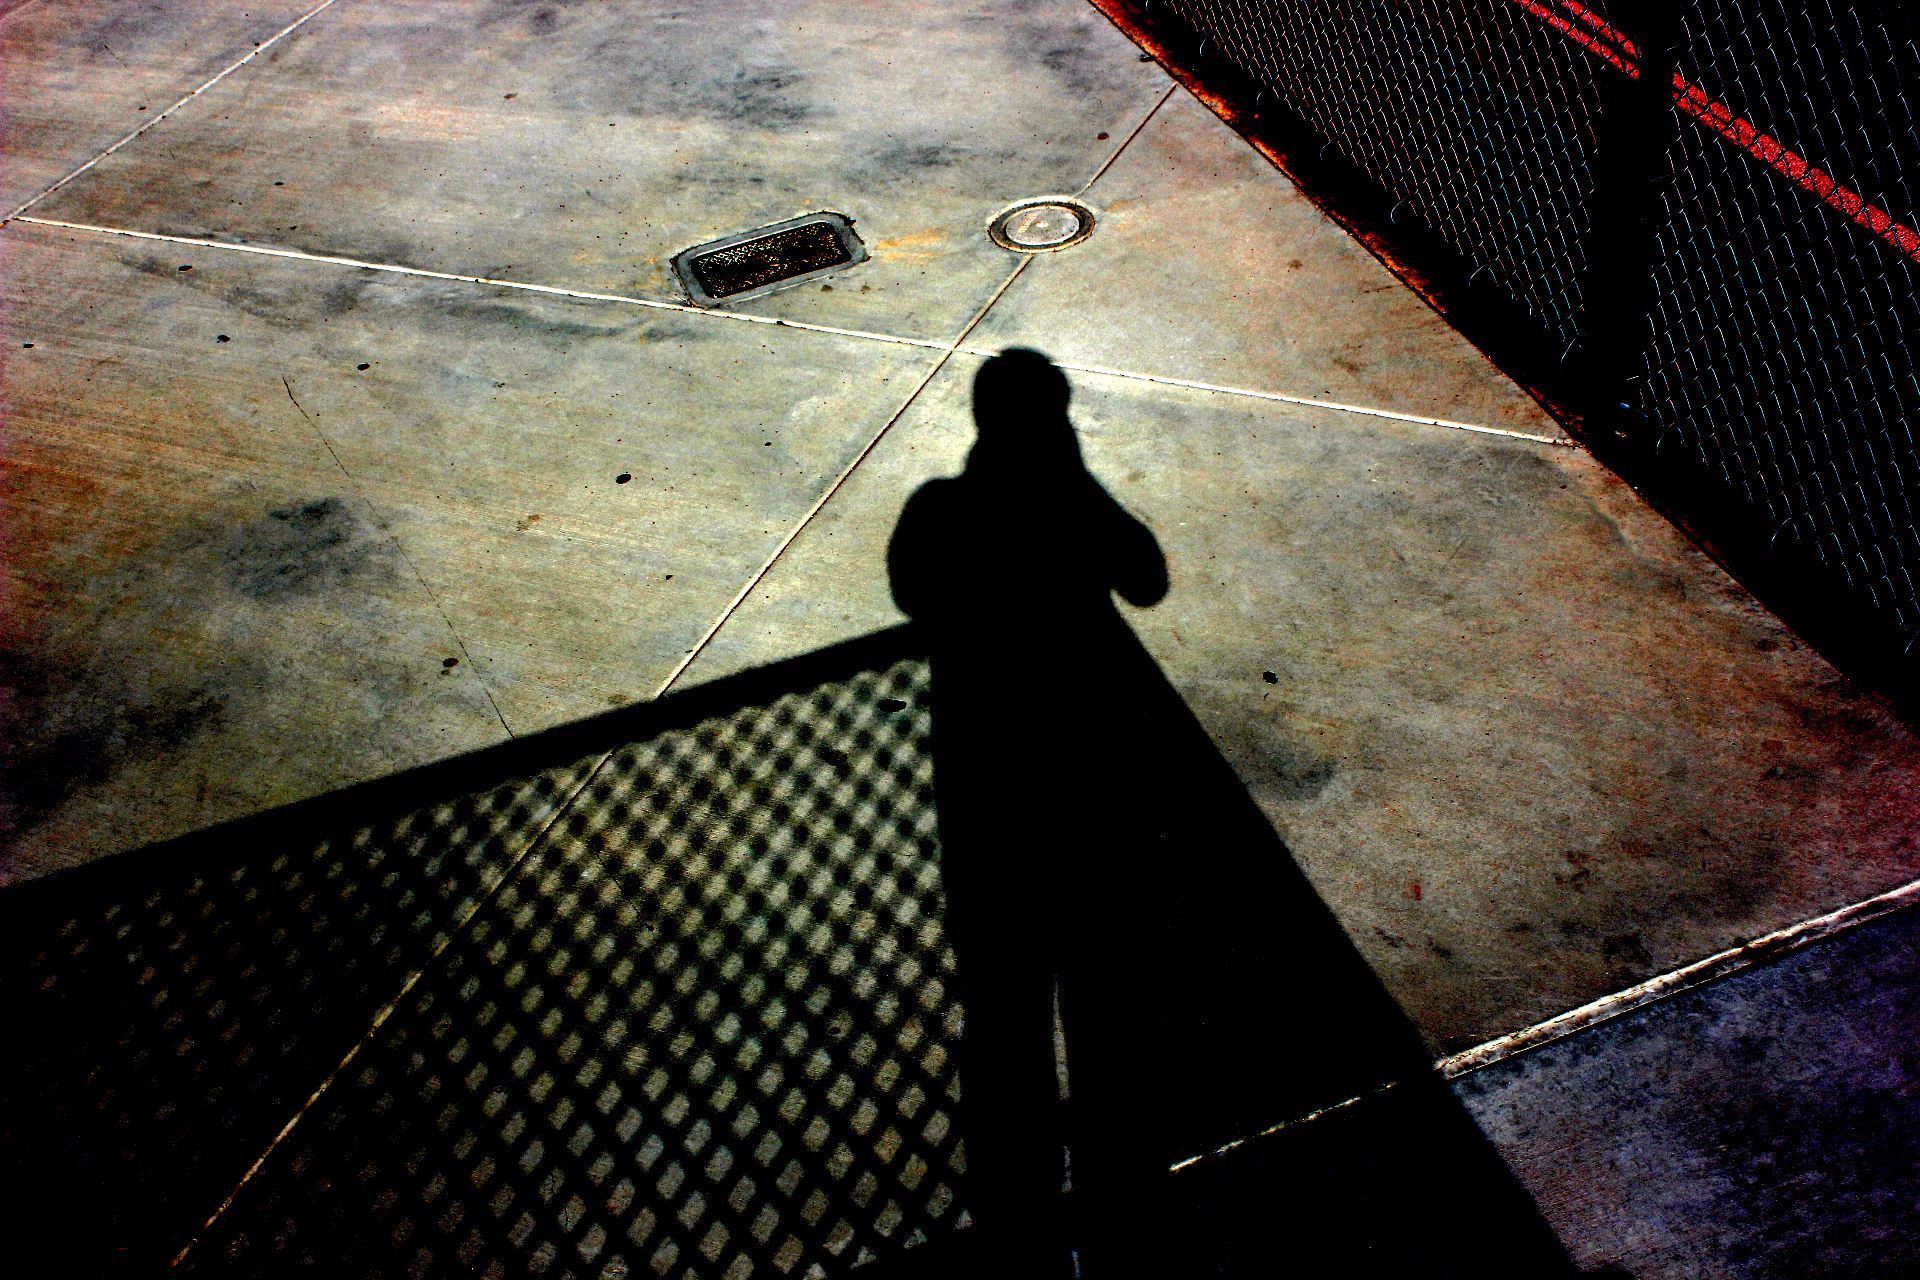
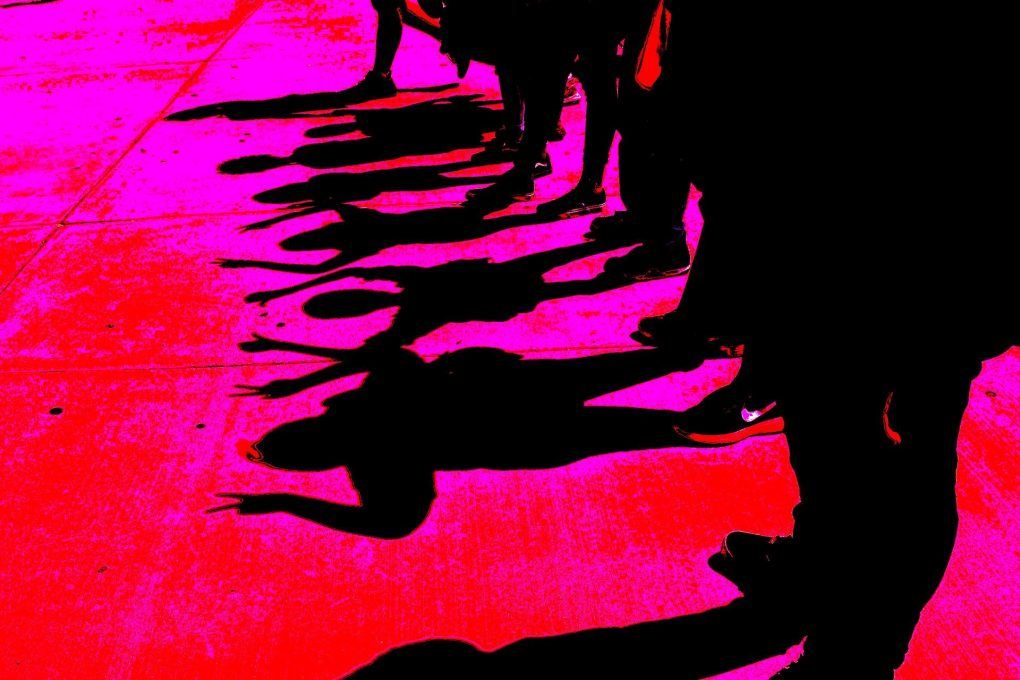
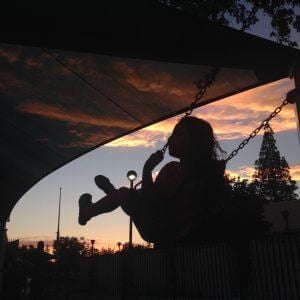

3. READ AND WRITE: WHAT EVERY BEGINNER NEEDS TO KNOW.
Read this link: https://www.photographytalk.com/photography-articles/5082-13-camera-settings-every-beginner-needs-to-know On your blog list the 13 setting every beginner should know and 1-2 sentences explaining what each one is.
4. FLIPGRID RESPONSE: TRAVEL DREAMS
Answer the question “Where would you like to go traveling to and why?” with a video response on Flipgrid. You will find the link to the flipgrid question in teams on the Flipgrid channel. Please respond to the question with a video response. Make sure to say your name in your video.
______________________________________
ASSIGNMENTS DUE FRIDAY, SEPTEMBER 4 (COMPLETED)
1. MAKE A BLOG
Create a blogsite with edublogs. https://edublogs.org/ Join the class blog, (cauchonphoto.edublogs.org), select a template, and design your site layout and design. Write an about me section as a Text Widget. Tell a little about yourself, 3-5 sentences. Add of photo of yourself with an Image Widget.
2. PHOTO FOUNDATION
Read the following link and write a 25 sentence synopsis on what you learned about aperture, shutter speed, ISO, and camera modes. As your first blogpost, copy and paste your sentences into a blogpost. DUE FRIDAY, SEPT 4
http://www.cambridgeincolour.com/tutorials/camera-exposure.htm
3. CAMERA SIMULATOR
Play around with the camera simulators and learn how to use the camera controls. http://www.canonoutsideofauto.ca/play/ On your blog make a blog post with 5 sentences telling me what you learned about camera controls. DUE, FRIDAY, SEPT 4
4. FLIPGRID RESPONSE:
Make a video to response to the question, What do you want to do for a career. https://flipgrid.com/cd4e47c2 DUE FRIDAY, SEPT 4
5. COMPOSITION
Read about what makes strong composition in a photograph and what catches the viewers eye. Composition Photos by Steve McCurry
Find 12 sample photos online which show good composition. Make a gallery of images in Edublogs. Post your gallery and write 12 complete sentences, (with capitals and periods), one sentence under each photo in the gallery before posting, to explain what element of composition each photo represents. DUE FRIDAY SEPT 4
______________________________________
______________________________________
____________________________________________________
2019-2020: The year Covid hit us
ASSIGNMENTS DUE THURSDAY MARCH 19:
1. PAINTING WITH LIGHT
-Go to a dark place to shoot for this assignment (back studio). Put the camera securely on a tripod and put your shutter speed at 20 to 30 sec (not 20th of a sec…but 20 full seconds). You must put the camera on self timer to avoid camera shake. Shoot on manual and try your fstop at 16 or 22, ISO at 100 or 200. -Pre focus on Manual focus mode, because the camera will not in autofocus! -Wave finger lights or pixel stick in front of the frame during the exposure and check out the results! -Post 1-6 painting with light photos you took and edited on your blog. Critique: Find an amazing painting with light photo on the Internet and write a paragraph about how you think the photographer achieved the result and why you think it is so eye catching.
2. PORTRAIT WITH MAKE UP
Take a beautiful portrait of someone, or use an existing portrait you took and apply make up to their face using Photoshop paint and brush tools. (Make sure the portrait is a head and shoulder shot.) Put makeup on 2 different portraits and post them to your blog. Read this link and watch the video about painting with brushes & make a blogpost explaining 5 important tips you learned from reading it.
https://helpx.adobe.com/photoshop/using/painting-tools.html
3. MY FAVORITE TEACHER
Photograph your favorite teacher with bounced external flash off camera with sync cord. Edit and post your best portrait and write a 3 paragraph reflection in academic language explaining why you like and admire this teacher. Give details, reasons and examples as to why you chose this teacher. Samples below:
_____________________________________________
Assignments Due Tuesday, March 10
1. ADVERTISING PHOTOGRAPHY
For this assignment you will create a photograph that would be used for advertising purposes. First you will research advertising photography on the Internet to generate ideas. Post 3 ads that you really like and write a sentence about why they catch your eye. Before you begin to create your advertisement, write a proposal by answering the following questions:
- Who is the client, or company you are representing?
- What is the product?
- Who is the target audience?
- Where would you expect to see this advertisement?
- What kind of lighting are you going to use to make this look professional?
- What props do you need?
Shoot the product and use of variety of compositions. Think about: lighting, composition, depth of field, product placement. Use Photoshop to tweak and enhance your photograph. Add necessary text and captions. Post your best advertising shot, EDITED, to your blog with the proposal. Samples below:
2. READ AND WRITE: FLASH BASICS
Read these online articles and on your blog write three paragraphs explaining the main points in the articles and at least five things you learned from reading it.
https://www.popphoto.com/gallery/21-tips-better-flash-photography
3. 3-5 ON LOCATION PORTRAITS OR STILL LIFES WITH BOUNCED FLASH
Use the Canon digital camera and an external bounced flash to photograph portraits/still lifes on location. Set your camera on Manual, Auto White Balance, ISO 400, F8 @ 60th of a second shutter speed. Photograph at least 10 portraits/still lifes and post your top 3-5 edited bounced flash images to your blog. Also include in the post 2 images of the same subject comparing direct vs. bounced flash.
As a writing critique answer the following questions on your blog in a separate post. Samples below:
1.When would you use external flash?
2.What does flash synchronization mean?
3.What does ETTL mean?
4.What will happen when you shoot faster than the camera sync speed?
5.Why do photographers bounce the flash and use a diffuser?
6.What is a slave?
7.What should you do if your image comes out too dark or too light?

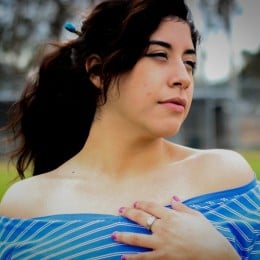


______________________________________________
Assignments Due Feb 19:
1. READ AND WRITE: INTRODUCTION TO USING STROBES
Read this entire article on beginning strobe use and then write a three paragraph reflection on your blog detailing what the article is about and the most important things you got out of reading it. https://photography.tutsplus.com/articles/a-fundamental-introduction-to-studio-lighting-equipment–photo-6067
2. STUDIO PORTRAITS WITH STROBES AND GELS
Photograph 25 portraits in the studio using the strobes and colored gels in the background. Edit your portraits in Lightroom and make cosmetic retouches in Photoshop. Post 9-12 final portraits on your blog. Writing critique: Find a portrait online that was shot with studio strobe lighting and write 20 sentences to describe the subject and their personality based on the photographers version of them. Evaluate the lighting used in the photograph and how you think the lights were arranged to get the results. Samples below:
3. WARHOL/POPART
-For your Pop Art assignment you should photograph an object, which is POPULAR IN THE CULTURE TODAY.
-Make 4 copies of the photo you chose, 4×6 or 6×4 (200 res) each, labeling them Warhol 1, Warhol 2 and so on
-Work on each picture separately, experimenting with filters, gradient maps, colors, patterns, and more….make sure there is contrast between the subject and the background!
-When you complete the 4 individual photos, merge the layers in each.
-Open a new document in Photoshop, 8×12 or 12×8 (200 res)
-Move the four individual photos into the new document.
-Save as a jpeg and post
Find a pop artist online & answer to the following questions. Include a work by the artist.
- What is Pop Art?
- Why is this artist’s work considered Pop Art?
- Describe some of this artists work.
- Why did you pick this artist and why do you like his/her work?


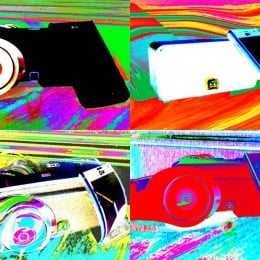


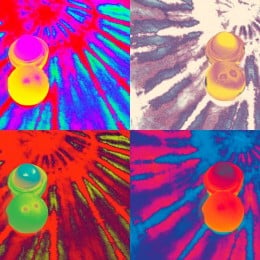
______________________________________________
Next assignments:
1. Candid Moments with Captions (3-5 Photos with captions for each)
Photograph candid moments and edit your images in Photoshop. In the caption section of each photo you post write a caption including who, what , where and why. include your technical info for each photo (MASIL) For a critique, look at the work of photographer Henri Cartier Bresson ,who captured the “decisive moment”. On your blog post 2-3 of his photographs and write 10 sentences about his work and your opinion of his timing, composition and ability to capture the perfect moment. Student Samples below:


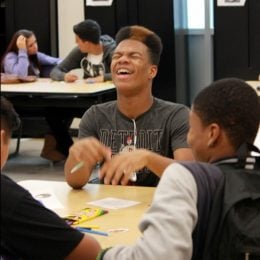


2. 50 Photos edited in Lightroom
Take 50 different photos of the same subject. Vary the lighting and composition of your photographs. Edit your photographs in Lightroom and post the BEST 12 to 15 photos to your blog as a gallery.
3. Emotion Diptych
Use hot lights or natural lighting to create a mood that matches an emotion you would like to convey. Do the same with an opposite or matching emotion to create a diptych. It can be as a set of portraits or any subject that you believe conveys the emotion that you have chosen. Create a 20×10- 300 res blank document. Size your 2 photos to fit within the space. Put a stroke around each of the photos in th diptych.
_____________________________________________
ASSIGNMENTS DUE WEDNESDAY, JANUARY 22
1. Photographer Research Project
You will research, produce and present a PowerPoint Slide Show about a professional and influential photographer of your choice. The project is to have 15-20 slides and include the information below, and at least 10 photographs. You can choose from the enclosed list or pick a significant photographer of your choice. Questions to answer when doing photographer research project are below. Email your presentation to caucrg@fusd.net or put in my flashdrive.
- What is the photographer’s real name and year he or she was born? Is he/she still alive?
- What is their style of photography (ex: photojournalism, editorial, documentary, advertising, portraits, magazine, sports, war)?
- Are there any special photography techniques this photographer uses in his/her work? (Think about composition, depth of field, history…)
- Who does the photographer work for?
- What type of cameras and lens does this photographer work with, and why?
- What type of lighting does this photographer primarily use and why?
- Who are some of your photographer’s early influences?
- Are there any interesting stories about this photographer or his/her work?
- What do you like (or not like) about their work, and why did you select this photographer?
Robert Mapplethorpe – flowers, portraits, nudes * Annie Leibovitz – celebrity portraits * Danny Clinch – musicians * Edward Weston – black and white nudes,landscapes Ansel Adams – black and white landscape * Cindy Sherman – self portraits * Diane Arbus – strange and different portraits * David Lachappelle – unique celebrity portraits * Imogen Cunningham – black and white * Eliot Porter – color landscape Alfred Eisenstadt – candid photojournalism * Linda McCartney – musicians in the 60’s *Herb Ritts – celebrity portraits * Henry Cartier- Bresson -candid street, the decisive moment *Andy Warhol – bizarre pop art *Robert Frank -street *Mary *Paul Strand – black and white *Lewis Hind – child labor *James Nachtwey – war * Irving Penn – fashion, still lifes * Richard Avedon – portrait *Weegee – street photojournalism *Mark Seliger – celebrity portraits * Jerry Uelsmann – photo montage * Dorothea Lange – documentary *Anne Geddes – children *Kim Anderson – children *Nigel Barker- Fashion *William Wegman – dogs *Man Ray – rayograms, fashion, portraits in the 20 *Arnold Newman – environmental portraits * Steve McCurry – National Geographic portraits * Danny Lyon – street and documentary *Brad Mangin – sports *Neil Leifer – sports
For more photographer choices check out Contemporary Photographers
2. BODY, SHAPE, FORM
Photograph a part of the body, or something, which shows shape and form. Think about getting great QUALITY OF LIGHT and make your composition a strong one. Post between 1-3 photos. Critique: List 10 hashtags for your photo(s)


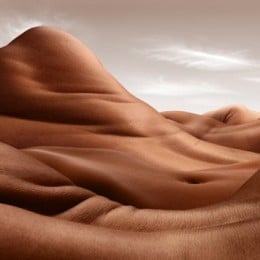


3. WHAT IS YOUR COLOR
Create a Photoshop Collage 12×9 or 9×12 300 resolution representing your favorite color. Include a photo of yourself, the color you select and some writing about why this is YOUR color. Perhaps add a tint of your color. Post to blog.
_____________________________________
Assignments due Dec 18
1. YOUR PORTFOLIO
Make your photography portfolio in Powerpoint or Prezi.
Have one photograph per slide.
Make sure your portfolio has between 10 and 12 images that you shot, edited and created.
You can include your digital art work, as well as traditional artwork, and also video.
Include a beginning slide with your name and an end slide with an inspirational quote.
You will present your portfolio to the class as part of your midterm.
______________________________________________
ASSIGNMENTS DUE FRIDAY NOVEMBER 22
1. STUDIO PORTRAITS
Use the studio backdrop (white or black) to photograph PORTRAITS of classmates. Use the tungsten “hot lights” to light the portraits Make sure to put your white balance on TUNGSTEN and shoot at ISO 400 or 800. Go right up to the subject and meter them on MANUAL. Take at least 12 photographs and edit them in PS. Post anywhere between 6 and 12 portraits as either a gallery or individually.. Include technical info: MASIL Critique: Find a studio portrait online and write a list of 25 words you would hashtag the photo if you posted it on Instagram. Include the photographers name if possible. In a separate blog post, answer these questions: 1. What is the purpose of the main light? 2. What is the purpose of the fill light? 3. List the lighting patterns.
2. WHITE BALANCE READ AND WRITE
http://digital-photography-school.com/introduction-to-white-balance/
Read this link on white balance and on your blog write a one paragraph synopsis of what you learned from reading the article. Under that list all the white balance settings and at least one sentence about each.
3. SHOOT LIKE AARON SISKIND
Research the work of Aaron Siskind, an American photographer who shot abstract black and white images, which focus on nature, architecture and human form. Take some photos on the MONOCHROME setting, in the style of Aaron Siskind, edit them with good density and contrast, and post 2-3 black and white images on your blog with the technical information in the caption of each photo. Under your photo, post a photo by Aaron Siskind and write three complete sentences describing his work and your opinion of his work.


__________________________________________________________
ASSIGNMENTS DUE TUESDAY, NOVEMBER 14
1. AM I TALKING TO MYSELF
Photograph several images of yourself or someone else in the same location, and put them all together in Photoshop to make it look as if you (or they) are relating to themselves in some way. Use one of the photos as the base image, and move the other subjects in the base image to create a unique photo for this Am I Talking To Myself assignment. Writing Critique: Make a blog post called My Inspiration and list 15-20 things, which inspire your creativity. Sample student work below:
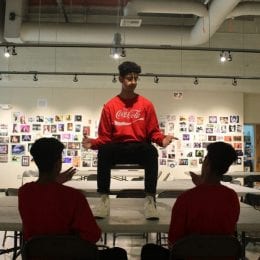

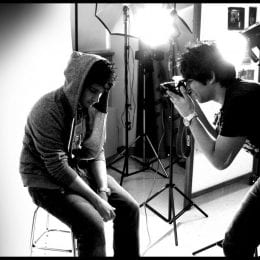
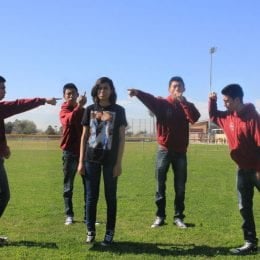

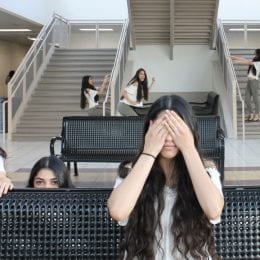


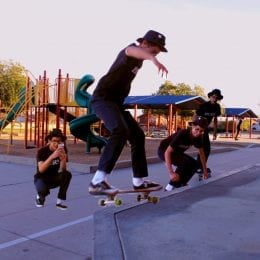
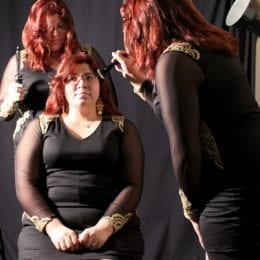
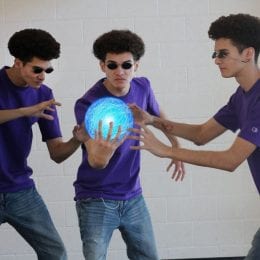

2. HISTORY OF PHOTOGRAPHY TIMELINE
Watch the Powerpoint about the History of Photography Also go online and research the History of Photography. Use this timeline template to list the most important inventions and events in history in chronological order. Copy the template and open it in Photoshop. Fill in the boxes with dates and important inventions in photography. Post the template to your blog in a post titled: History of Photography Timeline. Under the template list 3-5 events and/or inventions in photography which impresses you the most, and has the most impact on your life today. (2-3 paragraphs)
3. WORD ART
-Make a Photoshop document 4×6 or 6×4 (100 ppi)
-Find an interesting image on the Internet and use the move tool to move it into your document in Photoshop
-Size it with Control T + shift to fit in the document
-Make another document the same size as the first
-With the Text Tool, type a word or phrase in a thick black font
-Find a picture online to go inside of the word and copy and paste it into the document with the text
-Put the picture layer on top of the word layer
-Press Control +Alt + G to put the image inside the word.
-Merge the picture and text layers together (make the background layer invisible to not include it in the merge)
-Move the word with the picture in it in the other document with the Internet image, and save as a .jpeg. Post to blog.
_________________________________________________________
_________________________________________________________
Assignments due Monday, November 4:
1. ILLUSTRATION OF AN ICONIC IMAGE
Make a new document 8×12 or 12×8 200 resolution. Paste the illustration you want to trace and fit to the correct size. Make a new blank layer to trace on and lock it. Trace the illustration with a thin pencil and then color it in with brushes and the paint bucket. Make sure to add a background to your illustration. Samples below:


2. ALPHABET PHOTOGRAPHY
Look for images which represent letters and create a word in photographs -Edit your photos in PS and then make a new document to put the word in. -Make your document 30×8-2oo resolution and fit your images in to make the word. If you need more space go to Image>Adjust>Canvas Size and resize bigger. -Save as a jpeg and post to your blog. -Critique: List 5 valuable things you learned in Photo class so far this year.


3. TED TALK: HOW PHOTOGRAPHY CONNECTS US
Watch this Ted Talk on how photography connects us and on your blog make a post summarizing, critiquing, judging and evaluating what you got out of watching the video. Have at least 3 paragraphs.
https://www.ted.com/talks/david_griffin_on_how_photography_connects
____________________________________________
Assignments Due Tuesday, October 22
1. HDR PHOTOGRAPHY
-Go online and research the meaning of HDR. Create a blogpost explaining what the term HDR in photography means and ways to achieve successful results.
-Photograph 5 different exposures of a landscape (on Manual) for this assignment. One at the perfect exposure, plus one and two stops underexposed and one and two stops overexposed. USE A TRIPOD for this!
-Save images in a folder and open Photoshop>File>Automate>Merge to HDR Pro
-Select your five landscape images and press ok. Photoshop will compile your images into one HDR image.
-You will probably need to do more adjustments to make it more vibrant and saturated. You could bring in cool clouds from the Internet to blend into your sky.
-Post to blog and please TITLE YOUR WORK!!! Write a 10 sentence critique of your own work and post under your image.
2. FRAMING A SUBJECT
Take at least 3 different photographs using framing in the composition. Post 2-3 of your photographs, EDITED of course. Include the technical info: MASIL. SAMPLES BELOW -Critique your own photographs you posted and answer these questions.
- What camera metering mode did I use and why?
- Do I have a strong composition?
- How well did I edit my photographs?
- What would I do differently if I shot this assignment again?
- Do you think your photographs belong on the blog home page and should be considered one of the best from all the photo classes?
3. PHOTO WORDS DEFINED
Define these words in a word document and then copy and paste your definitions in a blog post titled Photography Definitions:
pixel, image resolution, megabyte, megapixel, gigabyte, jpeg, raw, tiff, png, white balance, histogram, aperture, shutter speed, depth of field, aperture priority, shutter priority, bitmap, exposure, watermarking, optical zoom, digital zoom, bracketing, light meter, image stabilization, noise, lag time, hot shoe, fisheye, macro, telephoto, wide angle, DSLR, dynamic range, exposure compensation
___________________________________________________________
ASSIGNMENTS DUE FRIDAY OCT 11
1. DIGITAL COLLAGE: ALL ABOUT ME
-Gather imagery online that represents at least five things about yourself.
-In Photoshop, make an 8×10 or 10×8 @150 resolution document and title it All About Me Collage
-Select elements from the Internet images to move into your collage.
-After you get a good selection with the magic wand or magnetic lasso, remember to go in Mask and refine your selection. If you want soft edges you will go to select>modify>feather.
-Think about rules of good composition when designing your layout of elements and background
-Move layers around from the layer palette, if you want to change what is on top of another element.
-To blend layers for a unique effect, you use the move tool and use Shift+ to scroll through blend modes.
-Save your work as a psd until you are completely done with it, and then save as a jpeg to post to your blog.
-Write a three paragraph reflection about what how your collage visually represents you. Post under your work in your blog.
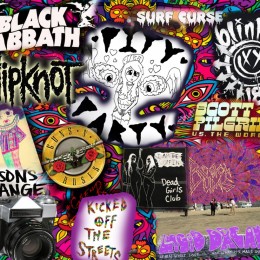
- Johnny

- Destiney
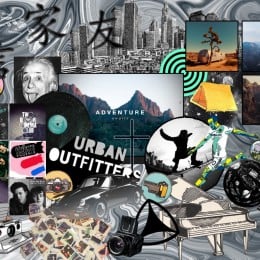
- Brandon
- Vivi

- Janice

- Tasneem

- Louis

- Joseph

- Mandy
2. SELF PORTRAIT WITH TEXT
Take a tripod and DSLR camera on self-timer mode and photograph a few self portraits (photographs you take of yourself). Edit your favorite photo in Photoshop and include some text within the image to create a mixed media selfie. In the caption section when you post include the MASIL and for a critique make a list of 25 words or phrases to describe yourself. Student samples below:
3. COMMENTS ON THE BLOG
Look through some classmates blogs and make three comments. Each comment must have at least three sentences. Remember grammar and punctuation.
4. WHAT EVERY BEGINNER NEEDS TO KNOW READ AND WRITE
Read this link: https://www.photographytalk.com/photography-articles/5082-13-camera-settings-every-beginner-needs-to-know On your blog list the 13 setting every beginner should know and 1-2 sentences explaining what each one is.
___________________________________________
ASSIGNMENTS DUE WEDNESDAY, OCTOBER 2
1. CAPTURING ACTION AND MOTION IN PHOTOGRAPHY
Read these online article about capturing action and motion photography and write two to three paragraphs stating what you learned about action and motion photography techniques.
http://www.digital-photo-secrets.com/tip/50/freezing-the-action/
http://digital-photography-school.com/how-to-capture-motion-blur-in-photography/
Take photos outside that capture ACTION SHARP. Try to “capture the moment”. Shoot at the shutter priority mode and auto focus AI SERVO . Make sure your shutter speed is above 125th of a second. ISO 400. Take several photos and post your favorite 2 action shots, edited in Photoshop.
Take action photos inside trying to capture MOTION BLUR. Try to “capture the moment”. Shoot at the shutter priority mode and auto focus AI SERVO mode. Make sure your shutter speed is 60th or below for more blur. Use a tripod to make sure stationary objects are not blurred. Take several photos and post your favorite 2 shots , edited in Photoshop. -Include technical info on all photos: MASIL
Find 2 photos online, one showing action sharp and another showing motion blur. Guess what shutter speeds, f stops, and lens were used. Post as critique. Samples below:
2. TAKE A VACATION
In this assignment you are going to go on a virtual vacation. Find a location online where you would like to go and digitally put yourself into that location. Make sure to match lighting and color balance to make it look realistic as possible. You must add 3 props into the scene (sunglasses, shopping bags, friends to go with you, etc…) Make your new document for all the elements in the image a 12×8 150 resolution. include 1-3 sentences under your photo when you post it to explain why you would like to go on this vacation.


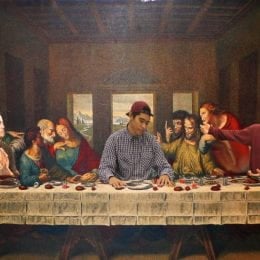

3. 100 MOST INFLUENTIAL PHOTOS OF ALL TIME
Read this link and on your blog pick 3 of the most influential photos to write about. Include the story behind the photo and what intrigues you about it. Make sure to post the three photos with your writing.
__________________________________________________________________________________________________________________________________________________________________________________________
ASSIGNMENTS DUE FRIDAY, SEPTEMBER 20
1. DEPTH OF FIELD
-Read these two links and write two paragraphs explaining in your own words what depth of field is in photography and the ways to control depth of field when shooting. Call this blogpost: Depth of Field Explained. http://www.macworld.com/article/1150150/depthoffield.html http://www.digitalcameraworld.com/2013/07/17/what-is-depth-of-field-how-aperture-focal-length-and-focus-control-whats-sharp/
– Go outside and take two photographs of the same subject, trying to get two different depth of fields. Remember to first format the memory card, set WB to auto and ISO to 400, and be on Manual focusing. You will set the camera mode to AV (aperture priority). Make sure to focus on the same subject for both shots you take.
-In Photo #1, you will get a shallow depth of field. Zoom out to the longest focal length of the lens which is 55mm. Set the aperture on f5.6 (the widest aperture at 55mm) and take note of what the camera sets the shutter speed at. Make sure it is not below 60th of a second. Get in good and close to your subject
-In Photo #2, you will get a good depth of field. Put your lens at 18mm ( which is the widest lens mm on your lens). Set your aperture at f16, and take note of what the camera sets the shutter speed at. Make sure it is not below 60th of a second, or open up the aperture to f11. Stay a bit further back to get a better depth of field.
-Repeat the depth of field activity 2-3 times to make sure you get it right.
-In the lab, edit your photos for maximum impact and post each one (good and shallow depth of field) to your blog as the large photo. Include the technical info in the caption section of each (Mode, ISO, Shutter speed, Fstop, Focal length of lens.
– For the critique for this assignment you are to find two photos online- one which shows a good depth of field and one which shows a shallow depth of field. In the caption section when you post them guess at what you think the aperture, shutter speed and lens mm was for each photo.


2. CAMERA MODES
Read through this link on camera modes. On your blog make a new post writing 2 sentences about each camera mode.
3. SURREALISM
After practicing with Kim on the mountain, make your own surrealist piece by putting someone or something where they don’t belong. Make a 10×8 or 8×10 150 resolution document in Photoshop and bring in Internet images for this assignment. Practice selecting, masking and refining your selections. Look at the work of surrealist artists Salvador Dali, Rene Magritte, and Jerry Uelsman and explore other surrealist artists and photographers online. Post your surrealism work in a blog post and also include a work by a surrealist artist who inspires you. Write a 100 word reflection, critiquing their surrealism, and mention how you think you did on your surrealism work.
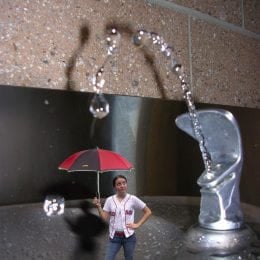

___________________________________________
ASSIGNMENTS DUE TUESDAY, SEPT 10
1. MANDALAS
Create 2 unique mandalas in Photoshop, using the shape tool and Internet imagery.
Make a new document 8×8 100 res and create each mandala, thinking about composition and symmetry.
Draw a circle with the elliptical marquee tool.
Press control and J to make the selection its own layer.
Stroke the layer to see the circle.
Use the shape tool to put in shapes.
Copy a shape by pressing alt with move tool.
To combine shapes into one layer, make any layer you do not want merged to be invisible, and then go to layer>merge visible.
To flip a layer, go to Edit>transform>transform either vertical or horizontal.
When you save each mandala, save as a .png, not .jpeg.
When you post it will only show the circle, not the white document.(If you are not done with your mandala be sure to save it as a .psd while you are still working on it.)
2. PORTRAIT READ AND WRITE
Read this article about creating powerful portraits, and write a list of 15 important tips you learned from reading it.
https://digital-photography-school.com/using-composition-create-powerful-portraits/
3. ON LOCATION PORTRAITS WITH NATURAL LIGHT
-Take at least 10 portraits of a classmate on location using natural light
-Think about exposure, lighting, composition, posing and expression. (Make sure your subject does not have on the yellow vest in the portrait photographs you are taking.)
-Set your ISO to 1600 or 3200 so your shutter speed does not go below 60th of a second. Open your aperture up as wide as it will go.
-Edit your photos in Photoshop and post between 3-10 EDITED photos of your subject (as a gallery or as individual photos)
-Critique: Find an on-location portrait online with natural lighting. Post that photo and make a list of 25 words or phrases you think of when you look at this photo. Include the photographers name if possible.
-****Include your technical info in the caption section of each photo. MASIL
***Include your technical info in the caption section of each photo. MASIL
_______________________________________
ASSIGNMENTS DUE FRIDAY AUGUST 30
1. SHADOWS AND LIGHT ASSIGNMENT
-Photograph 3 photos which show strong shadow and light -Edit 2 of your shadow photos -Include the technical info with each photo: F-stop, Shutter Speed, ISO, Mode and Lens mm -Pick a photo from the Internet showing shadows -Write 10 complete sentences describing the elements in the shadow photo you chose from the Internet and why you like it. -Post your 2 photos, technical info, internet image and writing critique to your blog.
2. READ AND WRITE : LENSES
Read this article about lenses and on your blog list 20 important facts you learned about camera lenses. http://digital-photography-school.com/choosing-lenses-when-to-use-which-lens-and-why/
3. ALTERNATIVE CAMERA ANGLES
-Go outside in brighter light and take 4 photographs of the same subject from 4 different camera angles- strait on, from above, from below, and then tilt the camera at any of the other 3 angles. Put your ISO at 400, and meter the scene on Manual to get the correct exposure. Keep your exposure the same on all 4 photos and make sure to keep the same subject in focus for all 4.
-Put your photos in a folder on your h drive: DIGITAL PHOTO>ANGLES
-Edit your photos in Photoshop with IMAGE ADJUSTMENTS and post all 4 of your photos to your blog (large). INCLUDE THE TECHNICAL INFORMATION: MASIL: Mode, Aperture, Shutter speed, ISO, and Focal Length of Lens
-Find one photo online which shows an interesting camera angle. Post it to your blog and write a 20 sentence critique explaining why you think this is such a successful photograph- compositionally and technically, and why you chose it.
_____________________________________________
ASSIGNMENTS DUE FRIDAY AUGUST 23
1. TEXTURE
Go outside in brighter light and photograph 5 photos that show texture.
Put your ISO at 400, and meter the scene to get the correct exposure.
Put your photos in a folder on your h drive: DIGITAL PHOTO>TEXTURE ASSIGNMENT
Edit your photos in Photoshop with IMAGE ADJUSTMENTS and post 3 of your photos to your blog.
INCLUDE THE TECHNICAL INFORMATION( for each photo): aperture, shutter speed, ISO, and camera mode. Post the technical info in the caption section of each photo.
Find one photo online which shows amazing texture. Write a two paragraph critique explaining why you think this is such a successful photograph and why you chose it. Be sure to use academic language, proper grammar and sentence structure.
2. PHOTO COMPOSITION
Read about what makes strong composition in a photograph and what catches the viewers eye. Find 12 sample photos online which show good composition. Make a gallery of images in Edublogs. Post your gallery and write 12 complete sentences, (with capitals and periods), one sentence under each photo in the caption section of the gallery, to explain what element of composition each photo represents.
____________________________________________________________
First assignments for 2019-2020 school year:
1. MAKE A BLOG
Create a blogsite with edublogs. https://edublogs.org/ Join the class blog, (cauchonphoto.edublogs.org), select a template, and design your site layout and design. Write an about me section as a Text Widget. Tell a little about yourself, 3-5 sentences. Add of photo of yourself with an Image Widget.
2. PHOTO FOUNDATION
Read the following links and write 25 complete sentences reviewing what you learned about aperture, shutter speed, ISO, and camera modes. As your first blogpost, copy and paste in your sentences from a word document. http://www.cambridgeincolour.com/tutorials/camera-exposure.htm
___________________________________________
__________________________________________________________
___________________________________________
LAST ASSIGNMENTS OF THE YEAR:
1. RE-CREATE A PHOTO
Look for a photograph online which you would like to re-create. Analyze the original photo for composition and lighting and re-create the photo as closely as you can. Include original photo in your post. Samples below.


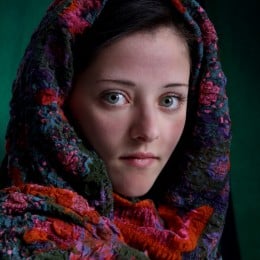


2. MIRROR IMAGE
Photograph an interesting photo with lots of lines. Put the edited photo in a new document and make a copy of the image to flip to make mirror imagery. Either 2 or 4 images would work for the mirror image. Post to blog.
3. LETTER TO NEXT YEARS PHOTO STUDENTS
Write a three paragraph letter to next year’s photo students. Talk about what you liked and did not like about the class, projects and workload, and any other pieces of advice you give to future Digital Photo students here at Jurupa.
4. POETRY AND YOUR PHOTOGRAPHY
- Take a new photo for this assignment or use one of your existing edited photos.
- Make a new document 11×14 or 14×11 @ 300 res
- Move your photo into your new document and size to fit.
- Add a quote, poetry, song lyrics or your own words to your edited image
- Post to your blog


-

- OLYMPUS DIGITAL CAMERA
5. LIGHTROOM SLIDESHOW PORTFOLIO
Make sure to make slideshow in YOUR catalog
Import Portfolio Photo Folder from Desktop
With photos all selected create a collection
Organize and reorder in Library
Edit in Develop
In Library module, go to metadata for each image and add a caption
Go to Slideshow module and on each photo go to ABC and then caption to move caption where you want and choose color
In slideshow choose background and wash color, stroke, timing and import music
Preview slideshow, then play
Export out to Desktop
Give to Cauchon in her flashdrive
_______________________________________________________________________________________________________________________________________________________________________________________________________________________________________________
Assignments due Friday, April 19
1. Masters of Photography Essay
Look at this website: http://www.masters-of-photography.com/ and find one photographer whose work you admire. Write a 300 word essay about that photographer, his background, style of work, lighting and compositions. Also include what it is that you like about their work and how it inspires you. Include at least two of their photographs in your blog post.
2. Graduation Cover Design
Create a design for the cover of the Jurupa Hills High School 2019 Graduation booklet. The size should be 5.5×8.5 with 300 resolution. Make sure to include a graphic and the following information:
Jurupa Hills High School Graduation (or Commencement)
Citizens Business Bank Arena
Wednesday, May 22, 2019 7:00 pm


3. Advertising Photography
For this assignment you will create a photograph that would be used for advertising purposes. First you will research advertising photography on the Internet to generate ideas. Post 3 ads that you really like and write a sentence about why they catch your eye. Before you begin to create your advertisement, write a proposal by answering the following questions:
- Who is the client, or company you are representing?
- What is the product?
- Who is the target audience?
- Where would you expect to see this advertisement?
- What kind of lighting are you going to use to make this look professional?
- What props do you need?
Shoot the product and use of variety of compositions. Think about: lighting, composition, depth of field, product placement. Use Photoshop to tweak and enhance your photograph. Add necessary text and captions. Post your best advertising shot, EDITED, to your blog with the proposal. Samples below:
4. MULTIPLE EXPOSURE WITH FLASH AND SLOW SHUTTER SPEED
In the dark studio, set your camera to 30 seconds at F 8 or 11 (adjust as necessary to get the perfect exposure)and 200 ISO. Make sure to be on Manual metering and MF for manual focus. Focus before the lights go off. During the long exposure, have your subject move slightly and manually set off the external flash (at M mode, not ETTL) each time they move and you will capture them several times during the long exposure. You should post your best 1-3 images from the multiple exposure shoot. Read these online article and write 20 sentences about what you learned. http://www.photomatters.org/multiple-exposure http://www.tpub.com/photography1/ph20994.htm
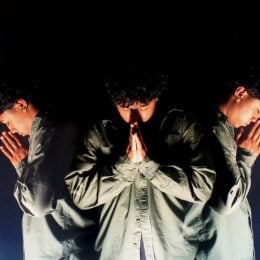

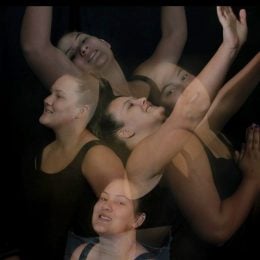
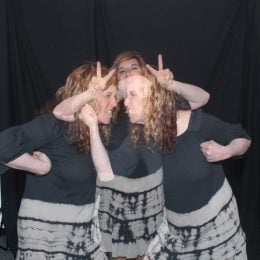


___________________________________________________________________________________________
Assignments due Monday, April 8
1. YOUR FAVORITE TEACHER
Use bounced external flash off camera and sync cord, to take some nice portraits of your favorite teacher. Edit and post your best portrait and write a 3 paragraph reflection in academic language explaining why you like and admire this teacher. Give details, reasons and examples as to why you chose this teacher. Samples below:
2. PORTRAIT WITH MAKE UP
Take a beautiful portrait of someone, or use an existing portrait you took and apply make up to their face using Photoshop paint and brush tools. (Make sure the portrait is a head and shoulder shot.) Put makeup on 2 different portraits and post them to your blog. Read this link and watch the video about painting with brushes & make a blogpost explaining 5 important tips you learned from reading it.
https://helpx.adobe.com/photoshop/using/painting-tools.html
3. BODY, SHAPE, FORM
Photograph a part of the body, or something, which shows shape and form. Think about getting great QUALITY OF LIGHT and make your composition a strong one. In the caption section of your image write 10 words to describe your image.
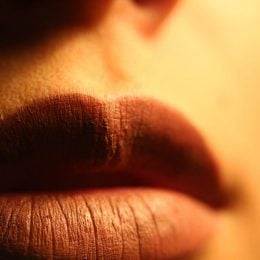
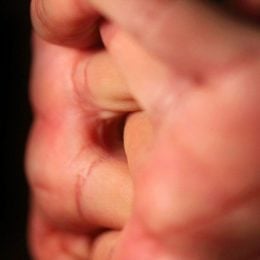

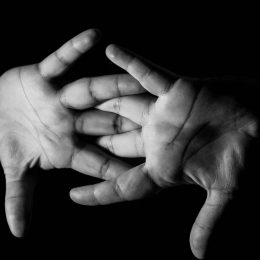

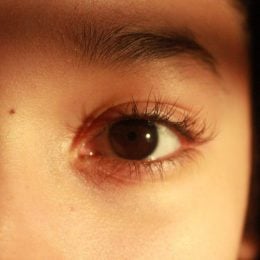

___________________________________________
1. ALBUM COVER FOR A MUSICAL ARTIST
Work with a musical artist in Mr. Fresquez’s class (or photograph a class member and pretend they are a musical artist) to produce an album cover design. Make sure the cover has a strong photograph and text to include the artist’s name and the name of the record. Make sure you make the album cover 12×12 with 300 resolution.
YOUR PHOTOGRAPHY BUSINESS POWERPOINT, BUSINESS CARD AND PRESENTATION (worth 3 assignment grades)
PRESENTATIONS BEGIN FRIDAY, MARCH 8
You will start a (pretend) photography business either by yourself or in partnership with one of your peer students. Create a Powerpoint to present to the class and include the items on the list below:
* Business Name
* Your name as sole owner or names of people in the partnership, and the job responsibilities of each.
* The type of photography you specialize in, and the types of jobs you intend to get.
* Samples of work you would like to produce for your clients. (get from online, not your own work)
* What type of equipment will you be using and how much will you be spending on equipment? (Go to B&H.com to look for equipment)
* How much will you charge? Will you offer packages?
* Your (pretend) web site address *
* Who are your inspirations?
* Where will you conduct your business? (which state will you live, will you work out of your home or rent office space in which location)
* Branding: Your business card (Make your business card a 3.5 x 2.5 document in Photoshop. If you make a double sided card, make two documents, front and back.)
* Marketing: Include a slide about how are you going to advertise and get jobs in your field?
* Market Research: How much money you would like to make in your first year of business, and how much you foresee making in 5 years, and also in 10 years.
_________________________________________
Assignments due Friday, March 2
1. PAINTING WITH LIGHT
-Go to a dark place to shoot for this assignment (back studio). Put the camera securely on a tripod and put your shutter speed at 20 to 30 sec (not 20th of a sec…but 20 full seconds). You must put the camera on self timer to avoid camera shake. Shoot on manual and try your fstop at 8 or 11. ISO at 200. -Pre focus on Manual focus mode, because the camera will not in autofocus! -Wave finger lights in front of the frame during the exposure and check out the results! -Post 1 to 3 Painting with Light photos you took and edited on your blog.
Critique: Find an amazing painting with light photo on the Internet and write a paragraph about how you think the photographer achieved the result and why you think it is so eye catching.


NEW ASSIGNMENTS MARCH 2019
1. FILL FLASH OUTSIDE
-Read this link, (or find another link online), about using FILL FLASH outside to fill in the shadows. Write 1 paragraph explaining what fill flash outside is and why you would need to use it to get perfect exposure on the subject and background. http://www.digital-photo-secrets.com/tip/195/using-a-flash-when-outside/
-Go outside and photograph a subject which is BACKLIT. Set your camera on AV to meter the natural light. Use a small aperture like f11 or 16 and a low ISO like 200 or 400. Make sure your flash is on ETTL and fill the subject in shadow with fill lighting from the external flash. Post 2-3 photos showing your understanding and good usage of fill flash.


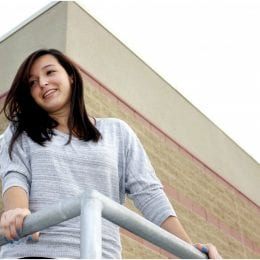

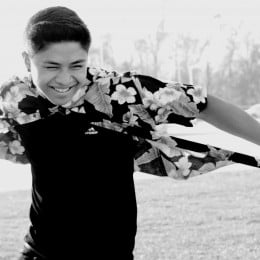


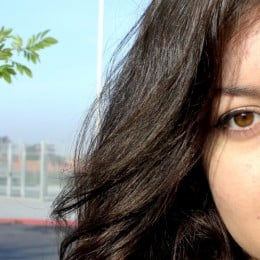
2. READ AND WRITE: INTRODUCTION TO USING STROBES
Read this entire article on beginning strobe use and then write a three paragraph reflection on your blog detailing what the article is about and the most important things you got out of reading it. https://photography.tutsplus.com/articles/a-fundamental-introduction-to-studio-lighting-equipment–photo-6067
3. STUDIO PORTRAITS WITH STROBES AND GELS
Photograph 25 portraits in the studio using the strobes and colored gels in the background. Edit your portraits in Lightroom and make cosmetic retouches in Photoshop. Post 9-12 final portraits on your blog. Writing critique: Find a portrait online that was shot with studio strobe lighting and write 20 sentences to describe the subject and their personality based on the photographers version of them. Evaluate the lighting used in the photograph and how you think the lights were arranged to get the results. Samples below:
4. COMMENTS ON THE BLOG
Make three comments on the blog homepage. Each comment must have at least three sentences. Remember grammar and punctuation.
__________________________________________
ASSIGNMENTS DUE FRIDAY, FEBRUARY 15
1. PAINTING WITH LIGHT
–Go to a dark place to shoot for this assignment. Put the camera securely on a tripod and put your shutter speed at 20 to 30 sec (not 20th of a sec…but 20 full seconds). You must put the camera on self-timer to avoid camera shake. Shoot on manual and try your f-stop at 11 or 13. ISO at 200 ISO. -Pre focus on Manual focus mode, because the camera will not in autofocus! -Wave finger lights in front of the frame during the exposure and check out the results! -You might need to make adjustments in exposure and try again. Post 2-5 images to your blog. Read this link and make a list of 10 tips you learned about painting with light from reading it. https://microsites.lomography.com/light-painting/


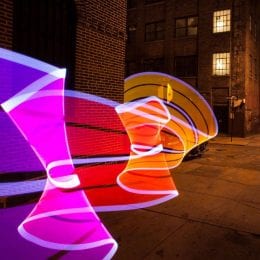

2. TAKE A VACATION
In this assignment you are going to go on a virtual vacation. Find a location online where you would like to go and digitally put yourself into that location. Make sure to match lighting and color balance to make it look realistic as possible. You must add 3 props into the scene (sunglasses, shopping bags, friends to go with you, etc…) Make your new document for all the elements in the image a 12×8 150 resolution. include 1-3 sentences under your photo when you post it to explain why you would like to go on this vacation.


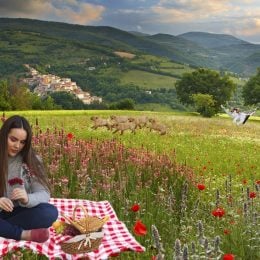
3. READ AND WRITE: FLASH BASICS
Read these online articles and on your blog write three paragraphs explaining the main points in the articles and at least five things you learned from reading it.
https://www.popphoto.com/gallery/21-tips-better-flash-photography
4. 3-5 ON LOCATION PORTRAITS WITH BOUNCED FLASH
Use the Canon digital camera and an external bounced flash to photograph portraits on location. Set your camera on Manual, Auto White Balance, ISO 400, F8 @ 60th of a second shutter speed. Photograph at least 10 portraits and post your top 3-5 edited bounced flash portraits to your blog.
As a writing critique answer the following questions on your blog in a separate post. Samples below:
1.When would you use external flash?
2.What does flash synchronization mean?
3.What does ETTL mean?
4.What will happen when you shoot faster than the camera sync speed?
5.Why do photographers bounce the flash and use a diffuser?
6.What is a slave?
7.What should you do if your image comes out too dark or too light?
______________________________________
Assignments due Monday, February 4
1. HDR PHOTOGRAPHY
-Go online and research the meaning of HDR photography. Create a blogpost explaining what the term HDR in photography means and ways to achieve successful results. Choose an HDR image from online to post and give your opinion about the image you chose and what impresses you about it and why? Include the image in your post. Photograph 5 different exposures of a landscape (on Manual) for this assignment. One at the perfect exposure, plus one and two stops underexposed and one and two stops overexposed. USE A TRIPOD for this! -Save images in a folder and open Photoshop>File>Automate>Merge to HDR Pro -Select your five landscape images and press ok. Photoshop will compile your images into one HDR image. -You will probably need to do more adjustments to make it more vibrant and saturated. You should bring in cool clouds from the Internet to blend into your sky. Post to blog with a list of the 5 exposures you used to create the image. (MASIL) Samples below:

-

- ]


2. Shoot like Aaron Siskind
Research the work of Aaron Siskind, an American photographer who shot abstract black and white images, which focus on nature, architecture and human form. Take some photos on the MONOCHROME setting, in the style of Aaron Siskind, edit them with good density and contrast, and post 2-3 black and white images on your blog with the technical information in the caption of each photo. Under your photo, post a photo by Aaron Siskind and write three complete sentences describing his work and your opinion of his work.


3. Photographer Research Project
You will research, produce and present a PowerPoint Slide Show about a professional and influential photographer of your choice. The project is to have 15-20 slides and include the information below, and at least 10 photographs. You can choose from the enclosed list or pick a significant photographer of your choice. Questions to answer when doing photographer research project are below. Email your presentation to caucrg@fusd.net or put in my flashdrive by Wednesday January 30th.
- What is the photographer’s real name and year he or she was born? Is he/she still alive?
- What is their style of photography (ex: photojournalism, editorial, documentary, advertising, portraits, magazine, sports, war)?
- Are there any special photography techniques this photographer uses in his/her work? (Think about composition, depth of field, history…)
- Who does the photographer work for?
- What type of cameras and lens does this photographer work with, and why?
- What type of lighting does this photographer primarily use and why?
- Who are some of your photographer’s early influences?
- Are there any interesting stories about this photographer or his/her work?
- What do you like (or not like) about their work, and why did you select this photographer?
Robert Mapplethorpe – flowers, portraits, nudes * Annie Leibovitz – celebrity portraits * Danny Clinch – musicians * Edward Weston – black and white nudes,landscapes Ansel Adams – black and white landscape * Cindy Sherman – self portraits * Diane Arbus – strange and different portraits * David Lachappelle – unique celebrity portraits * Imogen Cunningham – black and white * Eliot Porter – color landscape Alfred Eisenstadt – candid photojournalism * Linda McCartney – musicians in the 60’s *Herb Ritts – celebrity portraits * Henry Cartier- Bresson -candid street, the decisive moment *Andy Warhol – bizarre pop art *Robert Frank -street *Mary *Paul Strand – black and white *Lewis Hind – child labor *James Nachtwey – war * Irving Penn – fashion, still lifes * Richard Avedon – portrait *Weegee – street photojournalism *Mark Seliger – celebrity portraits * Jerry Uelsmann – photo montage * Dorothea Lange – documentary *Anne Geddes – children *Kim Anderson – children *Nigel Barker- Fashion *William Wegman – dogs *Man Ray – rayograms, fashion, portraits in the 20 *Arnold Newman – environmental portraits * Steve McCurry – National Geographic portraits * Danny Lyon – street and documentary *Brad Mangin – sports *Neil Leifer – sports
_________________________________________________________
ASSIGNMENTS AFTER BREAK
1. 50 PHOTOS EDITED IN LIGHTROOM
Take 50 different photos of the same subject. Vary the lighting and composition of your photographs. Edit your photographs in Lightroom and post the BEST 12 to 20 photos to your blog as a gallery.
2. ILLUSTRATION OF AN ICONIC IMAGE
Make a new document 8×12 or 12×8 200 resolution. Paste the illustration you want to trace and fit to the correct size. Make a new blank layer to trace on and lock it. Trace the illustration with a thin pencil and then color it in with brushes and the paint bucket. Make sure to add a background to your illustration. Samples below:


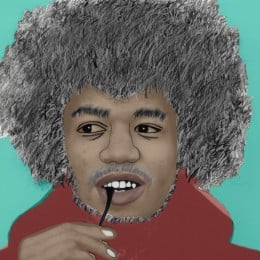


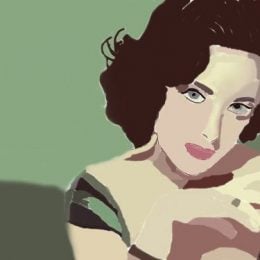
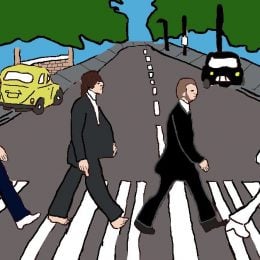

_
3. JPEG VS. RAW READ AND WRITE
Research what jpeg and raw file formats are, and the differences between them. Write a two paragraph reflection comparing and contrasting them both on your blog.
___________________________________
ASSIGNMENTS DUE MONDAY DECEMBER 3
1. YOUR PORTFOLIO
Put your best work together in a folder on your desktop called Portfolio. Use Powerpoint to present your portfolio to the class. Your portfolio should consist of (at least) 12 slides. 1 Intro slide with your name on it and 10 slides of your best work to date (1 image per slide). The last slide should contain a quote that is meaningful to you. Put your presentation in my flashdrive or email your presentation to me at caucrg@fusd.net by Friday, November 30. Also put your portfolio images on your blog as a gallery.
2. WHAT IS YOUR COLOR
Create a Photoshop Collage 12×9 or 9×12 300 resolution representing your favorite color. Include a photo of yourself, the color you select and some writing about why this is YOUR color. Perhaps add a tint of your color. Post to blog.
3. COMMENTS ON THE BLOG
Look at some of the blogs of your peers, and make five comments on five different images that were posted, (from five different students). Make sure your comments are in sentence form and in academic language. Send an email to me (caucrg@fusd.net) and tell me whose blogs you commented on and the comments you left.
___________________________________________
ASSIGNMENTS DUE FRIDAY NOVEMBER 16
1. Silhouette Series
Think of a good concept for your silhouette photos and then take photos of backlit subjects to make high contrast silhouettes. You can edit them in Photoshop to give them more blacks and whites, and contrast. Use studio hot lights with two lights aimed at the background and turn the room light off to get more shadow on the subject(s). Meter for the background.


2. Candid Moments with Captions (3-5 Photos with captions for each)
Photograph candid moments and edit your images in Photoshop. In the caption section of each photo you post write a caption including who, what , where and why. include your technical info for each photo (MASIL) For a critique look at the work of photographer Henri Cartier Bresson ,who captured the “decisive moment”. On your blog post 2-3 of his photographs and write 10 sentences about his work and your opinion of his timing, composition and ability to capture the perfect moment. Student Samples below:
ASSIGNMENTS DUE TUESDAY NOVEMBER 6
1. AM I TALKING TO MYSELF
Photograph several images of yourself or someone else in the same location, and put them all together in Photoshop to make it look as if you (or they) are relating to themselves in some way. Use one of the photos as the base image, and move the other subjects in the base image to create a unique photo for this Am I Talking To Myself assignment. Writing Critique: Make a blog post called My Inspiration and list 15-20 things, which inspire your creativity. Sample student work below:


2. WHITE BALANCE READ AND WRITE
http://digital-photography-school.com/introduction-to-white-balance/
Read this link on white balance and on your blog write a one paragraph synopsis of what you learned from reading the article. Under that list all the white balance settings and at least one sentence about each.
3. STUDIO PORTRAITS
Use the studio backdrop (white or black) to photograph PORTRAITS of classmates. Use the tungsten “hot lights” to light the portraits Make sure to put your white balance on TUNGSTEN and shoot at ISO 400 or 800. Go right up to the subject and meter them on MANUAL. Take at least 12 photographs and edit them in PS. Post anywhere between 6 and 12 portraits as either a gallery or individually.. Include technical info: MASIL Critique: Find a studio portrait online and write a list of 25 words you would hashtag the photo if you posted it on Instagram. Include the photographers name if possible. In a separate blog post, answer these questions: 1. What is the purpose of the main light? 2. What is the purpose of the fill light? 3. List the lighting patterns.


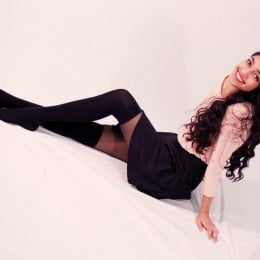


___________________________________________
ASSIGNMENTS DUE TUESDAY OCTOBER 30
1. PUT YOURSELF IN HISTORY
Find a historic photo online and include yourself in the scene. Adjust size, color and resolution to match the historic photo to look as realistic as possible. Under your photo write a 2-3 sentence explanation as to why you chose to put yourself in this historic photo. Samples below:


2. SELF PORTRAIT WITH TEXT
Take a tripod and DSLR camera on self-timer mode and photograph a few self portraits (photographs you take of yourself). Edit your favorite photo in Photoshop and include some text within the image to create a mixed media selfie. In the caption section when you post include the MASIL and for a critique make a list of 25 words or phrases to describe yourself. Student samples below:

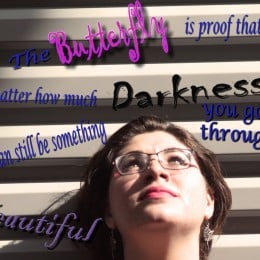


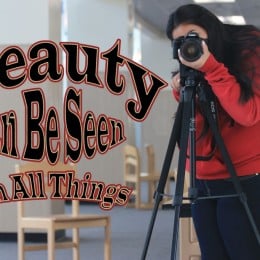

3. READ AND WRITE
Factors to Consider When Buying a New Digital Camera: Read this article on factors to consider when buying a new digital camera. On your blog summarize the article and make a list of ten of the most important factors you would consider when you are buying a new digital camera and WHY. Factors to Consider When Choosing a Digital Camera
4. CONCEPTUAL SELF PORTRAIT
Take a photograph which represents something important about yourself, without showing your face in the photograph. In the caption section when you post include the MASIL and for a critique first define the word “conceptual” and then write a two to three paragraph reflection explaining how this photograph conceptually and visually shows something about you and what you are attempting to share about yourself with the viewer. Also, research the work of photographer Cindy Sherman. Post your favorite photo of hers on your blog and write 5 sentences explaining your opinion of her work and style and her ability to become famous from her self portrait photography series work. Student samples below:
________________________________________________________
ASSIGNMENTS DUE FRIDAY, OCTOBER 19
1. PHOTO WORDS DEFINED
Define these 35 words in a word document and then copy and paste your definitions in a blog post titled Photography Definitions:
pixels, image resolution, megabyte, megapixel, gigabyte, jpeg, raw, tiff, png, white balance, histogram, aperture, shutter speed, depth of field, aperture priority, shutter priority, bitmap, exposure, watermarking, optical zoom, digital zoom, bracketing, light meter, image stabilization, noise, lag time, hot shoe, fisheye, macro, telephoto, wide angle, DSLR, dynamic range, exposure compensation
2. TEDTALK: HOW PHOTOGRAPHY CONNECTS US
Watch this Tedtalk on how photography connects us and on your blog make a post summarizing, critiquing, judging and evaluating what you got out of watching the video. Have at least 3 paragraphs.
https://www.ted.com/talks/david_griffin_on_how_photography_connects
3. ALPHABET PHOTOGRAPHY
Look for images which represent letters and create a word in photographs -Edit your photos in PS and then make a new document to put the word in. -Make your document 16×8 3oo resolution and fit your images in to make the word. DO NOT DISTORT THE WORDS TO MAKE THEM FIT. -If you need more space go to Image>Adjust>Canvas Size and resize bigger. -Save as a jpeg and post to your blog. -Critique: List 5 valuable things you learned in Photo class so far this year.


ASSIGNMENTS DUE THURSDAY OCTOBER 11:
1. FRAMING A SUBJECT
Take at least 3 different photographs using framing in the composition. Post 2-3 of your photographs, EDITED of course. Include the technical info: MASIL. SAMPLES BELOW -Critique your own photographs you posted and answer these questions.
- What camera metering mode did I use and why?
- Do I have a strong composition?
- How well did I edit my photographs?
- What would I do differently if I shot this assignment again?
- Do you think your photographs belong on the blog home page and should be considered one of the best from all the photo classes?
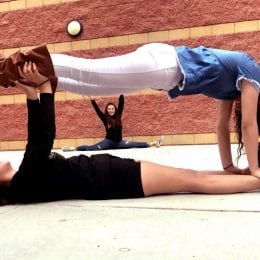
2. MANDALAS
Research the meaning of “mandala” and include the definition on your blog post.
Create 2 unique mandalas in Photoshop, using the shape tool and Internet imagery.
Make a new document 8×8 100 res and create each mandala, thinking about composition and symmetry.
Draw a circle with the elliptical marquee tool.
Press control and J to make the selection its own layer.
Stroke the layer to see the circle.
Use the shape tool to put in shapes.
Copy a shape by pressing alt with move tool.
To combine shapes into one layer, make any layer you do not want merged to be invisible, and then go to layer>merge visible.
To flip a layer, go to Edit>transform>transform either vertical or horizontal.
When you save each mandala, save as a .png, not .jpeg.
When you post it will only show the circle, not the white document.(If you are not done with your mandala be sure to save it as a .psd while you are still working on it.)
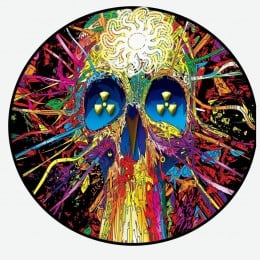


3. HISTORY OF PHOTOGRAPHY
Watch the Powerpoint about the History of Photography history-of-photo-presentation-1vfj5uz Also go online and research the History of Photography Use this timeline template to list the most important inventions and events in history in chronological order. Copy the template and open it in Photoshop. Fill in the boxes with dates and important inventions in photography.Post the template to your blog in a post titled: History of Photography Timeline. Under the template list 3-5 events and/or inventions in photography which impresses you the most, and has the most impact on your life today. (2-3 paragraphs)
__________________________________________________________
ASSIGNMENTS DUE TUESDAY OCT 2
1. ON LOCATION PORTRAITS WITH NATURAL LIGHT
-Take at least 10 portraits of a classmate on location using natural light
-Think about exposure, lighting, composition, posing and expression. (Make sure your subject does not have on the yellow vest in the portrait photographs you are taking.)
-Set your ISO to 1600 or 3200 so your shutter speed does not go below 60th of a second. Open your aperture up as wide as it will go.
-Edit your photos in Photoshop and post between 3-10 EDITED photos of your subject (as a gallery or as individual photos)
-Critique: Find an on-location portrait online with natural lighting. Post that photo and make a list of 25 words or phrases you think of when you look at this photo. Include the photographers name if possible.
-****Include your technical info in the caption section of each photo. MASIL
2. 100 MOST INFLUENTIAL PHOTOS OF ALL TIME
Read this link and on your blog pick 3 of the most influential photos to write about. Include the story behind the photo and what intrigues you about it. Make sure to post the three photos with your writing.
3. WORD ART
-Make a Photoshop document 4×6 or 6×4 (100 ppi)
-Find an interesting image on the Internet and use the move tool to move it into your document in Photoshop
-Size it with Control T + shift to fit in the document
-Make another document the same size as the first
-With the Text Tool, type a word or phrase in a thick black font
-Find a picture online to go inside of the word and copy and paste it into the document with the text
-Put the picture layer on top of the word layer
-Press Control +Alt + G to put the image inside the word.
-Merge the picture and text layers together (make the background layer invisible to not include it in the merge)
-Move the word with the picture in it in the other document with the Internet image, and save as a .jpeg. Post to blog.
______________________________________________________________
ASSIGNMENTS DUE FRIDAY, SEPTEMBER 21
1. CAPTURING ACTION AND MOTION IN PHOTOGRAPHY
-Read these online article about capturing action and motion photography and write one or two paragraphs stating what you learned about action and motion photography techniques..
http://www.digital-photo-secrets.com/tip/50/freezing-the-action/
http://digital-photography-school.com/how-to-capture-motion-blur-in-photography/
-Take photos outside that capture ACTION SHARP. Try to “capture the moment”. Shoot at the shutter priority mode and auto focus AI SERVO . Make sure your shutter speed is above 125th of a second. ISO 400 Take several photos and post your favorite 2 action shots, edited in Photoshop.
-Take action photos inside trying to capture MOTION BLUR. Try to “capture the moment”. Shoot at the shutter priority mode and auto focus AI SERVO mode. Make sure your shutter speed is 60th or below for more blur. Use a tripod to make sure stationary objects are not blurred. Take several photos and post your favorite 2 shots , edited in Photoshop.
-Include technical info on all photos: MASIL
-Find 2 photos online, one showing action sharp and another showing motion blur. Guess what shutter speeds, f stops, and lenses were used. Post as critique.


2. COMMENTS ON THE BLOG Make 3 comments on the homepage of the blog. Be more specific with your comments and tell what it is you like or do not like about the work. Be constructive with your criticism. Put your name on all comments.
3. WARHOL / POP ART
-For your Pop Art assignment you should photograph an object, which is POPULAR IN THE CULTURE TODAY.
-Make 4 copies of the photo you chose, 4×6 or 6×4 (200 res) each, labeling them Warhol 1, Warhol 2 and so on… (you can change the size in PS in IMAGE>IMAGE SIZE (6×4.5 or 4.5×6 is ok too. Just make your big document 12×9 or 9×12 if you do that)
-Work on each picture separately, experimenting with filters, gradient maps, colors, patterns, and more….make sure there is contrast between the subject and the background!
-When you complete the 4 individual photos, merge the layers in each.
-Open a new document in Photoshop, 8×12 or 12×8 (200res)…or 9×12 or 12×9 if your individual shots are 4.5×6 or 6×4.5 -Move the four individual photos into the new document.
-Save as a jpeg and post with critique.
-Critique: Research and answer these questions about an interesting pop artist. Post one of his or her works with your answers to the following questions.
- What is Pop Art?
- Why is this artist’s work considered Pop Art?
- Describe some of this artists work.
- Why did you pick this artist and why do you like his/her work?
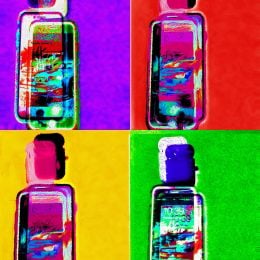


____________________________________________________________
ASSIGNMENTs DUE TUESDAY SEPT 11
1. DEPTH OF FIELD
-Read these two links and write two paragraphs explaining in your own words what depth of field is in photography and the ways to control depth of field when shooting. Call this blogpost: Depth of Field Explained. http://www.macworld.com/article/1150150/depthoffield.html http://www.digitalcameraworld.com/2013/07/17/what-is-depth-of-field-how-aperture-focal-length-and-focus-control-whats-sharp/
– Go outside and take two photographs of the same subject, trying to get two different depth of fields. Remember to first format the memory card, set WB to auto and ISO to 400, and be on Manual focusing. You will set the camera mode to AV (aperture priority). Make sure to focus on the same subject for both shots you take.
-In Photo #1 You will get a shallow depth of field. Zoom out to the longest focal length of the lens which is 55mm. Set the aperture on f5.6 (the widest aperture at 55mm) and take note of what the camera sets the shutter speed at. Make sure it is not below 60th of a second. Get in good and close to your subject
-In Photo #2 You will get a good depth of field. Put your lens at 18mm ( which is the widest lens mm on your lens). Set your aperture at f16, and take note of what the camera sets the shutter speed at. Make sure it is not below 60th of a second, or open up the aperture to f11. Stay a bit further back to get a better depth of field.
-Repeat the depth of field activity 2-3 times to make sure you get it right.
-In the lab, edit your photos for maximum impact and post each one (good and shallow depth of field) to your blog(large photo size). Include the technical info in the caption section of each MASIL (Mode, Aperture, Shutter Speed, ISO, Lens mm)
– For the critique for this assignment you are to find two photos online- one which shows a good depth of field and one which shows a shallow depth of field. In the caption section when you post them guess at what you think the aperture, shutter speed and lens mm was for each photo.
2. CAMERA MODES
http://digital-photography-school.com/digital-camera-modes
Read through this link on camera modes. On your blog make a new post writing 2 sentences about what each camera mode does.
3. DIGITAL COLLAGE: ALL ABOUT ME
-Gather imagery online that represents at least five things about yourself.
-In Photoshop, make an 8×10 or 10×8 @150 resolution document and title it All About Me Collage
-Select elements from the Internet images to move into your collage.
-After you get a good selection with the magic wand or magnetic lasso, remember to go in Mask and refine your selection. If you want soft edges you will go to select>modify>feather.
-Think about rules of good composition when designing your layout of elements and background. Move layers around from the layer palette.
-To blend layers for a unique effect, you use the move tool and use Shift+ to scroll through blend modes.
-Save your work as a psd until you are completely done with it, and then save as a jpeg to post to your blog.
-Write a three paragraph reflection about what how your collage visually represents you. Post under your work in your blog.


_________________________________________________________
ASSIGNMENTS DUE WEDNESDAY, AUGUST 29:
1. ALTERNATIVE CAMERA ANGLES
-Go outside in brighter light and take 4 photographs of the same subject from 4 different camera angles- strait on, from above, from below, and then tilt the camera at any of the other 3 angles. Put your ISO at 400, and meter the scene on Manual to get the correct exposure. Keep your exposure the same on all 4 photos and make sure to keep the same subject in focus for all 4.
-Put your photos in a folder on your h drive: DIGITAL PHOTO>ANGLES
-Edit your photos in Photoshop with IMAGE ADJUSTMENTS and post all 4 of your photos to your blog (large). INCLUDE THE TECHNICAL INFORMATION: MASIL: Mode, Aperture, Shutter speed, ISO, and Focal Length of Lens
-Find one photo online which shows an interesting camera angle. Post it to your blog and write a 20 sentence critique explaining why you think this is such a successful photograph- compositionally and technically, and why you chose it.
2. SURREALISM -Research online for the meaning of SURREALISM and post the definition of surrealism and one example of a surrealistic work of art or photograph. In 2 paragraphs, explain what surrealism is, and why you chose this image and what makes it surreal. Make sure to credit the artist. (Salvador Dali, Rene Magritte, and Jerry Uelsman are a few surrealistic artists) -After practicing with Kim on the mountain, make your own surrealist piece by putting someone or something where they don’t belong. Make a 10×8 or 8×10 200 resolution document in Photoshop and bring in Internet images for this assignment. Practice selecting, masking and refining your selections. Save as a jpeg and post to your blog.
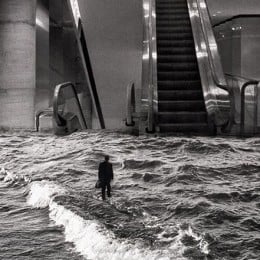


3. LENSES READ AND WRITE Read this article and write three paragraphs explaining what you now know and understand about camera lenses. ALL ABOUT LENSES
4. SHADOWS AND LIGHT -Take and edit 2 photos which show strong SHADOWS and CONTRAST -Include technical info with each photo: MASIL: f-stop, Shutter Speed, ISO, Mode, Lens -Get a photo from the Internet showing shadows -Write a 20 sentence critique about the Internet photo -Post to blog


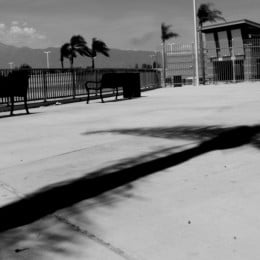

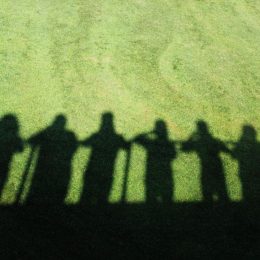


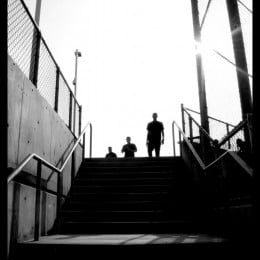


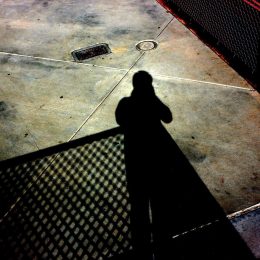

___________________________________________________
First assignments for 2018-2019 school year:
1. Make a blogsite with edublogs. https://edublogs.org/ Join the class blog, (cauchonphoto.edublogs.org), select a template, and design your site layout and design. Due Fri, Aug 10
2. Read the following link and write 25 complete sentences reviewing what you learned about aperture, shutter speed, ISO, and camera modes. As your first blogpost, copy and paste in your sentences from a word document. Due Friday, Aug 10 http://www.cambridgeincolour.com/tutorials/camera-exposure.htm
3. Play around with the camera simulators and learn how to use the camera controls. Then practice with the camera in the classroom. https://camerasim.com/camerasim-free-web-app/ http://www.canonoutsideofauto.ca/play/
4. First Shooting Assignment: TEXTURE Go outside in brighter light and photograph 5 photos that show texture. Put your ISO at 400, and meter the scene to get the correct exposure. Put your photos in a folder on your h drive: DIGITAL PHOTO>TEXTURE ASSIGNMENT Edit your photos in Photoshop with IMAGE ADJUSTMENTS and post 3 of your photos to your blog. INCLUDE THE TECHNICAL INFORMATION(for each photo): aperture, shutter speed, ISO, and camera mode Find one photo online which shows amazing texture. Write a two paragraph critique explaining why you think this is such a successful photograph and why you chose it. Be sure to use academic language, proper grammar and sentence structure.
5. COMPOSITION Read about what makes strong composition in a photograph and what catches the viewers eye. Find 12 sample photos online which show good composition. Make a gallery of images in Edublogs. Post your gallery and write 12 complete sentences, (with capitals and periods), one sentence under each photo in the gallery before posting, to explain what element of composition each photo represents. ______________________________________________________________ ______________________________________________________________ LAST ASSIGNMENT OF THE YEAR:
LIGHTROOM SLIDESHOW PORTFOLIO
- Make sure to make slideshow in YOUR catalog
- Import Portfolio Photo Folder from Desktop
- With photos all selected create a collection
- Organize and reorder in Library
- Edit in Develop
- In Library module, go to metadata for each image and add a caption
- Go to Slideshow module and on each photo go to ABC and then caption to move caption where you want and choose color
- In slideshow choose background and wash color, stroke, timing and import music
- Preview slideshow, then play
- Export out to Desktop
- Give to Cauchon in her flashdrive
________________________________
ASSIGNMENTS DUE FRIDAY, MAY 4
1. Silhouette Series
Think of a good concept for your silhouette photos and then take photos of backlit subjects to make high contrast silhouettes. You can edit them in Photoshop to give them more blacks and whites, and contrast. Use studio hot lights with two lights aimed at the background and turn the room light off to get more shadow on the subject(s). Meter for the background.


2. Shoot like Aaron Siskind
Research the work of Aaron Siskind, an American photographer who shot abstract black and white images, which focus on nature, architecture and human form. Take some photos on the MONOCHROME setting, in the style of Aaron Siskind, edit them with good density and contrast, and post 2-3 black and white images on your blog with the technical information in the caption of each photo. Under your photo, post a photo by Aaron Siskind and write three complete sentences describing his work and your opinion of his work.


3. Food Photography
-Go online and look at good samples of food photography. Post 2-3 amazing photos of food that you really enjoy looking at and write a 2 paragraph reflection about why you think the lighting and composition is so strong that the photo makes you crave the food. Explain how you think the lighting was achieved. -Read this online article on how to photograph food (and research some other tips online) and write 10 complete sentences on your blog on what you learned. http://digital-photography-school.com/top-5-tips-on-how-to-photograph-food/ -Then, pretend you are a studio food photographer and photograph food using the studio and the strobes. Take a few photos with varying compositions and post your favorite one or two edited photos to your blog with the writing assignments.


4. Letter to next years photo students
Write a three paragraph letter to next year’s photo students. Talk about what you liked and did not like about the class, projects and workload, and any other pieces of advice you give to future Digital Photo students here at Jurupa.
5. Masters of Photography Essay
Look at this website: http://www.masters-of-photography.com/ and find one photographer whose work you admire. Write a 300 word essay about that photographer, his background, style of work, lighting and compositions. Also include what it is that you like about their work and how it inspires you. Include at least two of their photographs in your blog post _____________________________________________
NEW ASSIGNMENTS
1. ALBUM COVER DESIGN You will design an album cover (10×10 300 res) for an artist in Mr. Fresquez’s digital audio production class. You will work together with the artist to conceptualize and execute their ideas for their album cover. You will photograph the imagery for them and design the cover based on their ideas and desires. Post the cover design on your blog and also write a paragraph reflecting on how it was to work with an artist and share ideas for the final product.
2. GRADUATION COVER DESIGN Create a design for the cover of the Jurupa Hills 2018 Graduation booklet. The size should be 5.5 x 8.5 300 resolution. Make sure to include the following info: Jurupa Hills High School Graduation, Citizens Business Bank Arena, Thursday, May 24, 2018 from 3:00 pm to 5:00 pm. Post to your blog.
-

- Nadia
-

- Mandy
-

- Joseph
-

- Haila
-

- Arleen
-

- Angie

3. FILL FLASH OUTSIDE -Read these link about using FILL FLASH outside to fill in the shadows. Write 3 paragraphs explaining what fill flash outside is and why you would need to use it to get perfect exposure on the subject and background. http://www.digital-photo-secrets.com/tip/195/using-a-flash-when-outside/ -Go outside and photograph a subject which is BACKLIT. Set your camera on AV to meter the natural light. Use a small aperture like f11 or 16 and a low ISO like 200 or 400. Make sure your flash is on ETTL and fill the subject in shadow with fill lighting from the external flash. Post 2-3 photos showing your understanding and good usage of fill flash.


______________________________________________
ASSIGNMENTS DUE WEDNESDAY, APRIL 4:
1. MULTIPLE EXPOSURE WITH FLASH AND SLOW SHUTTER SPEED In the dark studio, set your camera to 30 seconds at F 8 or 11 (adjust as necessary to get the perfect exposure)and 200 ISO. Make sure to be on Manual metering and MF for manual focus. Focus before the lights go off. During the long exposure, have your subject move slightly and manually set off the external flash (at M mode, not ETTL) each time they move and you will capture them several times during the long exposure. You should post your best 1-3 images from the multiple exposure shoot. READ AND WRITE: MULTIPLE EXPOSURES WITH FLASH Read these online article and write 20 sentences about what you learned. http://www.photomatters.org/multiple-exposure http://www.tpub.com/photography1/ph20994.htm


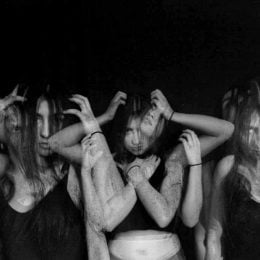

2. PORTRAIT WITH MAKE UP Take a beautiful portrait of someone and apply make up to their face using Photoshop paint and brush tools. (Make sure the portrait is a head and shoulder shot.) Put makeup on 2 different portraits and post them to your blog. Read this link and watch the video about painting with brushes & make a blogpost explaining 5 important tips you learned from reading it. https://helpx.adobe.com/photoshop/using/painting-tools.html


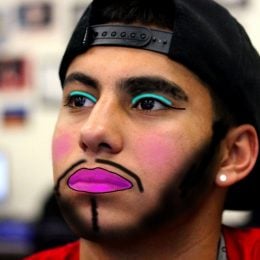


3. PUT YOURSELF IN HISTORY Find a historic photo online and include yourself in the scene. Adjust size, color and resolution to match the historic photo to look as realistic as possible. Under your photo write a 2-3 sentence explanation as to why you chose to put yourself in this historic photo. Samples below:
______________________________________________________________ YOUR PHOTOGRAPHY BUSINESS POWERPOINT AND BUSINESS CARD (worth 3 assignment grades) You will start a (pretend) photography business either by yourself or in partnership with one of your peer students. Create a Powerpoint Presentation to present to the class and include the items on the list below: * Business Name * Your name as sole owner or names of people in the partnership * The type of photography you specialize in, and the types of jobs you intend to get. * Samples of work you would like to produce for your clients. * What type of equipment will you be using and how much will you be spending on equipment? (Go to B&H.com to look for equipment) * How much will you charge? Will you offer packages? * Your (pretend) web site address * Who are your inspirations? * Where will you conduct your business? (which state will you live, will you work out of your home or rent office space in which location) * Branding: Your business card (Make your business card a 3.5 x 2.5 document in Photoshop) * Marketing: Include a slide about how are you going to advertise and get jobs in your field? * Market Research: How much money you would like to make in your first year of business, and how much you foresee making in 5 years, and also in 10 years. *ASSIGNMENT PRESENTATIONS BEGIN THURSDAY, MARCH 8 _________________________________________
Assignments due Friday, March 2
1. PAINTING WITH LIGHT -Go to a dark place to shoot for this assignment (back studio). Put the camera securely on a tripod and put your shutter speed at 20 to 30 sec (not 20th of a sec…but 20 full seconds). You must put the camera on self timer to avoid camera shake. Shoot on manual and try your fstop at 8 or 11. ISO at 200. -Pre focus on Manual focus mode, because the camera will not in autofocus! -Wave finger lights in front of the frame during the exposure and check out the results! -Post 1 to 3 Painting with Light photos you took and edited on your blog. Critique: Find an amazing painting with light photo on the Internet and write a paragraph about how you think the photographer achieved the result and why you think it is so eye catching.


2. YOUR FAVORITE TEACHER Use bounced external flash off camera and sync cord, to take some nice portraits of your favorite teacher. Edit and post your best portrait and write a 3 paragraph reflection in academic language explaining why you like and admire this teacher. Give details, reasons and examples as to why you chose this teacher. Samples below:


3. BODY, SHAPE, FORM Photograph a part of the body, or something, which shows shape and form. Think about getting great QUALITY OF LIGHT and make your composition a strong one. In the caption section of your image write 10 words to describe your final image.
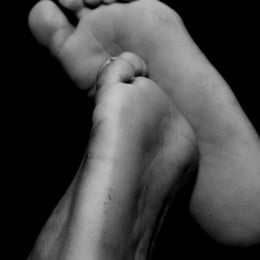

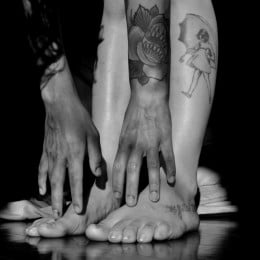
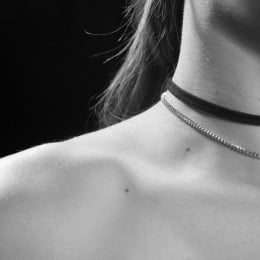

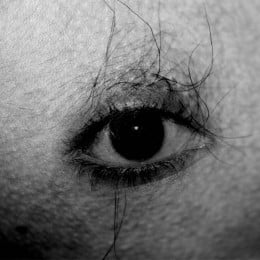


4. SPORTS PHOTOGRAPHY FROM THE OLYMPICS CRITIQUE Look online for photographs from this years winter Olympics. Find a few photos (3-5), which you think are absolutely amazing. Post them to your blog and explain under each photo how you think the photographer shot the image technically. Also talk about the composition and why the image is so successful. ___________________________________________
NEW ASSIGNMENTS DUE TUESDAY, FEBRUARY 20:
1. MAGAZINE COVER Look at magazine covers online and post 3-5 covers you like and explain why these covers attracted your eye. Then create a magazine cover (9×12 @ 300 res)using your own photographic image. Include the name of the magazine and a list of articles, which would be within the magazine. Make it look as authentic as possible.
2. READ AND WRITE: FLASH BASICS Read this online article and on your blog write three paragraphs explaining the main points in the article and at least five things you learned from reading it. http://www.popphoto.com/gallery/21-tips-better-flash-photography
3. 3-5 ON LOCATION PORTRAITS WITH BOUNCED FLASH Use the Canon digital camera and an external bounced flash to photograph portraits on location. Set your camera on Manual, Auto White Balance, ISO 400, F8 @ 60th of a second shutter speed. Photograph at least 10 portraits and post your top 3-5 edited bounced flash portraits to your blog. As a writing critique answer the following questions on your blog in a separate post. Samples below: -When would you use external flash? -What does flash synchronization mean? -What does ETTL mean? -What will happen when you shoot faster than the camera sync speed? -Why do photographers bounce the flash and use a diffuser? – What is a slave? -What should you do if your image comes out too dark or too light?
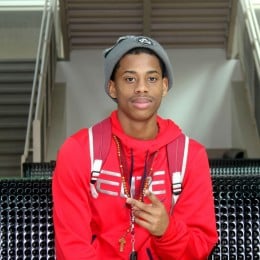


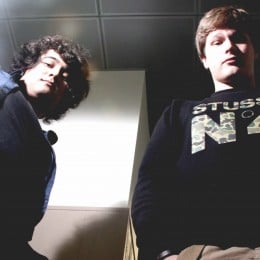
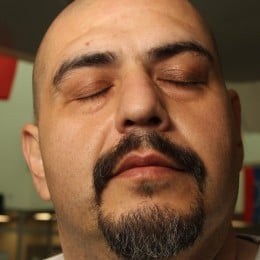
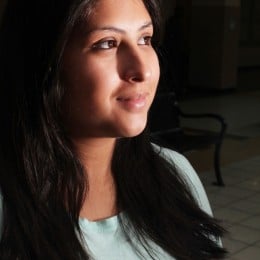


4. TAKE A VACATION In this assignment you are going to go on a virtual vacation. Find a location online where you would like to go and digitally put yourself into that location. Make sure to match lighting and color balance to make it look realistic as possible. You must add 3 props into the scene (sunglasses, shopping bags, friends to go with you, etc…) Make your new document for all the elements in the image a 12×8 150 resolution. include 1-3 sentences under your photo when you post it to explain why you would like to go on this vacation.
_______________________________________________
NEW ASSIGNMENTS DUE MONDAY, FEBRUARY 5
1. READ AND WRITE: INTRODUCTION TO USING STROBES Read this entire article on beginning strobe use and then write a three paragraph reflection on your blog detailing what the article is about and the most important things you got out of reading it. https://photography.tutsplus.com/articles/a-fundamental-introduction-to-studio-lighting-equipment–photo-6067
2. STUDIO PORTRAITS WITH STROBES AND GELS Photograph 25 portraits in the studio using the strobes and colored gels in the background. Edit your portraits in Lightroom and make cosmetic retouches in Photoshop. Post 9-12 final portraits on your blog. Writing critique: Find a portrait online that was shot with studio strobe lighting and write 20 sentences to describe the subject and their personality based on the photographers version of them. Evaluate the lighting used in the photograph and how you think the lights were arranged to get the results. Samples below:
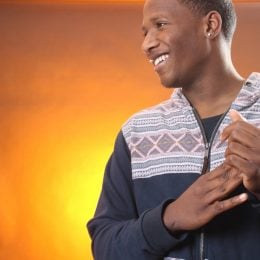


3. HDR PHOTOGRAPHY -Go online and research the meaning of HDR photography. Create a blogpost explaining what the term HDR in photography means and ways to achieve successful results. –Look online for an HDR image and then make a blog post about one image that impresses you and why? Include the image in your post. -Photograph 5 different exposures of a landscape (on Manual) for this assignment. One at the perfect exposure, plus one and two stops underexposed and one and two stops overexposed. USE A TRIPOD for this! -Save images in a folder and open Photoshop>File>Automate>Merge to HDR Pro -Select your five landscape images and press ok. Photoshop will compile your images into one HDR image. -You will probably need to do more adjustments to make it more vibrant and saturated. You should bring in cool clouds from the Internet to blend into your sky. Post to blog with a list of the 5 exposures you used to create the image. (MASIL) Samples below:
++++++++++++++++++++++++++++++++++++++++++++++++++++++++++++++ NEW ASSIGNMENTS AFTER BREAK: DUE FRIDAY, JAN 20, 2018
1. 50 PHOTOS EDITED IN LIGHTROOM Take 50 different photos of the same subject. Vary the lighting and composition of your photographs. Edit your photographs in Lightroom and post the BEST 20-30 photos to your blog as a gallery.
2. 5 COMMENTS ON THE BLOG HIGHLIGHTS OF SEMESTER 1 POST> -3 COMPLETE SENTENCES PER COMMENT
3. TEDTALK: HOW PHOTOGRAPHY CONNECTS US
Watch this Tedtalk on how photography connects us and on your blog make a post summarizing, critiquing, judging and evaluating what you got out of watching the video. Have at least 3 paragraphs.
3. AM I TALKING TO MYSELF
Photograph several images of yourself or someone else in the same location, and put them all together in Photoshop to make it look as if you (or they) are relating to themselves in some way. Use one of the photos as the base image, and move the other subjects in the base image to create a unique photo for this Am I Talking To Myself assignment. Writing Critique: Make a blog post called My Inspiration and list 15-20 things, which inspire your creativity. Sample student work below:
_______________________________________________
ASSIGNMENTS DUE TUESDAY, DECEMBER 5
1. Your Portfolio
Put your best work together in a Portfolio. Use Powerpoint to present your portfolio to the class. Your portfolio should consist of (at least) 12 slides. 1 Intro slide with your name on it and 10 slides of your best work to date (1 image per slide). The last slide should contain a quote that is meaningful to you.Put in my flash drive or email me at caucrg@fusd.net, by Tuesday December 5. Also put your portfolio images on your blog as a gallery.
2. Self Portrait with Text
Take a tripod and DSLR camera on self-timer mode and photograph a few self portraits (photographs you take of yourself). Edit your favorite photo in Photoshop and include some text within the image to create a mixed media selfie. In the caption section when you post include the MASIL and for a critique make a list of 25 words or phrases to describe yourself. Student samples below:


____________________________________________
Photographer Research Project (due Tuesday, November 28)
You will produce and present a PowerPoint Slide Show about a professional and influential photographer of your choice. The project is to have 15-20 slides and include the information below, and at least 10 photographs. You can choose from the enclosed list or pick a significant photographer of your choice. Questions to answer when doing photographer research project are below. Email your presentation to caucrg@fusd.net or put in my flashdrive by Thursday, November 16.
- What is the photographer’s real name and year he or she was born? Is he/she still alive?
- What is their style of photography (ex: photojournalism, editorial, documentary, advertising, portraits, magazine, sports, war)?
- Are there any special photography techniques this photographer uses in his/her work? (Think about composition, depth of field, history…)
- Who does the photographer work for?
- What type of cameras and lens does this photographer work with, and why?
- What type of lighting does this photographer primarily use and why?
- Who are some of your photographer’s early influences?
- Are there any interesting stories about this photographer or his/her work?
- What do you like (or not like) about their work, and why did you select this photographer?
Robert Mapplethorpe – flowers, portraits, nudes * Annie Leibovitz – celebrity portraits * Danny Clinch – musicians * Edward Weston – black and white nudes,landscapes Ansel Adams – black and white landscape Cindy Sherman – self portraits * Diane Arbus – strange and different portraits * David Lachappelle – unique portraits * Imogen Cunningham – black and white Eliot Porter – color landscape Alfred Eisenstadt – candid photojournalism Linda McCartney – musicians in the 60’s Herb Ritts – celebrity portraits * Henry Cartier- Bresson -candid street, the decisive moment Andy Warhol – bizarre Robert Frank -street Mary Ellen Mark – portraits * Eddie Adams – war, photojournalism Robert Capa – war Paul Strand – black and white Lewis Hind – child labor James Nachtwey – war * Irving Penn – fashion, still lifes * Richard Avedon – portraits Margaret Bourke White – early photojournalism Lee Friedlander – black and white candid Harold Edgerton – motion Sebastiao Salgado – photojournalism Weegee – street photojournalism Mark Seliger – celebrity portraits * Jerry Uelsmann – photo montage * Dorothea Lange – documentary Anne Geddes – children Kim Anderson – children Nigel Barker- Fashion William Wegman – dogs Man Ray – rayograms, fashion, portraits in the 20 Arnold Newman – environmental portraits * Steve McCurry – National Geographic portraits * Danny Lyon – street and documentary Brad Mangin – sports Neil Leifer – sports _________________________________________________________
New Assignments due Thursday November 9
1. Candid Moments with Captions (3-5 Photos with captions for each)
Photograph candid moments and edit your images in Photoshop. In the caption section of each photo you post write a caption including who, what , where and why. include your technical info for each photo (MASIL) For a critique look at the work of photographer Henri Cartier Bresson ,who captured the “decisive moment”. On your blog post 2-3 of his photographs and write 10 sentences about his work and your opinion of his timing, composition and ability to capture the perfect moment. Student Samples below:
2. Define these 35 words in a word document and then copy and paste your definitions in a blog post titled Photography Definitions:
pixels, image resolution, megabyte, megapixel, gigabyte, jpeg, raw, tiff, png, white balance, histogram, aperture, shutter speed, depth of field, aperture priority, shutter priority, bitmap, exposure, watermarking, optical zoom, digital zoom, bracketing, light meter, image stabilization, noise, lag time, hot shoe, fisheye, macro, telephoto, wide angle, DSLR, dynamic range, exposure compensation
3. Mirror Imagery
Photograph an interesting photo with lots of lines. Put the edited photo in a new document and make a copy of the image to flip to make mirror imagery. Either 2 or 4 images would work for the mirror image. Post to blog. List 10 words to describe your photograph.
__________________________________________________________________________________________________________________________________________________________________________________________ NEW ASSIGNMENTS DUE MONDAY, NOVEMBER 6
1. PORTRAIT LIGHTING READ AND WRITE Read this link about Portrait Lighting and on your blog write a synopsis of the key facts you learned when you read the article in 2-3 paragraphs. http://www.cambridgeincolour.com/tutorials/portrait-lighting.htm
2. WHITE BALANCE READ AND WRITE http://digital-photography-school.com/introduction-to-white-balance/ Read this link on white balance and on your blog write a one paragraph synopsis of what you learned from reading the article. Under that list all the white balance settings and at least one sentence about each.
3. STUDIO PORTRAITS Use the studio backdrop (white or black) to photograph PORTRAITS of classmates. Use the tungsten “hot lights” to light the portraits Make sure to put your white balance on TUNGSTEN and shoot at ISO 400 or 800. Go right up to the subject and meter them on MANUAL. Take at least 12 photographs and edit them in PS. Post anywhere between 6 and 12 portraits as either a gallery or individually.. Include technical info: MASIL Critique: Find a studio portrait online and write a list of 25 words you would hashtag the photo if you posted it on Instagram. Include the photographers name if possible. In a separate blog post, answer these questions: 1. What is the purpose of the main light? 2. What is the purpose of the fill light? 3. List the lighting patterns.
4. ALPHABET PHOTOGRAPHY -Look for images which represent letters and create a word in photographs -Edit your photos in PS and then make a new document to put the word in. -Make your document 16×8 2oo resolution and fit your images in to make the word. If you need more space go to Image>Adjust>Canvas Size and resize bigger. -Save as a jpeg and post to your blog. -Critique: List 5 valuable things you learned in Photo class so far this year.


_______________________________________________________ ASSIGNMENTS DUE FRIDAY, OCTOBER 20
1. COMMENTS ON THE BLOG Make 5 comments on the homepage of the blog. Be more specific with your comments and tell what it is you like or do not like about the work. Be constructive with your criticism.
2. WARHOL / POP ART -For your Pop Art assignment you should photograph an object, which is POPULAR IN THE CULTURE TODAY. -Make 4 copies of the photo you chose, 4×6 or 6×4 (200 res) each, labeling them Warhol 1, Warhol 2 and so on… (you can change the size in PS in IMAGE>IMAGE SIZE (6×4.5 or 4.5×6 is ok too. Just make your big document 12×9 or 9×12 if you do that) -Work on each picture separately, experimenting with filters, gradient maps, colors, patterns, and more….make sure there is contrast between the subject and the background! -When you complete the 4 individual photos, merge the layers in each. -Open a new document in Photoshop, 8×12 or 12×8 (200res)…or 9×12 or 12×9 if your individual shots are 4.5×6 or 6×4.5 -Move the four individual photos into the new document. -Save as a jpeg and post with critique. -Critique: Research and answer these questions about an interesting pop artist. Post one of his or her works with your answers to the following questions.
- What is Pop Art?
- Why is this artist’s work considered Pop Art?
- Describe some of this artists work.
- Why did you pick this artist and why do you like his/her work?
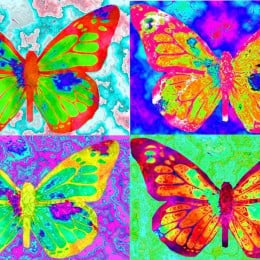


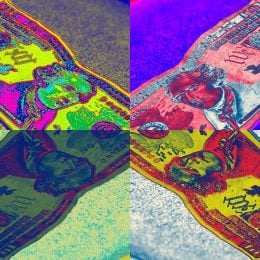

3. WHAT IS YOUR COLOR Create a Photoshop Collage 12×9 or 9×12 300 resolution representing your favorite color. Include a photo of yourself, the color you select and some writing about why this is YOUR color. Perhaps add a tint of your color. Post to blog.

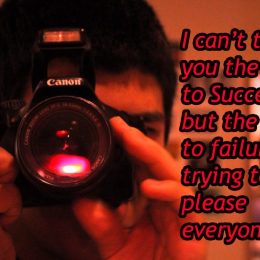
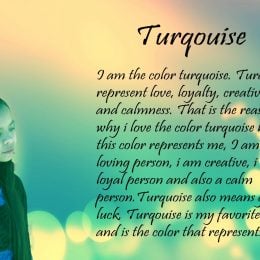


4. JPEG VS. RAW READ AND WRITE Research what jpeg and raw file formats are, and the differences between them. Write a three paragraph reflection comparing and contrasting them both on your blog. ______________________________________________________________ ASSIGNMENTS DUE TUESDAY OCT 10
1. CAPTURING ACTION AND MOTION IN PHOTOGRAPHY -Read these online article about capturing action and motion photography and write one or two paragraphs stating what you learned about action and motion photography techniques.. http://www.digital-photo-secrets.com/tip/50/freezing-the-action/ http://digital-photography-school.com/how-to-capture-motion-blur-in-photography/ -Take photos outside that capture ACTION SHARP. Try to “capture the moment”. Shoot at the shutter priority mode and auto focus AI SERVO . Make sure your shutter speed is above 125th of a second. ISO 400 Take several photos and post your favorite 2 action shots, edited in Photoshop. -Take action photos inside trying to capture MOTION BLUR. Try to “capture the moment”. Shoot at the shutter priority mode and auto focus AI SERVO mode. Make sure your shutter speed is 60th or below for more blur. Use a tripod to make sure stationary objects are not blurred. Take several photos and post your favorite 2 shots , edited in Photoshop. -Include technical info on all photos: MASIL -Find 2 photos online, one showing action sharp and another showing motion blur. Guess what shutter speeds, f stops, and lens were used. Post as critique. Samples below:
-
- Erik

-

- Catresse

2. POETRY AND YOUR PHOTOGRAPHY 1. Take a new photo for this assignment or use one of your existing edited photos. 2. Make a new document 11×14 or 14×11 @ 300 res 3. Move your photo into your new document and size to fit. 4. Add a quote, poetry, song lyrics or your own words to your edited image. Make sure to put a layer style with your text. 5. Post to your blog
______________________________________________________________ ASSIGNMENTS DUE MONDAY, OCTOBER 2
1. DEPTH OF FIELD -Read these two links and write two paragraphs explaining in your own words what depth of field is in photography and the ways to control depth of field when shooting. Call this blogpost: Depth of Field Explained. http://www.macworld.com/article/1150150/depthoffield.html http://www.digitalcameraworld.com/2013/07/17/what-is-depth-of-field-how-aperture-focal-length-and-focus-control-whats-sharp/
– Go outside and take two photographs of the same subject, trying to get two different depth of fields. Remember to first format the memory card, set WB to auto and ISO to 400, and be on Manual focusing. You will set the camera mode to AV (aperture priority). Make sure to focus on the same subject for both shots you take.
-In Photo #1 You will get a shallow depth of field. Zoom out to the longest focal length of the lens which is 55mm. Set the aperture on f5.6 (the widest aperture at 55mm) and take note of what the camera sets the shutter speed at. Make sure it is not below 60th of a second. Get in good and close to your subject
-In Photo #2 You will get a good depth of field. Put your lens at 18mm ( which is the widest lens mm on your lens). Set your aperture at f16, and take note of what the camera sets the shutter speed at. Make sure it is not below 60th of a second, or open up the aperture to f11. Stay a bit further back to get a better depth of field. -Repeat the depth of field activity 2-3 times to make sure you get it right. -In the lab, edit your photos for maximum impact and post each one (good and shallow depth of field) to your blog(large photo size). Include the technical info in the caption section of each MASIL (Mode, Aperture, Shutter Speed, ISO, Lens mm)
– For the critique for this assignment you are to find two photos online- one which shows a good depth of field and one which shows a shallow depth of field. In the caption section when you post them guess at what you think the aperture, shutter speed and lens mm was for each photo.


2. 100 MOST INFLUENTIAL PHOTOS OF ALL TIME http://100photos.time.com/ Read this link and on your blog pick 3 of the most influential photos to write about. Include the story behind the photo and what intrigues you about it. Make sure to post the three photos with your writing.
3. ILLUSTRATION OF AN ICONIC IMAGE Make a new document 8×12 or 12×8 150 resolution. Paste the illustration you want to trace and fit to the correct size. Make a new blank layer to trace on and lock it. Trace the illustration with a thin pencil and then color it in with brushes and the paint bucket. Make sure to add a background to your illustration. Samples below:


ASSIGNMENTS DUE FRIDAY, SEPTEMBER 22 1. FRAMING A SUBJECT -Take at least 3 different photographs using framing in the composition. Post 2-3 of your photographs, EDITED of course. Include the technical info: MASIL. SAMPLES BELOW -Critique your own photographs you posted and answer these questions.
- What camera metering mode did I use and why?
- Do I have a strong composition?
- How well did I edit my photographs?
- What would I do differently if I shot this assignment again?
- Do you think your photographs belong on the blog home page and should be considered one of the best from all the photo classes?
2. WORD ART -Make a Photoshop document 4×6 or 6×4 (100 ppi) -Find an interesting image on the Internet and use the move tool to move it into your document in Photoshop -Size it with Control T + shift to fit in the document -Make another document the same size as the first -With the Text Tool, type a word or phrase in a thick black font -Find a picture online to go inside of the word and copy and paste it into the document with the text -Put the picture layer on top of the word layer -Press Control +Alt + G to put the image inside the word. -Merge the picture and text layers together (make the background layer invisible to not include it in the merge) -Move the word with the picture in it in the other document with the Internet image, and save as a .jpeg. Post to blog.


3. HISTORY OF PHOTOGRAPHY Watch the Powerpoint about the History of Photography history-of-photo-presentation-1vfj5uz Also go online and research the History of Photography Use this timeline template to list the most important inventions and events in history in chronological order. Copy the template and open it in Photoshop. Fill in the boxes with dates and important inventions in photography.Post the template to your blog in a post titled: History of Photography Timeline. Under the template list 3-5 events and/or inventions in photography which impresses you the most, and has the most impact on your life today. (2-3 paragraphs) ___________________________________________________________ ASSIGNMENTS DUE FRIDAY, SEPTEMBER 15, 2017 1. SHADOWS AND LIGHT -Take and edit 2 photos which show strong SHADOWS and CONTRAST -Include technical info with each photo: MASIL: f-stop, Shutter Speed, ISO, Mode, Lens -Get a photo from the Internet showing shadows -Write a 10 sentence critique about the Internet photo -Post to blog
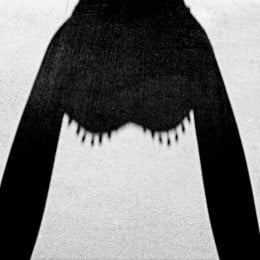

2. DIGITAL COLLAGE: ALL ABOUT ME -Gather imagery online that represents at least five things about yourself. -In Photoshop, make an 8×10 or 10×8 @150 resolution document and title it All About Me Collage -Select elements from the Internet images to move into your collage. -After you get a good selection with the magic wand or magnetic lasso, remember to go in Mask and refine your selection. If you want soft edges you will go to select>modify>feather. -Think about rules of good composition when designing your layout of elements and background. Move layers around from the layer palette. -To blend layers for a unique effect, you use the move tool and use Shift+ to scroll through blend modes. -Save your work as a psd until you are completely done with it, and then save as a jpeg to post to your blog. -Write a three paragraph reflection about what how your collage visually represents you. Post under your work in your blog.
-
- Destiney
-
- Louis
-
- Vivi
-
- Janice
-
- Mandy
-
- Johnny
-
- Joseph
-
- Brandon
-
- Tasneem
3. COMMENTS ON STUDENT WORK Look at the photos on the blog homepage and make at least 3 comments on three photos created by your peers. Use complete sentences and have at least two sentences per comment. Include your name at the end of the comment. ______________________________________________________________ ASSIGNMENTS DUE WEDNESDAY, SEPT 6
1. ON LOCATION PORTRAITS WITH NATURAL LIGHT -Take at least 10 portraits of a classmate on location using natural light -Think about exposure, lighting, composition, posing and expression. (Make sure your subject does not have on the yellow vest in the portrait photographs you are taking.) -Set your ISO to 1600 or 3200 so your shutter speed does not go below 60th of a second. Open your aperture up as wide as it will go. -Edit your photos in Photoshop and post between 3-10 EDITED photos of your subject (as a gallery or as individual photos) -Critique: Find an on-location portrait online with natural lighting. Post that photo and make a list of 25 words you think of when you look at this photo. Include the photographers name if possible. -****Include your technical info in the caption section of each photo. MASIL

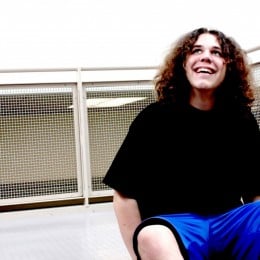

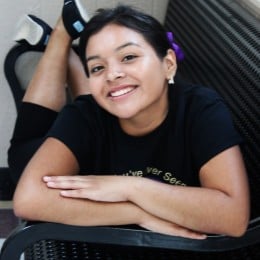


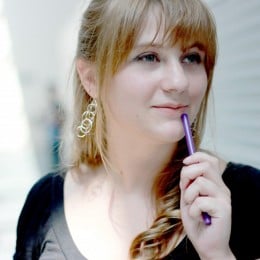

2. SURREALISM -Research online for the meaning of SURREALISM and post the definition of surrealism and one example of a surrealistic work of art or photograph. In 2 paragraphs, explain what surrealism is, and why you chose this image and what makes it surreal. Make sure to credit the artist. (Salvador Dali, Rene Magritte, and Jerry Uelsman are a few surrealistic artists) -After practicing with Kim on the mountain, make your own surrealist piece by putting someone or something where they don’t belong. Make a 10×8 or 8×10 200 resolution document in Photoshop and bring in Internet images for this assignment. Practice selecting, masking and refining your selections. Save as a jpeg and post to your blog.

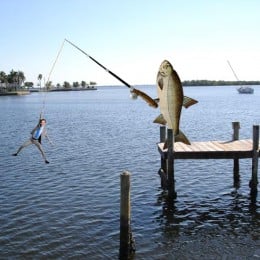


3. CAMERA MODES http://digital-photography-school.com/digital-camera-modes Read through this link on camera modes. On your blog make a new post writing 2 sentences about what each camera mode does. *******************************************************************************
ASSIGNMENTS DUE FRIDAY, AUGUST 25
- ALTERNATIVE CAMERA ANGLES -Go outside in brighter light and take 4 photographs of the same subject from 4 different camera angles- strait on, from above, from below, and then tilt the camera at any of the other 3 angles. Put your ISO at 400, and meter the scene on Manual to get the correct exposure. Keep your exposure the same on all 4 photos and make sure to keep the same subject in focus for all 4. -Put your photos in a folder on your h drive: DIGITAL PHOTO>ANGLES -Edit your photos in Photoshop with IMAGE ADJUSTMENTS and post all 4 of your photos to your blog (large). INCLUDE THE TECHNICAL INFORMATION: MASIL: Mode, Aperture, Shutter speed, ISO, and Focal Length of Lens -Find one photo online which shows an interesting camera angle. Post it to your blog and write a 10 sentence critique explaining why you think this is such a successful photograph- compositionally and technically, and why you chose it.
-

- Omar
-

- Brandon A
-

- Sharyse
-
2. MANDALAS Create 2 unique mandalas in Photoshop, using the shape tool and Internet imagery. Make a new document 8×8 100 res and create each mandala, thinking about composition and symmetry. Draw a circle with the elliptical marquee tool. Press control and J to make the selection its own layer. Stroke the layer to see the circle. Use the shape tool to put in shapes. Copy a shape by pressing alt with move tool. To combine shapes into one layer, make any layer you do not want combined invisible, and then go to layer>merge visible. To flip a layer, go to Edit>transform>transform either vertical or horizontal. When you save each mandala, save as a .png, not .jpeg. When you post it will only show the circle, not the white document. (If you are not done with your mandala be sure to save it as a .psd while you are still working on it.)


3. LENSES READ AND WRITE Read this article and write three paragraphs explaining what you now know and understand about camera lenses. lenses-1kaubut ____________________________________ First assignments for 2017-2018 school year: 1. Make a blogsite with edublogs. https://edublogs.org/ Join the class blog, select a template, and design your site layout and design. 2. Read the following link and write 25 complete sentences reviewing what you learned about aperture, shutter speed, ISO, and camera modes. As your first blogpost, copy and paste in your sentences from a word document. http://www.cambridgeincolour.com/tutorials/camera-exposure.htm 3. Play around with the camera simulators and learn how to use the camera controls. Then practice with the camera in the classroom. http://camerasim.com/apps/camera-simulator/ http://www.canonoutsideofauto.ca/play/ ____________________________________________________________________________________________________________________________ ____________________________________________________________________________________________________________________________ ASSIGNMENTS DUE FRIDAY, AUGUST 18
1. First Shooting Assignment: TEXTURE Go outside in brighter light and photograph 5 photos that show texture. Put your ISO at 400, and meter the scene to get the correct exposure. Put your photos in a folder on your h drive: DIGITAL PHOTO>TEXTURE ASSIGNMENT Edit your photos in Photoshop with IMAGE ADJUSTMENTS and post 3 of your photos to your blog. INCLUDE THE TECHNICAL INFORMATION(for each photo): aperture, shutter speed, ISO, and camera mode Find one photo online which shows amazing texture. Write a two paragraph critique explaining why you think this is such a successful photograph and why you chose it. Be sure to use academic language, proper grammar and sentence structure.
2. COMPOSITION Read about what makes strong composition in a photograph and what catches the viewers eye. Find 12 sample photos online which show good composition. Make a gallery of images in Edublogs. Post your gallery and write 12 complete sentences, (with capitals and periods), one sentence under each photo in the gallery before posting, to explain what element of composition each photo represents. __________________________________________________ ASSIGNMENTS DUE TUESDAY, MAY 2:
1. MAGAZINE COVER Create a magazine cover (9×12 @ 300 res)using your own photographic image. Include the name of the magazine and a list of articles, which would be within the magazine. Make it look as authentic as possible.
-
- Lesley
-

- Gloria
-

- Ariel

-

- Edgar
-

- Augustin


2. PHOTOMONTAGE: WHERE YOU SEE YOURSELF IN 10 YEARS Make a well blended digital photomontage (12×8 or 8×12 -150 res) to show where you see yourself in 10 years. Under your photomontage write a 3 paragraph reflection explaining the elements you put in your work.


3. COMMENTS ON STUDENT WORK Look at the photos on the blog homepage and make at least 3 comments on the three photos created by your peers. Use complete sentences and have at least two sentences per comment. Include your name at the end of the comment. ___________________________________________________________ ASSIGNMENTS DUE TUESDAY APRIL 25
1. Graduation Cover Design: Create a design for the cover of the Jurupa Hills 2016 Graduation booklet. The size should be 5.5 x 8.5 300 resolution. Make sure to include the following info: Jurupa Hills High School Graduation, Citizens Business Bank Arena, Wednesday, May 24, 2017, 3:00 pm.


2. Advertising Photography For this assignment you will create a photograph that would be used for advertising purposes. First you will research advertising photography on the Internet to generate ideas. You will write a proposal before you begin to shoot. Answer the following questions:
- Who is the client, or company you are representing?
- What is the product?
- Who is the target audience?
- Where would you expect to see this advertisement?
- What kind of lighting are you going to use to make this look professional?
- What props do you need?
Shoot the product and use of variety of compositions. Think about: lighting, composition, depth of field, product placement. Use Photoshop to tweak and enhance your photograph. Add necessary text and captions. Post your best advertising shot, EDITED, to your blog with the proposal and 3 ads from the Internet which inspire you.. Samples below:


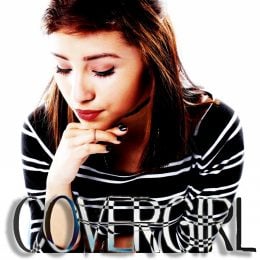

Photograph your Favorite Teacher with Writing Reflection Use bounced external flash off camera and sync cord, to take some nice portraits of your favorite teacher. Edit and post your best portrait and write a 3 paragraph reflection in academic language explaining why you like and admire this teacher. Give details, reasons and examples as to why you chose this teacher. Samples below:

4. Letter to Next Year’s Photo Students Write a three paragraph letter to next year’s photo students. Talk about what you liked and did not like about the class, projects and workload, and any other pieces of advice you give to future Digital Photo students here at Jurupa. _________________________________________________________ ASSIGNMENTS DUE TUESDAY APRIL 18
1. CANDID MOMENTS WITH CAPTIONS (3-5 Photos with captions for each) Photograph candid moments here at school, and edit your images in Lightroom and Photoshop. In the caption section of each photo you post write a caption including who, what, where and why. For a critique look at the work of photographer Henri Cartier Bresson, who captured the “decisive moment”. On your blog post 2-3 of his photographs and write 10 sentences about his work and your opinion of his timing, composition and ability to capture the perfect moment. Student Samples below:


2. MULTIPLE EXPOSURE WITH FLASH AND SLOW SHUTTER SPEED In the dark studio, set your camera to 30 seconds at F 8 or 11 (adjust as necessary to get the perfect exposure)and 200 ISO. Make sure to be on Manual metering and MF for manual focus. Focus before the lights go off. During the long exposure, have your subject move slightly and manually set off the external flash (at M mode, not ETTL) each time they move and you will capture them several times during the long exposure. You should post your best 1-3 images from the multiple exposure shoot. READ AND WRITE: MULTIPLE EXPOSURES WITH FLASH Read these online article and write 20 sentences about what you learned. http://www.photomatters.org/multiple-exposure http://www.tpub.com/photography1/ph20994.htm

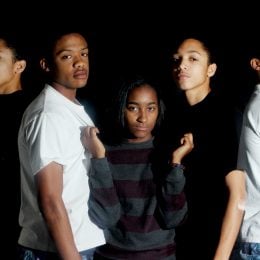
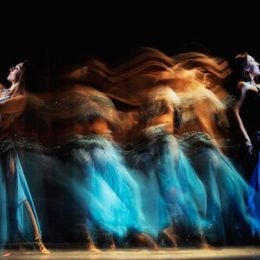


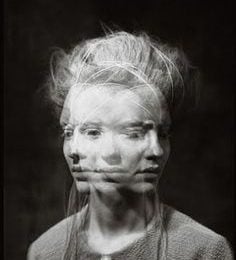


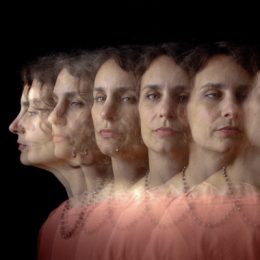
3. SPARTY SHOWCASE AND AWARD NIGHT POSTER Design an 11×14 (300 resolution) poster to advertise our Sparty Showcase and Awards Night on Tuesday, May 9,2017 from 6-8 pm. Include the following information in your poster and also a graphic or image. Sparty Showcase and Awards Night Jurupa Hills High School Palace of Fine Arts Tuesday, May 9, 2017 from 6-8 See the work of students in our CTE classes: Digital Photography Digital Audio Recording Television and Film Digital Graphic Design 3D Animation
4. WHAT IS YOUR COLOR Create a Photoshop Collage 12×9 or 9×12 300 resolution representing your favorite color. Include your self portrait, the color you select and some writing about why this is YOUR color. Post to blog.

_____________________________________________________________________ Assignments Due After Break YOUR PHOTOGRAPHY BUSINESS POWERPOINT: (worth 2 assign grades) You will start a (pretend) photography business either by yourself or in partnership with one or two of your peer students. Create a Powerpoint Presentation to present to the class and include the items on the list below: * Business Name * Your name as sole owner or names of people in the partnership * The type of photography you specialize in, and the types of jobs you intend to get. * Samples of work you would like to produce for your clients. * What type of equipment will you be using and how much will you be spending on equipment? * Your (pretend) web site address * Who are your inspirations? * Where will you conduct your business? (which state will you live, will you work out of your home or rent office space in which location) * Branding: Your business card (Make your business card a 3.5 x 2.5 document in Photoshop) * Marketing: Include a slide about how are you going to advertise and get jobs in your field? * Market Research: How much money you would like to make in your first year of business, and how much you foresee making in 5 years, and also in 10 years. ____________________________________________________________ ASSIGNMENTS DUE FRIDAY, MARCH 10
PORTRAIT WITH MAKE UP Take a beautiful portrait of someone and apply make up to their face using Photoshop paint and brush tools. (Make sure the portrait is a head and shoulder shot.) Put makeup on 2 different portraits and post your favorite one to your blog. Read this link and watch the video about painting with brushes & make a blogpost explaining 5 important tips you learned from reading it. https://helpx.adobe.com/photoshop/using/painting-tools.html Samples below:
SELF PORTRAIT ILLUSTRATION Take a self-portrait or use an existing one for this project. Make a new document 8×12 300 resolution. Put your self-portrait within the new document. Put a blank layer on top of your photograph, and lock the photo layer. Use the pencil to trace yourself and then use brushes and colors to color in your illustration. Add a background to your illustration layer and post to your blog as a .jpeg, with a list of 10 words to describe yourself.


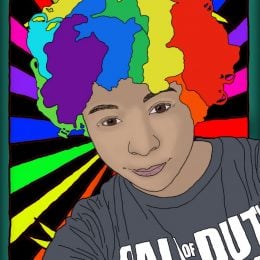
MASTERS OF PHOTOGRAPHY ESSAY Look at this website: http://www.masters-of-photography.com/ and find one photographer whose work you admire. Write a 300 word essay about that photographer, his background, style of work, lighting and compositions. Also include what it is that you like about their work and how it inspires you. Include at least two of their photographs in your blog post _____________________________________________________________ ASSIGNMENTS DUE FRIDAY, MARCH 3
1. HDR PHOTOGRAPHY -Go online and research the meaning of HDR photography. Create a blogpost explaining what the term HDR in photography means and ways to achieve successful results. –Read this article and then make a blog post about one image that impresses you and why? Include the image in your post. http://hdrguide.com/best-hdr-photographers -Photograph 5 different exposures of a landscape (on Manual) for this assignment. One at the perfect exposure, plus one and two stops underexposed and one and two stops overexposed. USE A TRIPOD for this! -Save images in a folder and open Photoshop>File>Automate>Merge to HDR Pro -Select your five landscape images and press ok. Photoshop will compile your images into one HDR image. -You will probably need to do more adjustments to make it more vibrant and saturated. You should bring in cool clouds from the Internet to blend into your sky. Post to blog with a list of the 5 exposures you used to create the image. (MASIL) Samples below:


2. FILL FLASH OUTSIDE -Read these links about using FILL FLASH outside to fill in the shadows. Write 10 sentences explaining what fill flash outside is and why you would need to use it to get perfect exposure on the subject and background. http://www.digitalcameraworld.com/2012/05/20/master-fill-flash-in-4-easy-steps/ http://www.digital-photo-secrets.com/tip/195/using-a-flash-when-outside/ -Go outside and photograph a subject which is BACKLIT. Set your camera on AV to meter the natural light. Use a small aperture like f11 or 16 and a low ISO like 200 or 400. Make sure your flash is on ETTL and fill the subject in shadow with fill lighting from the external flash. Post 2-3 photos showing your understanding and good usage of fill flash.


3. PAINTING WITH LIGHT -Go to a dark place to shoot for this assignment. Put the camera securely on a tripod and put your shutter speed at 20 to 30 sec (not 20th of a sec…but 20 full seconds). You must put the camera on self-timer to avoid camera shake. Shoot on manual and try your f-stop at 8 or 11. ISO at 200 ISO. -Pre focus on Manual focus mode, because the camera will not in autofocus! -Wave finger lights in front of the frame during the exposure and check out the results! -You might need to make adjustments in exposure and try again. Post your image (s) to your blog. Write a 10 sentence critique of your own work and post under your image. Read this link and make a list of 10 tips you learned about painting with light from reading it. https://microsites.lomography.com/light-painting/
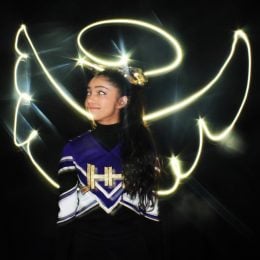
4. READ AND WRITE: FLASH BASICS Read this online article and on your blog write three paragraphs explaining the main points in the article and at least five things you learned from reading it. http://www.popphoto.com/gallery/21-tips-better-flash-photography ______________________________________________________________ Assignments Due Tuesday, February 21
3-5 On location portraits with bounced external flash Use the Canon digital camera and an external bounced flash to photograph portraits on location. Set your camera on Manual, Auto White Balance, ISO 400, F8 @ 60th of a second shutter speed. Photograph at least 10 portraits and post your top 3-5 edited bounced flash portraits to your blog. As a writing critique answer the following questions on your blog in a separate post. Samples below: -When would you use external flash? -What does flash synchronization mean? -What does ETTL mean? -What will happen when you shoot faster than the camera sync speed? -Why do photographers bounce the flash and use a diffuser? – What is a slave? -What should you do if your image comes out too dark or too light?


Take a Vacation In this assignment you are going to go on a virtual vacation. Find a location online where you would like to go and digitally put yourself into that location. Make sure to match lighting and color balance to make it look realistic as possible. You must add 3 props into the scene (sunglasses, shopping bags, friends to go with you, etc…) Make your new document for all the elements in the image a 12×8 150 resolution. include 1-3 sentences under your photo when you post it to explain why you would like to go on this vacation.


Read and Write : An Introduction to using strobes Read this entire article on beginning strobe use and then write a three paragraph reflection on your blog detailing what the article is about and the most important things you got out of reading it. http://photography.tutsplus.com/tutorials/an-introduction-to-using-strobes-in-your-photography–photo-692 ___________________________________________________________ NEXT ASSIGNMENTS DUE MONDAY, FEBRUARY 6
1. Am I Talking to Myself Photograph several images of yourself or someone else in the same location, and put them all together in Photoshop to make it look as if you (or they) are relating to themselves in some way. Use one of the photos as the base image, and move the other subjects in the base image to create a unique photo for this Am I Talking To Myself assignment. Writing Critique: Make a blog post called My Inspiration and list 15-20 things, which inspire your creativity. Sample student work below:
2. Studio Portraits with strobes and colored gels Photograph portraits in the studio using the strobes and colored gels in the background. Edit your portraits in Lightroom and make cosmetic retouches in Photoshop. Post 8-12 final portraits on your blog. Writing critique: Find a portrait online that was shot with studio strobe lighting and make a list of 20 sentences to describe that photo and your opinion of it. Samples below:


3. Put Yourself in History Find a historic photo online and include yourself in the scene. Adjust size, color and resolution to match the historic photo to look as realistic as possible. Under your photo write a 2-3 sentence explanation as to why you chose to put yourself in this historic photo. Samples below:
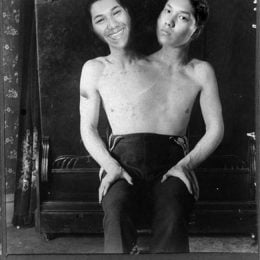


4. Factors to Consider When Buying a New Digital Camera Read and Write Read this article on factors to consider when buying a new digital camera. On your blog summarize the article and make a list of ten of the most important factors you would consider when you are buying a new digital camera and WHY. Factors to Consider When Choosing a Digital Camera ____________________________________________________________ HAPPY NEW YEAR!!! WELCOME 2017 ASSIGNMENTS DUE FRIDAY JANUARY 20:
1. DIGITAL PORTFOLIO Make a portfolio (in Powerpoint) of your best photography work. Include a title slide with your name, at least 10 slides of your portfolio work (1 image per slide), and an end slide with an inspirational quote on it.
2. 50 PHOTOS EDITED IN LIGHTROOM Take 50 different photos of the same subject. Vary the lighting and composition of your photographs. Edit your photographs in Lightroom and post the BEST 21 photos to your blog as a gallery.
3. WATCH THIS TEDTALK; HOW PHOTOGRAPHY CONNECTS US AND SUMMARIZE http://www.ted.com/talks/david_griffin_on_how_photography_connects On your blog make a post summarizing, critiquing, judging the video. Have at least 3 paragraphs.
4. COMPARE/CONTRAST LIGHTROOM AND PHOTOSHOP On your blog list 5 comparisons between Lightroom and Photoshop editing software ___________________________________________________________ ASSIGNMENTS DUE MONDAY, DECEMBER 12 1. Self Portrait with Text Take a tripod and DSLR camera on self-timer mode and photograph a few self portraits (photographs you take of yourself). Edit your favorite photo in Photoshop and include some text within the image to create a mixed media selfie. In the caption section when you post include the MASIL and for a critique make a list of 25 words or phrases to describe yourself. Student samples below:


2. Conceptual Self Portrait Take a photograph which represents something important about yourself, without showing your face in the photograph. In the caption section when you post include the MASIL and for a critique first define the word “conceptual” and then write a two to three paragraph reflection explaining how this photograph conceptually and visually shows something about you and what you are attempting to share about yourself with the viewer. Also, research the work of photographer Cindy Sherman. Post your favorite photo of hers on your blog and write 5 sentences explaining your opinion of her work and style and her ability to become famous from her self portrait photography series work. Student samples below:


______________________________________________________________ ASSIGNMENTS DUE TUESDAY, NOVEMBER 29
- Shoot like Aaron Siskind
Research the work of photographer Aaron Siskind, who shot for shapes, form and contrast. Set the camera to Monochrome and go shooting in black and white in the style of Aaron Siskind. Post three photos you shot and edited with MASIL. Critique: Post three photos you like by Aaron Siskind and in one paragraph explain what you like about the photos and describe Aaron Siskind’s style of photography.


2. Photographer Research Project You will produce and present a PowerPoint Slide Show about a professional and influential photographer of your choice. The project is to be between 10 and 15 slides and include the information below and at least 10 photographs. You can choose from the enclosed list or pick a significant photographer of your choice. Questions to answer when doing photographer research project are below. Email your presentation to caucrg@fusd.net or put in my flashdrive by Friday, November 18.
- What is the photographer’s real name and year he or she was born? Is he/she still alive?
- What is their style of photography (ex: photojournalism, editorial, documentary, advertising, portraits, magazine, sports, war)?
- Are there any special photography techniques this photographer uses in his/her work? (Think about composition, depth of field, history…)
- Who does the photographer work for?
- What type of cameras and lens does this photographer work with, and why?
- What type of lighting does this photographer primarily use and why?
- Who are some of your photographer’s early influences?
- Are there any interesting stories about this photographer or his/her work?
- What do you like (or not like) about their work, and why did you select this photographer?
Robert Mapplethorpe – flowers, portraits, nudes * Annie Leibovitz – celebrity portraits * Danny Clinch – musicians * Edward Weston – black and white nudes,landscapes Ansel Adams – black and white landscape Cindy Sherman – self portraits * Diane Arbus – strange and different portraits * David Lachappelle – unique portraits * Imogen Cunningham – black and white Eliot Porter – color landscape Alfred Eisenstadt – candid photojournalism Linda McCartney – musicians in the 60’s Herb Ritts – celebrity portraits * Henry Cartier- Bresson -candid street, the decisive moment Andy Warhol – bizarre Robert Frank -street Mary Ellen Mark – portraits * Eddie Adams – war, photojournalism Robert Capa – war Paul Strand – black and white Lewis Hind – child labor James Nachtwey – war * Irving Penn – fashion, still lifes * Richard Avedon – portraits Margaret Bourke White – early photojournalism Lee Friedlander – black and white candid Harold Edgerton – motion Sebastiao Salgado – photojournalism Weegee – street photojournalism Mark Seliger – celebrity portraits * Jerry Uelsmann – photo montage * Dorothea Lange – documentary Anne Geddes – children Kim Anderson – children Nigel Barker- Fashion William Wegman – dogs Man Ray – rayograms, fashion, portraits in the 20 Arnold Newman – environmental portraits * Steve McCurry – National Geographic portraits * Danny Lyon – street and documentary Brad Mangin – sports Neil Leifer – sports ASSIGNMENTS DUE THURSDAY, NOVEMBER 10 1) Silhouette Story or Series Think of a good concept for your silhouette photos and then take photos of backlit subjects to make high contrast silhouettes. You can edit them in Photoshop to give them more blacks and whites, and contrast. Use studio hot lights with two lights aimed at the background and turn the room light off to get more shadow on the subject(s). Meter for the background. Include a few images within one document to make a shadow story or series.


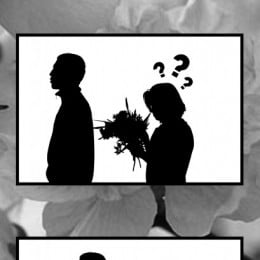


2) Illustration of an Iconic Image Make a new document 8×12 or 12×8 150 resolution. Paste the illustration you want to trace and fit to the correct size. Make a new blank layer to trace on and lock it. Trace the illustration with a thin pencil and then color it in with brushes and the paint bucket. Make sure to add a background to your illustration. Samples below:


3) Small Group Critique Writing In groups of 2 or 3, evaluate and critique 5 of the photographs on the homepage of the blog, which were shot, edited and posted by your peers.). Analyze, Evaluate, and Judge the photos and write 2 paragraphs about each of the 5 photos you chose to critique. Post your writing on one person’s blog and put all the names of each member of the group. _____________________________________________________________ ASSIGNMENTS DUE TUESDAY, NOVEMBER 1 1. Alphabet Photography -Look for images which represent letters and create a word in photographs -Edit your photos in PS and then make a new document to put the word in. -Make your document 16×8 2oo resolution and fit your images in to make the word. If you need more space go to Image>Adjust>Canvas Size and resize bigger. -Save as a jpeg and post to your blog. -Critique: List 5 valuable things you learned in Photo class so far this year.
2. Body, Shape Form Photograph a part of the body, or something, which shows shape and form. Think about getting great QUALITY OF LIGHT and make your composition a strong Post 1 to 3 original photos you shot and edited. In the caption section of your image(s) write 10 words to describe them.
3. 30 Photos That Changed The World Read this link about the 30 Photos that changed the world and write a 500 word reflection about 3 of the photographs. Include the 3 photographs you selected, the story behind each photograph, how it impacted the world and your opinion of each photograph. http://www.photographyschoolsonline.net/blog/2010/30-photos-that-changed-the-world/ _______________________________________________________ ASSIGNMENTS DUE TUESDAY, OCTOBER 25 1. MIRROR IMAGE Photograph an interesting photo with lots of lines. Put the edited photo in a new document and make a copy of the image to flip to make mirror imagery. Either 2 or 4 images would work for the mirror image. Post to blog.
2. STUDIO PORTRAITS Use the studio backdrop (white or black) to photograph PORTRAITS of classmates. Use the tungsten “hot lights” to light the portraits Make sure to put your white balance on TUNGSTEN and shoot at ISO 400 or 800. Go right up to the subject and meter them on MANUAL. Take at least 12 photographs and edit them in PS. Post anywhere between 6 and 12 portraits as either a gallery or individually.. Include technical info: MASIL Critique: Find a studio portrait online and write a list of 25 words you would hashtag the photo if you posted it on Instagram. Include the photographers name if possible. In a separate blog post, answer these questions: 1. What is the purpose of the main light? 2. What is the purpose of the fill light? 3. List the lighting patterns.


3. PORTRAIT LIGHTING READ AND WRITE Read this link about Portrait Lighting and on your blog write a list of 20 facts you learned from reading this online article. http://www.cambridgeincolour.com/tutorials/portrait-lighting.htm 4. WHITE BALANCE READ AND WRITE http://digital-photography-school.com/introduction-to-white-balance/ Read this link on white balance and on your blog write a 8-10 sentence synopsis of what you learned from reading the article. Under that list all the white balance settings and at least one sentence about each. ____________________________________ ASSIGNMENTS DUE FRIDAY, OCTOBER 14 1. On-Location Portraits with Natural Light -Take at least 12 portraits of a classmate on location using natural light -Think about exposure, lighting, composition, posing and expression. (Make sure your subject does not have on the yellow vest in the portrait photographs you are taking.) -Edit your photos in Photoshop and post between 5-12 EDITED photos of your subject (as a gallery or as individual photos)-Critique: Find an on-location portrait online with natural lighting. Post that photo and make a list of 25 words you think of when you look at this photo. Include the photographers name if possible.-****Include your technical info in the caption section of each photo. MASIL


2. Warhol/Pop Art -For your Pop Art assignment you should photograph an object, which is POPULAR IN THE CULTURE TODAY. -Make 4 copies of the photo you chose, 4×6 or 6×4 (200 res) each, labeling them Warhol 1, Warhol 2 and so on… (you can change the size in PS in IMAGE>IMAGE SIZE (6×4.5 or 4.5×6 is ok too. Just make your big document 12×9 or 9×12 if you do that) -Work on each picture separately, experimenting with filters, gradient maps, colors, patterns, and more….make sure there is contrast between the subject and the background! -When you complete the 4 individual photos, merge the layers in each. -Open a new document in Photoshop, 8×12 or 12×8 (200res)…or 9×12 or 12×9 if your individual shots are 4.5×6 or 6×4.5 -Move the four individual photos into the new document. -Save as a jpeg and post with critique. -Critique: Research and answer these questions about an interesting pop artist. Post one of his or her works with your answers to the following questions.
- What is Pop Art?
- Why is this artist’s work considered Pop Art?
- Describe some of this artists work.
- Why did you pick this artist and why do you like his/her work?
3. Word Art -Make a Photoshop document 4×6 or 6×4 (100 ppi) -Find an interesting image on the Internet and use the move tool to move it into your document in Photoshop -Size it with Control T + shift to fit in the document -Make another document the same size as the first -With the Text Tool, type a word or phrase in a thick black font -Find a picture online to go inside of the word and copy and paste it into the document with the text -Put the picture layer on top of the word layer -Press Control +Alt + G to put the image inside the word. -Merge the picture and text layers together (make the background layer invisible to not include it in the merge) -Move the word with the picture in it in the other document with the Internet image, and save as a .jpeg. Post to blog.


4. Understanding Histograms Read this link on histograms and on your blog explain what a histogram is and why it is important in digital photography (2 paragraphs) http://digital-photography-school.com/understanding-histograms/ __________________________________________________________________________________________________________________________________________________________________________________________ ASSIGNMENTS DUE FRIDAY, SEPT 30
1. Define these 35 words in a word document and then copy and paste your definitions in a blog post titled Photography Definitions: pixels, image resolution, megabyte, megapixel, gigabyte, jpeg, raw, tiff, png, white balance, histogram, aperture, shutter speed, depth of field, aperture priority, shutter priority, bitmap, exposure, watermarking, optical zoom, digital zoom, bracketing, light meter, image stabilization, noise, lag time, hot shoe, fisheye, macro, telephoto, wide angle, DSLR, dynamic range, digital negative, exposure compensation
2. History of Photography Watch the Powerpoint about the History of Photography history-of-photo-presentation-1vfj5uz Also go online and research the History of Photography Use this timeline template to list the most important inventions and events in history in chronological order. Copy the template and open it in Photoshop. Fill in the boxes with dates and important inventions in photography.Post the template to your blog in a post titled: History of Photography Timeline. Under the template list 3-5 events and/or inventions in photography which impresses you the most, and has the most impact on your life today. (2-3 paragraphs)  3. Framing a subject -Take at least 3 different photographs using framing in the composition. Post 2-3 of your photographs, EDITED of course. Include the technical info: MASIL. SAMPLES BELOW -Critique your own photographs you posted and answer these questions.
- What camera metering mode did I use and why?
- Do I have a strong composition?
- How well did I edit my photographs?
- What would I do differently if I shot this assignment again?
- Do you think your photographs belong on the blog home page and should be considered one of the best from all the photo classes?


-
- Chubs

__________________________________________________________________________________________________________________________________________________________________________________________ ASSIGNMENTS DUE FRIDAY, SEPT 23 1. EXPLAIN THIS CHART IN 300 WORDS ON YOUR BLOG  2. COMMENTS ON BLOG Go to the homepage of the blog and make 2 comments on 3 photos by your peers that you really like. Make sure to have at least two sentences why you like the photo. Put your name under your comment. 3. CAPTURING ACTION AND MOTION IN PHOTOGRAPHY -Read these online article about capturing action and motion photography and write one or two paragraphs stating what you learned about action and motion photography techniques.. http://www.digital-photo-secrets.com/tip/50/freezing-the-action/ http://digital-photography-school.com/how-to-capture-motion-blur-in-photography/ -Take photos outside that capture ACTION SHARP. Try to “capture the moment”. Shoot at the shutter priority mode and auto focus AI SERVO . Make sure your shutter speed is above 125th of a second. ISO 400 Take several photos and post your favorite 2 action shots, edited in Photoshop. -Take action photos inside trying to capture MOTION BLUR. Try to “capture the moment”. Shoot at the shutter priority mode and auto focus AI SERVO mode. Make sure your shutter speed is 60th or below for more blur. Use a tripod to make sure stationary objects are not blurred. Take several photos and post your favorite 2 shots , edited in Photoshop. -Include technical info on all photos: MASIL -Find 2 photos online, one showing action sharp and another showing motion blur. Guess what shutter speeds, f stops, and lens were used. Post as critique. Samples below:
-
- Philip
-

- by Ariana
-
- Flor
-

- by Gerardo
-
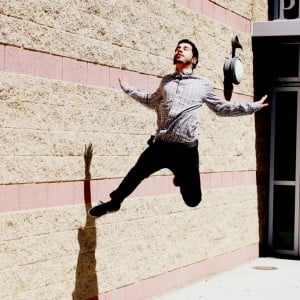
- by Bella
-

- Agustin
-
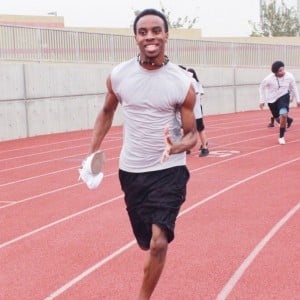
- by Alma
4. MANDALAS Create 2 unique mandalas in Photoshop, using the shape tool and Internet imagery. Make a new document 8×8 100 res and create each mandala, thinking about composition and symmetry. Draw a circle with the elliptical marquee tool. Press control and J to make the selection its own layer. Stroke the layer to see the circle. Use the shape tool to put in shapes. Copy a shape by pressing alt with move tool. To combine shapes into one layer, make any layer you do not want combined invisible, and then go to layer>merge visible. To flip a layer, go to Edit>transform>transform either vertical or horizontal. When you save each mandala, save as a .png, not .jpeg. When you post it will only show the circle, not the white document. (If you are not done with your mandala be sure to save it as a .psd while you are still working on it.)
______________________________________________________________ ASSIGNMENTS DUE TUESDAY, SEPTEMBER 13 1. DIGITAL COLLAGE: ALL ABOUT ME -Gather imagery online that represents at least five things about yourself. -In Photoshop, make an 8×10 or 10×8 @150 resolution document and title it All About Me Collage -Select elements from the Internet images to move into your collage. -After you get a good selection with the magic wand or magnetic lasso, remember to go in Mask and refine your selection. If you want soft edges you will go to select>modify>feather. -Think about rules of good composition when designing your layout of elements and background. Move layers around from the layer palette. -To blend layers for a unique effect, you use the move tool and use Shift+ to scroll through blend modes. -Save your work as a psd until you are completely done with it, and then save as a jpeg to post to your blog. -Write a three paragraph reflection about what how your collage visually represents you. Post under your work in your blog. 2. DEPTH OF FIELD -Read these two links and write two paragraphs explaining in your own words what depth of field is in photography and the ways to control depth of field when shooting. Call this blogpost: Depth of Field Explained. http://www.macworld.com/article/1150150/depthoffield.html http://www.digitalcameraworld.com/2013/07/17/what-is-depth-of-field-how-aperture-focal-length-and-focus-control-whats-sharp/ – Go outside and take two photographs of the same subject, trying to get two different depth of fields. Remember to first format the memory card, set WB to auto and ISO to 400, and be on Manual focusing. You will set the camera mode to AV (aperture priority). Make sure to focus on the same subject for both shots you take. -In Photo #1 You will get a shallow depth of field. Zoom out to the longest focal length of the lens which is 55mm. Set the aperture on f5.6 (the widest aperture at 55mm) and take note of what the camera sets the shutter speed at. Make sure it is not below 60th of a second. Get in good and close to your subject -In Photo #2 You will get a good depth of field. Put your lens at 18mm ( which is the widest lens mm on your lens). Set your aperture at f16, and take note of what the camera sets the shutter speed at. Make sure it is not below 60th of a second, or open up the aperture to f11. Stay a bit further back to get a better depth of field. -Repeat the depth of field activity 2-3 times to make sure you get it right. -In the lab, edit your photos for maximum impact and post each one (good and shallow depth of field) to your blog as the large photo. Include the technical info in the caption section of each (Mode, ISO, Shutter speed, Fstop, Focal length of lens. – For the critique for this assignment you are to find two photos online- one which shows a good depth of field and one which shows a shallow depth of field. In the caption section when you post them guess at what you think the aperture, shutter speed and lens mm was for each photo. ____________________________________________________________ ASSIGNMENTS DUE FRIDAY SEPT 2 1. CAMERA MODES http://digital-photography-school.com/digital-camera-modes/1 paragraph about what each camera mode does. Read through this link on camera modes. On your blog make a new post writing 2 sentences about what each camera mode does. 2. SURREALISM -Research online for the meaning of SURREALISM and post the definition of surrealism and one example of a surrealistic work of art or photograph. In 2 paragraphs, explain what surrealism is, and why you chose this image and what makes it surreal. Make sure to credit the artist. (Salvador Dali, Rene Magritte, and Jerry Uelsman are a few surrealistic artists) After practicing with Kim on the mountain, make your own surrealist piece by putting someone or something where they don’t belong. Make a 10×8 or 8×10 150 resolution document in Photoshop and bring in Internet images for this assignment. Practice selecting, masking and refining your selections. Save as a jpeg and post to your blog.
______________________________________________________________ ASSIGNMENTS DUE FRIDAY AUGUST 26
- SHADOWS AND LIGHT ASSIGNMENT
-Photograph 3 photos which show strong shadow and light -Edit 2 of your shadow photos -Include the technical info with each photo: f-stop, Shutter Speed, ISO, Mode -Pick a photo from the Internet showing shadows -Write 10 complete sentences describing the elements in the shadow photo you chose from the Internet and why you like it. -Post your 2 photos, technical info, internet image and writing critique to your blog.


2. READ AND WRITE : LENSES Read this article about lenses and on your blog list 20 important facts you learned about camera lenses. http://digital-photography-school.com/choosing-lenses-when-to-use-which-lens-and-why/ 3. ALTERNATIVE CAMERA ANGLES -Take 4 shots of the same subject from 4 different camera angles (from above, below, strait on and tilted) -Post 4 edited photos showing different camera angles of the same subject (from above, below, strait on and tilted) -Include technical Info with each photo: f-stop, Shutter Speed, ISO, Mode -Find a photo from the Internet showing an alternative camera angle -Write a 20 sentence writing critique about the Internet photo.


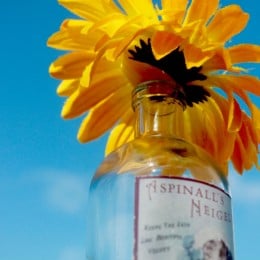
____________________________________________________________ ________________________________________________________ First assignments for 2016-2017 school year: 1. Make a blogsite with edublogs. https://edublogs.org/ Join the class blog, select a template, and design your site layout and design. 2. Read the following link and write 25 sentences reviewing what you learned about aperture, shutter speed, ISO, and camera modes. As your first blogpost, copy and paste in your sentences from a word document. http://www.cambridgeincolour.com/tutorials/camera-exposure.htm 3. Play around with the camera simulator and learn how to use the camera controls. Then practice with the camera in the classroom. http://camerasim.com/apps/camera-simulator/ ______________________________________________________________ ASSIGNMENTS DUE FRIDAY, AUGUST 19
- First Shooting Assignment: TEXTURE
Go outside in brighter light and photograph 5 photos that show texture. Put your ISO at 400, and meter the scene to get the correct exposure. Put your photos in a folder on your h drive: DIGITAL PHOTO>TEXTURE ASSIGNMENT Edit your photos in Photoshop with IMAGE ADJUSTMENTS and post 3 of your photos to your blog. INCLUDE THE TECHNICAL INFORMATION(for each photo): aperture, shutter speed, ISO, and camera mode Find one photo online which shows amazing texture. Write a two paragraph critique explaining why you think this is such a successful photograph and why you chose it. Be sure to use academic language, proper grammar and sentence structure. 2. COMPOSITION Read about what makes strong composition in a photograph and what catches the viewers eye. Find 12 sample photos online which show good composition. Make a gallery of images in Edublogs. Post your gallery and write 12 complete sentences, (with capitals and periods), one sentence under each photo in the gallery before posting, to explain what element of composition each photo represents. ____________________________________________________________ ____________________________________________________________ END OF SCHOOL YEAR 2015-2016 DUE DATES: Thursday May 5: Photomontage with Reflection, Poetry and Photography, Magazine Cover Monday, May 9: 3 new images from old assignments Tuesday, May 10: Lightroom Slide Show Portfolio May 18 and 19: Take Final ___________________________________________________ Lightroom Slideshow Portfolio (Due Tuesday May 10)
- Make sure to make slideshow in YOUR catalog
- Import Portfolio Photo Folder from Desktop
- With photos all selected create a collection
- Organize and reorder in Library
- Edit in Develop
- In Library module, go to metadata for each image and add a caption
- Go to Slideshow module and on each photo go to ABC and then caption to move caption where you want and choose color
- In slideshow choose background and wash color, stroke, timing and import music
- Preview slideshow, then play
- Export out to Desktop
- Give to Cauchon in her flashdrive
___________________________________________________________ Assignments Due Wed/Thur, May 4/5 1. PHOTOMONTAGE: WHERE YOU SEE YOURSELF IN 10 YEARS Make a well blended digital photomontage (12×8 or 8×12 -150 res) to show where you see yourself in 10 years. Under your photomontage write a 3 paragraph reflection explaining the elements you put in your work.

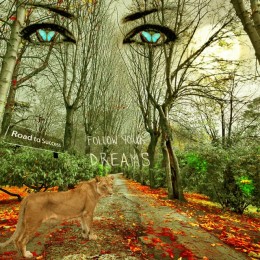


2. POETRY AND YOUR PHOTOGRAPHY
- Take a new photo for this assignment or use one of your existing edited photos.
- Make a new document 11×14 or 14×11 @ 300 res
- Move your photo into your new document and size to fit.
- Add a quote, poetry, song lyrics or your own words to your edited image
- Post to your blog
-
- OLYMPUS DIGITAL CAMERA
3. MAGAZINE COVER Create a magazine cover (9×12 @ 300 res)using your own photographic image. Include the name of the magazine and a list of articles, which would be within the magazine. Make it look as authentic as possible.
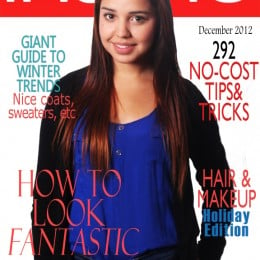
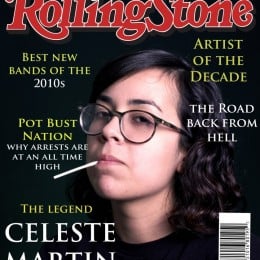


______________________________________________________________ _____________________________________________________________ Assignments Due Monday, April 25:
- Graduation Cover Design:
Create a design for the cover of the Jurupa Hills 2016 Graduation booklet. The size should be 5.5 x 8.5 300 resolution. Make sure to include the following info: Jurupa Hills High School Graduation, Citizens Bank Arena, Wednesday, May 25, 2016, 7:00 pm


- Movie Poster about the Story of Your Life
-Look at movie posters online and put 3 that you like on your blog with an explanation what is it that captures your eye and that you like about these movie posters. -Then make your poster in Photoshop 16×20 @ 300 resolution. Make sure to include the title, at least one original photograph, the actors who will be in the movie, a catch phrase, and a rating. -Post to your blog, and in a 200-300 word reflection give a synopsis on what your movie is about.
3. Food Photography -Go online and look at good samples of food photography. Post 3 to 5 photos of food that you really enjoy looking at and write a 3 paragraph reflection about why you think the lighting and composition is so strong that the photo makes you crave the food. Explain how you think the lighting was achieved. -Read these online articles on how to photograph food and write 10 complete sentences on your blog on what you learned. http://www.foodportfolio.com/blog/food_photography/food_photgraphy.html http://digital-photography-school.com/top-5-tips-on-how-to-photograph-food/ -Then, pretend you are a studio food photographer and photograph food using the studio and the strobes. Take a few photos with varying compositions and post your favorite one or two edited photos to your blog with the writing assignments.
____________________________________________________________________________________________________________________________ New assignments Due Friday, April 15:
- The Touch Series: Create a series of photos where people are touching in some way.
-
- Close Up Portraits: Take close up portraits of some of your classmates. You can use any type of lighting you choose, but make sure to compose as a close up composition. Post 3 portraits of different individuals to your blog and include a list of 10 words in the caption section of each photograph to describe that person.


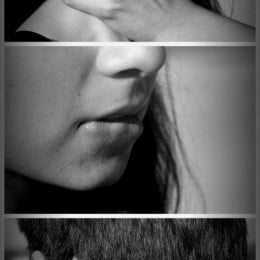

3. How to make skin clear: Read and Write Read this online article about How to Use the Clone Stamp tool in Photoshop to make clear skin. Write a 3-5 sentence reflection explaining what you learned from reading it. Then apply what you learned to your close up portraits http://digital-photography-school.com/how-to-use-the-clone-stamp-tool-in-photoshop-to-make-clear-skin/ 4. Wacky Landscape: Take a landscape photo and use Photoshop adjustments to make it wacky and surreal. Use liquify, hue saturation, gradient maps, and other techniques you have learned to create an eye catching and wacky landscape.


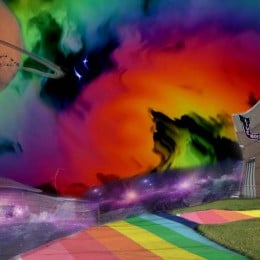


______________________________________________________________ Digital Photo Assignment for Photo 1 and 2: DUE THURSDAY APRIL 4 500 word reflection in MLA format, titled: “My Experience in Photography Class” Give details on these topics:
- What you learned this year in class (equipment, technical camera controls, lenses, software PS and LR, lighting, techniques? Details!!!
- What were your favorite and least favorite assignments? Give details and reasons why!
- What changes would you make in the course curriculum? What changes and why.
- Do you feel you bonded with the other students and teacher? How so?
- Would you take more photography courses in the future? Why?
- What is your favorite thing to photograph? Why?
- Would you consider becoming a professional photographer and What field of photography would you be interested in. Why?
- Do you think photography is a good form of visual communication? Why and how so? Write your reflection word and post to your blog by Thursday, April 7
______________________________________________________________ ASSIGNMENTS DUE MONDAY, APRIL 4
1. Re-create a Photograph
Look for a photograph online which you would like to re-create. Analyze the original photo for composition and lighting and re-create the photo as closely as you can. Post your photo on your blog with the original photograph. Samples below:


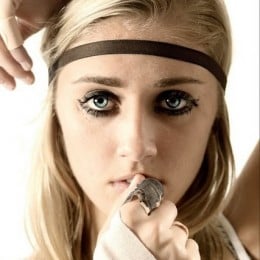
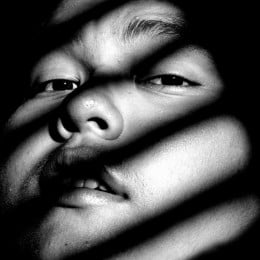


2. Diptych
Make a diptych image (2 images together), and the theme is OPPOSITES. In Photoshop make a new document 20×8 300 resolution, and fit your two photographs within the one document. Samples below:


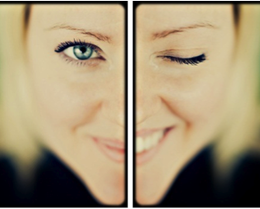


3. Jump Start Your Photography
Read this article about ways to jump start your photography. On your blog list 10 ways to get inspired in your photography with details and examples of how you can achieve this: http://www.diyphotography.net/25-ways-to-jump-start-photography-inspiration/ __________________________________________________________ __________________________________________________________
COMPLETED ASSIGNMENTS:
Read this article about HISTOGRAMS (due Thursday, March 17)
On your blog make a list of 25 new digital photography tips you learned about histograms.
http://digital-photography-school.com/histograms-for-beginners/
________________________________________________________ Your Photography Business Powerpoint: (due on my flashdrive by Monday, March 14) You will start a (pretend) photography business either by yourself or in partnership with one of your peer students. Create a Powerpoint Presentation to present to the class and include the items on the list below. (This assignment will count as 3 grades in your gradebook: 1- Your Powerpoint/ 2- Your Presentation/ 3- Your Business Card and Logo): * Business Name and Logo (make a logo in Photoshop for your business. Research photo business logos online to get ideas) * Your name as sole owner or names of the two members in the partnership. *What are the roles of the partners (ex: president, vice president, photographer, editor/retoucher, sales and marketing etc…) * Where will you conduct your business? (which state will you live, will you work out of your home or rent office space in which location) *Address and phone # (pretend) * The type of photography you specialize in, and the types of jobs you intend to get. * Samples of work you would like to produce for your clients. (not your current work, but work from online which is the type of work you would like to produce) * Your web site address (pretend) * What equipment will you be using? (cameras, lenses, strobes, flash, studio set up, hot lights, gels, etc) * Who are your inspirations? * Branding: Create a logo for your business and also make a business card (Make your business card a 3.5 x 2.5 300 res document in Photoshop). Include your logo and business card in your Powerpoint. * Marketing: Include a slide about how are you going to advertise and get jobs in your field? * Market Research: How much money you would like to make in your first year of business, and how much you foresee making in 5 years, and also in 10 years. ______________________________________________________________ ______________________________________________________________ ASSIGNMENTS DUE FRIDAY MARCH 4 1. Your Personal Profile Save this image and open it in Photoshop. Fill out the Personality Profile using the text tool and keep transforming the text to fit it around in the circles. Repost on your blog after you have filled in the circles.  2. Photograph your Favorite Teacher with Writing Reflection Use bounced external flash off camera and sync cord, to take some nice portraits of your favorite teacher. Edit and post your best portrait and write a 3 paragraph reflection in academic language explaining why you like and admire this teacher. Give details, reasons and examples as to why you chose this teacher.


3. Shoot like Aaron Siskind Research the work of Aaron Siskind, an American photographer who shot abstract black and white images, which focus on nature, architecture and human form. Take some photos on the MONOCHROME setting, in the style of Aaron Siskind, edit them with good density and contrast, and post 2-3 black and white images on your blog with the technical information in the caption of each photo. Under your photo, post a photo by Aaron Siskind and write three complete sentences describing his work and your opinion of his work.


_______________________________________________________________________________________________________________________________________________________________________________________ ASSIGNMENTS DUE FRIDAY, FEB 26 1. Put Yourself in History Find a historic photo online and include yourself in the scene. Adjust size, color and resolution to match the historic photo to look as realistic as possible. Under your photo write a three sentence explanation as to why you chose to put yourself in this historic photo.


2. Fill Flash Outside Read these links about using FILL FLASH outside to fill in the shadows. Write 10 sentences explaining what fill flash outside is and why you would need to use it to get perfect exposure on the subject and background. http://www.digitalcameraworld.com/2012/05/20/master-fill-flash-in-4-easy-steps/ http://www.digital-photo-secrets.com/tip/195/using-a-flash-when-outside/ Go outside and photograph a subject which is BACKLIT. Set your camera on AV to meter the natural light. Use a small aperture like f11 or 16 and a low ISO like 200 or 400. Make sure your flash is on ETTL and fill the subject in shadow with fill lighting from the external flash. Post 2-3 photos showing your understanding and good usage of fill flash.
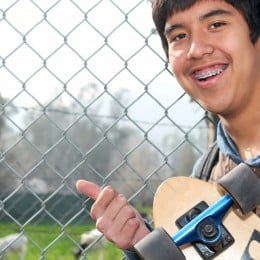


3. Advertising Photography
For this assignment you will create a photograph that would be used for advertising purposes. First you will research advertising photography on the Internet to generate ideas. You will write a proposal before you begin to shoot. Answer the following questions:
- Who is the client, or company you are representing?
- What is the product?
- Who is the target audience?
- Where would you expect to see this advertisement?
- What kind of lighting are you going to use to make this look professional?
- What props do you need?
Shoot the product and use of variety of compositions. Think about: lighting, composition, depth of field, product placement. Use Photoshop to tweak and enhance your photograph. Add necessary text and captions. Post your best advertising shot, EDITED, to your blog with the proposal. Samples below:


4. Advertising Research and Writing Research advertising photography online and then on your blog post 5 ads that you saw and thought were very effective in getting the consumer to want to buy the product. Write a 2-3 paragraph reflection about what type of lighting the photographer used to create the ad, and why you think they are so effective. Alos, mention if you could invision yourself as a commercial advertising photographer and what skills you think you would need to be successful. ____________________________________________________ ____________________________________________________ ASSIGNMENTS DUE THURSDAY, FEBRUARY 18 1. Critique of student work on blog Look at the blog home page and check out the best student work. On your blog, write a 3 paragraph critique about 3 of your favorite images by your peers. Include the photos you chose in your blog post and who the artist was who produced the image. 2. Studio Portraits with strobes and colored gels Photograph portraits in the studio using the strobes and colored gel in the background. Edit your portraits in Lightroom or Photoshop and post 8-10 final portraits on your blog. Writing critique: Find a portrait online that was shot with studio strobe lighting and make a list of 20 sentences to describe that photo and your opinion of it.


3. Read and Write : An Introduction to using strobes Read this entire article on beginning strobe use and then write a three paragraph reflection on your blog detailing what the article is about and the most important things you got out of reading it. You will put your new knowledge to work this week when producing your studio portraits. http://photography.tutsplus.com/tutorials/an-introduction-to-using-strobes-in-your-photography–photo-692 4. Take a Vacation In this assignment you are going to go on a virtual vacation. Find a location online where you would like to go and digitally put yourself into that location. Make sure to match lighting and color balance to make it look realistic as possible. You must add 3 props into the scene (sunglasses, shopping bags, friends to go with you, etc…) Make your new document for all the elements in the image a 12×8 150 resolution. include 1-3 sentences under your photo when you post it to explain why you would like to go on this vacation.


__________________________________________________________________________ ASSIGNMENTS DUE FRIDAY FEBRUARY 5 1. READ AND WRITE: MULTIPLE EXPOSURES WITH FLASH Read these online article and write 20 sentences about what you learned. http://www.photomatters.org/multiple-exposure http://www.tpub.com/photography1/ph20994.htm 2. MULTIPLE EXPOSURE WITH FLASH AND SLOW SHUTTER SPEED In the dark studio, set your camera to 20 seconds at F 11 or 16 (adjust as necessary to get the perfect exposure)and 200 ISO. Make sure to be on Manual metering and MF for manual focus. Focus before the lights go off. During the long exposure, have your subject move slightly and manually set off the external flash (at M mode, not ETTL) each time they move and you will capture them several times during the long exposure. You should post your best 1-3 images from the multiple exposure shoot. Also post 1 multiple exposure with flash image from online and write 5 sentences about it. Samples below:


3. HDR PHOTOGRAPHY -Go online and research the meaning of HDR. Create a blogpost explaining what the term HDR in photography means and ways to achieve successful results. -Photograph 5 different exposures of a landscape (on Manual) for this assignment. One at the perfect exposure, plus one and two stops underexposed and one and two stops overexposed. USE A TRIPOD for this! -Save images in a folder and open Photoshop>File>Automate>Merge to HDR Pro -Select your five landscape images and press ok. Photoshop will compile your images into one HDR image. -You will probably need to do more adjustments to make it more vibrant and saturated. You could bring in cool clouds from the Internet to blend into your sky. -Post to blog and please TITLE YOUR WORK!!! Write a 10 sentence critique of your own work and post under your image. Samples below:


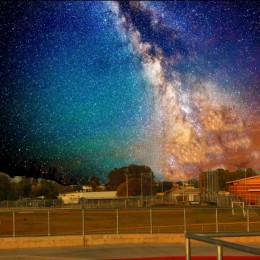
________________________________________________________________________________________ ________________________________________________________________________________________ 4 ASSIGNMENTS DUE TUESDAY, FEBRUARY 2 1. 50 Photos Edited in Lightroom Take 50 different photos of the same subject. Vary the lighting and composition of your photographs. Edit your photographs in Lightroom and post the 30 photos to your blog as a gallery. 2. Watch this Tedtalk: How Photography Connect Us. http://www.ted.com/talks/david_griffin_on_how_photography_connects On your blog make a post summarizing, critiquing, judging the video. Have at least 3 paragraphs. 3. Compare Lightroom and Photoshop On your blog list 5 comparisons between Lightroom and Photoshop editing software 4. Painting with Light -Go to a dark place to shoot for this assignment (back studio). Put the camera securely on a tripod and put your shutter speed at 20 to 30 sec (not 20th of a sec…but 20 full seconds). You must put the camera on self timer to avoid camera shake. Shoot on manual and try your fstop at 8 or 11. ISO at 200. -Pre focus on Manual focus mode, because the camera will not in autofocus! -Wave finger lights in front of the frame during the exposure and check out the results! -Post 1 painting with Light photos you took and edited on your blog.\Critique: Find an amazing painting with light photo on the Internet and write a paragraph about how you think the photographer achieved the result and why you think it is so eye catching.
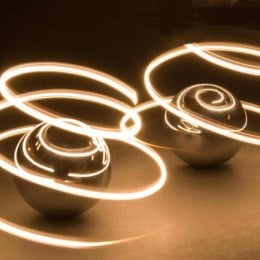

______________________________________________________________ First assignments in Semester 2: DUE FRIDAY, JAN 22
(1) Silhouette Series
Think of a good concept for your silhouette photos and then take photos of backlit subjects to make high contrast silhouettes. You can edit them in Photoshop to give them more blacks and whites, and contrast. Use studio hot lights with two lights aimed at the background and turn the room light off to get more shadow on the subject(s). Meter for the background.


(2) Read and Write: Raw vs. Jpeg Image Capture
Research the difference between shooting in RAW vs JPEG. On your blog write 2 paragraphs with complete sentences comparing and contrasting raw vs. jpeg image capture. Here is a good link to read: http://www.digitalcameraworld.com/2015/06/08/what-is-a-raw-file-we-explain-the-pros-and-cons/
(3) External Flash Worksheet
Answer the following questions on your blog in a separate post: -When would you use external flash? -Do you need to meter the light if you use flash? -What does flash synchronization mean? -What does ETTL mean? -What will happen when you shoot faster than the camera sync speed? -Why do photographers bounce the flash and use a diffuser? – What is a slave? -What should you do if your image comes out too dark or too light?
(4) Flash Photo Compare
Find two portraits online- one where the photographer used flash inside, and one where flash was not used. Make 5 comparisons between the two photos. Post the photos and your comparisons in a separate blog post. This assignment is the critique portion of the next assignment:
(5) 3-5 On Location Portraits with Bounced External Flash
-Use the Canon digital camera and an external bounced flash to photograph portraits on location. Practice shooting with on the hot shoe and also off camera flash with a sync cord. Set your camera on Manual, Auto White Balance, ISO 400, F8 @ 60th of a second shutter speed. Photograph at least 10 portraits and post your top 3-5 edited portraits to your blog.
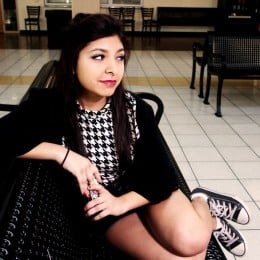

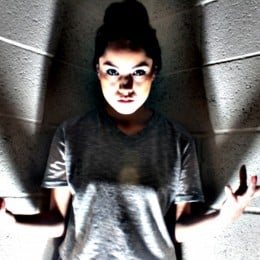


{{{{{{{{{{{}}}}}}}}}}}}}}}}}}}}{{{{{{{{{{{{{{{{{{{{{}}}}}}}}}}}}}}}}}}{{{{{{{{{{{{{{}}}}}} Last assignments of the semester:
1. Photographer Powerpoint and Presentation
This week you will give your Powerpoint presentation about the photographer you chose to research.
2. Your Portfolio
Put your best work together in a Portfolio. Use Powerpoint or Prezi to present your portfolio to the class. Your portfolio should consist of (at least) 12 slides. 1 Intro slide with your name on it and 10 slides of your best work to date (1 image per slide). The last slide should contain a quote that is meaningful to you.
3. Read and Write
Read this link: https://www.photographytalk.com/photography-articles/5082-13-camera-settings-every-beginner-needs-to-know On your blog list the 13 setting every beginner should know and 1-2 sentences explaining what each one is.
4. Review of a Student Blog
Look through the student blogs (to the right), and on your blog make a new post titled: My review of __________’s blog. Write a review of one of the student blogs which you like and explain why you like their work and describe some of your favorite posts. Describe their photographic style and also, what they can do next semester to improve and build on their photography work.
5. Am I Talking To Myself
Photograph several images of yourself or someone else in the same location, and put them all together in Photoshop to make it look as if you (or they) are relating to themselves in some way. Use one of the photos as the base image, and move the other subjects in the base image to create a unique photo for this Am I Talking To Myself assignment.Writing Critique: Make a blog post called My Inspiration and list 15-20 things which inspire your creativity. Sample student work below:
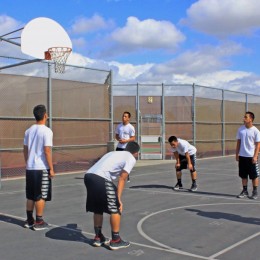

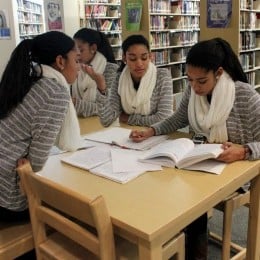


______________________________________________________________
Assignments Due Nov 20
1. Mandalas
Create 2 unique mandalas using the shape tool in Photoshop. Make a new document 10×10 200 res and create each mandalas, thinking about composition and symmetry. You can use imagery from the internet also. When you save each mandala, save as a .png, not .jpeg. When you post it will only show the circle, not the white document. Write 1 sentence in the caption section describing each mandala.


2. Body, Shape Form
Photograph a part of the body, or something, which shows shape and form. Think about getting great QUALITY OF LIGHT and make your composition a strong one. In the caption section of your image write 10 words to describe your final image.


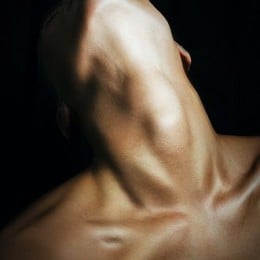


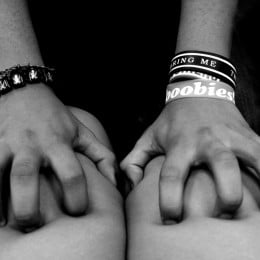
3. Portrait with Make Up
Use one of your existing portraits, or take a new portrait and apply make up to your subject using Photoshop.


4. Photographer Research Project
You will produce and present a PowerPoint Slide Show about a Professional Photographer of your choice. The project is to be between 10 and 15 slides and include the information below and at least 10 photographs. You can choose from the enclosed list or pick a significant photographer of your choice. Questions to answer when doing photographer research project are below. Email your presentation to caucrg@fusd.net or put in my flashdrive by Tuesday, Nov 16
- What is the photographer’s real name and year he or she was born? Is he/she still alive?
- What is their style of photography (ex: photojournalism, editorial, documentary, advertising, portraits, magazine, sports, war)?
- Are there any special photography techniques this photographer uses in his/her work? (Think about composition, depth of field, history…)
- Who does the photographer work for?
- What type of cameras and lens does this photographer work with, and why?
- What type of lighting does this photographer primarily use and why?
- Who are some of your photographer’s early influences?
- Are there any interesting stories about this photographer or his/her work?
- What do you like (or not like) about their work, and why did you select this photographer?
5. Comments on the Home Page of the Blog
Make 3 comments on the home page of the blog on the BEST photos from the last 3 assignments. Make sure to put your name on the comments. ________________________________________________________ 4 Assignments due Tuesday November 10 : 1. MIRROR IMAGE Photograph an interesting photo with lots of lines. Put the edited photo in a new document and make a copy of the image to flip to make mirror imagery. Either 2 or 4 images would work for the mirror image. Post to blog.
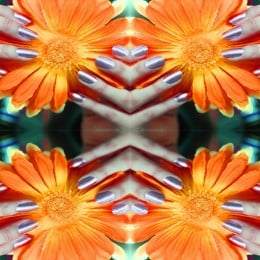
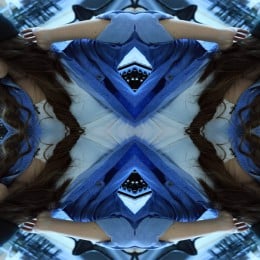


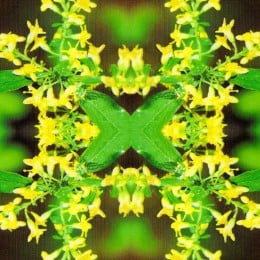

2. STUDIO PORTRAITS Use the studio backdrop (white or black) to photograph PORTRAITS of classmates. Use the tungsten “hot lights” to light the portraits Make sure to put your white balance on TUNGSTEN and shoot at ISO 400 or 800. Go right up to the subject and meter them on MANUAL. Take at least 12 photographs and edit them in PS. Post anywhere between 6 and 12 portraits as either a gallery or individually.. Include technical info: MASIL Critique: Find a studio portrait online and write a list of 25 words you think of when you look at the portrait. Include the photographers name if possible. In a separate blog post, answer these questions: 1. What is the purpose of the main light? 2. What is the purpose of the fill light? 3. List the lighting patterns
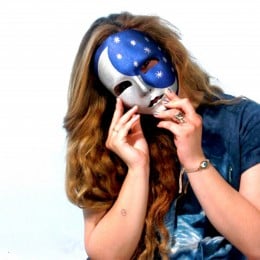


3 WHAT IS YOUR COLOR Create a Photoshop Collage 12×9 or 9×12 300 resolution representing your favorite color. Include your self portrait, the color you select and some writing about why this is YOUR color. Post to blog.


4. PORTRAIT LIGHTING READ AND WRITE Read this link about Portrait Lighting and on your blog write a list of ten facts you learned from reading this online article. http://www.cambridgeincolour.com/tutorials/portrait-lighting.htm _____________________________________________________________________ Assignments Due Wednesday, October 28 1. Self Portrait with Text Take a tripod and DSLR camera on self-timer mode and photograph a few self portraits (photographs you take of yourself). Edit your favorite photo in Photoshop and include some text within the image to create a mixed media selfie. In the caption section when you post include the MASIL and for a critique make a list of 25 words or phrases to describe yourself. Student samples below:


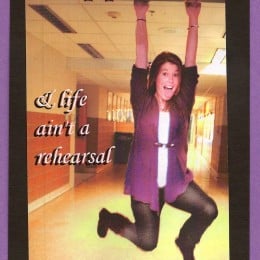

2. Conceptual Self Portrait Take a photograph which represents something important about yourself, without showing your face in the photograph. In the caption section when you post include the MASIL and for a critique first define the word “conceptual” and then write a two to three paragraph reflection explaining how this photograph conceptually and visually shows something about you and what you are attempting to share about yourself with the viewer. Also, research the work of photographer Cindy Sherman. Post your favorite photo of hers on your blog and write 5 sentences explaining your opinion of her work and style and her ability to become famous from her self portrait photography series work. Student samples below:


3. Buy a Digital Camera Essay Research different cameras online and decide which camera you would purchase if you were to buy a new digital camera tomorrow. List the features you like in this camera and why you have decided to purchase this particular one. Think about things like: price, size, ISO settings, manual and auto capabilities, flash settings, wireless communication, battery life, lenses, brands, specialty features, etc. Write a 500 word essay on your blog explaining which digital camera you would buy and why. Sites to check out: http://www.bhphotovideo.com/ https://www.imaging-resource.com/cameras/compare/ 4. White Balance Read and Write Research the meaning of white balance online. On your blog define white balance and list the white balance settings. ALso tell why you need to change your white balance under different lighting conditions. _____________________________________________________________ Assignments Due Friday October 16 1. Illustration of an Iconic Image Make a new document 8×12 or 12×8 150 resolution. Paste the illustration you want to trace and fit to the correct size. Make a new blank layer to trace on and lock it. Trace the illustration with a thin pencil and then color it in with brushes and the paint bucket. Make sure to add a background to your illustration. Samples below:
2. Candid Moments with Captions (3-5 Photos with captions for each) Photograph candid moments and edit your images in Photoshop. In the caption section of each photo you post write a caption including who, what , where and why. include your technical info for each photo (MASIL) For a critique look at the work of photographer Henri Cartier Bresson ,who captured the “decisive moment”. On your blog post 2-3 of his photographs and write 10 sentences about his work and your opinion of his timing, composition and ability to capture the perfect moment. Student Samples below:
Assignments Due Friday, October 9 1. History of Photography Timeline Watch this Powerpoint about the history of Photography history-of-photo-presentation Also go online and research the History of Photography Use this timeline template to list the most important inventions and events in history in chronological order. Post the template to your blog in a post titled: The history of photography. Under the template list 3-5 events and/or inventions in photography which impresses you the most, and has the most impact on your life today. (3-5 paragraphs)  2. Social Issue Poster In Photoshop make a document 16×20- 150 resolution for your Social Issue Poster. Pick a social issue which is close to your heart. Include a heading, body text, image (s) from online which visually show your views on this issue. Think about layout, design and composition when you put together your poster. After you save your final version as a jpeg, post to your blog and write 10 sentences explaining what this social issue means to you and your views on it, which should be obvious in your poster. Samples of past student work below. (Please note that I did not require past student to have a heading and body text, but I am requiring that of you this year.)


___________________________________________________________________ Assignments Due Monday October 5: 1. On Location Portraits with Natural Light -Take at least 10 portraits of a classmate on location using natural light -Think about exposure, lighting, composition, posing and expression. (Make sure your subject does not have on the yellow vest in the portrait photographs you are taking.) -Edit your photos in Photoshop and post between 3-10 EDITED photos of your subject (as a gallery or as individual photos) -Critique: Find an on-location portrait online with natural lighting. Post that photo and make a list of 25 words you think of when you look at this photo. Include the photographers name if possible. -****Include your technical info in the caption section of each photo. MASIL 2. Framing a subject -Take at least 3 different photographs using framing in the composition. Post 2-3 of your photographs, EDITED of course. Include the technical info: MASIL -Critique your own photographs you posted and answer these questions.
- What camera metering mode did I use and why?
- Do I have a strong composition?
- How well did I edit my photographs?
- What would I do differently if I shot this assignment again?
- Do you think your photographs belong on the blog home page and should be considered one of the best from all the photo classes?
3. Define these 35 words in a word document and then copy and paste your definitions in a blog post titled Photography Definitions: pixels, image resolution, megabyte, megapixel, gigabyte, jpeg, raw, tiff, png, white balance, histogram, aperture, shutter speed, depth of field, aperture priority, shutter priority, bitmap, exposure, watermarking, optical zoom, digital zoom, bracketing, light meter, image stabilization, noise, lag time, hot shoe, fisheye, macro, telephoto, wide angle, DSLR, dynamic range, digital negative, exposure compensation SAMPLES OF SHOOTING ASSIGNMENTS BELOW: On Location Portraits


Frame within a Frame Composition


_____________________________________________________________ ASSIGNMENTS DUE MONDAY, SEPTEMBER 28 1. Look at the new “Best” photos on the homepage of our blog and make a comment on 3 photographs by your peers. 2. 30 Photos That Changed The World Read this link about the 30 Photos that changed the world and write a 500 word reflection about 3 of the photographs. Include the story behind each photograph, how it impacted the world and your opinion of it. photo is about and your opinion of it. http://www.photographyschoolsonline.net/blog/2010/30-photos-that-changed-the-world/ 3. Warhol/Pop Art -For your Pop Art assignment you should photograph an object, which is POPULAR IN THE CULTURE TODAY. -Make 4 copies of the photo you chose, 4×6 or 6×4 (200 res) each, labeling them Warhol 1, Warhol 2 and so on… -Work on each picture separately, experimenting with filters, gradient maps, colors, patterns, and more….make sure there is contrast between the subject and the background! -When you complete the 4 individual photos, merge the layers in each. -Open a new document in Photoshop, 8×12 or 12×8 (200res) -Move the four individual photos into the new document. -Save as a jpeg and post
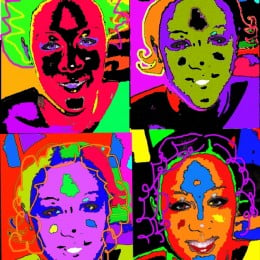

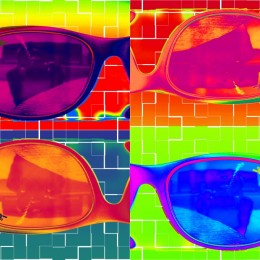


-Critique: Research and answer these questions about an interesting pop artist.
- What is Pop Art?
- Why is this artist’s work considered Pop Art?
- Describe some of this artists work.
- Why did you pick this artist and why do you like his/her work?
4. Alphabet Photography -Look for images which represent letters and create a word in photographs -Edit your photos in PS and then make a new document to put the word in. -Make your document 16×8 2oo resolution and fit your images in to make the word. If you need more space go to Image>Adjust>Canvas Size and resize bigger. -Save as a jpeg and post to your blog. -Critique: List 5 valuable things you learned in Photo class so far this year.


______________________________________________________________
ASSIGNMENTS DUE FRIDAY, SEPT 18
1. DIGITAL COLLAGE: ALL ABOUT ME -Gather imagery online that represents at least five things about yourself. -In Photoshop, make an 8×10 or 10×8 @150 resolution document and title it All About Me Collage -Select elements from the Internet images to move into your collage. -After you get a good selection with the magic wand or magnetic lasso, remember to go in Mask and refine your selection. If you want soft edges you will go to select>modify>feather. -Think about rules of good composition when designing your layout of elements and background. Move layers around from the layer palette. -To blend layers for a unique effect, you use the move tool and use Shift+ to scroll through blend modes. -Save your work as a psd until you are completely done with it, and then save as a jpeg to post to your blog. -Write a three paragraph reflection about what how your collage visually represents you. Post under your work in your blog. Samples below:


2. CAPTURING ACTION AND MOTION IN PHOTOGRAPHY -Take photos outside that capture ACTION SHARP. Try to “capture the moment”. Shoot at the shutter priority mode and auto focus AI SERVO . Make sure your shutter speed is above 125th of a second. ISO 400 Take several photos and post your favorite 2 action shots, edited in Photoshop. -Take action photos inside trying to capture MOTION BLUR. Try to “capture the moment”. Shoot at the shutter priority mode and auto focus AI SERVO mode. Make sure your shutter speed is 60th or below for more blur. Use a tripod to make sure stationary objects are not blurred. Take several photos and post your favorite 2 shots , edited in Photoshop. -Include technical info on all photos: MASIF -Find 2 photos online, one showing action sharp and another showing motion blur. Guess what shutter speeds, f stops, and lens were used. Post as critique. -Read this online article about capturing action and motion photography and write one or two paragraphs stating what you learned about action and motion photography techniques.. http://digiphotomag.com/articles/how-to-capturing-action-motion/ Samples below:
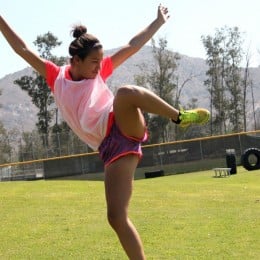
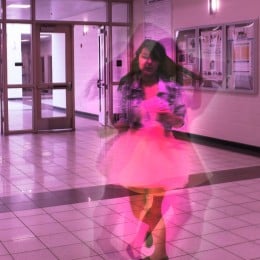

______________________________________________________________
ASSIGNMENTS DUE TUESDAY, SEPTEMBER 8
1. SHADOWS AND LIGHT – 2 Edited Photos showing strong SHADOWS and CONTRAST -Technical Info with each photo: f-stop, Shutter Speed, ISO, Mode -A photo from the Internet showing shadows -10 sentence writing critique about the Internet photo 2. CAMERA MODES http://digital-photography-school.com/digital-camera-modes/1 paragraph about what each camera mode does. Read through this link on camera modes. On your blog make a new post writing 2 sentences about each camera mode. 3. SURREALISM After practicing with Kim on the mountain, make your own surrealist piece by putting someone or something where they don’t belong. Make a 10×8 or 8×10 200 resolution document in Photoshop and bring in Internet images for this assignment. Practice selecting, masking and refining your selections. Look at the work of surrealist artists Salvador Dali, Rene Magritte, and Jerry Uelsman and explore other surrealist artists and photographers online. Post your surrealism work in a blog post and also include a work by a surrealist artist who inspires you. Write a 100 word reflection, critiquing their surrealism, and mention how you think you did on your surrealism work. 4. DEPTH OF FIELD -Read these two links and write two paragraphs explaining in your own words what depth of field is in photography and the ways to control depth of field when shooting. Call this blogpost: Depth of Field Explained. http://www.macworld.com/article/1150150/depthoffield.html http://www.digitalcameraworld.com/2013/07/17/what-is-depth-of-field-how-aperture-focal-length-and-focus-control-whats-sharp/ – Go outside and take two photographs of the same subject, trying to get two different depth of fields. Remember to first format the memory card, set WB to auto and ISO to 400, and be on Manual focusing. You will set the camera mode to AV (aperture priority). Make sure to focus on the same subject for both shots you take. -In Photo #1 You will get a shallow depth of field. Zoom out to the longest focal length of the lens which is 55mm. Set the aperture on f5.6 (the widest aperture at 55mm) and take note of what the camera sets the shutter speed at. Make sure it is not below 60th of a second. Get in good and close to your subject -In Photo #2 You will get a good depth of field. Put your lens at 18mm ( which is the widest lens mm on your lens). Set your aperture at f16, and take note of what the camera sets the shutter speed at. Make sure it is not below 60th of a second, or open up the aperture to f11. Stay a bit further back to get a better depth of field. -Repeat the depth of field activity 2-3 times to make sure you get it right. -In the lab, edit your photos for maximum impact and post each one (good and shallow depth of field) to your blog as the large photo. Include the technical info in the caption section of each (Mode, ISO, Shutter speed, Fstop, Focal length of lens. – For the critique for this assignment you are to find two photos online- one which shows a good depth of field and one which shows a shallow depth of field. In the caption section when you post them guess at what you think the aperture, shutter speed and lens mm was for each photo. ________________________________________________________________ Assignment Due Wed/Thur, August 26/27: 2. TEXTURE Go outside in brighter light and photograph 5 photos that show texture. Put your ISO at 400, and meter the scene to get the correct exposure. Put your photos in a folder on your h drive: DIGITAL PHOTO>TEXTURE ASSIGNMENT Edit your photos in Photoshop with IMAGE ADJUSTMENTS and post 3 of your photos to your blog. INCLUDE THE TECHNICAL INFORMATION: aperture, shutter speed, ISO, and camera mode Find one photo online which shows amazing texture. Write a two paragraph critique explaining why you think this is such a successful photograph- compositionally and technically, and why you chose it. 3. COMPOSITION Read below about what makes strong composition in a photograph and what catches the viewers eye. Find 12 sample photos online which show good composition. Put them in a folder in your Digital Photography folder (which is in your H drive) and upload them to your blog as a gallery of images. Post your gallery and write 10 complete sentences, (with capitals and periods), one sentence under each photo in the gallery before posting, to explain what element of composition each photo represents.
_________________________________________________
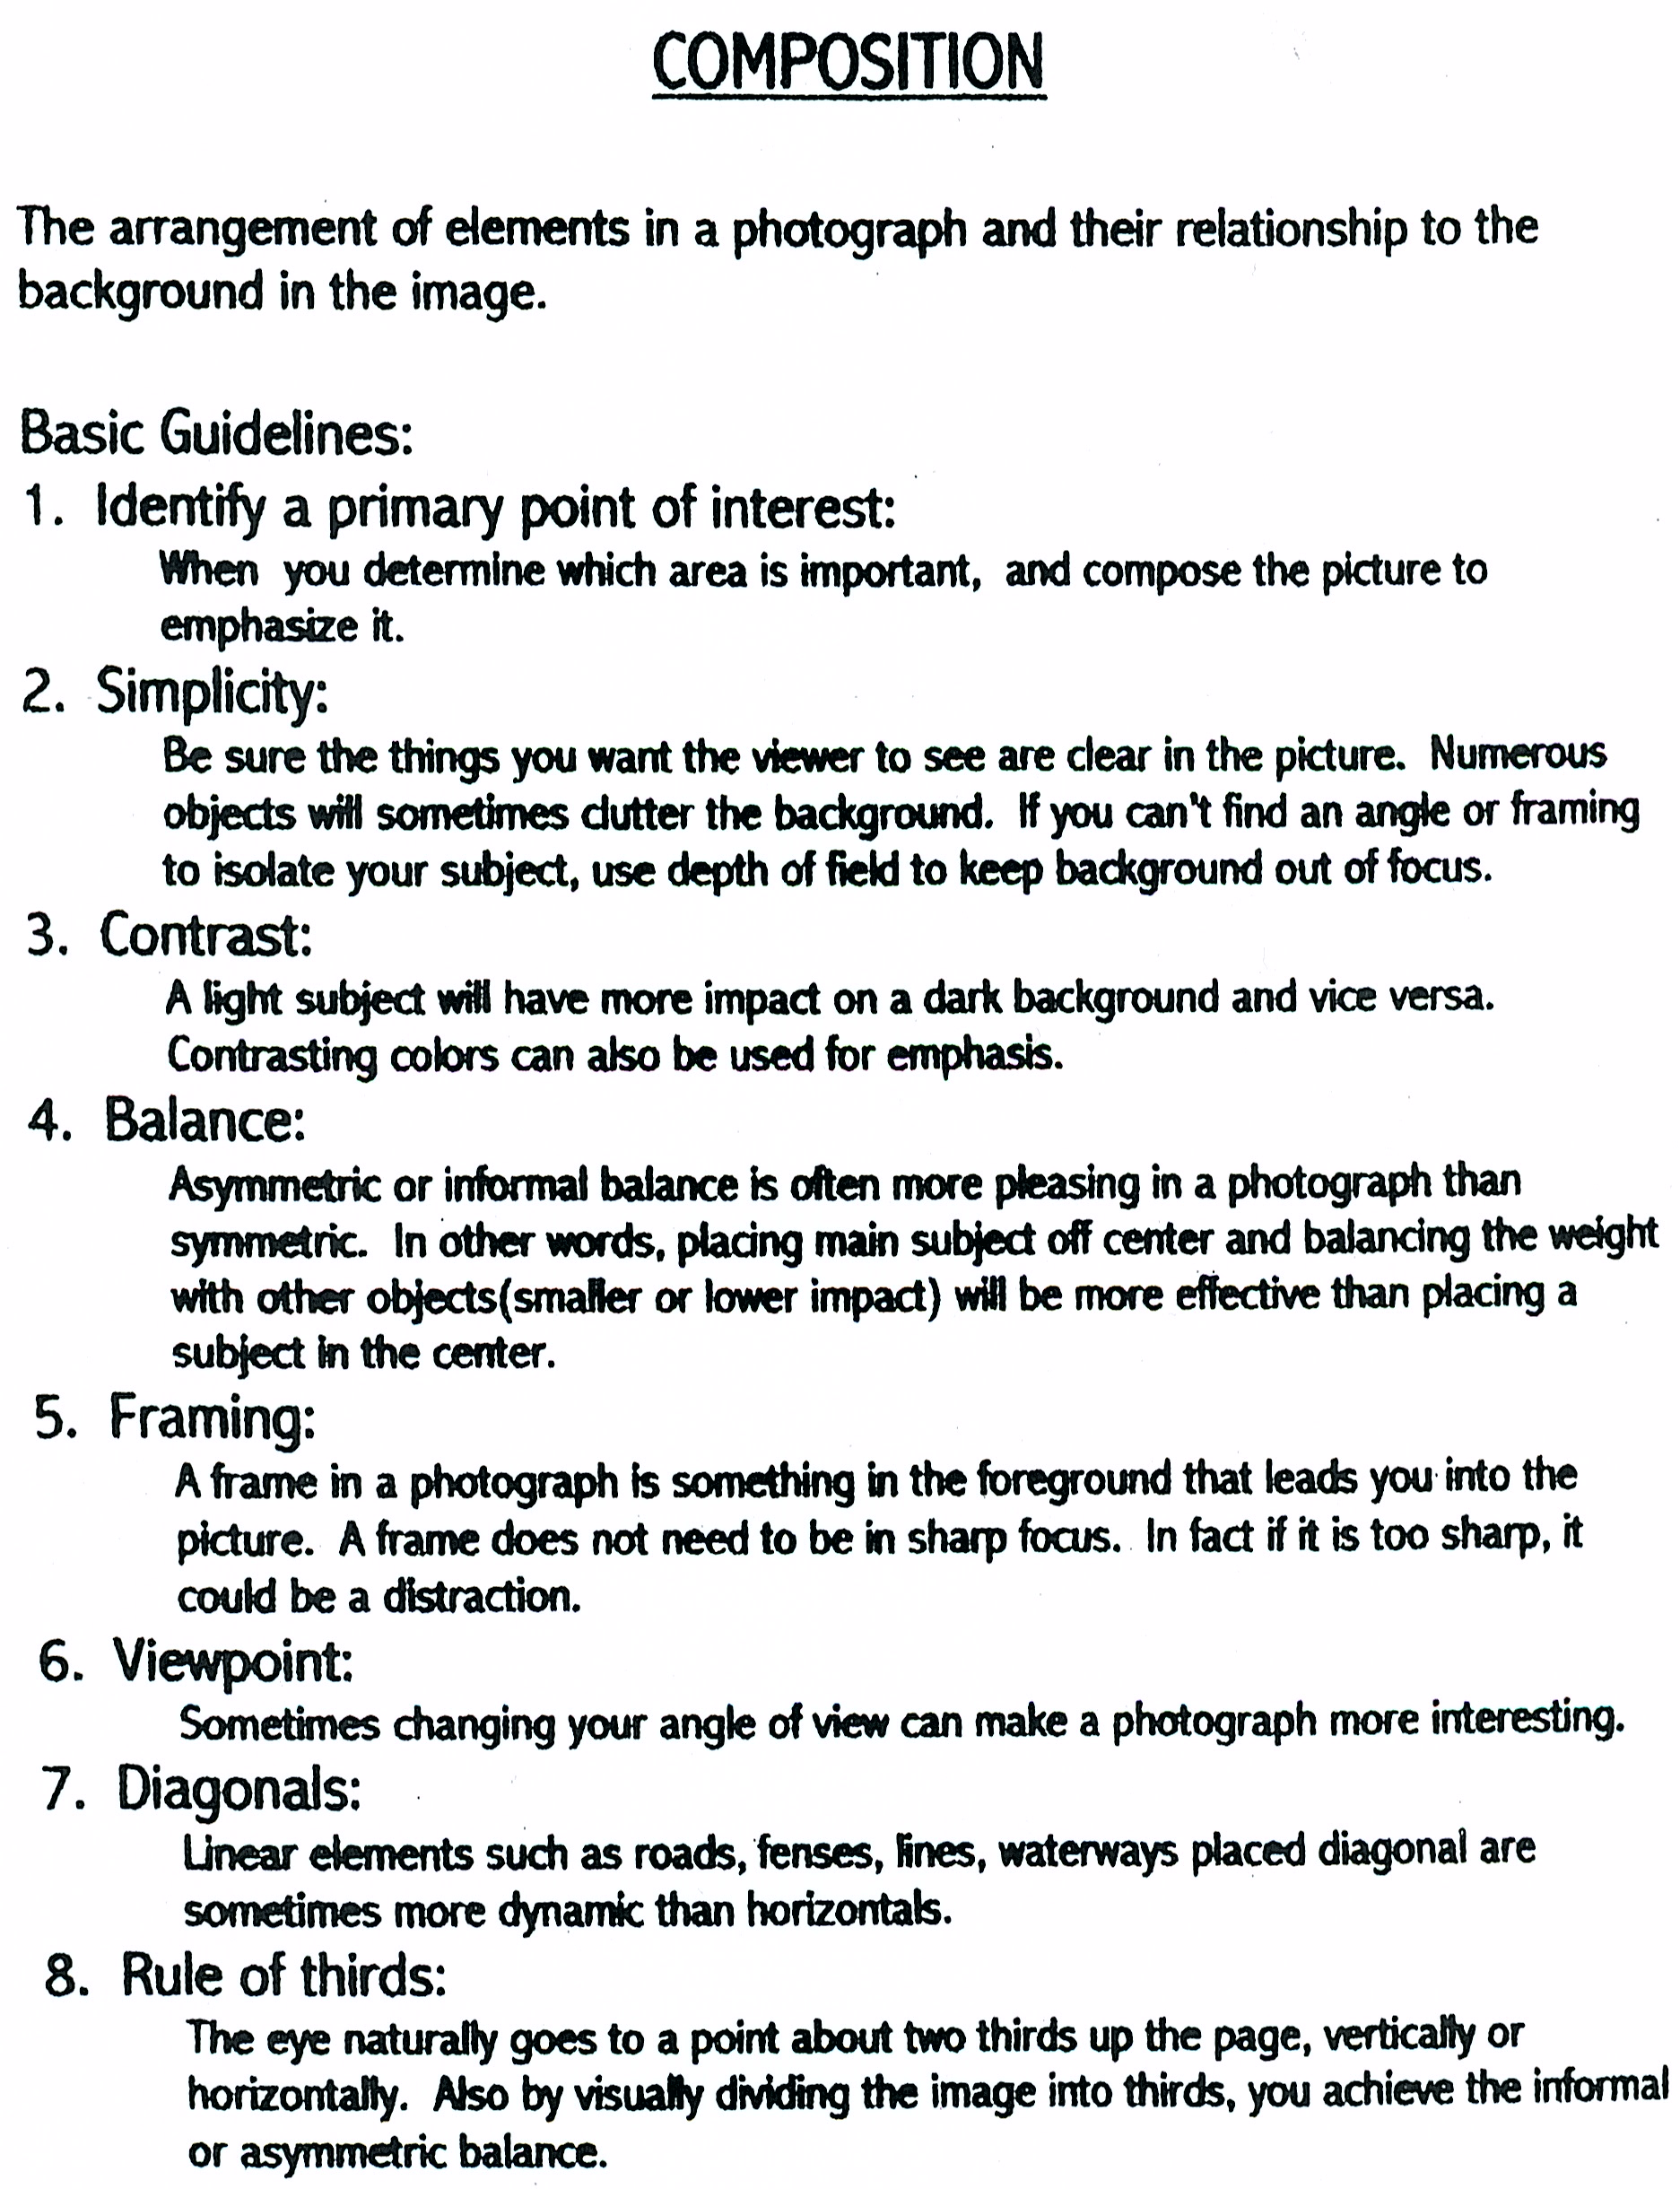 ___________________________________________________________
____________________________________________
____________________________________________________________ First assignments: 1. Make a blogsite with edublogs. https://edublogs.org/ Join the class blog, select a template, and design your site layout and design, 2. Read the following link and write 25 sentences reviewing what you learned about aperture, shutter speed, ISO, and camera modes. As your first blogpost, copy and paste in your sentences from Word. http://www.cambridgeincolour.com/tutorials/camera-exposure.htm 3. Play around with the camera simulator and learn how to use the camera controls. Then practice with the camera in the classroom. http://camerasim.com/apps/camera-simulator/ ________________________________________________________ ________________________________________________________ ________________________________________________________
2014-2015 school year
1. ME AND MYSELF PHOTO Scan or rephotograph a photo of yourself as a child and add your current self to the image. Check out this link to get ideas: http://www.demilked.com/double-self-portraits-chino-otsuka/ 2. AMAZING COMPOSITION Photograph with composition in mind and post 3 new photos on your blog which show very strong composition!! Label each photo with the compositional tip you used to make an eye catching image. 3. PHOTOMONTAGE: WHERE YOU SEE YOURSELF IN 10 YEARS Make a well blended digital photomontage (12×8 or 8×12 -150 res) to show where you see yourself in 10 years. 4. LIGHTROOM PRACTICE Photograph 100 photos of the same subject (portrait, landscape, advertising, still life etc…) Open your Lightroom catalog and make a new collection for your new images. Edit your photos in Lightroom and post 20-30 of your best ones as a gallery. _____________________________________________________________ NEW ASSIGNMENTS DUE MONDAY MAY 4 1. LETTER TO NEXT YEARS PHOTO STUDENT Write a letter to next years new photo students. Include at least 500 words and describe some of your favorite assignments and experiences in photo class. 2. COMPOSE a 12×24 (300 res) SOCIAL ISSUE POSTER Include appropriate graphics and text to support your cause. Make sure the graphics are not too small and lower resolution. Write a 3 paragraph reflection describing why you chose this social issue and your views on it. 3. CUBISM Create a cubistic photo image after looking at the work of Pablo Picasso and David Hockney. Take one of your photographs and cut it into pieces and reassemble on a new document. Post to blog. In the post include an image by Picasso or Hockney and describe why you like it. 4. CRITIQUE OF STUDENT WORK ON BLOG Look at the blog home page and check out the best student work. On your blog, write a 3 paragraph critique about 1 or 2 of your favorite images by your peers. Include the photo (s) you chose in your blog post and who the artist was who produced the image. ASSIGNMENTS DUE FRIDAY APRIL 24: 1. Design our Commencement Program Cover Make a 5×7 300 res document and design a program cover for this year’s graduation. The best design will be chosen to be the actual program cover. Info to include: Jurupa Hills Commencement Ceremony, Citizens Business Bank Arena, Thursday, May 28 from 3-5 2. Read and Write Read this online article and write a three paragraph reflection on your blog commenting on what you learned from reading it. http://petapixel.com/2015/03/11/10-beliefs-that-suck-the-life-out-of-photographers/ 3. Re-create a Photo Look for a photograph online which you would like to re-create. Analyze the original photo for composition and lighting and re-create the photo as closely as you can. Samples below. 4. Diptych Make a diptych image (2 images together), and the theme is OPPOSITES. Samples below Re creations
Diptychs


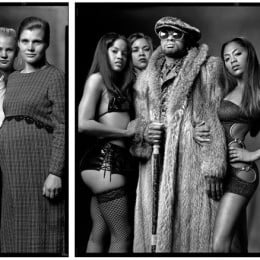
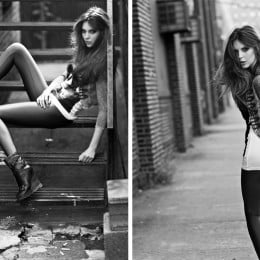


ASSIGNMENTS DUE FRIDAY, APRIL 17 Put Yourself in History Find a historic photo online and include yourself in the scene. Adjust size, color and resolution to match the historic photo to look as realistic as possible. Animal Morphing Morph together two or three different animals to create a new species. Blend the images together seamlessly to look as if they are one animal. Add a background or habitat. Name your new animal species. The Touch Series Create a series of photos where people are touching in some way. Samples of all three assignments below.


______________________________________________________________
Your Photography Business Powerpoint: (due Fri, April 10)
You will start a (pretend) photography business either by yourself or in partnership with one or two of your peer students. Create a Powerpoint Presentation to present to the class and include the items on the list below: * Business Name * Your name as sole owner or names of people in the partnership * The type of photography you specialize in, and the types of jobs you intend to get. * Samples of work you would like to produce for your clients. * Your (pretend) web site address * Who are your inspirations? * Where will you conduct your business? (which state will you live, will you work out of your home or rent office space in which location) * Branding: Your business card (Make your business card a 3.5 x 2.5 document in Photoshop) * Marketing: Include a slide about how are you going to advertise and get jobs in your field? * Market Research: How much money you would like to make in your first year of business, and how much you foresee making in 5 years, and also in 10 years.
NEW ASSIGNMENTS AFTER SPRING BREAK
1. Portrait with Make Up (due Monday, April 6)
Take a beautiful portrait of someone you admire and apply make up to their face using Photoshop paint and brush tools. Post to blog.
2. Advertising Photography (due Monday, April 6)
For this assignment you will create a photograph that would be used for advertising purposes. First you will research advertising photography on the Internet to generate ideas. You will write a proposal before you begin to shoot. Answer the following questions:
- Who is the client, or company you are representing?
- What is the product?
- Who is the target audience?
- Where would you expect to see this advertisement?
- What kind of lighting are you going to use to make this look professional?
- What props do you need?
Shoot the product and use of variety of compositions. Think about: lighting, composition, depth of field, product placement. Use Photoshop to tweak and enhance your photograph. Add necessary text and captions. Post your best advertising shot, EDITED, to your blog with the proposal. Samples below:


___________________________________________________________________________________ ASSIGNMENTS DUE FRIDAY MARCH 20
- Fill Flash Outside
Read these links about using FILL FLASH outside to fill in the shadows. Write 10 sentences explaining what fill flash outside is and why you would need to use it to get perfect exposure on the subject and background. http://www.digitalcameraworld.com/2012/05/20/master-fill-flash-in-4-easy-steps/ http://www.digital-photo-secrets.com/tip/195/using-a-flash-when-outside/ Go outside and photograph a subject which is BACKLIT. Set your camera on AV or TV to meter the natural light. Make sure your flash is on ETTL and fill the subject in shadow with fill lighting from the flash. Post 2-3 photos showing your understanding and good usage of fill flash.
- Buying a new digital camera writing reflection
Pretend you are going to buy a new digital camera. Go online to research. Try going to http://www.bhphotovideo.com/ Brands, Camera modes, Types of digital camera (dslr, point and shoot, mirrorless), Cost and Size, and Specifications of different cameras (megapixels, ISO settings, camera modes, flash settings, interchangeable lenses, battery life, shutter lag) Write a 500 word synopsis in academic language, on which camera you would choose to purchase based on their research, and why you would choose that particular camera. Post your synopsis to your blog.
- Close up Portraits
Photograph a portrait of someone getting very close up. Try to get a good expression which communicates something about your subjects personality. Post 2-5 amazing close up portraits to your blog and make a list of 20 words to describe the person in your photographs. 4. Photograph your Favorite Teacher with Writing Reflection Use bounced external flash to take some nice portraits of your favorite teacher. Edit and post your best portrait and write a 3 paragraph reflection in academic language explaining why you like and admire this teacher. Fill Flash Samples


Close up Portraits


_______________________________________________________________
Photo 1 Assignments due Tuesday March 10
1. 3-5 On location portraits with bounced external flash
Use the Canon digital camera and an external bounced flash to photograph portraits on location. Practice shooting with on the hot shoe and also off camera flash with a sync cord. Set your camera on Manual, Auto White Balance, ISO 400, F8 @ 60th of a second shutter speed. Photograph at least 10 portraits and post your top 3-5 edited portraits to your blog. As a writing critique answer the following questions on your blog in a separate post. It will count as a separate grade.:
-When would you use external flash? -What does flash synchronization mean? -What does ETTL mean? -What will happen when you shoot faster than the camera sync speed? -Why do photographers bounce the flash and use a diffuser? – What is a slave? -What should you do if your image comes out too dark or too light?
2. Illustrate an Iconic Image
Find an iconic photographic image online and trace and color the image you selected. Post the finished illustration to your blog and write a reflection about what iconic means and why the image you chose to illustrate is considered “iconic”. Samples of bounced on and off camera external flash below:

Some Iconic Images:


______________________________________________________________ Photo 1 Assignments Due Tuesday, March 3 1. Poetry and Your Photography
- Take a new photo for this assignment or use one of your existing edited photos.
- Make a new document 11×14@ 200 res
- Move your photo into your new document and size to fit.
- Add a quote, poetry, song lyrics or your own words to your edited image
- Post to your blog
- In a writing critique answer this question in 2-3 sentences: Why did you choose these words to go with this image
2. Magazine Cover Create a magazine cover using your own photographic image. Include a cover title and a list of articles, which would be within the magazine. 3. Wacky Landscape Take a landscape photo and use Photoshop to enhance and dramatize the image to make it look wacky and otherworldly. Post to your blog, and come up for a name for your new landscape location. 4. Read and Write: Flash Photography Read this article about external flash use and write 20 sentences describing some useful information you learned from reading it. http://photoextremist.com/book/2-Introduction_to_External_Flash.pdf Poetry and Your Photography Samples:


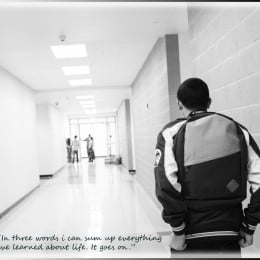
Magazine Cover Samples:


Wacky Landscape Photos
_________________________________________________________ Photo 1 Assignments Due Tuesday, February 16 1. Studio Portraits with strobes and colored gels Photograph portraits in the studio using the strobes and colored gel in the background. Edit your portraits in Lightroom or Photoshop and post 8-10 final portraits on your blog. Writing critique: Find a portrait online that was shot with studio strobe lighting and make a list of 20 sentences to describe that photo and your opinion of it. 2. Self – Illustration Take a new photograph of yourself and edit it in Photoshop. Make a new blank layer above the photo. Make the photo layer a regular layer not a background layer, and then make a new layer under the photo and fill it with white. Use the pencil tool to outline your self- portrait. Fill the illustration in with color and ADD A BACKGROUND. 3. Read and Write : An Introduction to using strobes Read this entire article on beginning strobe use and then write a three paragraph reflection on your blog detailing what the article is about and the most important things you got out of reading it. You will put your new knowledge to work this week when producing studio portraits. http://photography.tutsplus.com/tutorials/an-introduction-to-using-strobes-in-your-photography–photo-692


_________________________________________________
3 Assignments Due Tuesday, February 10
1. TRIPTYCH: BODY PARTS Take 3 photos which go together visually to make a triptych. Edit your photos in Photoshop. Make a new document and size it to be a 9×16 or 16×9 at 200 resolution
- Go back to your edited three photos and crop each to 3×5 or 5×3 at 200 resolution.
- Move each image into your triptych and resize if necessary.
- Layout your images any way your like to make an interesting triptych
- Add a subtle low key background under the three photos
- Merge layers and save as a jpg.
- Post your triptych photo to your blog and come up with a creative name for your work.
- Writing Critique: Make a new blog post: What I learned in Photo class and list 20 important and valuable things you learned in Photography class. Student samples below:


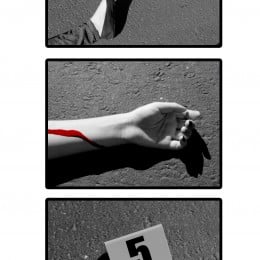
2. Silhouette Series
Photograph subjects against the white background lit with two hot lights. Meter for the background so the subject becomes a silhouette. Shoot a series or story to be communicated visually through your imagery. Edit your photos to get maximum contrast and a silhouetted subject. Make a large blank document in Photoshop and put your series silhouette images within it to create a silhouette story or series. Writing Critique: Write a short reflection (5-10 sentences) describing what your silhouette story is representing and what you would like people to know about it. Student samples below:

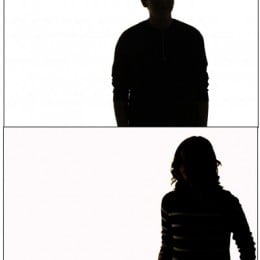


3. Am I Talking to Myself
Take numerous photos of yourself or someone else relating to themselves in some creative way. Merge them all together in Photoshop to make a fun and humorous montage titled Am I Talking To Myself. Writing Critique: Make a blog post called My Inspiration and list 10-20 things which inspire your creativity. Student samples below:


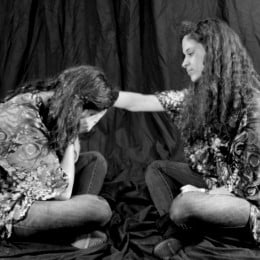
______________________________________________________________ _______________________________________________________________
Assignments Due Thur, Jan 29
1. HDR Photography -Go online and research the meaning of HDR. Create a blogpost explaining what the term HDR in photography means and ways to achieve successful results. -Photograph 5 different exposures of a landscape (on Manual) for this assignment. One at the perfect exposure, plus one and two stops underexposed and one and two stops overexposed. USE A TRIPOD for this! -Save images in a folder and open Photoshop>File>Automate>Merge to HDR Pro -Select your five landscape images and press ok. Photoshop will compile your images into one HDR image. -You will probably need to do more adjustments to make it more vibrant and saturated. You could bring in cool clouds from the Internet to blend into your sky. -Post to blog and please TITLE YOUR WORK!!! Write a 10 sentence critique of your own work and post under your image. 2. Painting with Light -Go to a dark place to shoot for this assignment. Put the camera securely on a tripod and put your shutter speed at 20 to 30 sec (not 20th of a sec…but 20 full seconds). You must put the camera on self timer to avoid camera shake. Shoot on manual and try your fstop at 8 or 11. ISO at 200 or 400. -Pre focus on Manual focus mode, because the camera will not in autofocus! -Wave finger lights in front of the frame during the exposure and check out the results! -You might need to make adjustments in exposure and try again. Post your image (s) to your blog. Write a 10 sentence critique of your own work and post under your image.
HDR SAMPLE STUDENT WORK


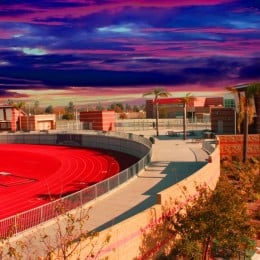


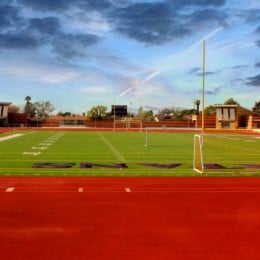

PAINTING WITH LIGHT STUDENT WORK

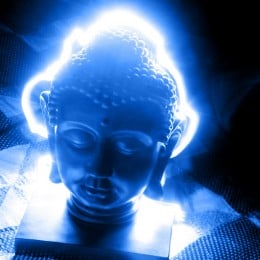
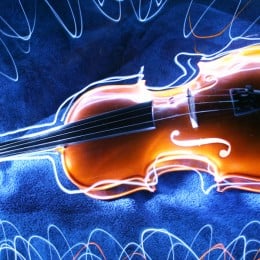


Assignments for the week of Jan 12-16
1. Shooting for Composition
Shoot 10 new photographs which show STRONG COMPOSITION. Edit your photos and post 5-10 new photos on your blog. Caption each of your photos with the compositional tip you used to catch the viewers eye.
Also, look online for photos you think have strong composition and catch your eye. Post 5 photos you find with a short paragraph stating what you really really like about those photos. Any similarities in your picture choices? DUE FRIDAY, JAN 16
2. Photographer Research Project
You will produce and present a PowerPoint Slide Show about a Professional Photographer of your choice. The project is to be between 10 and 15 slides and include the information below and at least 10 photographs. You can choose from the enclosed list or pick a significant photographer of your choice. Questions to answer when doing photographer research project are below. Email your presentation to caucrg@fusd.net or put in my flashdrive by TUESDAY, JAN 20.
- What is the photographer’s real name and year he or she was born? Is he/she still alive?
- What is their style of photography (ex: photojournalism, editorial, documentary, advertising, portraits, magazine, sports, war)?
- Are there any special photography techniques this photographer uses in his/her work? (Think about composition, depth of field, history…)
- Who does the photographer work for?
- What type of cameras and lens does this photographer work with, and why?
- What type of lighting does this photographer primarily use and why?
- Who are some of your photographer’s early influences?
- Are there any interesting stories about this photographer or his/her work?
- What do you like (or not like) about their work, and why did you select this photographer?
Robert Mapplethorpe – flowers, portraits, nudes * Annie Leibovitz – celebrity portraits * Danny Clinch – musicians * Edward Weston – black and white nudes,landscapes Ansel Adams – black and white landscape Cindy Sherman – self portraits * Diane Arbus – strange and different portraits * David Lachappelle – unique portraits * Imogen Cunningham – black and white Eliot Porter – color landscape Alfred Eisenstadt – candid photojournalism Linda McCartney – musicians in the 60’s Herb Ritts – celebrity portraits * Henry Cartier- Bresson -candid street, the decisive moment Andy Warhol – bizarre Robert Frank -street Mary Ellen Mark – portraits * Eddie Adams – war, photojournalism Robert Capa – war Paul Strand – black and white Lewis Hind – child labor Duane Michals -fine art James Nachtwey – war * Irving Penn – fashion, still lifes * Richard Avedon – portraits Margaret Bourke White – early photojournalism Lee Friedlander – black and white candid Harold Edgerton – motion Sebastiao Salgado – photojournalism Weegee – street photojournalism Mark Seliger – celebrity portraits * Jerry Uelsmann – photo montage * Dorothea Lange – documentary Anne Geddes – children Kim Anderson – children Nigel Barker- Fashion William Wegman – dogs Man Ray – rayograms, fashion, portraits in the 20 Arnold Newman – environmental portraits * Steve McCurry – National Geographic portraits * Danny Lyon – street and documentary Brad Mangin – sports Neil Leifer – sports Nick Saglimbeni – LA fashion __________________________________________________________ New Assignments: Due Monday December 8 Take a Vacation You need a vacation! Find an image online of a place you would like to go for your vacation. Include yourself in the scene and add at least 3 props to take along with you. (ie: sunglasses, camera, friends, suitcases, shopping bags, etc…) Make a 12×8 100 resolution document for your Take a Vacation image and add all the necessary ingredients. Post your image to your blog with 5 sentences explaining your vacation destination choice and your digital additions to the scene. Candid Moments with Captions Use a longer lens to photograph candid moments around the school. Edit your shots and post 3 candids with captions under them explaining who, what, where, and why?? Include your technical information: f stop, shutter speed, iso, lens, mode) Critique: Look at the work of Henri Cartier Bresson online. In a blog post choose 2 of your favorite photos of his to post and write 5 sentences describing the work of Cartier Bresson and what you think of it. YOUR PORTFOLIO (Due in my flashdrive or emailed to me by Mon, Dec 8) Look through your body of photography work for PORTFOLIO material. Make a new folder in your digital photo folder called portfolio and select 10-20 of your images and collages for your portfolio. Make a Powerpoint or Prezi show with your portfolio work. Include a title slide with your name and some information about yourself, and then put each of your photography pieces on a single slide. Begin with your strongest piece and end with a piece we will remember! Try to organize your slides so one image leads to the next visually. Portfolio Presentation is due the week we return from Nov break. You will give it to Ms. C in her flashdrive and then present your portfolio to the class. __________________________________________________________________________________________________________________________________________________________________________________________ 4 Assignments Due November 19 1. Self Portrait with Meaningful Text Use the digital slr camera with the self timer on and a tripod to take photos of yourself. Edit your photo in Photoshop and add meaningful text which works with the photo to convey something about yourself. Critique: Write 5 sentences describing the work of Cindy Sherman and your opinion of her self portrait series work. Post your work and critique to blog.


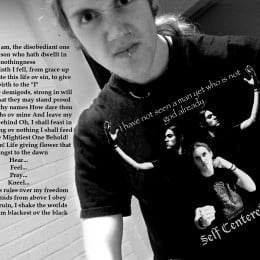


2. Conceptual Self Portrait Photograph something which conceptually represents you in some way. Take at least 10 photos with different composition and lighting. Edit your photos in Photoshop and post to blog. Critique: Define “conceptual” and discuss in a 2 paragraph reflection how your photograph represents you.


3. What is Your Color Create a Photoshop Collage 12×9 or 9×12 300 resolution representing your favorite color. Include your self portrait, the color you select and some writing about why this is YOUR color. Post to blog.
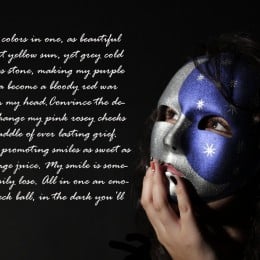

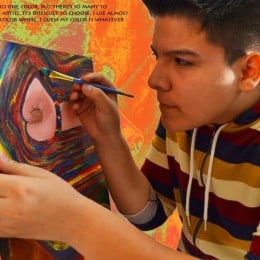
4. Jpeg vs. Raw- Read and Write Research what the terms jpeg and raw are, and the differences between these file formats. Include a two paragraph reflection comparing and contrasting them on your blog. ______________________________________________________________ Assignments Week of October 27-31 1. Body, Shape, Form Post one STRONG image you shot and edited showing body, shape, form Use the macro lens if you want to focus very close.


2. Shoot like Aaron Siskind Research the work of photographer Aaron Siskind, who shot for shapes, form and contrast. Set the camera to Monochrome and go shooting in black and white in the style of Aaron Siskind. Post three photos you shot and edited with FSIML. Critique: Post three photos you like by Aaron Siskind and in one paragraph explain what you like about the photos and describe Aaron Siskind’s style of photography.

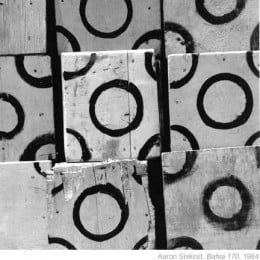
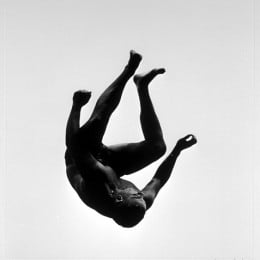


3. Mirror Imagery Photograph an interesting photo with lots of lines. Put the edited photo in a new document and make a copy of the image to flip to make mirror imagery. Either 2 or 4 images would work for the mirror image. Post to blog.
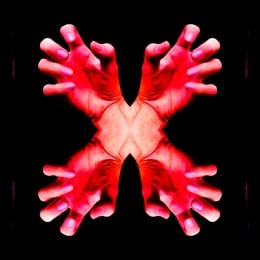
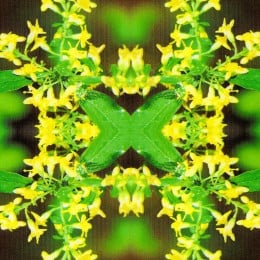

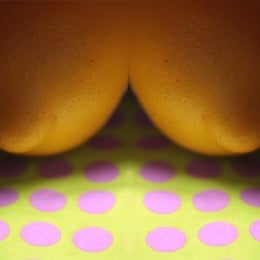


______________________________________________________________ Week of Oct 20-24 (all 4 assignments due Friday Oct 24) 1. 30 Photos that changed the world Read this link about the 30 Photos that changed the world and write a two paragraph reflection about 3 of the photos. Include what the photo is about and your opinion of it.: http://www.photographyschoolsonline.net/blog/2010/30-photos-that-changed-the-world/ 2. History Invention Worksheet Research an important photography invention and fill out the worksheet (get from Cauchon and give back to her when complete) 3. Alphabet Photography -Look for images which represent letters and create a word in photographs -Edit your photos in PS and then make a new document to put the word in. Make your document 16×8 2oo resolution and fit your images in to make the word. If you need more space go to Image>Adjust>Canvas Size and resize bigger. Samples below:

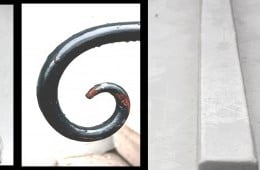

4. Studio Portraits Use the studio backdrop (white or black) to photograph PORTRAITS of classmates. Use the tungsten “hot lights” to light the portraits Make sure to put your white balance on TUNGSTEN and shoot at ISO 400 or 800. Go right up to the subject and meter them on MANUAL. Take at least 10 photographs and edit them in PS. Post anywhere between 3 and 10 portraits. Include technical info: FSIML Critique: Find a studio portrait online and write a list of 25 words you think of when you look at the portrait. Include the photographers name if possible.
-

- by Chris
-
- by Cynthia
-

- by Anjelica
-

- by Martha

-

- by Steve
-

- by Eduardo
October 10-20 1. Small Group Critique Writing (Due Friday, October 10) In groups of 2 or 3, evaluate and critique 2 of the action motion photographs shot, edited and posted by your peers. (look on home page of blog for the 21 photos selected to be on display on the blog). Analyze, Evaluate,and Judge the photos and write 2 paragraphs about each of the 2 photos you chose to critique. Post your writing on one persons blog and put all the names of each member of the group. 2. Warhol/Pop Art (Due Friday, October 10) -For your Pop Art assignment you should photograph an object, which is POPULAR IN THE CULTURE TODAY. -Make 4 copies of the photo you chose, 4×6 or 6×4 (200 res) each, labeling them Warhol 1, Warhol 2 and so on… -Work on each picture separately, experimenting with filters, gradient maps, colors, patterns, and more….make sure there is contrast between the subject and the background! -When you complete the 4 individual photos, merge the layers in each. -Open a new document in Photoshop, 8×12 or 1

-
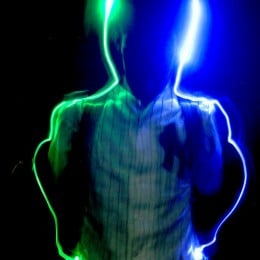
- Painting with Light
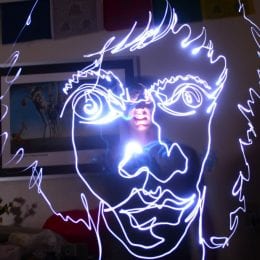


2. 100 MOST INFLUENTIAL PHOTOS OF ALL TIME
http://100photos.time.com/
Read this link and on your blog pick 3 of the most influential photos to write about. Include the story behind the photo and what intrigues you about it. Make sure to post the three photos with your writing.